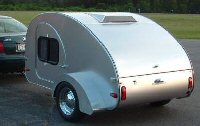
4-Day Weekender - Toddler bed!

...ask your questions in the appropriate forums BUT document your build here...preferably in a single thread...dates for updates, are appreciated....

Re: 4-Day Weekender - Varnish and electrical

Postby Gunguy05 » Sun Sep 28, 2014 8:56 pm

Looking nice. I really like the color scheme, and it looks like all of the finishing touches are coming together well.

I don't like the varnishing either. I just got finished with my interior cabinets today (they are varnish only, no stain like the rest of the cabinets), and I still am not happy with the results. I can seem to make all of the parts have an even coat and everything look the same. The stained ones look ok, but the varnish only ones look uneven to me. Guess it's time to sand again and try for a 3rd/4th coat.

Keep up the good work. You are almost campable!
Brian


Checkout my buildThe Regal Eagle Bow front for 4
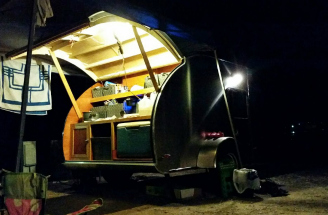
Image
Also my teardrop updates from blog on Dad Rambles
User avatar
Gunguy05
The 300 Club
 
Posts: 385
Images: 6
Joined: Mon Dec 02, 2013 4:45 pm
Location: South GA

Re: 4-Day Weekender - Varnish and electrical

Postby Kharn » Sun Sep 28, 2014 9:01 pm

So here's a sketch of the prop rod pocket I may mount on the underside of the hatch.
Prop pocket.jpg
Prop pocket.jpg (163.53 KiB) Viewed 2323 times
User avatar
Kharn
500 Club
 
Posts: 655
Images: 1
Joined: Sun Jul 17, 2011 1:54 pm

Re: 4-Day Weekender - Varnish and electrical

Postby noseoil » Sun Sep 28, 2014 10:46 pm

Wondering why you don't use the gas strut approach for the lid, instead of a prop stick. It's simple & does everything you need with very little fuss and has nothing to go wrong or roll around or get misplaced. Just lift to open and it stays up, why not? Apologies if the answer is somewhere in the thread and I missed it. tim
Build log: viewtopic.php?f=50&t=60248
The time you spend planning is more important than the time you spend building.........

137905
User avatar
noseoil
1000 Club
1000 Club
 
Posts: 1820
Images: 669
Joined: Sun Apr 27, 2014 8:46 am
Location: Raton, New Mexico, living the good life!
Top

Re: 4-Day Weekender - Varnish and electrical

Postby Kharn » Mon Sep 29, 2014 4:43 am

I looked into a gas strut before, but with the two shelves being so high on the walls there weren't any good solutions for the available body/stroke length combinations without hitting something or blocking the oven from opening.
User avatar
Kharn
500 Club
 
Posts: 655
Images: 1
Joined: Sun Jul 17, 2011 1:54 pm
Top

Re: 4-Day Weekender - Varnish and electrical

Postby Kharn » Mon Sep 29, 2014 8:22 pm

I did three colors of touch-up work, including in the tongue box interior, cabin interior and the galley sliding doors, plus put varnish on the four panels that needed it. I'm not sure I'll be able to smell anything tomorrow. :?
User avatar
Kharn
500 Club
 
Posts: 655
Images: 1
Joined: Sun Jul 17, 2011 1:54 pm
Top

Re: 4-Day Weekender - Varnish and electrical

Postby rebapuck » Mon Sep 29, 2014 10:29 pm

Make the door curtains long. Try them out. You can always shorten later.
Judy
1966 VW camper
1967 VW singlecab
Image
User avatar
rebapuck
.
 
Posts: 2243
Images: 1
Joined: Thu May 14, 2009 1:55 pm
Location: Chapel Hill NC
Top

Re: 4-Day Weekender - Varnish and electrical

Postby Kharn » Thu Oct 02, 2014 7:13 am

I spent about two hours last night filing the two hatch latch panels, I needed to remove about 1/16" from the inside of the hatch piece that overlaps the wall, to make sure there's clearance and it won't scrape the paint on either side. The curb side really needed attention as the hatch to trailer joint is slightly racked, about 1/16" at the latch location, so it was scraping paint just putting the pieces on.

That. Sucked. If I had been at my parents' house or thought about the clearance when I was making the panels, I could have just milled it off in about 5 minutes. The road side piece still has some to go but it seems good enough for now, when I visit for Christmas I may take the pieces with me and hit them with the mill to do it right. The problem with my design is that I wanted the overlap to make sure the hatch won't slide while we're driving because I'm not sure of the design strength of the latches in their vertical directions. If I had been more confident in that strength, I would have cut the plates at the panel joint and eliminated the issue. The tongue box doesn't have the same issue because the inner lip prevents the lid from shifting when closed, and the AC door uses a different latch design that has a specified strength for vertical movement.

I also took off all the sharp edges so people won't cut themselves if they bump the trailer, and I made the clearance cuts on the side plates necessary to clear the rear marker lights. I think I'm going to paint the pieces to match the trailer, since I'm going to do the same to the table rails and the rain gutters, but I'm not going to try to paint the latches as I think that would just be a disaster. Touching up the stainless steel screws to match is one debate I'm still not settled on, I may have to primer/paint a few to test how well they take the paint.

I've read that some people put a screw through each side of the hurricane hinge to make sure the two pieces do not become misaligned, does anyone have a tutorial or write-up on how to do it correctly? Also, what size screw should I use? I'm thinking a #6x1/2" stainless?
User avatar
Kharn
500 Club
 
Posts: 655
Images: 1
Joined: Sun Jul 17, 2011 1:54 pm
Top

Re: 4-Day Weekender - Varnish and electrical

Postby Kharn » Thu Oct 02, 2014 1:15 pm

noseoil wrote:Wondering why you don't use the gas strut approach for the lid, instead of a prop stick. It's simple & does everything you need with very little fuss and has nothing to go wrong or roll around or get misplaced. Just lift to open and it stays up, why not? Apologies if the answer is somewhere in the thread and I missed it. tim

Your post actually got me thinking about the problem I had finding a gas strut to fit and I had an idea. Instead of a gas strut, I could use telescoping square tube, with a quick release button (like on an Easy-Up leg) to index the tube at the right location and then another set of through-holes for a pin to lock the tube at the extended position. At that point, as long as the extension distance isn't more than ~80% the length of the larger tube, I would be able to make it work.

The advantages would be no pressure from the strut on the hatch when it is closed, so I wouldn't have to worry about the attachment point ripping out or the strut having performance issues in the cold or over years of use. And the positioning is not as critical, with a gas strut I'd want the rod to be slightly extended when in the closed position after passing a most-compressed point midway through the swing so that it would help pull the hatch closed once the most-compressed point is passed. It would also mean no loose rod to bang around or need to be secured, the system would lock itself in the up position automatically, and the pin would be easier for my wife to insert when she's standing on her toes (which she has to do to lift the hatch to its full height) since the button would index it at the right spot.
User avatar
Kharn
500 Club
 
Posts: 655
Images: 1
Joined: Sun Jul 17, 2011 1:54 pm
Top

Re: 4-Day Weekender - Varnish and electrical

Postby S. Heisley » Thu Oct 02, 2014 8:01 pm

That sounds like a good idea!
User avatar
S. Heisley
Super Lifetime Member
 
Posts: 8774
Images: 495
Joined: Mon Sep 17, 2007 10:02 am
Location: No. California
Top

Re: 4-Day Weekender - Varnish and electrical

Postby Kharn » Thu Oct 02, 2014 8:53 pm

And CAD confirms it will (can? :O ) work. :D
hatch telescope 2.jpg
hatch telescope 2.jpg (133.55 KiB) Viewed 2164 times

hatch telescope 1.jpg
hatch telescope 1.jpg (45.93 KiB) Viewed 2164 times


I'm using 0.083" walled steel square tubing from McMaster (if you want to use this on your own build, make sure you buy stuff noted as for telescoping use, otherwise you'll get a weld seam on the inside of the tubes and they won't slide correctly), plus a snap button and 1/4" diameter push button quick release pin. The 0.083" tubing should be much thicker than your average Easy-Up leg, so I don't anticipate any problems holding my ~40lb hatch up. You also definitely need the pin, if the snap should fail you could easily break bones with the hatch slamming closed and would definitely cause some damage to your tear. I've used the push button pins at work, they're much more expensive than the spring-loaded ball detent style alone, but they absolutely won't work themselves out and anyone touching instead of looking is less likely to remove it.

As with every McMaster order, I found a ton of other stuff I don't know how I have managed to survive without. :lol: 7/8" screws for assembling two 1/2" panels together, footman loops for holding down the oven and dutch oven, 50' of webbing, 25 pack of buckles, etc.
User avatar
Kharn
500 Club
 
Posts: 655
Images: 1
Joined: Sun Jul 17, 2011 1:54 pm
Top

Re: 4-Day Weekender - Varnish and electrical

Postby noseoil » Fri Oct 03, 2014 7:10 am

Build log: viewtopic.php?f=50&t=60248
The time you spend planning is more important than the time you spend building.........

137905
User avatar
noseoil
1000 Club
1000 Club
 
Posts: 1820
Images: 669
Joined: Sun Apr 27, 2014 8:46 am
Location: Raton, New Mexico, living the good life!
Top

Re: 4-Day Weekender - Varnish and electrical

Postby Kharn » Fri Oct 03, 2014 10:36 am

Yeah, that would've worked. :oops:
I'm going to stick with the telescoping rod and see how it works for us, maybe I'll go to a strut if we have any issues or don't like it.

I spent the morning making the wire runs to the rear of the camper, one 12-2 romex and two 16-2 low voltage runs, for the galley 120v and 12v outlets and trailer side marker lights. Now I have to head in to work and hope the mechanics aren't too busy so I can use one of their lifts and do a brake job on my Yukon. :thumbdown:
User avatar
Kharn
500 Club
 
Posts: 655
Images: 1
Joined: Sun Jul 17, 2011 1:54 pm
Top

Re: 4-Day Weekender - Varnish and electrical

Postby Kharn » Fri Oct 03, 2014 9:49 pm

So my simple pads-and-rotors brake job turned into also adding new calipers on the rear, and discovering that my truck has a radiator for the power steering pump. I found out about that radiator because it is now leaking, thanks to some roadwork in the area. :x Our first camping trip shouldn't be affected as I have a replacement showing up this week and have a four day weekend to do the swap, but some trailer parts will probably be missing or unfinished depending on how long the work takes.

I got a chance to play around with my new ratcheting crimper, this thing is really nice and should make the wiring work a lot easier than trying to tin and wire nut everything, especially for tight areas like the forward marker lights. :D
User avatar
Kharn
500 Club
 
Posts: 655
Images: 1
Joined: Sun Jul 17, 2011 1:54 pm
Top

Re: 4-Day Weekender - Varnish and electrical

Postby capnTelescope » Sat Oct 04, 2014 12:00 am

Kharn wrote:... ratcheting crimper ...

Oooooo! :envious:
I've been using one of those "squeeze hard with both hands" models. Soldering has mostly been for when a wire is too short. Which turns out to be all too frequent.
I'll burn that bridge when I come to it.

Brad
ImageImageImage

Building the Bed & Breakfast
User avatar
capnTelescope
Lifetime member
 
Posts: 1218
Images: 368
Joined: Sun Jun 27, 2004 3:44 pm
Location: Round Rock, TX
Top

Re: 4-Day Weekender - Varnish and electrical

Postby Kharn » Sat Oct 04, 2014 4:58 am

Here's the particular model I bought, high reviews, works well, but it can only use the jaws it comes with, more expensive units's jaws can be changed for other crimping tasks: Ratcheting crimper I built a control panel for an arcade cabinet using a manual crimper, I wish I'd known how much easier a ratchet model would have made it because it had over 60 connections that all required crimping.

UPS says my McMaster package will arrive Monday, gotta love being a 2hr drive from their nearest warehouse. I also ordered our 6" mattress from Walmart and paid $5 for shipping so that I'd have it by Thursday instead of next Tuesday. I'd made a joke earlier about using our air mattress in the camper if the foam one didn't arrive, my wife did not think that was nearly as funny as I did and made it clear that there had to be foam in the camper or she wasn't going. :lol:
User avatar
Kharn
500 Club
 
Posts: 655
Images: 1
Joined: Sun Jul 17, 2011 1:54 pm
Top

PreviousNext

Return to Build Journals

Who is online

Users browsing this forum: No registered users and 19 guests