I am partial to the silver shadow profile, as well as, the Grumman 2 and Kenskill from the design library. I am leaning towards an aluminum roof with woody sides. My guess is that you have to be creative hiding your screws/nails for the galley and interior shelving if you want a woody exterior. We are still figuring this part out. We don't want to overbuild, but don't want our shelves to fall down. We are going to plan our build next with actual measurements now that we have the trailer in the garage. I will get out the sketch pad (I'm sure he will, too) and we will put our modest technical drawing skills to work (for me those skills were only honed in middle school). Gotta get that graph paper from school! (I'm a science teacher if I didn't mention it earlier).
So, that is our basic plan. I want the basics, want it to look clean and neat, but that is about it.... 12v (I think) to power the lights, etc. with a deep cycle battery. Maybe an outlet or 2 for charging devices or a coffee maker. A 120V (?) plug just in case I camp in a place where they provide electricity, which also means I need a converter, I think. I am not planning on having a sink, running water, a fridge, or AC, but will have a small propane stove. I just want a cool camp set up so I can cook, have a comfy bed, have coffee, grab a cold one from a cooler of ice, and sit by the fire and enjoy time with friends. And Dad wants to be able to take it on a trip hunting/fishing, so he is pretty rustic, too.
That is the plan so far, folks! Any tips on a woody exterior (sides only) and being creative with fastening everything together?
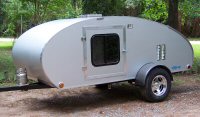
I attached a photo I found on here somewhere because I like the profile.
No school for me tomorrow, so cheers everyone!


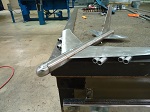
 but I will save that for after it is built. Smiles all around since we finally found the trailer size we wanted at a fair price. I am hoping to take some metal off tomorrow, but it might have to wait until after the holidays. So for now, here is a hello from my Dad (Jim), my partner in crime during this very exciting project.


 Welcome to Lauren & Jim !


 Maybe it could use some additional framing where cabinets and or shelves will need support? The cut outs suggest you are considering insulating your walls by using an internal framework that will have plywood skins outside and inside. 1/4" outside and 1/8" inside are good. Epoxy and/or fiberglass can protect the wood. Then protect the epoxy from sun damage with varnish. Raka.com is a good epoxy supplier.