1st Build, a 5'x8' Foamie Teardrop on a 4'x8' HF Trailer

...ask your questions in the appropriate forums BUT document your build here...preferably in a single thread...dates for updates, are appreciated....

Re: 1st Build, a 5'x8' Foamie Teardrop on a 4'x8' HF Trailer

Postby jseyfert3 » Fri Mar 21, 2014 11:21 pm

Two coats of the mix on tonight. I tried my HVLP spray gun, but I quickly decided against it cause the overspray would have coated everything in the garage by the time I was done. I brushed it on, it's the consistency of water. Really weird, I've never brushed on something that thin before.

I should be able to get two more coats on tomorrow, then I'll decide if I need to do more or do a coat with more poly mixed in, or perhaps finish with straight poly. The OSB drinks it up like crazy. By the time I get around the whole floor, the OSB where I started is completely dry.
User avatar
jseyfert3
Teardrop Master
 
Posts: 285
Images: 1
Joined: Sun Jan 05, 2014 9:13 am
Location: Peoria, IL, USA

Re: 1st Build, a 5'x8' Foamie Teardrop on a 4'x8' HF Trailer

Postby jseyfert3 » Sat Mar 22, 2014 11:43 pm

I decided to wait a bit longer to put another coat on, to let the first two I did on the same day dry better. They are drying in a semi-heated, unventilated garage because the weather is not very warm right now. What happened to our sunny, 50 °F days we were getting? Not supposed to get above 50 °F again until next Saturday, highs mostly in the 30's this whole next week. :shock:

My house smells like paint thinner because the weather sucks...

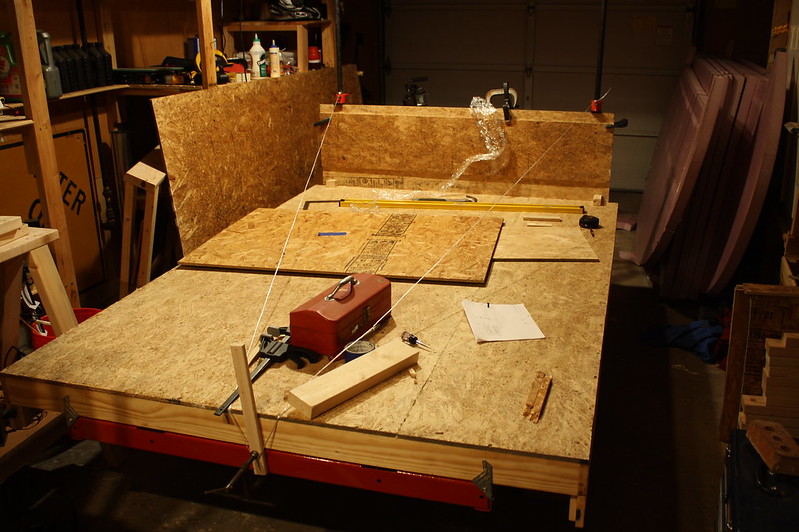
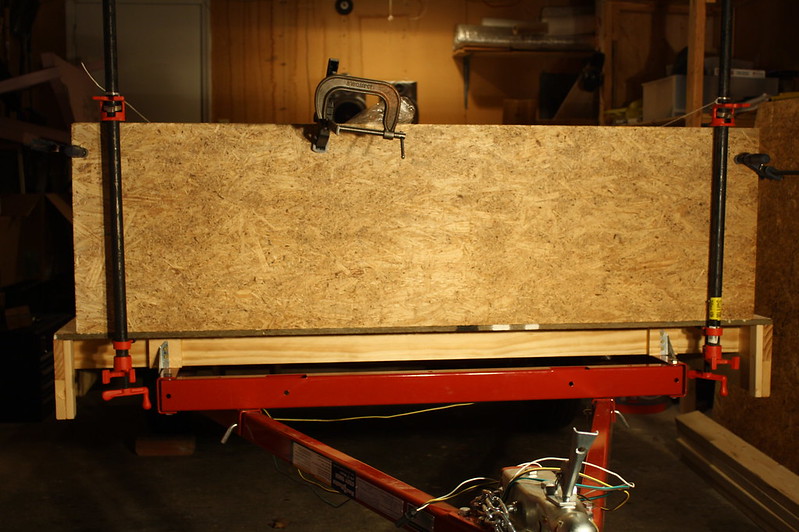
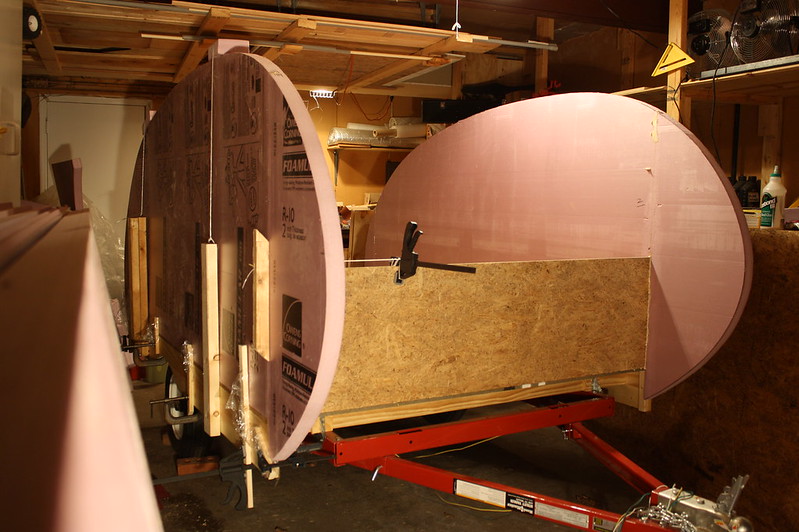
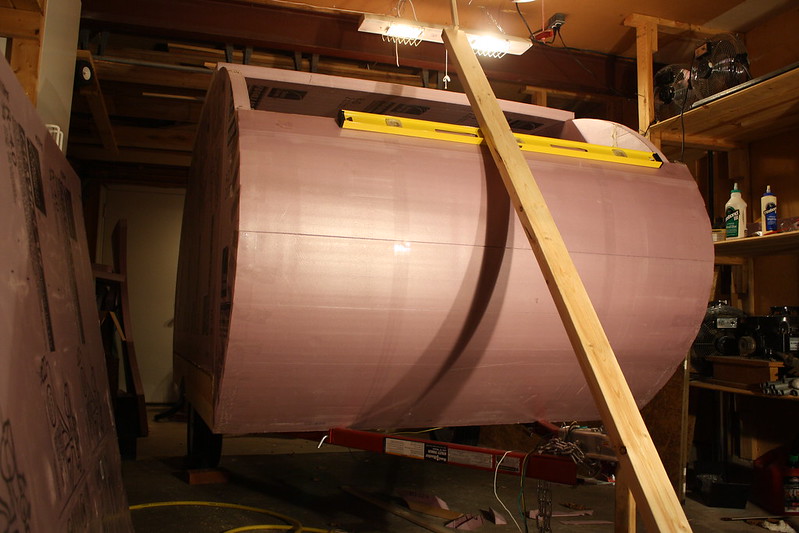
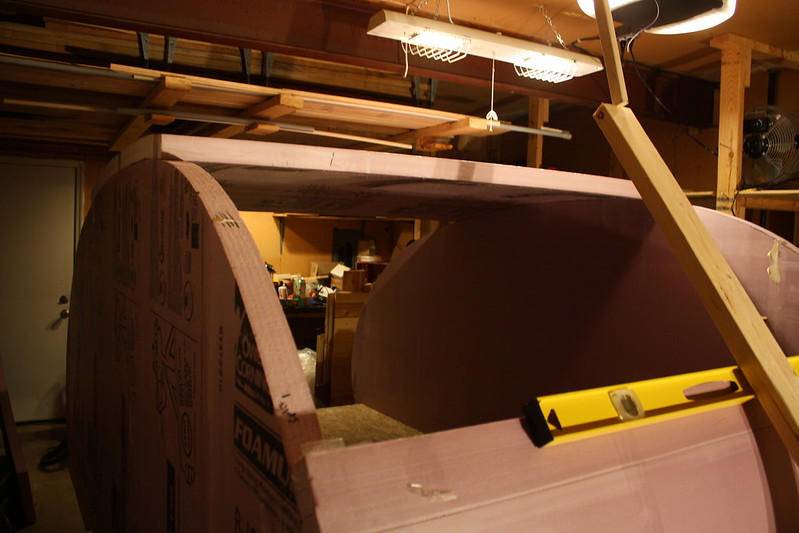
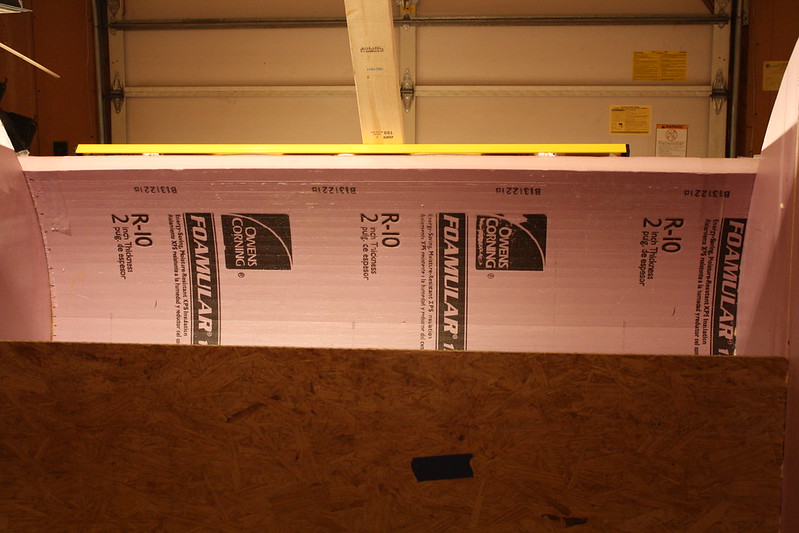
Anyhow, good news is now that I have the third coat on, I'm seeing improvement. With the first two coats, I'd work all the way around till I got back where I started, and by that time, the wood was bone dry except for the last couple sections I just did. With this third coat, it's not soaking in as much, there is even wet spots on the thirsty OSB that I started with by the time I got done (approx 35 minutes). This is a good sign since it shows the wood pores are getting filled.

Image
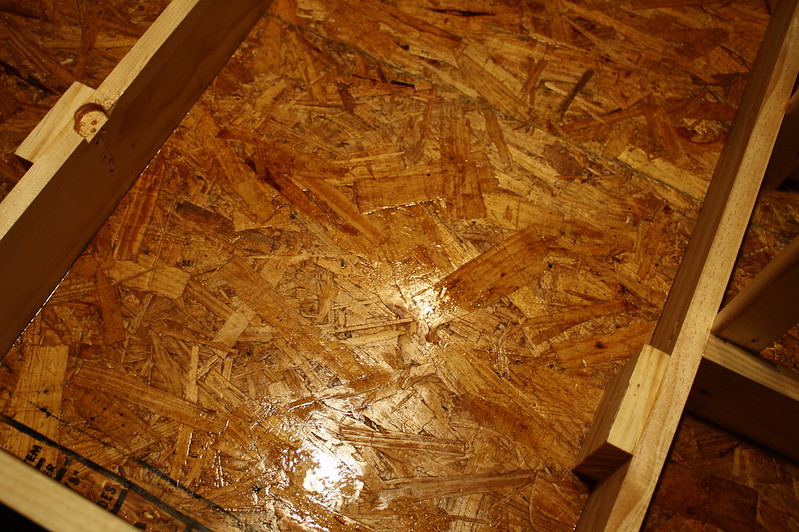
Third Coat of 75% Thinner, 25% Poly - Not Soaking in As Much by jseyfert3, on Flickr

Because of this, after I finished, I wiped off the first half, then after I let it sit for a half hour or so I'll wipe off the second half. Otherwise the stuff that doesn't soak in will turn into white spots with an excess buildup of flattener, since this is satin poly and not gloss, and it's probably pretty old cause the previous owners left it here.
User avatar
jseyfert3
Teardrop Master
 
Posts: 285
Images: 1
Joined: Sun Jan 05, 2014 9:13 am
Location: Peoria, IL, USA

Re: 1st Build, a 5'x8' Foamie Teardrop on a 4'x8' HF Trailer

Postby jseyfert3 » Mon Mar 31, 2014 12:44 pm

Yesterday I got some more work done, with the help of my dad. The floor assembly now had four dried coats of 75% paint thinner, 25% poly, and a test with some water drops showed them sitting on top of the OSB and not soaking in. So we took the floor, flipped it, and placed it on the HF trailer.

Before we attached it, I remembered to check tire clearance. With the side 1x4, I could remove the tires with no problems, but I added a second 1x4 and now it looked like I might have issues removing the tires, and I did. So we lofted a curve and cut it out with a jigsaw, sanded with a belt sander, and routered the edges of the wheelwells and bottom sides of the 1x4 with a 1/4" roundover bit.

Image

The wheels now could be easily installed or removed. I'm not 100% sure how I will protect the inside of the wheelwells from thrown rocks and road debris, but it will probably be plastic or similar.

Now that the wheels where good, it was time to attach the frame. I decided not to paint the trailer, as it will be hidden and would take a bit of time to do all the prepping and let it dry before I could attach the floor. As the floor had previously been attached with screws, all we had to do was line up the holes and run the screws in. I decided to use some Gorilla Glue to seal the screw holes from water entry, so my dad would apply a bit of GG to the front of the screw threads and hand it to me, who was under the trailer on a creeper, and I'd drive them in. I also discovered there was a bit of front to back droop in the floor, causing the middle to not sit flush on the HF frame, so I had my dad sit on the floor to move it down while I put the middle bracket screws in.

Image

I had to go to work, but my dad stayed and glued up the headboard. This rests on the front of the floor, and was glued to the floor with GG. He came up with this jig to hold it in place while gluing. This will eventually be glued to the foam sides and will gain additional strength from the interior canvasing once everything is up.

Image

Image

More to come later. At this stage in the build, stuff should start coming together pretty quick. It's always the details and planning that take a long time. But as long as the outside is complete and canvased by April 18th so I can tow it, I'll have all summer to work out tiny interior/galley details.
User avatar
jseyfert3
Teardrop Master
 
Posts: 285
Images: 1
Joined: Sun Jan 05, 2014 9:13 am
Location: Peoria, IL, USA
Top

Re: 1st Build, a 5'x8' Foamie Teardrop on a 4'x8' HF Trailer

Postby KCStudly » Mon Mar 31, 2014 1:31 pm

Nice graceful fender arch. :thumbsup: Good job. :applause:
KC
My Build: The Poet Creek Express Hybrid Foamie

Poet Creek Or Bust
Engineering the TLAR way - "That Looks About Right"
TnTTT ORIGINAL 200A LANTERN CLUB = "The 200A Gang"
Green Lantern Corpsmen
User avatar
KCStudly
Donating Member
 
Posts: 9611
Images: 8169
Joined: Mon Feb 06, 2012 10:18 pm
Location: Southeastern CT, USA
Top

Re: 1st Build, a 5'x8' Foamie Teardrop on a 4'x8' HF Trailer

Postby jseyfert3 » Mon Mar 31, 2014 9:19 pm

My dad came over again tonight. He wants to make sure I get it done in time and is enjoying a new building experience, building out of foam. It's nice to have a second input and another pair of hands. Tonight, we glued up one of the walls.

I was told to use a Stanley Sureform to rough up the foam surface before gluing up the canvas, but I figured it wouldn't hurt to use it for the edges of the foam either. This was about $6 at Home Depot. Tiny, but it gets the job done.

Image

To hold the wall in place, we used four scrap pieces of 1x2 held by clamps to the side of the floor frame, wrapped in plastic wrap to keep them from gluing to the side of the trailer. We used a straight piece of 1x6 wrapped in plastic wrap slid up alongside the inside of the wall. This picture shows the initial setup (no wrap on the 1x6 yet).

Image

After getting stuff set up, we used a spray bottle to wet the OSB floor and applied the Gorilla Glue to the foam while the wall was upside down.

Image

We flipped the wall in place, then used some 2x4s and string to weigh down the wall (the one 2x4 is doubled cause it was junk and half the weight of the other 2x4). These 2x4's hang on both sides of the wall to stay balanced, and there is a scrap block of foam on the top of the wall to keep the strings from biting into the wall. The 1x6 was slid up to the wall, pressing it against the outside 1x2's, and tacked into place with two small nails. Note the string coming out of the wall near the front and going to the clamp on the headboard.

I later slid the rear set of 2x4 weights back at least a foot, as it seemed the rear part of the wall was rising more then the rest as the GG expanded. Overall, the entire wall started rising a little bit from the glue expansion. The weight is not a lot compared to the surface area of the glued surface.

Image

This string goes through a hole we drilled in the wall and holds a piece of scrap wood on the outside, pulling the wall in tight against the headboard while the glue between the headboard and wall dries.

Image

That was all for tonight, along with a little bit of talking and planning for later. This next part is three paragraphs that detail my hot wire cutter I made today that few people can or could copy, so feel free to just skip to the pictures below the text, none of it is important.

I saw how fast and neat the hot wire cutters people use for cutting and kerfing where, so I wanted to build one. Most people use a "dumb" car battery charger, but I didn't have one. What I did have was a microwave oven transformer (MOT) from an old microwave. These MOTs take 120 VAC and step it up to around 2000 VAC to power the magnetron. I knocked out the primaries a long time ago, and rewound it with about 24 turns of 14 gauge enamel insulated wire, which gave me 24 VAC output, which I was intending to use to power a DIY power supply. I learned later I could not, since when idle, this beast draws 65 W of power, which goes to heating up the transformer. This does not happen when fully loaded, but I would not be drawing anywhere near the approx. 1000 design Watts, so it was going to overheat with extended use and thus worthless for that project, and was put in the back corner.

When I read about hot wire cutters, I remembered this. Since I don't need to run it for hours on end, it would be fine to use as a power source. I nailed the MOT to a scrap piece of 2x4 and soldered up some stranded wire I had laying in my electronics junk bins (one man's trash is another man's treasure!). I then tried a 1.5'-2' piece of some fence wire, which was in my house when I bought it, looks like galvanized steel. I hooked it up to the stranded copper wire and plugged the transformer in. Within seconds, the wire was glowing red hot! I then tried 6'. This time, it took at least 20 seconds but parts started glowing. I unwrapped a 14' piece (this is a 1/2 mile roll) and tried again. This time, no glowing, and it was hot enough to cut the foam. Problem is, I needed 14' of not very flexable wire.

I originally planned to wire up a dimmer I took out of one of my rooms cause the design sucks and the knobs where breaking off, but couldn't find it. After the 14' of wire I needed without it, I looked harder and found it finally. After screwing it to a 2x4 I screwed to the first 2x4, and wiring it up, I tested the original, short piece by turning up the dimmer slider until it was hot enough to cut foam. Success! No glowing wire, no super long lengths. Plus with the dimmer I can use different lengths for various kerfing/cutting "attachments".

Here is the hot wire cutter with the piece of wire I used as a successful test.

Image

And here is a piece of scrap foam cut by the wire cutter, the top face is the cut face. Note the wavy cut is due to being hand held. The hot wire leaves a nice, smooth cut in the foam.

Image
User avatar
jseyfert3
Teardrop Master
 
Posts: 285
Images: 1
Joined: Sun Jan 05, 2014 9:13 am
Location: Peoria, IL, USA
Top

Re: 1st Build, a 5'x8' Foamie Teardrop on a 4'x8' HF Trailer

Postby jseyfert3 » Tue Apr 01, 2014 10:52 am

Got the second wall in place and glued myself. Give it a few hours before I unclamp it, and I'll probably start working on something else.

Image
User avatar
jseyfert3
Teardrop Master
 
Posts: 285
Images: 1
Joined: Sun Jan 05, 2014 9:13 am
Location: Peoria, IL, USA
Top

Re: 1st Build, a 5'x8' Foamie Teardrop on a 4'x8' HF Trailer

Postby KCStudly » Tue Apr 01, 2014 3:19 pm

When I was using GG I would take one of those fake credit/membership cards that always seem to come in the mail and use it as a spreader squeegee to evenly distribute the glue over 100/ct of the glued surface. Just a thin fill is all you need.

In my climate (which I'm guessing is about 4 to 6 hrs later than yours, although maybe more humid in the summer being along the coast) I finally figured out that just wiping a damp towel along the opposite piece was plenty of moisture without making the glue over activate (small tight bubbles are stronger than big airy bubbles).

Just another point of data to consider. :thumbsup:
KC
My Build: The Poet Creek Express Hybrid Foamie

Poet Creek Or Bust
Engineering the TLAR way - "That Looks About Right"
TnTTT ORIGINAL 200A LANTERN CLUB = "The 200A Gang"
Green Lantern Corpsmen
User avatar
KCStudly
Donating Member
 
Posts: 9611
Images: 8169
Joined: Mon Feb 06, 2012 10:18 pm
Location: Southeastern CT, USA
Top

Re: 1st Build, a 5'x8' Foamie Teardrop on a 4'x8' HF Trailer

Postby jseyfert3 » Tue Apr 01, 2014 11:30 pm

I tried using my new hot wire cutter to cut some foam and was disappointed. It moved pretty slow (at least in my mind), threw smoke and fumes (I reduced most fumes with a vapor filter on my respirator), but the cut quality was low. Not like when I ran a small test piece over a single wire. To cut 2" thick foam, you need a 2"+ V-shaped piece of wire, which try as I might, was not perfectly in line and caused a cut line with two somewhat offset lines. I said screw it and set my circular saw to cut 2" and went to town.

The edge of my garage worked well for this, as the concrete in my garage is fairly flat, and there is a small drop-off where the concrete ends to give the blade space to stick through.

Image

This method cuts a very smooth line very fast, it's like you're not even cutting anything. Lots of clingy foam dust! I cut two of the foam sheets to 5'6" long, to be used for the roof.

Image

Since I "gave up" on the hot wire cutter, I kerfed with the circular saw. I set the depth to leave about a quarter inch or so, about what I had seen looking around on the forum and tried a test piece. I first cut a kerf every 4", bent it over my wall to see where that was good enough, marked the location, then cut middle lines to end up with 2" kerf spacing. I tried bending the piece on the wall again, noting where the 2" kerfs worked and where they did not, where I would need closer spacing.

My dad then arrived to help me, and with his help we kerfed two roof pieces. Using the marks I had, we kerfed one piece with 1" and 2" kerf lines, tested it, and changed a few more 2" lines to 1" lines as they weren't close enough. LOTS of dust! Especially on my dad, since as I made the cut it was throwing dust onto him. The two boards closest to the camera where for me to kneel on while cutting, the piece furthest away was the guide piece for the saw my dad would hold and then position again after each cut. It went fairly quick, you can run the saw as fast as you'd like, and he'd have the guide about positioned again by the time I had brought the saw back and lined it back up.

Image

By the time we ate, kerfed both pieces, tested, and cleaned up, it was about time for him to go. I kept messing with the pieces after he left to get them ready to glue up. I still had to cut the beveled cut where the foam meets up at an angle with the straight front of the trailer. However, my circular saw could not cut the required ~33° angled cut and still get through the foam, it would leave about a half inch uncut. I tested cutting a piece on my tiny table saw, and it could cut all the way through the foam on my test pieces. However, after I tried holding up my roof piece, I realized there was no way I could guide this now floppy piece of foam through the table saw. So I cut it with my circular saw, then after some experimentation and thinking, I grabbed a handsaw and cut the rest of the cut with that. Worked out good, the circular saw cut acted as a guide.

Doing a test bend, I snapped the outside of the foam at one of the kerf lines about 2/3 down the width. Realizing I needed more strength, I thought back to building my RC airplane out of foam, and using packing tape to reinforce the foam skin to keep it from breaking. So I ran four strips of tape down the outside surface of the foam, opposite and perpendicular to the kerfs. Then, with my roommates help, we glued it up.

He held the foam, while I applied glue and water. After I had applied it, he started bending the foam near the bottom, and I ran strips of packing tape from the front of the TD to the walls, pulling as I attached them to the walls, which pulled the foam in and held it snug against the curve. I ran a strip of tape, a gap about as wide as a strip of tape, and so on. I taped up about half of one side, then the other side, and finished with the top half of the first side. I ran the glue in two sections as well, bottom and top halves.

Image

The 2x4, straightedge, and 1x2 (above the 2x4) are holding the top of the curve in a little bit. I noticed after we were done it was bowing out a little at the top, so I wanted to push it in, at least while the glue dried. This was actually my roommates suggestion, he said lean a 2x4 against it, but it didn't do much, so he said put a stick between the top of it and the ceiling, which pressed it down and worked quite well.

Image

Using my dad's suggestion, I taped the second cut piece on top of the TD before I started gluing the front piece in. This positioned and spaced the walls at the top, to make sure they would end up at the proper spacing and helped align the front walls.

Image

Here's another view of the inside of the curve. I did not apply any glue inside the kerf lines, I figured that the canvas I will apply inside and out will hold everything together fine.

Image

I will apply the next roof piece tomorrow. Good progress today.
User avatar
jseyfert3
Teardrop Master
 
Posts: 285
Images: 1
Joined: Sun Jan 05, 2014 9:13 am
Location: Peoria, IL, USA
Top

Re: 1st Build, a 5'x8' Foamie Teardrop on a 4'x8' HF Trailer

Postby lthomas987 » Wed Apr 02, 2014 10:28 am

So can I ask why you didn't cut your doors before you stood your walls up? I was planning to cut the doors and window openings while everything was still flat for ease. I look forward to seeing how you do this.

Also when I was kerfing 1" foam for my tiny bike trailer I cut the kerfs with my table saw, but I cut them about 1/2"-3/4" deep. So then the foam was very easy to bend. I was thinking of kerfing my 2" foam nearly an inch deep. So I am intrigued by your shallower kerfs.

On my test piece for my bike trailer I put in WAY too much gorilla glue in the kerfs. It was a giant blobby mess on the inside, but it is still holding a curve nicely unsupported in my garage. I was very happy to have done that test piece and made my mess on some scrap. The final piece I used almost no GG on the front and none in the back. Thinking exactly what you were thinking about the canvas holding it all together anyhow.

It looks great! I am impressed with how fast you're getting it all together.

Laura
Laura
Bike-Drop a Micro-Foamy Build Journal http://www.tnttt.com/viewtopic.php?f=50&t=59274
My first Superlegarra-ish Foamy build http://www.tnttt.com/viewtopic.php?f=55&t=59049
User avatar
lthomas987
Donating Member
 
Posts: 357
Images: 204
Joined: Sun Feb 02, 2014 2:41 pm
Location: Minneapolis, MN, USA
Top

Re: 1st Build, a 5'x8' Foamie Teardrop on a 4'x8' HF Trailer

Postby KCStudly » Wed Apr 02, 2014 1:18 pm

Excellent progress, and fine attention to the details. :thumbsup:
KC
My Build: The Poet Creek Express Hybrid Foamie

Poet Creek Or Bust
Engineering the TLAR way - "That Looks About Right"
TnTTT ORIGINAL 200A LANTERN CLUB = "The 200A Gang"
Green Lantern Corpsmen
User avatar
KCStudly
Donating Member
 
Posts: 9611
Images: 8169
Joined: Mon Feb 06, 2012 10:18 pm
Location: Southeastern CT, USA
Top

Re: 1st Build, a 5'x8' Foamie Teardrop on a 4'x8' HF Trailer

Postby jseyfert3 » Wed Apr 02, 2014 1:28 pm

lthomas987 wrote:So can I ask why you didn't cut your doors before you stood your walls up? I was planning to cut the doors and window openings while everything was still flat for ease. I look forward to seeing how you do this.

Also when I was kerfing 1" foam for my tiny bike trailer I cut the kerfs with my table saw, but I cut them about 1/2"-3/4" deep. So then the foam was very easy to bend. I was thinking of kerfing my 2" foam nearly an inch deep. So I am intrigued by your shallower kerfs.

On my test piece for my bike trailer I put in WAY too much gorilla glue in the kerfs. It was a giant blobby mess on the inside, but it is still holding a curve nicely unsupported in my garage. I was very happy to have done that test piece and made my mess on some scrap. The final piece I used almost no GG on the front and none in the back. Thinking exactly what you were thinking about the canvas holding it all together anyhow.

It looks great! I am impressed with how fast you're getting it all together.

Laura

I didn't cut the doors because I had found this post in the giant foamie thread (found using the handy summery thread). Basically GPW said to not cut the door until after basic assembly, as the walls become rather flimsy if you cut the door opening before you assemble the foam. My dad also agreed with this, he didn't think it would be wise to cut the door openings until the walls and at least some of the ceiling panels were glued. Two more roof panels and I'll be at the hinge point, once I'm there, I'll cut the door openings before I glue up the hatch. This will allow me access inside the TD which I may need while forming/gluing the hatch. Still need to research and plan my door and hatch.

My kerfs are not shallow. I didn't get a close up picture, but they run through the majority of the foam, leaving only about a 1/4" uncut at the bottom of the kerf. Similar to the picture of the kerfed pink foam in the first post in this thread.

I originally thought of putting GG in the kerfs, until I had kerfed in and looked and the 30+ kerf lines, each 5.5' long. :shock:

Thank you. I'm a little surprised myself at some of the progress, however, I have a deadline of just over two weeks to get the structure done, canvased, and painted on the outside, so I can tow it. :frightened:

KCStudly wrote:Excellent progress, and fine attention to the details. :thumbsup:

Thanks. :)
User avatar
jseyfert3
Teardrop Master
 
Posts: 285
Images: 1
Joined: Sun Jan 05, 2014 9:13 am
Location: Peoria, IL, USA
Top

Re: 1st Build, a 5'x8' Foamie Teardrop on a 4'x8' HF Trailer

Postby lthomas987 » Wed Apr 02, 2014 3:32 pm

jseyfert3 wrote:
My kerfs are not shallow. I didn't get a close up picture, but they run through the majority of the foam, leaving only about a 1/4" uncut at the bottom of the kerf. Similar to the picture of the kerfed pink foam in the first post in this thread.


That's what I get for reading at work. :oops: I misinterpreted what you said. :oops:

I am very impressed with your progress. :thumbsup:

I am sure towing it will go fine.
Laura
Bike-Drop a Micro-Foamy Build Journal http://www.tnttt.com/viewtopic.php?f=50&t=59274
My first Superlegarra-ish Foamy build http://www.tnttt.com/viewtopic.php?f=55&t=59049
User avatar
lthomas987
Donating Member
 
Posts: 357
Images: 204
Joined: Sun Feb 02, 2014 2:41 pm
Location: Minneapolis, MN, USA
Top

Re: 1st Build, a 5'x8' Foamie Teardrop on a 4'x8' HF Trailer

Postby jseyfert3 » Thu Apr 03, 2014 12:22 am

Worked a 12 hr shift today, so I didn't glue the piece in the morning like I thought and then work on kerfing more pieces, but once I got back from work I got the 2nd piece on with some help from my roommate.

Image

To get the two pieces to match up at the curve, my roommate stood inside the trailer (weird saying that there is something to be inside of), and held the top half of this second roof piece up so it was angled at the angle the top of the bottom piece ended at after I applied glue and water at the joint. I applied some tape strips to hold the outside edge together (the inside edge will be held together by the curving force), and then we started curving the piece over.

Image

After the joint, it was pretty much the same as yesterday, except with a much bigger curve radius so the foam bent over much easier. I didn't apply the perpendicular to the curve strips of tape to this piece like I did to the first one, since the curve was much gentler it wasn't required (or maybe I just needed more kerfs). Here's what the tape holding the curved foam on looks like. The joint between the two sheets is closer to the top right by the "FOAMU" on the wall. What appears to be a joint near the bottom is one of the 1/4" slits the foam has every foot or two, opening up from the tension of being curved. May look like a lot of tape, but tape is $3 a roll, a sheet of foam is $26 and a lot of work if you fail to hold it properly.

Image

Another shot of the inside, just after gluing. You can see the glue foaming out already.

Image

One more sheet, or perhaps not an entire sheet, and it'll be time to add the hatch hinge support. I really need to start planning that whole thing...not even sure where I want the hatch to start yet...
User avatar
jseyfert3
Teardrop Master
 
Posts: 285
Images: 1
Joined: Sun Jan 05, 2014 9:13 am
Location: Peoria, IL, USA
Top

Re: 1st Build, a 5'x8' Foamie Teardrop on a 4'x8' HF Trailer

Postby lthomas987 » Thu Apr 03, 2014 9:18 am

LOOKS AWESOME!!! :applause: :applause:
Laura
Bike-Drop a Micro-Foamy Build Journal http://www.tnttt.com/viewtopic.php?f=50&t=59274
My first Superlegarra-ish Foamy build http://www.tnttt.com/viewtopic.php?f=55&t=59049
User avatar
lthomas987
Donating Member
 
Posts: 357
Images: 204
Joined: Sun Feb 02, 2014 2:41 pm
Location: Minneapolis, MN, USA
Top

Re: 1st Build, a 5'x8' Foamie Teardrop on a 4'x8' HF Trailer

Postby KCStudly » Thu Apr 03, 2014 10:08 am

+1 It is looking very awesome! :thumbsup: ...and it is giving me lots of encouragement for when I get to that phase. :thumbsup:
KC
My Build: The Poet Creek Express Hybrid Foamie

Poet Creek Or Bust
Engineering the TLAR way - "That Looks About Right"
TnTTT ORIGINAL 200A LANTERN CLUB = "The 200A Gang"
Green Lantern Corpsmen
User avatar
KCStudly
Donating Member
 
Posts: 9611
Images: 8169
Joined: Mon Feb 06, 2012 10:18 pm
Location: Southeastern CT, USA
Top

PreviousNext

Return to Build Journals

Who is online

Users browsing this forum: No registered users and 9 guests