Lifting roof XPStream - Almost Finished!

...ask your questions in the appropriate forums BUT document your build here...preferably in a single thread...dates for updates, are appreciated....

Re: Foldable foamie transformer with amenities

Postby OP827 » Tue Jun 16, 2015 11:23 pm

Since I will need 14ft long wood stringers to build some edges and I only have 8ft pine and yellow birch, I had to make a 1:10 scarfing joint jig. Did it this evening, spent probably 3 hours on figuring out the details and making it.
The sliding guide was made slightly narrower to have a little side play in the table saw groove so that when the cut is done the jig can be pushed against the blade. After the cut is finished the jig is pulled away from the blade so that the cut remains as precise as possible, I found that advice on the web and it does work well to protect the very thin scarfing cut from the saw blade play. I also added an angled handle of my own idea with a blade safeguard so that the scarfing action can be done safer, more precise and comfortable. It was simple and quick to make out of scrap materials at hand and easy to make the scarfing cuts upto 3.25" high with 10" table saw. Cheers! :beer:
133077133076133075133074133073133072
User avatar
OP827
Donating Member
 
Posts: 1560
Images: 405
Joined: Fri Apr 25, 2014 7:27 pm
Location: Bruce County Ontario

Re: Foldable foamie transformer with amenities

Postby OP827 » Tue Aug 11, 2015 4:00 pm

I was making some progress. Below is a dry fit.
166061166062166063166064166065
Last edited by OP827 on Thu Jun 17, 2021 6:13 pm, edited 2 times in total.
User avatar
OP827
Donating Member
 
Posts: 1560
Images: 405
Joined: Fri Apr 25, 2014 7:27 pm
Location: Bruce County Ontario

Re: Foldable foamie transformer with amenities

Postby Bluebunny » Tue Aug 11, 2015 9:53 pm

Nice, OP! Getting the pieces together really starts showing the concept. It's going to be standy AND roomy, and will still fit into your garage! Awesome
off topic Stitch-and-Glue ply kayak build... https://www.facebook.com/media/set/?set ... 254&type=3
Bluebunny
Teardrop Master
 
Posts: 101
Images: 44
Joined: Fri Jan 30, 2015 4:21 pm
Location: northern illinois
Top

Re: Foldable foamie transformer with amenities

Postby OP827 » Thu Aug 13, 2015 1:41 am

THanks Bluebunny for kind words, that is the plan at least.

Covered first panel outside surface with epoxy and 6oz fibeglass cloth this evening. Quite happy with the quality glassing outcome.
Was a very easy job by having the panel in horizontal position. I plan to cover all panels first and then assemble the walls and then cover panel seams with FG tape.

135164135163
User avatar
OP827
Donating Member
 
Posts: 1560
Images: 405
Joined: Fri Apr 25, 2014 7:27 pm
Location: Bruce County Ontario
Top

Re: Foldable foamie transformer with amenities

Postby KCStudly » Thu Aug 13, 2015 9:58 am

Looks super! :thumbsup:
KC
My Build: The Poet Creek Express Hybrid Foamie

Poet Creek Or Bust
Engineering the TLAR way - "That Looks About Right"
TnTTT ORIGINAL 200A LANTERN CLUB = "The 200A Gang"
Green Lantern Corpsmen
User avatar
KCStudly
Donating Member
 
Posts: 9616
Images: 8169
Joined: Mon Feb 06, 2012 10:18 pm
Location: Southeastern CT, USA
Top

Re: Foldable foamie transformer with amenities

Postby mikeschn » Thu Aug 13, 2015 7:41 pm

It's huge!!! But I'll bet it's light!!! :D

Mike...
The quality is remembered long after the price is forgotten, so build your teardrop with the best materials...
User avatar
mikeschn
Site Admin
 
Posts: 19202
Images: 479
Joined: Tue Apr 13, 2004 11:01 am
Location: MI
Top

Re: Foldable foamie transformer with amenities

Postby OP827 » Thu Aug 13, 2015 10:48 pm

Thanks Mike and KC for your support, it means a lot to me. Yes it is big because that was what my family members wanted. Yet the walls and front I can lift either with one or two hands, so I hope it will be light when it is done, the pine stock I am using is surprisingly very light too. So I made some more progress today, finished glassing wheel wells and more importantly flipped the front part and fibeglassed the whole thing and it was again an easy job having gravity on my side. I first faired the surface with epoxy and microballs mix to fix all holes and dings and while it was still wet I cut the FG cloth and started glassing. it went very well, just a little tired by the end of the day today. Thanks for reading. :beer:

I think I have to add a second layer of FB in the front area where the road chips may hit, what do you all think?

135189135188135187
User avatar
OP827
Donating Member
 
Posts: 1560
Images: 405
Joined: Fri Apr 25, 2014 7:27 pm
Location: Bruce County Ontario
Top

Re: Foldable foamie transformer with amenities

Postby Bluebunny » Fri Aug 14, 2015 3:17 pm

OP827 wrote:
I think I have to add a second layer of FB in the front area where the road chips may hit, what do you all think?


Another layer will add weight and labor, I wonder what additional protection it will add? A 24" wide sheetof aluminum might be N alternate. I wonder how punch resistant your single layer provides? Maybe instead consider epoxy resin repairs as the holes occur?

I would plan on extra glass in the areas of the skin receiving of torsional stress while on the road...
off topic Stitch-and-Glue ply kayak build... https://www.facebook.com/media/set/?set ... 254&type=3
Bluebunny
Teardrop Master
 
Posts: 101
Images: 44
Joined: Fri Jan 30, 2015 4:21 pm
Location: northern illinois
Top

Re: Foldable foamie transformer with amenities

Postby OP827 » Fri Aug 14, 2015 5:43 pm

Not much added weight really, about 0.35kg, but it adds strength a lot, it can take a light hammer hit and it will not punch through, but leave a good mark of course. It was almost as long to post this note as I did a second layer in the chips area, so not much of labor, cheers and thanks for looking!
Image
User avatar
OP827
Donating Member
 
Posts: 1560
Images: 405
Joined: Fri Apr 25, 2014 7:27 pm
Location: Bruce County Ontario
Top

Re: Foldable foamie transformer with amenities

Postby OP827 » Tue Aug 18, 2015 10:42 pm

Continued laminating walls exterior with FG/epoxy. All lower side walls are laminated and front finished with FG as well.
This photo below is just for record where the back wall wiring for marker and clearance lights is located. First wiring work on the trailer, is that a sign of progress?
This wiring side is now glued to plywood to complete the back wall panel.
Many little details here and there, adding the wheel wells area with coats of resin so they can be assembled with walls.
I plan to start permanent assembly of lower walls this week to enable work on the lifting roof next.

I am thinking of not using epoxy for laminating folding walls, they are plenty strong as is and they are only exposed to weather when camping, sooo... I think I can use either TB2 with FG or acrylic primer and paint inside and outside the folding walls :thinking: I want to save the epoxy for the roof part instead. :thinking: Oh, I will build and laminate the roof first and then make this decision.

Thanks for looking.

Image
User avatar
OP827
Donating Member
 
Posts: 1560
Images: 405
Joined: Fri Apr 25, 2014 7:27 pm
Location: Bruce County Ontario
Top

Re: Foldable foamie transformer with amenities

Postby noseoil » Wed Aug 19, 2015 7:39 am

Just wanted to say how well this one is going. The fiberglass is really turning out nicely & I like how you're working the panels & letting gravity help with the work. The finish work & sanding will take some time, but it's going to look great when it's painted. Are you planning on building the cabinets first, then assembling the walls around them, or is there room to slide things in place once the walls are all fastened? Best, tim
Build log: viewtopic.php?f=50&t=60248
The time you spend planning is more important than the time you spend building.........

137905
User avatar
noseoil
1000 Club
1000 Club
 
Posts: 1820
Images: 669
Joined: Sun Apr 27, 2014 8:46 am
Location: Raton, New Mexico, living the good life!
Top

Re: Foldable foamie transformer with amenities

Postby dales133 » Wed Aug 19, 2015 7:53 am

Great design and coming on very well.
Enjoying watching it except it makes me feel like a slacker!
User avatar
dales133
4000 Club
4000 Club
 
Posts: 4605
Images: 1
Joined: Mon Oct 13, 2014 5:26 pm
Top

Re: Foldable foamie transformer with amenities

Postby daveesl77 » Wed Aug 19, 2015 8:01 am

This is an outstanding concept and build! It is really coming together nice! What great ideas.

dave
*******
Dave and Regina - Enjoying old age, a LOT!

Build Journal - http://www.tnttt.com/viewtopic.php?f=50&t=62386
User avatar
daveesl77
Donating Member
 
Posts: 871
Images: 273
Joined: Tue Jan 27, 2015 4:33 pm
Location: Pocahontas County, West Virginia
Top

Re: Foldable foamie transformer with amenities

Postby OP827 » Wed Aug 19, 2015 3:12 pm

Dales133, Dave, thanks a lot for kind words and encouragement!

Tim, thanks! To answer your question, it really does not matter as there is enough space inside to install cabinets after without much effort with walls installed first, especially also having the removable roof, but I am contemplating to install the cabinets at the same time as walls so everything matches and square, will see, I may decide to install walls square and go to building the roof so the trailer is towable. I actually already build the bed and dinette sides, front frame and sides of kitchen cabinets, but after latest considerations of inside space I will be reducing the kitchen depth and height to have more space to move inside. I am also not decided on details of bathroom wall and dinette sitting interface with entry door and wall area, so that slows me down a lot. All electrical will be running inside the trailer cabinetry, at least that is the plan. In a few places I plan to use plastic channel that will be blended in the interior detail to be not noticeable.

So today I finished the back wall lamination and there are some pictures with more detail how it was done since I did not describe that before.

The panel was sanded, some small penetration holes done to improve on lamination strength (see more on it below) and cleaned, fiberglass cut to size and layed down on the panel:
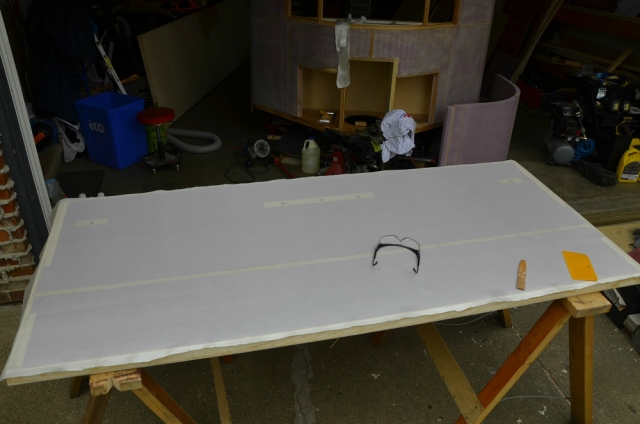
Image

I mixed epoxy in two big batches of a full cup to speed up the process as there is no need for epoxy to be in a pot, so no risk of it going off, i.e. once it is mixed for 1-1.5 minutes, I just poored the epoxy down on the cloth and used polyurethane spreader to distribute the epoxy. The whole process of pooring epoxy probably took about 10-15 minutes and rest of about an hour maybe was for squeezing it down and working details on the edges and around wiring holes. Wires were just hidden inside the holes in form of spiral to not interfere with the lamination. I now had a good feel for how much epoxy I'll need to finish off the panel since I already laminated all other panels, so this time it took these two big batches. Here is the finished laminated panel waiting for epoxy to set, It will take about 5 hours and then I can take a utility knife and clean the edges, so that will be done later this afternoon.

Image

Here is a cloesup of the panel edge. Since it is a back panel the vertical edge was rounded with a router bit, fiberglass is laying well with this radius. Surface overall is pretty good and true. only a finish fill of epoxy either with squeege or roller will be needed before the paint. Almost no sanding is required, just knock off the whatever is pocking out a little bit.

Image

Another closeup to show these small penetration holes I did to mitigate delamination issues some people are reporting on their builds. The holes are about 1/8-1/4" deep and made with a simple tool.

Image

And there are some tools used for the process. Polyurethane squeege/spreader, scissors, and the penetration tool. The penetration tool is made of scrap wood strip, I shot some brad nails through it. I just press this tool against the foam panel and move a bit and then press again to make the holes pattern you see above. It takes a few minutes to make all the holes in the panel, I just did not want to order and wait for the wallpaper removal roller that others are using on this forum and this little tool worked for me so I continued using it.

Image

Now back to thinking of how to make internal walls and things. :thinking:

Thanks for looking,

Oleg
User avatar
OP827
Donating Member
 
Posts: 1560
Images: 405
Joined: Fri Apr 25, 2014 7:27 pm
Location: Bruce County Ontario
Top

Re: Foldable foamie transformer with amenities

Postby OP827 » Thu Aug 20, 2015 9:32 pm

I ran into some minor issue with lamination of last back wall panel since I tried to do it faster than others. The tiny holes from penetration tool were usually first filled with either epoxy or epoxy and microballs mix before the FG cloth and everything was ok with these tiny holes, no issues - see the first photo below.

Last panel I did not do that, I just made these penetration holes and dropped the cloth and started laminating and then after some time, in a few spots were the epoxy was not poured excesively on the cloth, these little whitish areas appeared under the cloth - see second photo.
It is most likely because the epoxy went down these little holes and left cloth above starved without epoxy.

To fix this, I will sand the panel and impregnate cloth with epoxy once again, not a big isssue, but since I described the last panel method lamination in the previous post, I wanted to mention it here so that you, the reader would know and aware of it. Other than that, everything is good. 8)

Image
Image
User avatar
OP827
Donating Member
 
Posts: 1560
Images: 405
Joined: Fri Apr 25, 2014 7:27 pm
Location: Bruce County Ontario
Top

PreviousNext

Return to Build Journals

Who is online

Users browsing this forum: Google [Bot] and 13 guests