
Bruce
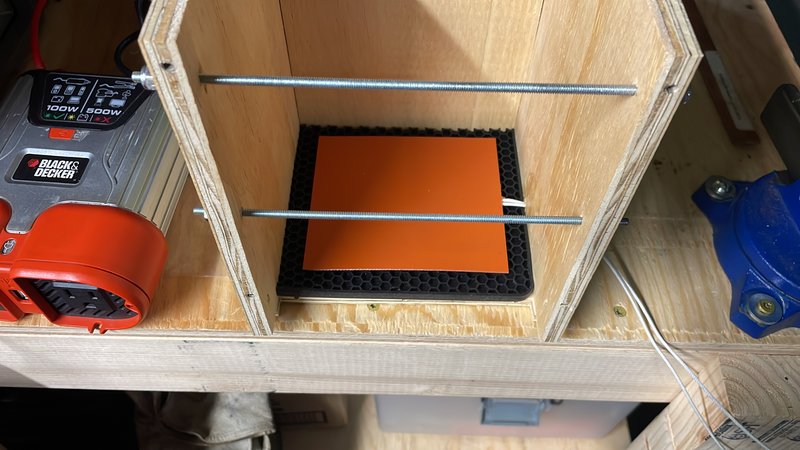
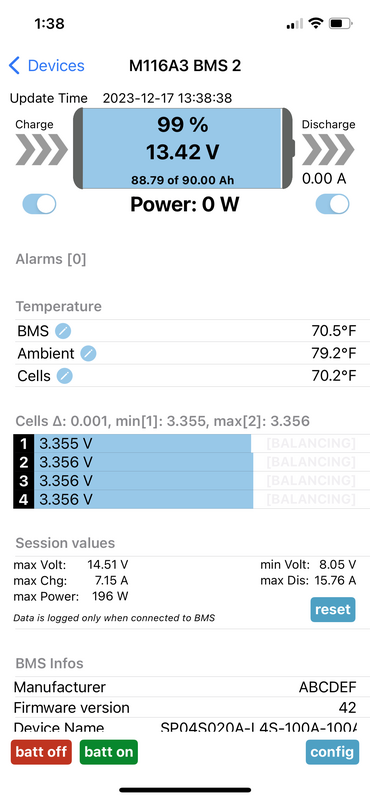
P.S. I'm running my annual 80% discharge test on the trailer LiFePo4 battery now, I'll post the results....
Teardrops n Tiny Travel Trailersor t n ttt for short (tnttt.com) |
![]() by bdosborn » Wed Dec 13, 2023 2:24 pm
by bdosborn » Wed Dec 13, 2023 2:24 pm


![]() by lfhoward » Sat Dec 16, 2023 12:17 am
by lfhoward » Sat Dec 16, 2023 12:17 am
bdosborn wrote:I was wondering the other day if you'd put your trailer in the winter configuration. Looks like you did, those are nice results.
Bruce
P.S. I'm running my annual 80% discharge test on the trailer LiFePo4 battery now, I'll post the results....


![]() by featherliteCT1 » Sat Dec 16, 2023 5:25 am
by featherliteCT1 » Sat Dec 16, 2023 5:25 am
![]() by lfhoward » Sat Dec 16, 2023 12:54 pm
by lfhoward » Sat Dec 16, 2023 12:54 pm
![]() by bdosborn » Sat Dec 16, 2023 2:40 pm
by bdosborn » Sat Dec 16, 2023 2:40 pm
lfhoward wrote:The 80% discharge test results will be interesting. Are you doing it out of curiosity, or is it good for the battery chemistry to get a good discharge and charge-up at least once a year?
![]() by featherliteCT1 » Sat Dec 16, 2023 3:41 pm
by featherliteCT1 » Sat Dec 16, 2023 3:41 pm
![]() by lfhoward » Sun Dec 17, 2023 8:04 pm
by lfhoward » Sun Dec 17, 2023 8:04 pm


![]() by Tom&Shelly » Sun Dec 17, 2023 10:42 pm
by Tom&Shelly » Sun Dec 17, 2023 10:42 pm
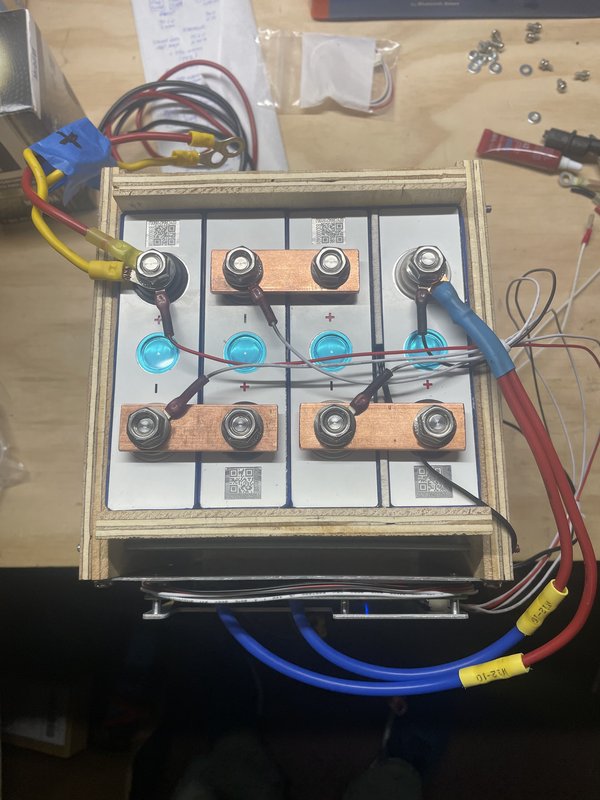
lfhoward wrote:Quick question for those who have built one of these. Do you loc-tite your battery studs into the terminals or no? I am finding conflicting opinions online about whether this is necessary or advisable.

![]() by lfhoward » Sun Dec 17, 2023 10:55 pm
by lfhoward » Sun Dec 17, 2023 10:55 pm
Tom&Shelly wrote:lfhoward wrote:Quick question for those who have built one of these. Do you loc-tite your battery studs into the terminals or no? I am finding conflicting opinions online about whether this is necessary or advisable.
I haven't built one of course, but this raises the question for me: Is there a conductive Loctite? Maybe that doesn't matter?
Tom
![]() by featherliteCT1 » Mon Dec 18, 2023 6:50 am
by featherliteCT1 » Mon Dec 18, 2023 6:50 am
![]() by bdosborn » Mon Dec 18, 2023 12:43 pm
by bdosborn » Mon Dec 18, 2023 12:43 pm
featherliteCT1 wrote: Periodically, I check the studs and nuts and none have loosened. It could be catastrophic if any wires come loose. I was concerned about both the studs and the nuts coming loose. Consequently, the serrated nuts would not affect whether the studs themselves come loose.
![]() by lfhoward » Mon Dec 18, 2023 10:59 pm
by lfhoward » Mon Dec 18, 2023 10:59 pm
![]() by foxontherun » Fri Jan 12, 2024 10:33 pm
by foxontherun » Fri Jan 12, 2024 10:33 pm
Re: M116A3 Build
Postby lfhoward » Sun Dec 17, 2023 8:04 pm
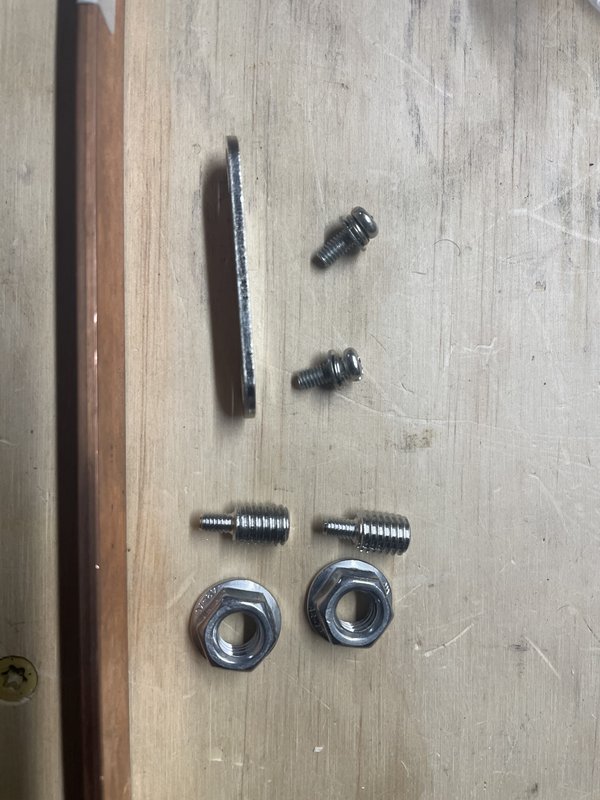
The batteries came with anemic little screws and thin bus bars. I replaced those with 5/16 studs that thread into the original holes.
![]() by lfhoward » Sat Jan 13, 2024 10:38 am
by lfhoward » Sat Jan 13, 2024 10:38 am


![]() by lfhoward » Sat Jan 13, 2024 10:44 am
by lfhoward » Sat Jan 13, 2024 10:44 am
foxontherun wrote:Re: M116A3 Build
Postby lfhoward » Sun Dec 17, 2023 8:04 pm
The batteries came with anemic little screws and thin bus bars. I replaced those with 5/16 studs that thread into the original holes.
Good evening,
I have never seen bolts like these before, what are they called? Looks like they would be useful for my batteries I am getting ready to install.
Thanks,
Harry
Users browsing this forum: No registered users and 68 guests