M116A3 Build

...ask your questions in the appropriate forums BUT document your build here...preferably in a single thread...dates for updates, are appreciated....

Re: M116A3 Build

Postby lfhoward » Thu Apr 28, 2016 11:31 am

Here's a quick update. I will be dropping off the sheet metal to get it bent professionally tomorrow morning. Next week is final exam week (and the grading that goes with it), but I'm hoping to carve out some days to work on the trailer. Looking forward to getting back into the project in a big way as soon as the semester ends! The nice weather is creating this trailer-building variant of spring fever.
My off-road camper build on an M116A3 military chassis:
http://www.tnttt.com/viewtopic.php?f=50&t=62581
Tow vehicle: 2008 Jeep Liberty with a 4 inch lift.
User avatar
lfhoward
1000 Club
1000 Club
 
Posts: 1370
Joined: Wed Jan 22, 2014 6:10 pm
Location: Philadelphia, PA

Re: M116A3 Build

Postby lfhoward » Wed May 04, 2016 6:33 pm

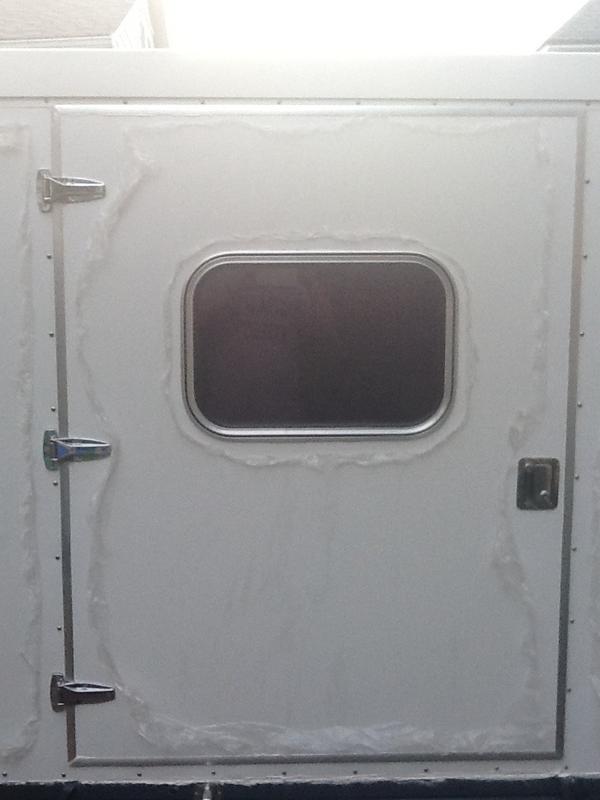
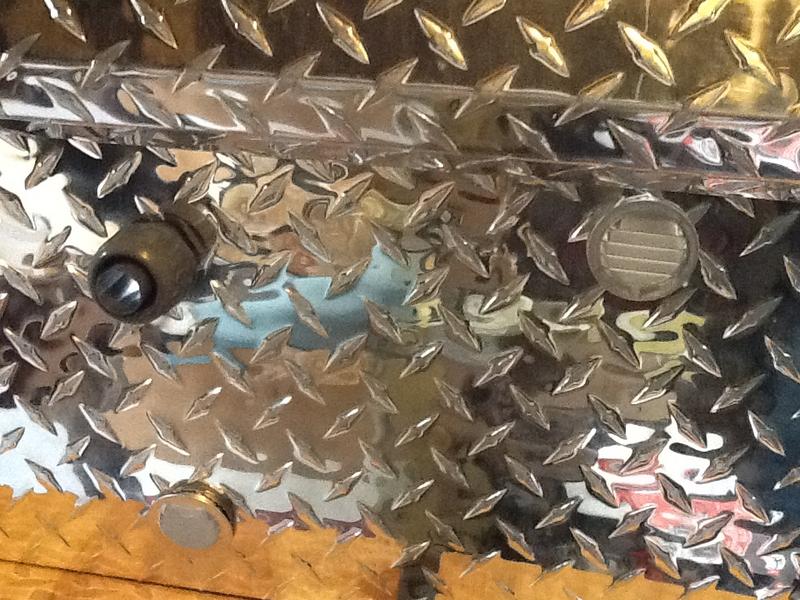
I got the sheet metal back today and it looks great! Fits like a glove on the trailer. No regrets to spending $150 to get the job done right, and happy to support a local business with exceptional customer service.

Rain is forecast every day through Sunday, so installation of the sheet metal is going to have to wait until next week.
My off-road camper build on an M116A3 military chassis:
http://www.tnttt.com/viewtopic.php?f=50&t=62581
Tow vehicle: 2008 Jeep Liberty with a 4 inch lift.
User avatar
lfhoward
1000 Club
1000 Club
 
Posts: 1370
Joined: Wed Jan 22, 2014 6:10 pm
Location: Philadelphia, PA

Re: M116A3 Build

Postby noseoil » Thu May 05, 2016 7:58 am

Sounds like spending the money was worth it in the long run. No worries now about getting a good fit & a waterproof seam! Now there will be something else to think about & keep you up at night....
Build log: viewtopic.php?f=50&t=60248
The time you spend planning is more important than the time you spend building.........

137905
User avatar
noseoil
1000 Club
1000 Club
 
Posts: 1820
Images: 669
Joined: Sun Apr 27, 2014 8:46 am
Location: Raton, New Mexico, living the good life!
Top

Re: M116A3 Build

Postby lfhoward » Sat May 07, 2016 5:34 pm

noseoil wrote:Sounds like spending the money was worth it in the long run. No worries now about getting a good fit & a waterproof seam! Now there will be something else to think about & keep you up at night....

Here's the bent sheets waiting for installation. They're hanging out with my nearly finished door.

Image

It was threatening rain all day, so I worked in the shop today on the tongue box instead.
Last edited by lfhoward on Sun May 13, 2018 3:02 pm, edited 2 times in total.
My off-road camper build on an M116A3 military chassis:
http://www.tnttt.com/viewtopic.php?f=50&t=62581
Tow vehicle: 2008 Jeep Liberty with a 4 inch lift.
User avatar
lfhoward
1000 Club
1000 Club
 
Posts: 1370
Joined: Wed Jan 22, 2014 6:10 pm
Location: Philadelphia, PA
Top

Re: M116A3 Build

Postby lfhoward » Sat May 07, 2016 5:47 pm

My tongue box is designed to hold three Group 24 size batteries. I built dividers to keep the batteries from shifting around.

Image

There are three openings in the rear of the tongue box: a watertight junction for flexible conduit, an inlet vent, and an outlet vent.

Inside view. The vents are set up high and low to create air convection inside the box and disperse any battery off gassing.

Image

Rear view. The vents on the back of the tongue box should be protected from rain and spray while driving.

Image

I cut the holes in the aluminum today and set the vents in place, but haven't sealed them around the edges yet. What's a good sealer for aluminum to aluminum? RTV silicone?
Last edited by lfhoward on Sun May 13, 2018 3:02 pm, edited 2 times in total.
My off-road camper build on an M116A3 military chassis:
http://www.tnttt.com/viewtopic.php?f=50&t=62581
Tow vehicle: 2008 Jeep Liberty with a 4 inch lift.
User avatar
lfhoward
1000 Club
1000 Club
 
Posts: 1370
Joined: Wed Jan 22, 2014 6:10 pm
Location: Philadelphia, PA
Top

Re: M116A3 Build

Postby S. Heisley » Sat May 07, 2016 8:52 pm

:thumbsup: You're thinking things through and doing a great job.
User avatar
S. Heisley
Super Lifetime Member
 
Posts: 8774
Images: 495
Joined: Mon Sep 17, 2007 10:02 am
Location: No. California
Top

Re: M116A3 Build

Postby noseoil » Sun May 08, 2016 8:15 am

Looks nice. Osi Quad, sikaflex or a good silicone should work well. Once the sealant is in place, make sure to tape them down so they don't move on you when the adhesive is setting up. Looks like plenty of battery for everything!
Build log: viewtopic.php?f=50&t=60248
The time you spend planning is more important than the time you spend building.........

137905
User avatar
noseoil
1000 Club
1000 Club
 
Posts: 1820
Images: 669
Joined: Sun Apr 27, 2014 8:46 am
Location: Raton, New Mexico, living the good life!
Top

Re: M116A3 Build

Postby dales133 » Sun May 08, 2016 4:21 pm

Looks great, yea id vote for sikaflex or an equivalent polyurethane adhesive /sealant.
User avatar
dales133
4000 Club
4000 Club
 
Posts: 4605
Images: 1
Joined: Mon Oct 13, 2014 5:26 pm
Top

Re: M116A3 Build

Postby lfhoward » Mon May 09, 2016 7:57 pm

Thanks everyone! It is encouraging to have you three following my build thread, and thanks for the ideas. I think I will Sikaflex the vents on (if I dare use Sikaflex as a verb!).

Today I mounted the support rails for the solar panel on the roof, which meant drilling 6 holes in my nicely waterproofed roof! :o It's all good though, because I removed the solar panel and covered the holes with painters tape for the time being. On Thursday (weather permitting) I'll be skinning the plywood roof in aluminum, and afterwards I'll be able to simply drill up from underneath through the existing holes to get the solar panel rails to line right up.
My off-road camper build on an M116A3 military chassis:
http://www.tnttt.com/viewtopic.php?f=50&t=62581
Tow vehicle: 2008 Jeep Liberty with a 4 inch lift.
User avatar
lfhoward
1000 Club
1000 Club
 
Posts: 1370
Joined: Wed Jan 22, 2014 6:10 pm
Location: Philadelphia, PA
Top

Re: M116A3 Build

Postby lfhoward » Tue May 10, 2016 10:46 am

I have a question about waterproofing the solar panel's L-brackets where they are screwed down to the roof.

At first I was thinking that I would just roll out a strip of butyl RV putty tape underneath the feet of the brackets, then screw them down through it. Good plan? Does the butyl tape continue to compress over time under the weight of the panels, leading to loose screws? (I was planning on waterproofing the Fantastic Fan housing this way too, but it's a lot lighter than a solar panel.)

Another option would be to put a bead of Sikaflex between the brackets and the roof, but that wouldn't be as thick or durable as the butyl tape, probably.

What do you think? Any better options I should consider?
My off-road camper build on an M116A3 military chassis:
http://www.tnttt.com/viewtopic.php?f=50&t=62581
Tow vehicle: 2008 Jeep Liberty with a 4 inch lift.
User avatar
lfhoward
1000 Club
1000 Club
 
Posts: 1370
Joined: Wed Jan 22, 2014 6:10 pm
Location: Philadelphia, PA
Top

Re: M116A3 Build

Postby noseoil » Tue May 10, 2016 6:46 pm

I fastened the brackets directly to the roof (metal on metal) & caulked the holes for each screw. I think the butyl rubber will move over time causing problems. Mine continues to "creep" here in the sun over time in places, but it's going to be in the 100's again this week & heat tends to soften the butyl rubber so things can change.

It might be better to use some 3M adhesive tape & put caulk in the holes (pre-drill pilot holes for the screws), for a better mounting system. Once it's fastened in place, it should be a permanent mount. I'm thinking I may re-set mine like this, but no plans for that yet. My main concern remains water & wood rot at the screw holes over time if water gets in. The oak I used should be better than a soft wood or poplar, but water can still get into places you don't expect it to go.
Build log: viewtopic.php?f=50&t=60248
The time you spend planning is more important than the time you spend building.........

137905
User avatar
noseoil
1000 Club
1000 Club
 
Posts: 1820
Images: 669
Joined: Sun Apr 27, 2014 8:46 am
Location: Raton, New Mexico, living the good life!
Top

Re: M116A3 Build

Postby Caveman1970 » Tue May 10, 2016 7:33 pm

:thumbsup:
"If at first you don't succeed....Caulk it!... A-lot!"
User avatar
Caveman1970
Teardrop Inspector
 
Posts: 21
Images: 26
Joined: Sat Jul 19, 2014 4:18 am
Location: Fairview NC
Top

Re: M116A3 Build

Postby Adirondackersouth » Tue May 10, 2016 9:07 pm

KCStudly wrote:Seems like it would be easier on the tax payers if they had someone drag it out for you. Geez. :roll:


This is crazy!
David Medici
Mechanicsville, Virginia 23116
Happy Trails
User avatar
Adirondackersouth
Teardrop Master
 
Posts: 103
Images: 3
Joined: Tue Jan 19, 2016 4:25 am
Location: Hanover County, Virginia (North of Richmond)
Top

Re: M116A3 Build

Postby lfhoward » Fri May 27, 2016 8:07 pm

A holiday weekend means quality trailer building time! :D

I got a head start on it today by drilling a 1" hole in the front of my trailer. I installed the watertight junction for the flexible electrical conduit that goes to the tongue/battery box. Psychologically, drilling that first hole was the hardest part of the day-- right through a perfect looking white aluminum wall! But it turned out well. I'll post pictures of that when I get the tongue box wired up.

The majority of the day was spent on the rear door. I had dry fit the door components before, but today I put the door together with Sikaflex and made it permanent.

Image

Looks like I could sell frozen meat from this thing! :lol:

The inside of the door is 1/4 thick tongue and groove cedar planking. It came out great! Smells amazing too. I'll be using the cedar planks for the interior walls too.

Image

The DIY trim ring I made for the window worked, too. I got a tight seal with the outside of the door using butyl putty tape. I need to make two more trim rings for the front windows at some point too, now that I know my method works.

The door closes well but still needs a few tweaks: The striker needs to move outwards 1/16 of an inch to match up with the latch. The inner door trim needs to be installed over the inner door edges, so that there will be a second, inner seal between the door and the frame when the door is closed. The outer seal using the T molding looks good and seems to work.

Tomorrow's task will be more aluminum skinning. I have three roof panels ready to go on, but I still need to cut out my side panels. It is exciting to see it come together. More pics to come tomorrow.
Last edited by lfhoward on Sun May 13, 2018 3:03 pm, edited 2 times in total.
My off-road camper build on an M116A3 military chassis:
http://www.tnttt.com/viewtopic.php?f=50&t=62581
Tow vehicle: 2008 Jeep Liberty with a 4 inch lift.
User avatar
lfhoward
1000 Club
1000 Club
 
Posts: 1370
Joined: Wed Jan 22, 2014 6:10 pm
Location: Philadelphia, PA
Top

Re: M116A3 Build

Postby noseoil » Sat May 28, 2016 8:42 am

Nice job on the door! It looks like all that time spent with odds & ends, dry fitting, thinking, pondering & weighing variables is paying off now! The skins will be a major mile-stone in your journey. Looking forward to seeing more pictures as things shape up. Have a good weekend on the build, three days should make for some real progress!
Build log: viewtopic.php?f=50&t=60248
The time you spend planning is more important than the time you spend building.........

137905
User avatar
noseoil
1000 Club
1000 Club
 
Posts: 1820
Images: 669
Joined: Sun Apr 27, 2014 8:46 am
Location: Raton, New Mexico, living the good life!
Top

PreviousNext

Return to Build Journals

Who is online

Users browsing this forum: No registered users and 25 guests