Slipstream

...ask your questions in the appropriate forums BUT document your build here...preferably in a single thread...dates for updates, are appreciated....

Re: Slipstream

Postby noseoil » Mon Jun 15, 2015 7:40 am

Yep, newspaper & titebond glue in about a 50-50 mix with water should work OK for some fairing of the curves. Just make sure that whatever you use is compatible with the finish covering you will use. You can cut strips at whatever width you need, soak in a trough & just lay it on with a brush or roller. Good old Elmer's glue all might work just as well & be a bit cheaper. I wouldn't use a traditional mix with white flour & water, but whole wheat might be OK in today's PC world.......

Not sure about sanding the glue surface & paper once it's dry, might be a real booger to get it right if it's too lumpy. Bondo might be OK to use as well, but not sure about it with the foam & chemistry, plus it can crack where the paper wouldn't. The smoother you get the foam initially, the better it will finish whatever you decide to use for the filler. A sure-form would leave fairly small voids to fill for a surface if the foam is set hard enough. Best of luck!
Build log: viewtopic.php?f=50&t=60248
The time you spend planning is more important than the time you spend building.........

137905
User avatar
noseoil
1000 Club
1000 Club
 
Posts: 1820
Images: 669
Joined: Sun Apr 27, 2014 8:46 am
Location: Raton, New Mexico, living the good life!

Re: Slipstream

Postby Robot » Mon Jun 15, 2015 8:09 am

Yes, I'm using a Surform for the shaping. It shapes well, if slowly. The foam is dense enough that it takes a while to make significant progress. I'm ok with this as it makes it idiot-resistant. Harder to accidentally carve out something important. I like the idea of the paper mache. I'm still leaning toward that for the interior ceiling.

Time for a test batch!
User avatar
Robot
Teardrop Advisor
 
Posts: 78
Joined: Mon Mar 30, 2015 3:06 pm

Re: Slipstream

Postby OP827 » Mon Jun 15, 2015 10:04 am

noseoil wrote:...
Bondo might be OK to use as well, but not sure about it with the foam & chemistry, plus it can crack where the paper wouldn't. The smoother you get the foam initially, the better it will finish whatever you decide to use for the filler. A sure-form would leave fairly small voids to fill for a surface if the foam is set hard enough. Best of luck!


Bondo does not affect GS foam ( https://en.wikipedia.org/wiki/Polyisocyanurate ), but the pink rigid foam is XPS will be chemically disolved since it is a polyester solvent resin, same base as XPS (extruded polyester styrene). You could mask XPS pink foam with tape or epoxy and then apply bondo to GS foam that you arefairing. Bondo will probably give you the strongest and still sandable surface, quick to do as well in comparison to water-based glues that require time and I also found not so easy to sand after they are dry, PVA glues soften up and kind a rubbery to sand when they get some heat from sand, have to sand the PVA based glues (like TB1,2,3) much slower than bondo or epoxy based. Just my 0.02.
User avatar
OP827
Donating Member
 
Posts: 1555
Images: 405
Joined: Fri Apr 25, 2014 7:27 pm
Location: Bruce County Ontario
Top

Re: Slipstream

Postby Wolffarmer » Mon Jun 15, 2015 8:50 pm

There is another body putty that the guys feel is much better than Bondo. It is silver ( not sure of the name ) at the local O'Rielly's it is right next to the Bondo. The body guy that did the restoration work on my Dad's car collection turns his nose up at Bondo.

Looking at web sites I think it might be Evercoat. But for our uses Bondo will probably work pretty good as it will not fall off after the outer skin is put on.
"these guys must be afraid of the dark"
User avatar
Wolffarmer
Donating Member
 
Posts: 4612
Images: 309
Joined: Wed May 02, 2007 1:32 pm
Location: Idaho Rupert
Top

Re: Slipstream

Postby RRJR » Tue Jun 16, 2015 1:56 am

Robot wrote:I'm wondering if I can get the corners 90% smooth & round, then use some sort of body filler for the myriad of little cracks & holes. Something like Bondo, but doesn't require mixing. Anyone have any similar experience or advice?


On my build I'm using EPS foam that I got for free off of Craigslist. It was recycled from some demolition project and it had gouges and little chunks missing all over the surface. It also had foil on one side and a thin plastic on the other side which when I peeled it off I created even more damage.

I'm using burlap instead of canvas for the outer skin. At first i tried gluing the burlap to the foam without repairing the damage. That didn't work out so well as it bubbled where there was damage. I then used drywall joint compound to fill in the damaged spots and then glued on the burlap. I thought it worked pretty good until I pulled off some of the burlap where I had changed my design(actually I was repairing a mistake). I found that the drywall joint compound did not stick to the foam and came off with the burlap.

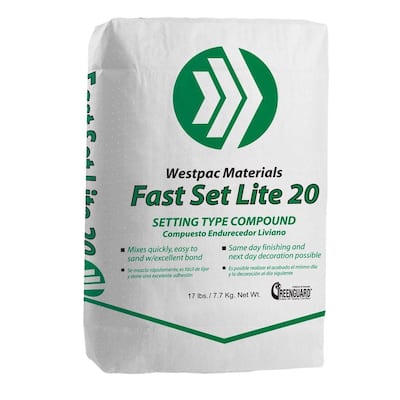
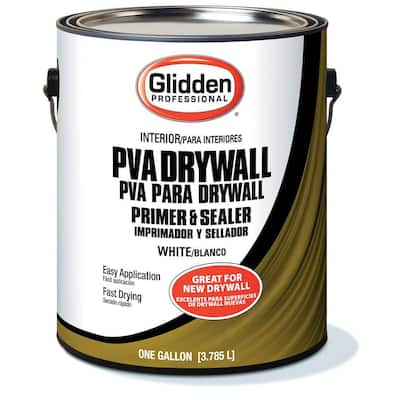
So for my third attempt at finding a solution it dawned on me that PVA primer is pretty much the same as glue. I took this lightweight drywall mix and used Glidden PVA drywall primer instead of water to mix it together. It worked perfect and adhered to the foam much better then just the drywall compound by itself.

Image
Image
RRJR
Teardrop Builder
 
Posts: 42
Joined: Sun Nov 23, 2014 1:37 pm
Top

Re: Slipstream

Postby Robot » Tue Jun 16, 2015 2:20 am

Interesting. How big were your gouges? Did you get any shrinking when it dried, or did you put the burlap on when it was set?

Many of the paper mache paste recipes I'm looking at use paper, water, glue, and some sort of filler. Drywall mud, plaster, and chalk are some of the fillers suggested. I'm wondering if ground up spray foam would make a good filler. I've got about 7 cans of cured foam from my failed mold making attempt. Make a slurry of foam with just enough paper and glue to hold it together.

Hurricane coming tomorrow. Hope my foamie doesn't blow away!
User avatar
Robot
Teardrop Advisor
 
Posts: 78
Joined: Mon Mar 30, 2015 3:06 pm
Top

Re: Slipstream

Postby RRJR » Tue Jun 16, 2015 3:00 am

Some of the gouges were big. 4 or 5 inches long and 1/2 inch deep. i waited until it was dry then sanded it smooth and glued on the burlap with paint.
Today I mixed some of the drywall mix with some of the primer that was thinned out with about 25% water. I made it kind of runny, about like a milkshake. I then used a 5" drywall knife and troweled it on the surface of the burlap that I previously had glued on the inside walls. It filled out the weave of the burlap in one coat. It dried in less than an hour and I was able to sand it smooth.
Using just paint it took me 5 or 6 coats to fill in the weave and even then it wasn't completely smooth.
I'll take some pics in the morning and post them.
One good thing about using burlap instead of canvas is it's only $1.99 a yard for 10oz weight that is 48 inches wide.
RRJR
Teardrop Builder
 
Posts: 42
Joined: Sun Nov 23, 2014 1:37 pm
Top

Re: Slipstream

Postby Robot » Tue Jun 16, 2015 4:00 am

Ok, I'm going to buy both of those items on the way home and give it a shot.

I started on my AC install today. I cut a hole in the floor for the air intake and a hole in the wall for the exhaust. I also put together what I thought was a pretty clever riser that won't obstruct airflow. My plan is to build a box around the AC routing the floor-hole air through the pvc riser into the "outside air intake" vents on the sides and top of the unit.
uploadfromtaptalk1434445214446.jpg
uploadfromtaptalk1434445214446.jpg (85.32 KiB) Viewed 2873 times
uploadfromtaptalk1434445204622.jpg
uploadfromtaptalk1434445204622.jpg (84.77 KiB) Viewed 2873 times
User avatar
Robot
Teardrop Advisor
 
Posts: 78
Joined: Mon Mar 30, 2015 3:06 pm
Top

Re: Slipstream

Postby Fred Trout » Tue Jun 16, 2015 2:55 pm

Don't forget to protect whatever vent hole remains in that floor from vermin (mice & other rodents, bugs, snakes). Mice just love coming inside those kinds of access points. Voles came into the house I bought through a dryer vent too close the ground and made a home in the walls - found it when I gutted the interior walls.
User avatar
Fred Trout
The 300 Club
 
Posts: 396
Joined: Fri May 08, 2015 4:30 pm
Location: SW Montana
Top

Re: Slipstream

Postby Robot » Mon Jun 22, 2015 1:28 am

Update time. I tried Fred's pva primer / drywall mud combo and it worked great. I got a bunch of the countersunk screws covered and the first layer of mud put on the corners. Then I got rained out. Hopefully the weather will dry out enough to let the mud dry. Getting the whole thing smooth is about all that's left before canvas.
uploadfromtaptalk1434953389881.jpg
uploadfromtaptalk1434953389881.jpg (81.59 KiB) Viewed 2731 times


I also got the air conditioner box done. I haven't put a grill on the floor opening yet, but I intend to.
uploadfromtaptalk1434952811759.jpg
uploadfromtaptalk1434952811759.jpg (110.8 KiB) Viewed 2731 times


The last thing I got done this weekend was I finally sat down and added up my receipts. I have been fearful of this but not knowing was worse. Grand total so far: $1,800.[GRINNING FACE WITH SMILING EYES] I'm pretty darn happy with that number. I still have work to do and money to spend, but finishing this thing out for less than $2,500 seems realistic now.
User avatar
Robot
Teardrop Advisor
 
Posts: 78
Joined: Mon Mar 30, 2015 3:06 pm
Top

Re: Slipstream

Postby Robot » Tue Jun 30, 2015 12:13 am

No posts lately because I'd been building without pictures. Mostly GS foam work filling & trimming.

I tried to get a couple of friends together this weekend to help me put on the canvas, but got no volunteers. So I figured out a way to do it by myself. It took a lot longer, but I got it done. I rolled the canvas on a pvc pipe and took my time, paint glue on 2 feet or so, roll on the canvas, smooth it out, repeat. For 7 hours.

I pulled the corners up into darts, then cut them off with scissors and then tried to smoosh the frayed edges together with glue. I have only done the initial "glue the canvas down" coat, not the "saturate the canvas" coat. But I'm pretty happy with my results. I had originally planned on having one seam at the back, however I didn't think about the door opening being a cut...I coulda/shoulda started at the door frame. Then I could have had no seams at all.

uploadfromtaptalk1435641174918.jpg
uploadfromtaptalk1435641174918.jpg (98.05 KiB) Viewed 2625 times
User avatar
Robot
Teardrop Advisor
 
Posts: 78
Joined: Mon Mar 30, 2015 3:06 pm
Top

Re: Slipstream

Postby Robot » Tue Jun 30, 2015 12:21 am

uploadfromtaptalk1435641682063.jpg
uploadfromtaptalk1435641682063.jpg (54.82 KiB) Viewed 2623 times
uploadfromtaptalk1435641675124.jpg
uploadfromtaptalk1435641675124.jpg (65.27 KiB) Viewed 2623 times
uploadfromtaptalk1435641666376.jpg
uploadfromtaptalk1435641666376.jpg (89.94 KiB) Viewed 2623 times
User avatar
Robot
Teardrop Advisor
 
Posts: 78
Joined: Mon Mar 30, 2015 3:06 pm
Top

Re: Slipstream

Postby Robot » Tue Jun 30, 2015 12:21 am

uploadfromtaptalk1435641708549.jpg
uploadfromtaptalk1435641708549.jpg (90.07 KiB) Viewed 2623 times
uploadfromtaptalk1435641701605.jpg
uploadfromtaptalk1435641701605.jpg (81.65 KiB) Viewed 2623 times
User avatar
Robot
Teardrop Advisor
 
Posts: 78
Joined: Mon Mar 30, 2015 3:06 pm
Top

Re: Slipstream

Postby Robot » Tue Jun 30, 2015 12:37 am

I still need to canvas the roof and the door. Then it's paint and....oh I'm sure I'll find 100 little things that need to be done. I have 8 days left before vacation. I'm still optimistic about finishing it, but I'm cutting it real close. 3 day weekend will help!
User avatar
Robot
Teardrop Advisor
 
Posts: 78
Joined: Mon Mar 30, 2015 3:06 pm
Top

Re: Slipstream

Postby aggie79 » Tue Jun 30, 2015 9:42 am

Stunning! :applause: :applause: Very nice work with the curves and canvas!
Tom (& Linda)
For build info on our former Silver Beatle teardrop:
Build Thread

93503
User avatar
aggie79
Super Duper Lifetime Member
 
Posts: 5405
Images: 686
Joined: Tue Aug 07, 2007 5:42 pm
Location: Watauga, Texas
Top

PreviousNext

Return to Build Journals

Who is online

Users browsing this forum: No registered users and 38 guests