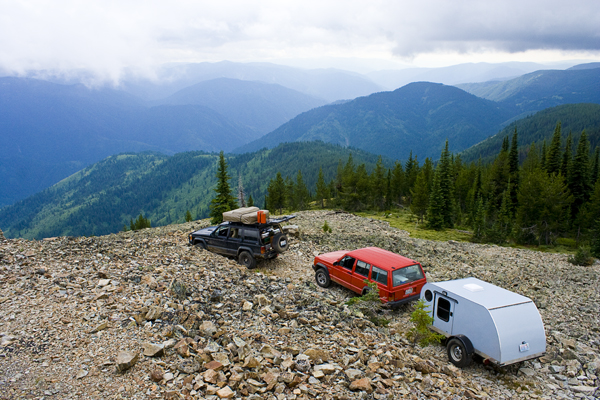
Meanwhile in the Netherlands,...

...ask your questions in the appropriate forums BUT document your build here...preferably in a single thread...dates for updates, are appreciated....

Re: Meanwhile in the Netherlands,...

Postby smeerkees » Mon Dec 11, 2023 12:04 pm

Ok.
This is where i am at the moment.

I removed all the alignment blocks and i have to say the hinges seem to work great.
the alignment of the hatch looks good too.

However since al the alignment blocks were removed you can see the complete result without any tension in the material.
I see i have to lower the horizontal beam above the hatch a little by about 3 mm (a little more than 1/10 of an inch).
It probably happened during welding in the middle rib (backbone) of the teardroptrailer. Since that is a curved (pre bend) part you have to be very careful with bringing in heat with welding.
So ok,a little more to do....

The next job is first to mount the alignmentblocks again, and mounting ( welding) the vertical rib in the hatch.
After that lowering the horizontal beam above the hatchdoor a little to smooth things out.
Than, try to make some detailphoto's of the hingebrackets clearing the "watergutter" drain.
Only than i can see if i can mount and use the 3rd.hinge in the middle of the hatch, and if so weld it in, etc.
And than: creating the "rainwatergutter" drain system behind the doors, and hatch.

However at that time it will be 2024 for month's already.

Meanwhile still searching for a suitable set of door and hatch handles and locks.
Some time ago i found something on an American internet site, however they don't ship to the Netherlands.
So looking further.....
Last edited by smeerkees on Mon Dec 11, 2023 5:48 pm, edited 2 times in total.
smeerkees
Teardrop Master
 
Posts: 103
Images: 0
Joined: Thu Feb 26, 2015 6:03 pm
Location: Netherlands

Re: Meanwhile in the Netherlands,...

Postby smeerkees » Mon Dec 11, 2023 12:09 pm

For making the "rainwatergutter drainsystem" i already bought some tools.

Maybe you know what these are? ( see fotograph)
(When you work with metal you surely do).

I mounted a set of 2 on a thick steel plate so i can clamp the whole thing on my workbench when in use.


Well that's it for now.

Greets from the Netherlands, Kees.
Attachments
IMG_2646 verkleind voor tnttt.jpg
IMG_2646 verkleind voor tnttt.jpg (51.17 KiB) Viewed 339 times
smeerkees
Teardrop Master
 
Posts: 103
Images: 0
Joined: Thu Feb 26, 2015 6:03 pm
Location: Netherlands

Re: Meanwhile in the Netherlands,...

Postby Tom&Shelly » Mon Dec 11, 2023 5:45 pm

smeerkees wrote:Does it realy work? Yes!
I hope to make some more detailfoto's of the hingebracket clearing the "watergutter" system in de future.


Looks good! :thumbsup:

Tom
172912 170466 173366
Tom&Shelly
Palladium Donating Member
 
Posts: 2203
Images: 1961
Joined: Tue Sep 05, 2017 3:27 pm
Location: Upstate New York/New Mexico
Top

Re: Meanwhile in the Netherlands,...

Postby smeerkees » Sun Jan 14, 2024 10:41 am

Hello Everybody,

Here is a small update as promised about the "overall" design idea of the "raingutter" system.

Espessially for Tom, and Shelly.

I made a bunch of pictures in the hope to give you an idea.

From the underside: with hatch in open and closed position.
Attachments
IMG_2782 verkleind voor tnttt.jpg
IMG_2782 verkleind voor tnttt.jpg (47.29 KiB) Viewed 172 times
IMG_2779 verkleind voor tnttt.jpg
IMG_2779 verkleind voor tnttt.jpg (44.94 KiB) Viewed 172 times
Last edited by smeerkees on Sun Jan 14, 2024 12:04 pm, edited 1 time in total.
smeerkees
Teardrop Master
 
Posts: 103
Images: 0
Joined: Thu Feb 26, 2015 6:03 pm
Location: Netherlands
Top

Re: Meanwhile in the Netherlands,...

Postby smeerkees » Sun Jan 14, 2024 10:49 am

And from the topside.

There is about 2/3 a 3/4 of an inch space between "gutter, and hatchhinge so enough space for the rubber seal.
Attachments
IMG_2806 verkleind voor tnttt.jpg
IMG_2806 verkleind voor tnttt.jpg (43.17 KiB) Viewed 165 times
IMG_2813 verkleind voor tnttt.jpg
IMG_2813 verkleind voor tnttt.jpg (37.72 KiB) Viewed 165 times
Last edited by smeerkees on Mon Jan 15, 2024 4:04 pm, edited 2 times in total.
smeerkees
Teardrop Master
 
Posts: 103
Images: 0
Joined: Thu Feb 26, 2015 6:03 pm
Location: Netherlands
Top

Re: Meanwhile in the Netherlands,...

Postby smeerkees » Sun Jan 14, 2024 10:57 am

Here an idea for the underside of the hatch.

The "gutter" will probably be a little less deep here and there, that is according to the depth i need for mounting the rubber seal.

The last picture is the underside of the hatch, and because water won't run uphill, i have to make 2 little drainpipes (both on the left and on the right side) with hoses through the floor of the trailer.
Yhe inside diameter of those drainhoses will be about 2/3 of an inch.

So In case of much water to dispose the biggest exess will run through the gutters outwards the underside of the hatch, and since that is not exactly the lowest point, the last bit of water will be gone by the 2 drainpipes left and right.

I hope you get an idea of it all.

The idea at this moment is to first form the sides 1 by 1 and Tig weld them together, and than glue those gutters to the existing beams. (For the hatch, and both the doors ofcourse) It has no structural strength to it, and i avoid a lot of heat in the structure. (espessially to avoid for the bended beams)
I know that there are solutions in the automotive world for things like this. Products like panelbond from 3M. Or something like JB Weld.

I have to say, the hinges fit remarkebly well. there is no play at all.
However there is one little thing to remember.
Since i didn't know the exact outcome of the hinges i did not make bumpstops for a maximum openig of the hatch in the design of the hinges.
I now think about 90 degrees of opening will be plenty.

Now i can use a pair of hatchstruts for maxumum opening (as also used in cars), or i can make some kind of bumpstop on the hinges itself.
In that case something a little adjustible would be great.
Either way i need to make something to not destroy the "gutter system" when the hatch will be opened to far.

So now i have to learn some skills for bending, stretching, and shrinking and otherwise manipulating thin metal plate.
The big blue and yellow things in a previous update are shrinking, and stretching blocks i bought already.
Metal can be pretty manuable but you have to learn some skills how to.

Well, thats about it for now.

I hope this update makes one and other a little more clear.

So for now greetz from the Netherlands,

Kees.
Attachments
IMG_2828 verkleind voor tnttt.jpg
IMG_2828 verkleind voor tnttt.jpg (36.44 KiB) Viewed 163 times
smeerkees
Teardrop Master
 
Posts: 103
Images: 0
Joined: Thu Feb 26, 2015 6:03 pm
Location: Netherlands
Top

Previous

Return to Build Journals

Who is online

Users browsing this forum: No registered users and 96 guests