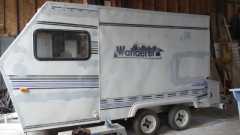
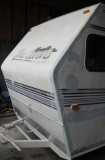
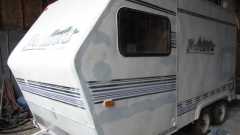
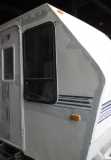
New build under way

...ask your questions in the appropriate forums BUT document your build here...preferably in a single thread...dates for updates, are appreciated....

Re: New build under way

Postby Funluvin001 » Mon Dec 07, 2015 6:10 pm

S. Heisley wrote:You're making good progress and everything is looking very nice! :thumbsup:

Thanks for the kind and motivating words!! :)
Funluvin001
Teardrop Advisor
 
Posts: 55
Images: 145
Joined: Sun Aug 16, 2015 6:40 pm
Location: P.E.I. Canada

Re: New build under way

Postby Funluvin001 » Mon Dec 07, 2015 6:19 pm

No pics today! Did get some more work done on the box and its mounting set up. Also did some wiring tidied up, also got the last bit of heat ducting installed. Small stuff. Next will be installing the box temporarily, finishing the bunks, some work inside the wheel wells, perhaps some paint and wall touch ups.. then putting things on ice till the spring.
Funluvin001
Teardrop Advisor
 
Posts: 55
Images: 145
Joined: Sun Aug 16, 2015 6:40 pm
Location: P.E.I. Canada

Re: New build under way

Postby Funluvin001 » Tue Dec 08, 2015 6:58 pm

So some pics today...
The rear storage box is now finished (except final paint and some more caulking) and mounted. Still need to deal with the wire entrance, not sure what I'll do there yet. Dont think they make 1.5" grommets, but maybe Im wrong. Got most of the wiring inside tidied up with a little tiny bit left to do - connect the furnace and drop a regulator in line. Anywho.....
138020
138021
138022
Funluvin001
Teardrop Advisor
 
Posts: 55
Images: 145
Joined: Sun Aug 16, 2015 6:40 pm
Location: P.E.I. Canada
Top

Re: New build under way

Postby Funluvin001 » Thu Dec 10, 2015 5:39 pm

Today I added something I forgot! I ran an extension for AC power out to the box such that I can keep my smart battery charger there for use when on AC feed. Then I finished the wiring for the furnace, and cleaning up some loose ends. Then, after an argument with a cheap media player I was going to install, decided to put in an Acer netbook I had kicking around with no real purpose. Found an old ATI remote wonder I had from eons ago and so now the netbook is remote controlled as well. That plus a little something I call the Wok-Fi, should get us decent wi-fi anywhere its available. Internet + media box all in one! Pretty cool if I do say so myself. Its connected to the TV via VGA.

After all of that I started on doing some trimming around the cabinets and called it a day!
138039
138040
138041
Funluvin001
Teardrop Advisor
 
Posts: 55
Images: 145
Joined: Sun Aug 16, 2015 6:40 pm
Location: P.E.I. Canada
Top

Re: New build under way

Postby Funluvin001 » Sat Dec 12, 2015 8:07 am

Got most of the interior trimming done today. Still some caulking and puttering around the bathroom (LOL!) but most is done.
138070
138071
138072
138073
138074
138075
Funluvin001
Teardrop Advisor
 
Posts: 55
Images: 145
Joined: Sun Aug 16, 2015 6:40 pm
Location: P.E.I. Canada
Top

Re: New build under way

Postby S. Heisley » Sat Dec 12, 2015 9:48 pm

This can not be your first build....You're moving too fast and too well. :o
User avatar
S. Heisley
Super Lifetime Member
 
Posts: 8772
Images: 495
Joined: Mon Sep 17, 2007 10:02 am
Location: No. California
Top

Re: New build under way

Postby Funluvin001 » Sun Dec 13, 2015 4:26 pm

So yesterday was spent painting the trimming and the inside of the door, and working starting to cover the inside of the wheel wells with aluminium. Today we finished that, and even loaded some RV moulding with caulk and fastened it to the seem where the aluminium meets the filon siding. We also mounted an external LED light fixture near the door, and chanced into something not banked on, from the reclaimed left-overs. We wound up installing it as a bathroom door and in fact think that's where it came from in the donor camper. It was already removed when we got it so can't be sure but it seems to make sense. Just a few loose ends to tie up and it will be time to sideline things till the spring. I have a regulator for the last remaining lights en route, and some LED strips we ordered from amazon, for under the rear cabinet. I might install some inside the cabinetry as well, we'll see. There is also a DC to DC step up supply on its way to be able to power the netbook from battery.

I think ultimately I will paint the inside of the wells with rubberised rocker guard paint. The rest is definitely getting a Marine 2-part poly coating, end to end. (Amershield if anyone is curious.)
138099
138098

I also started to make a protective aluminium plate which I think I'll polish and mount on the inside of the door around the pull handle area, and started to give some thought to what I'm going to do about mounting a solar panel on the roof, to act as a trickle charger for the battery. I have a decent sized one kicking around for just such a project!
Last edited by Funluvin001 on Sun Dec 13, 2015 6:14 pm, edited 3 times in total.
Funluvin001
Teardrop Advisor
 
Posts: 55
Images: 145
Joined: Sun Aug 16, 2015 6:40 pm
Location: P.E.I. Canada
Top

Re: New build under way

Postby Funluvin001 » Sun Dec 13, 2015 4:28 pm

S. Heisley wrote:This can not be your first build....You're moving too fast and too well. :o

Thanks so much, but yes it is my first build. Did a (failed) fix-up before now but never took on anything of this nature before! It's been quite a ride! LOL
Funluvin001
Teardrop Advisor
 
Posts: 55
Images: 145
Joined: Sun Aug 16, 2015 6:40 pm
Location: P.E.I. Canada
Top

Re: New build under way

Postby Funluvin001 » Mon Dec 14, 2015 5:09 pm

So today I re-installed the rear lower seat, and built some support legs for the outer most bunk edges. The tiny hinges are cheap and so I will have to replace them with something decent but for now they're mounted. I also haven't yet set up the magnetic holders I plan to make, to keep the legs up and out of the way, when the bunks are in the upright position, but I can do that any time at all, really. Same goes for some hooks to keep some wires up and out of the way. I also finished up the wiring with the exterior light and made it look half respectable.

I did notice that one section of one of the bunk frames is a little soft for my liking, so I may re-enforce it with some aluminium. I also started the process of cleaning up and dragging home some of the mass of tools that's collected over the last 3 mos. Amazing how much stuff piles up.

It seems my boss felt it needed to look a little more festive, so I arrived to find a wreath placed on it and light up. I got a good chuckle out of that! :lol:
Here are a few misc pics and what is as close to being finished pics, as will be posting till the spring.

138170
138165
138166
138167
138168
138169
138164

It's beginning to look a little bit like xmas! :)
Funluvin001
Teardrop Advisor
 
Posts: 55
Images: 145
Joined: Sun Aug 16, 2015 6:40 pm
Location: P.E.I. Canada
Top

Re: New build under way

Postby Funluvin001 » Mon May 16, 2016 5:12 am

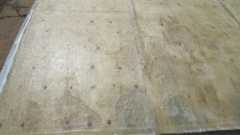
So this project is back from a long period of winter's hibernation. I've fibreglassed the roof, cut out and installed the roof vent, trimmed the roof edges, and have a couple of days (so far) invested in applying filler to the seems. My goal isn't perfection, but more so to make something 'acceptable' and body work really isn't my thing, so there will be some bows and whatnot. As I've seen in the heat, the filon will expand and so there is going to be a significant amount of warpage which can't be helped. It seems to be that the adhesive intended to stick the filon to the foam has really not done a lot and so in hindsight it would have been better if possible, to use epoxy and to have built the walls as single units and erect then after the fact. Without a large heated work space that really wasn't an option for me, so I get what I get.
141666
The cheapie tarp I had covering it somehow managed to let some water in and there was some warpage on the roof. I laid a few fibreglass patches in to build the surface back close to flat first, then put down a top layer covering the whole roof. I use something called 1808 which is a combined stitched cloth with mat. It was a resin sponge, but it really gave the roof some serious strength. I used a styrene-thinned layer of resin as a primer coat and then glassed onto it. All in all it took me about 2 gallons for the 81 sq. ft. roof!
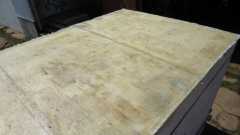
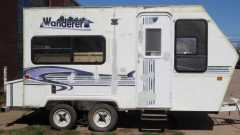
141667

141668

141669

141670

141671

141672
I had hoped to avoid it but I'm going to have to take out some of the screws in order to finish the body work around those areas.
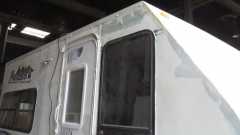
141673

So now I have to sort out if I'm going to do any more trim & if so - what exactly, and then it will be time for paint. I was going to try and strip off all the old decals but heat guns and fileon don't mesh. I will try an 'eraser wheel but if that doesn't work, to my regret I might have to simply paint over them. I also have a bucket of EPDM coating I plan on layering over the roof as a 'just in case' top coating.

In other news, we had a break in at the place the project was being stored this winter, and the guy ruined the window to the right of the man-door, so figuring how to make it work will be another added project. Thankfully I caught the guy in the place, but that won't fix the damage to the window frame. In the 3rd picture in this post, you can see the window hinge bar lying diagonally inside the window. (Lower operable section)
Funluvin001
Teardrop Advisor
 
Posts: 55
Images: 145
Joined: Sun Aug 16, 2015 6:40 pm
Location: P.E.I. Canada
Top

Re: New build under way

Postby Funluvin001 » Mon May 16, 2016 6:19 pm

So trimmed the front and rear today, did more body work, and ready for paint! :)

141709

141710

141711

I have limited patience for body work and 3+ days worth I'm done. if it doesn't look 'good enough' now, it's never going to. I still have a lot of other stuff to sort and finish so I really want to get this part of the show on the road.
Funluvin001
Teardrop Advisor
 
Posts: 55
Images: 145
Joined: Sun Aug 16, 2015 6:40 pm
Location: P.E.I. Canada
Top

Re: New build under way

Postby S. Heisley » Mon May 16, 2016 6:28 pm

I've seen where some people have used a hairdryer instead of a heat gun to take decals off. If you don't have a hair dryer, maybe you could borrow one from a mom or sister or...? and try that.
User avatar
S. Heisley
Super Lifetime Member
 
Posts: 8772
Images: 495
Joined: Mon Sep 17, 2007 10:02 am
Location: No. California
Top

Re: New build under way

Postby Funluvin001 » Mon May 16, 2016 6:38 pm

S. Heisley wrote:I've seen where some people have used a hairdryer instead of a heat gun to take decals off. If you don't have a hair dryer, maybe you could borrow one from a mom or sister or...? and try that.


Less heat but less effective too. I don't mind leaving them on though. I've read that Methyl-Ethyl-Ketone can work as well, but I don't know it's effects on fileon though!
Funluvin001
Teardrop Advisor
 
Posts: 55
Images: 145
Joined: Sun Aug 16, 2015 6:40 pm
Location: P.E.I. Canada
Top

Re: New build under way

Postby Funluvin001 » Wed May 18, 2016 6:10 am

So I did some trimming on the rear storage box and painted the frame under areas.

141733

141734

And laid down some glass on the vent to further water-proof things.

141735

It's now ready for paint & an EPDM rubber roof coating as an overkill measure.
Funluvin001
Teardrop Advisor
 
Posts: 55
Images: 145
Joined: Sun Aug 16, 2015 6:40 pm
Location: P.E.I. Canada
Top

Re: New build under way

Postby Funluvin001 » Wed May 18, 2016 5:38 pm

OK so, 2 coats of EPDM rubber coating (one left to go) on the roof today and had a wonderful afternoon with a nasty can of 2-part poly paint. I had forgotten how wicked the fumes from that stuff are!

Not superb, but I will do for now!!

141742

141743

141744
Funluvin001
Teardrop Advisor
 
Posts: 55
Images: 145
Joined: Sun Aug 16, 2015 6:40 pm
Location: P.E.I. Canada
Top

PreviousNext

Return to Build Journals

Who is online

Users browsing this forum: Bing [Bot] and 42 guests