A different kind of pop-up (11-5-17) fixing lessons learned

...ask your questions in the appropriate forums BUT document your build here...preferably in a single thread...dates for updates, are appreciated....

Re: A different kind of pop-up

Postby les45 » Tue Dec 01, 2015 7:38 pm

Update on initial efforts. Removed entire lift system (except telescoping legs) and cleaned and painted all parts. Decided to go with all new cables and welded eye-bolts. Still waiting on some pulleys and a thrust washer. Decided to remove all interior paneling in order to inspect the telescoping legs. That was a real pain in the butt working under the 28" head space. Should have done that with the initial demo but I didn't think. Telescoping legs appear to be in good shape so no need to remove them.

With the paneling off, I pulled all the AC wiring and outlets as I will install a whole new AC electrical system. The DC system looks to be in good shape so that will just be a matter of figuring out where all the wires go and cleaning them up. My new electrical system will be fairly basic with just a few AC outlets inside and outside and possibly a computer power supply to provide 12 volts DC for interior lighting and gadget charging. No battery or converter this time since we always camp at parks with campground power.

Concurrently, I'm starting the cleaning of the trailer frame. Lots of surface rust after 26 years but no structural issues so the plan is to wire brush all metal and treat with Corroseal rust converting metal primer and then paint with Rustoleum. Even less head space working under the trailer on that job.

As part of the bottom work, I planned to remove the Dexter torsion axle and clean and paint and repack the bearings off the frame but that plan quickly changed when I couldn't get one of the bolts off of each end. Apparently the torsion arm on each side lost its pre-set and would not drop low enough to clear one of the two mounting bolts. Rather than fight it, I installed all new hardware (except the one bolt on each end) and plan to clean the axle with the rest of the frame and re-pack the wheel bearings on the trailer.

Walls are in good shape with just a little water damage in one corner that will have to be rebuilt.
Image

Hoist parts cleaned up nicely; just waiting on a few parts from eBay and will be ready to re-install entire hoist system
Image

One advantage of the roof down is that it makes a nice work space to stage all the parts. Since I'll be crawling under the frame to do the cleaning, I made sure it is supported properly. Three concrete blocks, two wood boxes, four jack stands, four stabilizers, and trailer tongue jack should keep me safe.
Image

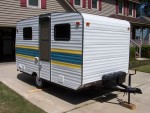
Torsion arm doesn't drop when unloaded so one bolt could not be removed on each end. The axle seems to work fine with no sag and tows like a dream. Not sure what the loss of pre-set means but no plans to change axle for now.
Image
User avatar
les45
500 Club
 
Posts: 974
Images: 605
Joined: Sat Feb 25, 2012 8:57 am
Location: Aiken, South Carolina

Re: A different kind of pop-up

Postby Alan_H » Tue Dec 29, 2015 2:03 pm

I'm subscribing! Your weekender is still one of my inspirations, so this one must be gonna be a real doozie!! :applause:
Alan_H
Lifetime member
 
Posts: 245
Images: 17
Joined: Mon Dec 02, 2013 4:44 pm

Re: A different kind of pop-up

Postby les45 » Thu Dec 31, 2015 2:28 pm

Progress has been slow between the holidays and nursing a persistent cold and cough. I did get the 26 year old decals removed from one side over the course of about 20 hours. That was a tedious pain in the @$$. After trying several methods, I finally ended up scraping the dried out decals with a razor blade scraper. I kept a halogen work light up against the metal to try to soften the vinyl and kept it moving ahead as I scraped. The blade worked fine on the flat surfaces but I had to use a rounded knife blade to pick out the decals in the bottom of the corrugations. All the scraping basically removed the vinyl top layer and left most of the glue. After trying several chemicals, I found the best way to remove the glue was denatured alcohol and medium steel wool and lots of elbow grease. It took off a lot of the paint also, but I plan to paint a stripe in that area using Rustoleum hammered paint. There were a lot of little nicks in the metal where the blade dug in but a little sanding and the textured paint will cover it all.

Before:
Image

After:
Image

Next phase is to crawl under and start wire brushing the frame. It has a little surface rust but no structural issues. I plan to coat it with Corroseal and top it off with a coat of Rusteolum.
User avatar
les45
500 Club
 
Posts: 974
Images: 605
Joined: Sat Feb 25, 2012 8:57 am
Location: Aiken, South Carolina
Top

Re: A different kind of pop-up

Postby Alan_H » Sat Jan 16, 2016 11:56 am

I have had good luck with removing the pinstripes and decals with a 3M rubber eraser wheel
Image

It is a little messy, with lots of little rubber bits about, like using a big pencil eraser, but it doesn't scratch up the paint and takes off the decals and most of the adhesive residue. Wear safety glasses!! Plus it's a lot faster than a blade.
Alan_H
Lifetime member
 
Posts: 245
Images: 17
Joined: Mon Dec 02, 2013 4:44 pm
Top

Re: A different kind of pop-up

Postby les45 » Sat Jan 16, 2016 1:50 pm

Alan_H wrote:I have had good luck with removing the pinstripes and decals with a 3M rubber eraser wheel
Image

It is a little messy, with lots of little rubber bits about, like using a big pencil eraser, but it doesn't scratch up the paint and takes off the decals and most of the adhesive residue. Wear safety glasses!! Plus it's a lot faster than a blade.


I tried one of those but it wore down in no time and really didn't do much. The 26 year old decals had dried out so badly that the eraser just wouldn't touch them. I wasn't trying to save the old paint since I'm going to paint a hammered metal stripe in that same area.
User avatar
les45
500 Club
 
Posts: 974
Images: 605
Joined: Sat Feb 25, 2012 8:57 am
Location: Aiken, South Carolina
Top

Re: A different kind of pop-up

Postby Alan_H » Thu Jan 28, 2016 5:47 pm

any updates? :D
Alan_H
Lifetime member
 
Posts: 245
Images: 17
Joined: Mon Dec 02, 2013 4:44 pm
Top

Re: A different kind of pop-up

Postby les45 » Thu Jan 28, 2016 7:17 pm

Alan_H wrote:any updates? :D


Things have been slow due to a bad cold that just wouldn't go away. Finally back up to speed now. I've just this week started re-installing the lift system. After thinking about it, I decided to replace the Dexter axle. Everything I read on other forums said that a Dexter axle is only good for about 20 years and mine is 27 years old. I was mildly surprised by the service I received from Dexter. They provided a price quote just two hours after receiving my specs by email. I placed my order the next day and they said I should receive it early next week. Total price was $325 including $100 shipping. I've suspended the frame cleaning until I remove the old axle which will give me more room to work under the trailer. I've bought most of the small parts I will need for my AC and DC electrical systems and my Fantastic Fan. Next buying phase will be shopping for windows that will go in some of the portable panels. Haven't decided what those will look like yet.
User avatar
les45
500 Club
 
Posts: 974
Images: 605
Joined: Sat Feb 25, 2012 8:57 am
Location: Aiken, South Carolina
Top

Re: A different kind of pop-up (update-new Dexter axle)

Postby les45 » Wed Feb 03, 2016 3:59 pm

After some additional research, I decided to replace the 27 year old Dexter torsion axle with a new one. Everything I read said that they are only good for about 20 years. I posted my experience in the Trailer and Chassis section already but I'll repeat it here. I was mildly surprised by the outstanding service I received from Dexter. Real people actually answer the phones and everyone from Engineering to Sales went out of their way to help. I placed my order on a Friday and received the new axle 11 days later (yesterday). I was also surprised that it only cost $325 including shipping. Getting the old axle off was the real problem. The advance angle of the torsion arm on the old axle was only about 5 degrees. This resulted in the torsion arm covering the bolt head on the rear mounting bolt on each side. You could not move the arm up or down to get it out of the way as it was just too tight. I finally found a large enough gap between the axle mount and the frame to get a long Sawzall blade to the bolt. Of course the bolts were Grade 8 so it took about 20 minutes of sawing on each one to cut it all the way through even with a carbide tipped blade. I had also posted previously about the car dollies that I had bought to move the trailer. They came in quite helpful in removing the old axle and for storing the new axle. After removing the other two bracket bolts, and with a trolley jack supporting the axle in the center, I simply dropped the old axle down onto the dollies and rolled it out. As you can see in the pics below, I ordered the new axle with a 32 degree down angle which gives me access to both bolt heads and will lift the trailer by about two inches. Next step is to clean and paint the frame before installing the new axle.

Old and new axle. They are virtually the same even after 27 years. I will be able to use the old hubs for spares. Bearings and races were in excellent condition.
Image

You can see the difference in the advance angle here. The old axle had maybe a 5 degree down angle that still covered the rear bolt head. The new axle is at 32 degrees down with the bolt head exposed for easy access.
Image

The car dollies also make for easy storage of the new axle until I am ready to install. Just roll it under the trailer and move it around as I need to.
Image
User avatar
les45
500 Club
 
Posts: 974
Images: 605
Joined: Sat Feb 25, 2012 8:57 am
Location: Aiken, South Carolina
Top

Re: A different kind of pop-up (update-new Dexter axle)

Postby lrrowe » Wed Feb 03, 2016 5:33 pm

les45 wrote:The car dollies also make for easy storage of the new axle until I am ready to install. Just roll it under the trailer and move it around as I need to.
Image


les, your photo just gave me a great idea for my CT. I need to remove the tires and set the trailer onto something in order to get it able to fit into my garage. I had considered resting the hubs directly onto two of these carts. But Dexter quickly told me not to do it. So I gave up on the idea and as result am letting the weather control my build progress. But seeing your axle rest on the dollies makes me think that if I build up a little frame to set on the dollies and then lower the CT frame and axle mount area onto it, I can lower the CT low enough to fit into the garage. Guess I had better build a mock up to see.

Thanks for posting.
Bob

First Post on Purchase of Trailer: http://www.tnttt.com/viewtopic.php?f=42&t=60722
Hot water infloor and radiator heating project:[url]http://www.tnttt.com/posting.php?mode=reply&f=54&t=62327[/

Image Image
User avatar
lrrowe
Donating Member
 
Posts: 3285
Images: 439
Joined: Sun Feb 10, 2013 5:54 am
Location: SW Virigina
Top

Re: A different kind of pop-up (update-new Dexter axle)

Postby les45 » Wed Feb 03, 2016 7:25 pm

lrrowe wrote:
les, your photo just gave me a great idea for my CT. I need to remove the tires and set the trailer onto something in order to get it able to fit into my garage. I had considered resting the hubs directly onto two of these carts. But Dexter quickly told me not to do it. So I gave up on the idea and as result am letting the weather control my build progress. But seeing your axle rest on the dollies makes me think that if I build up a little frame to set on the dollies and then lower the CT frame and axle mount area onto it, I can lower the CT low enough to fit into the garage. Guess I had better build a mock up to see.

Thanks for posting.


If you decide to use wheel dollies, make sure they are non-slip or possibly fasten your dunnage so that it can't move. I found these to be quite slick even with the diamond tread and some non-slip rubber pads under my axle brackets. I plan to put some non-slip material on them before I set the trailer tires on them later. I plan to use them to move the trailer from side to side in the garage in order to gain more room to work on the side closest to the wall without pulling it outside and turning it around every time.
User avatar
les45
500 Club
 
Posts: 974
Images: 605
Joined: Sat Feb 25, 2012 8:57 am
Location: Aiken, South Carolina
Top

Re: A different kind of pop-up (update-new Dexter axle)

Postby lrrowe » Wed Feb 03, 2016 8:23 pm

Good tip. I would think some sort of mechanical bolt or weld setup is in order. When you do yours and move it around, heed what the Dexter told me and do not rest the nubs directly on the dolly.
Bob

First Post on Purchase of Trailer: http://www.tnttt.com/viewtopic.php?f=42&t=60722
Hot water infloor and radiator heating project:[url]http://www.tnttt.com/posting.php?mode=reply&f=54&t=62327[/

Image Image
User avatar
lrrowe
Donating Member
 
Posts: 3285
Images: 439
Joined: Sun Feb 10, 2013 5:54 am
Location: SW Virigina
Top

Re: A different kind of pop-up (update-new Dexter axle)

Postby les45 » Wed Feb 03, 2016 11:01 pm

lrrowe wrote:Good tip. I would think some sort of mechanical bolt or weld setup is in order. When you do yours and move it around, heed what the Dexter told me and do not rest the nubs directly on the dolly.


Yes, they told me the same thing when I asked about jacking on the torsion arm to clear the hidden bolt. I did it anyway (to no avail) since I was planning to replace the old axle anyway. I plan to have the whole bottom end done and the wheels on when I set it on the dollies later.
User avatar
les45
500 Club
 
Posts: 974
Images: 605
Joined: Sat Feb 25, 2012 8:57 am
Location: Aiken, South Carolina
Top

Re: A different kind of pop-up (update-new Dexter axle)

Postby lrrowe » Thu Feb 04, 2016 9:11 am

But if we have the contact point behind the hub and arm, on the frame itself in the same area, I cannot see why that will not work. Regarding Dexter's advice, you can just image the load on the bottom of the hub rather then on the spindle. When I think about it, it seems for sure the weight of the trailer would deform the bottom of the brake mechanism (if you have one) or in your case, the point of stress (forgot my engineering terms) would be too concentrated on the bottom of the plate.
Bob

First Post on Purchase of Trailer: http://www.tnttt.com/viewtopic.php?f=42&t=60722
Hot water infloor and radiator heating project:[url]http://www.tnttt.com/posting.php?mode=reply&f=54&t=62327[/

Image Image
User avatar
lrrowe
Donating Member
 
Posts: 3285
Images: 439
Joined: Sun Feb 10, 2013 5:54 am
Location: SW Virigina
Top

Re: A different kind of pop-up (update-new Dexter axle)

Postby les45 » Thu Feb 04, 2016 12:10 pm

lrrowe wrote:But if we have the contact point behind the hub and arm, on the frame itself in the same area, I cannot see why that will not work. Regarding Dexter's advice, you can just image the load on the bottom of the hub rather then on the spindle. When I think about it, it seems for sure the weight of the trailer would deform the bottom of the brake mechanism (if you have one) or in your case, the point of stress (forgot my engineering terms) would be too concentrated on the bottom of the plate.


Yes, the mounting brackets are made to take the load so you should be good to set it down on the mounting brackets or that area of the frame. I guess the load on the hub coming through the lug nuts on a mounted wheel is better distributed to the bearings than a point load on the bottom of the hub rim.
User avatar
les45
500 Club
 
Posts: 974
Images: 605
Joined: Sat Feb 25, 2012 8:57 am
Location: Aiken, South Carolina
Top

Re: A different kind of pop-up (update-new Dexter axle)

Postby aggie79 » Thu Feb 04, 2016 3:28 pm

Bob,

Just be sure that you don't place the load on the axle tube. It will bend in a heart beat.

Take care,
Tom
Tom (& Linda)
For build info on our former Silver Beatle teardrop:
Build Thread

93503
User avatar
aggie79
Super Duper Lifetime Member
 
Posts: 5405
Images: 686
Joined: Tue Aug 07, 2007 5:42 pm
Location: Watauga, Texas
Top

PreviousNext

Return to Build Journals

Who is online

Users browsing this forum: No registered users and 13 guests