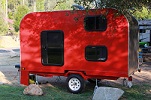
First build 5x10 Rimple design

...ask your questions in the appropriate forums BUT document your build here...preferably in a single thread...dates for updates, are appreciated....

First build 5x10 Rimple design

Postby mariannf » Mon Dec 07, 2015 1:34 pm

Hi all,
I have started my fist build. It is a 5x10x5(tall) canned ham design with bunk beds for two little ones and no galley. i am building on top of an HF 4x8 super duty.
I made the decision based on our primary need of just needing a space for sleeping/living and we are comfortable with using our camp cookware. Also since this is a first build i wanted to go as simple as possible.

I will upload my plans in a separate post, i based them on numerous different plans i have seen on this forum, and essentially it is a Rimple design.

Here are some details of the basic construction plans:
Floor:
- 2x4x120 across HF frame long ways
- 1x4 across 2x4s every 2ft (will raise floor 5 “ to clear fender)
- Use 5x10 plywood (Berry lunmber has 5x10 http://www.berrylumber.com/html/products.html
- Underside with hard foam insulation depth? 1 inch?
Side walls;
- 2 5x10 plywood for outer wall
- Use 1x2 for framing (use 1x3 for joining wall to floor)
- Use 3/4 inch hard foam insulation (? Is this right or should it be 1 inch)
- Use 2 5x5x 3mm Baltic birch for inner wall
Roof:
- 2x2 spars
- Use 5x5x3mm birch plywood for interior skin
- Use 5x5x3mm birch for exterior skin
- Insulation ¾ inch? Or flush with spars?
- Aluminum http://www.abcsupply.net/aluminum.html ( has 5x10 .04) about $110 per sheet
- Aluminum molding have to figure out (t-shape molding that is “dead soft” no need to anneal) (where to get?)

photo 1.JPG
here is the HF trailer with the three 2x4x120s longways across frame to get the 10 foot length and give height to go above the fender. disregard the 1x4s laying across the 2x4s in this photo.
photo 1.JPG (148.22 KiB) Viewed 6905 times
photo 1.JPG
here is the HF trailer with the three 2x4x120s longways across frame to get the 10 foot length and give height to go above the fender. disregard the 1x4s laying across the 2x4s in this photo.
photo 1.JPG (148.22 KiB) Viewed 6905 times
Last edited by mariannf on Thu Jan 07, 2016 7:24 pm, edited 2 times in total.
User avatar
mariannf
Teardrop Master
 
Posts: 193
Joined: Wed Oct 28, 2015 3:13 am

Re: First build 5x10 Rimple design

Postby mariannf » Mon Dec 07, 2015 1:41 pm

Once I had the 10 ft long 2x4s square i secured them at either end with 1x4s (cut to 58.5 inches across, and also squared). They are on end, so the total height of the 2xs laid flat and the 1x4s on end is 5 inches which is enough to clear the fenders. I secured the 1x4s to the 2x4s using Proline adhesive and #8 21/2 exterior construction screws.
the 2x4s will be joined to the HF frame using 3/8 lag bolts and self securing nuts.
photo 2.JPG
photo 2.JPG (112.02 KiB) Viewed 6901 times

It is square and level.
You will also see in this photo i put 1x4x120 down the length of the frame suing same glue and screw. To allow clearance for the wheels/fenders the front half is at 54.25 and the back half at 41.25 length.
Last edited by mariannf on Tue Aug 30, 2016 2:44 pm, edited 1 time in total.
User avatar
mariannf
Teardrop Master
 
Posts: 193
Joined: Wed Oct 28, 2015 3:13 am

Postby mariannf » Mon Dec 07, 2015 1:44 pm

x
Last edited by mariannf on Tue Aug 30, 2016 2:45 pm, edited 2 times in total.
User avatar
mariannf
Teardrop Master
 
Posts: 193
Joined: Wed Oct 28, 2015 3:13 am
Top

Re: First build 5x10 Rimple design

Postby mariannf » Mon Dec 07, 2015 1:45 pm

photo 4.JPG
photo 4.JPG (111.06 KiB) Viewed 6901 times

Here is the frame on top of the floor. The floor (and sidewalls) are 3/4 inch 5x10 plywood bought at Berry Lumber in Sacramento. There were a couple of nor cal lumber yeards with 5x10. Aura lumber also had this size.

In this pic i was just making sire everythign aligned and was square. I started painting the whole underside with truck bed liner.
will post pic when done. This is looking at the sub floor upside down: 2x4x120s long ways, 1x4s across, bottom/exterior facing side of floor.
Last edited by mariannf on Tue Aug 30, 2016 2:45 pm, edited 1 time in total.
User avatar
mariannf
Teardrop Master
 
Posts: 193
Joined: Wed Oct 28, 2015 3:13 am
Top

Re: First build Sacramento 5x10 Rimple design

Postby S. Heisley » Mon Dec 07, 2015 9:00 pm

Side walls;
- 2 5x10 plywood for outer wall
- Use 1x2 for framing (use 1x3 for joining wall to floor)
- Use 3/4 inch hard foam insulation (? Is this right or should it be 1 inch)


Yes, that is correct, if you are purchasing your 1x2" wood and not cutting it yourself. This is because manufactured 1" wood is really 3/4". (They think they are tricking us; but, we know.... ;) )

Also, 1x2 boards are plenty strong enough for the roof. You don't need 2x2 boards. The cabin gets its strength from the entire unit, not just a couple boards. Also, the bunk beds, attached from side to side will help stabilize the unit and take the place of the galley cabinets, which normally do that. I don't know what you have for a tow vehicle; but, assuming it isn't a truck, you'll want to keep the weight down. Since you don't have brakes on your trailer, you'll need to keep the weight under 1500 pounds anyway.

A Rimple is a good choice for your first build. Keep going. We're watching! :SG
User avatar
S. Heisley
Super Lifetime Member
 
Posts: 8772
Images: 495
Joined: Mon Sep 17, 2007 10:02 am
Location: No. California
Top

Re: First build5x10 Rimple design

Postby mariannf » Tue Dec 08, 2015 12:46 am

S. Heisley wrote:
Side walls;
- 2 5x10 plywood for outer wall
- Use 1x2 for framing (use 1x3 for joining wall to floor)
- Use 3/4 inch hard foam insulation (? Is this right or should it be 1 inch)


Yes, that is correct, if you are purchasing your 1x2" wood and not cutting it yourself. This is because manufactured 1" wood is really 3/4". (They think they are tricking us; but, we know.... ;) )

Also, 1x2 boards are plenty strong enough for the roof. You don't need 2x2 boards. The cabin gets its strength from the entire unit, not just a couple boards. Also, the bunk beds, attached from side to side will help stabilize the unit and take the place of the galley cabinets, which normally do that. I don't know what you have for a tow vehicle; but, assuming it isn't a truck, you'll want to keep the weight down. Since you don't have brakes on your trailer, you'll need to keep the weight under 1500 pounds anyway.

A Rimple is a good choice for your first build. Keep going. We're watching! :SG


Thanks Sharon! For the 1x2 spars across the roof how are they configured: the 1 side from top to bottom and 2 side across?
Right the estimated weight is about 1000-1200 not loaded.
I have a seperate question: is there any issue with underside insulation of the exterior facing floor? If insulated with hard foam board couldn't moisture get trapped between it and the plywood?
Last edited by mariannf on Tue Aug 30, 2016 2:46 pm, edited 1 time in total.
User avatar
mariannf
Teardrop Master
 
Posts: 193
Joined: Wed Oct 28, 2015 3:13 am
Top

Re: First build Sacramento 5x10 Rimple design

Postby KCStudly » Tue Dec 08, 2015 10:57 am

It is better to run the roof spars standing on edge. Not only are they stronger that way, but by separating the inner and outer skins more, the whole roof structure becomes stronger; and there is more room for insulation.

Do you mean to not skin the underside of the floor, just deck with insulation underneath? That has been done successfully in the past. It would be a good idea to fully seal the wood first. Epoxy, paint, "the mix", tar and other methods have been used.

Bob Henry (and others) like to put the extruded insulation on top of the floor and then just put the mattress over it.

I'm in the camp that likes the idea of a torsion box or SIP style of floor construction; thin skins top and bottom with a foam core.
KC
My Build: The Poet Creek Express Hybrid Foamie

Poet Creek Or Bust
Engineering the TLAR way - "That Looks About Right"
TnTTT ORIGINAL 200A LANTERN CLUB = "The 200A Gang"
Green Lantern Corpsmen
User avatar
KCStudly
Donating Member
 
Posts: 9611
Images: 8169
Joined: Mon Feb 06, 2012 10:18 pm
Location: Southeastern CT, USA
Top

Re: First build 5x10 Rimple design

Postby mariannf » Tue Dec 08, 2015 1:36 pm

KCStudly wrote:It is better to run the roof spars standing on edge. Not only are they stronger that way, but by separating the inner and outer skins more, the whole roof structure becomes stronger; and there is more room for insulation.

Do you mean to not skin the underside of the floor, just deck with insulation underneath? That has been done successfully in the past. It would be a good idea to fully seal the wood first. Epoxy, paint, "the mix", tar and other methods have been used.

Bob Henry (and others) like to put the extruded insulation on top of the floor and then just put the mattress over it.

I'm in the camp that likes the idea of a torsion box or SIP style of floor construction; thin skins top and bottom with a foam core.


Hi KC and thanks. That makes sense about the spars being on end.

I wasn't going to insulate or use a top/inside skin. Just have a 3/4 inch ply floor attached to the wood frame subfloor. the underside is coated with truck bed liner paint and on the inside I am thinking of using a a thick carpet pad and carpeting. The side walls and roof will be insulated. Most if not all of the floor will have foam mattress over it so it is hard to the need for underside insulation. thoughts??
Last edited by mariannf on Tue Aug 30, 2016 2:46 pm, edited 1 time in total.
User avatar
mariannf
Teardrop Master
 
Posts: 193
Joined: Wed Oct 28, 2015 3:13 am
Top

Re: First build Sacramento 5x10 Rimple design

Postby KCStudly » Tue Dec 08, 2015 2:47 pm

So the difference between a foam mattress and foam carpet backing, and hard foam insulation is that the hard foam will not tend to absorb and hold moisture; at least not nearly as much as the spongy foams.

Several people have reported that w/o hard insulation under a spongy foam mattress humidity (moisture from perspiration, breath, and/or coming in from rainy weather with damp clothing... don't even try to pull the old, "but I will only be camping in good weather" ploy... everybody gets rained on sooner or later), especially in cold weather camping (cold weather = anywhere below the dew point... doesn't necessarily have to be "too cold to camp") can collect in and under the mattress, potentially becoming the start of a mold problem. Others, especially people who live in very dry climates like Arizona, etc., never run into this problem.

My thought is that: 1) I live in region with the potential for very humid weather in the summer; 2) I would like to be able to camp pretty much anywhere in the country, thru at least 3 seasons, and at times at high elevation where overnight temps can drop dramatically, even in the middle of summer; and 3) my wife is very intolerant of any thing resembling cold, so I went with sandwich construction and 1-1/2 inches of foam. Some may say overkill, but if there is morning frost or it snows a little at Poet Creek, even in late August, I would not be very much surprised.
KC
My Build: The Poet Creek Express Hybrid Foamie

Poet Creek Or Bust
Engineering the TLAR way - "That Looks About Right"
TnTTT ORIGINAL 200A LANTERN CLUB = "The 200A Gang"
Green Lantern Corpsmen
User avatar
KCStudly
Donating Member
 
Posts: 9611
Images: 8169
Joined: Mon Feb 06, 2012 10:18 pm
Location: Southeastern CT, USA
Top

Re: First build 5x10 Rimple design

Postby mariannf » Tue Dec 08, 2015 3:49 pm

KCStudly wrote:So the difference between a foam mattress and foam carpet backing, and hard foam insulation is that the hard foam will not tend to absorb and hold moisture; at least not nearly as much as the spongy foams.

Several people have reported that w/o hard insulation under a spongy foam mattress humidity (moisture from perspiration, breath, and/or coming in from rainy weather with damp clothing... don't even try to pull the old, "but I will only be camping in good weather" ploy... everybody gets rained on sooner or later), especially in cold weather camping (cold weather = anywhere below the dew point... doesn't necessarily have to be "too cold to camp") can collect in and under the mattress, potentially becoming the start of a mold problem. Others, especially people who live in very dry climates like Arizona, etc., never run into this problem.

My thought is that: 1) I live in region with the potential for very humid weather in the summer; 2) I would like to be able to camp pretty much anywhere in the country, thru at least 3 seasons, and at times at high elevation where overnight temps can drop dramatically, even in the middle of summer; and 3) my wife is very intolerant of any thing resembling cold, so I went with sandwich construction and 1-1/2 inches of foam. Some may say overkill, but if there is morning frost or it snows a little at Poet Creek, even in late August, I would not be very much surprised.


Thanks again KC, i appreciate it. We are in Sacramento where it is hot and dry and will only camp in central or northern California so cold is not much of an issue. But I want to make sure I understand what you are saying. Moisture can collect under the foam mattress if the floor is not insulated?
Last edited by mariannf on Tue Aug 30, 2016 2:47 pm, edited 1 time in total.
User avatar
mariannf
Teardrop Master
 
Posts: 193
Joined: Wed Oct 28, 2015 3:13 am
Top

Re: First build Sacramento 5x10 Rimple design

Postby KCStudly » Tue Dec 08, 2015 4:46 pm

When it is cold/cool out and the inside of the cabin is warm and humid, yes. This is made worse in cool/cold temps when you only have the ventilation open to a minimum, trying to conserve heat, and moisture has more of a chance to build up.
KC
My Build: The Poet Creek Express Hybrid Foamie

Poet Creek Or Bust
Engineering the TLAR way - "That Looks About Right"
TnTTT ORIGINAL 200A LANTERN CLUB = "The 200A Gang"
Green Lantern Corpsmen
User avatar
KCStudly
Donating Member
 
Posts: 9611
Images: 8169
Joined: Mon Feb 06, 2012 10:18 pm
Location: Southeastern CT, USA
Top

Re: First build Sacramento 5x10 Rimple design

Postby S. Heisley » Tue Dec 08, 2015 9:39 pm

KC is giving you good advice. Actually, you will get less moisture build-up if you add Styrofoam underneath your floor. What I did for mine was fit Styrofoam between the boards, using a light spray glue to attach. Even though I had epoxied the under side of my floor, after I finished securing the hard foam, I sprayed everything with undercarriage spray, which you can get at an auto parts store. It is said that you can secure the foam with large washers, screwed into your boards; however, I secured mine with metal plumbers tape, too. (I also used hardware cloth; but have since become convinced that the hardware cloth was over-kill and unnecessary.) You can wait to see how you fare and do all this later; but, it will be harder to do when you are laying on your back, looking up.

The evenings do get cold in California, above Sacramento; and, especially if you plan to go into the mountains or over to the coast. Parts of the coast are often in the upper 30's in the mornings and sometimes don't get above the cold, foggy 60's in the daytime. It just depends on where you go. In the Sierras, especially near Lassen National Park, it can be in the upper 80's in the day time and still get down into the mid-30's at night. This is because there are underground ice caves (lava tunnels) that never thaw and these act like a refrigerator as soon as the sun goes down. As long as you have Styrofoam insulation in your floor, walls, and ceiling, you will do very well, staying at least 10 degrees (or more) above the exterior night time temperatures. The insulation will also help keep your trailer cooler during the hot summer days, keeping your trailer the temperature of a shaded area, even when left closed up in full sun for hours. It quiets down noise, too.

Yes, set your ceiling spars uP for added strength. This also allows you to put two layers of 3/4" Styrofoam insulation in your ceiling area, where you need it the most. Styrofoam is inexpensive, easy to work with and adds almost no weight; so, why not?!
User avatar
S. Heisley
Super Lifetime Member
 
Posts: 8772
Images: 495
Joined: Mon Sep 17, 2007 10:02 am
Location: No. California
Top

Re: First build 5x10 Rimple design

Postby mariannf » Wed Dec 09, 2015 12:48 am

S. Heisley wrote:KC is giving you good advice. Actually, you will get less moisture build-up if you add Styrofoam underneath your floor. What I did for mine was fit Styrofoam between the boards, using a light spray glue to attach. Even though I had epoxied the under side of my floor, after I finished securing the hard foam, I sprayed everything with undercarriage spray, which you can get at an auto parts store. It is said that you can secure the foam with large washers, screwed into your boards; however, I secured mine with metal plumbers tape, too. (I also used hardware cloth; but have since become convinced that the hardware cloth was over-kill and unnecessary.) You can wait to see how you fare and do all this later; but, it will be harder to do when you are laying on your back, looking up.

The evenings do get cold in California, above Sacramento; and, especially if you plan to go into the mountains or over to the coast. Parts of the coast are often in the upper 30's in the mornings and sometimes don't get above the cold, foggy 60's in the daytime. It just depends on where you go. In the Sierras, especially near Lassen National Park, it can be in the upper 80's in the day time and still get down into the mid-30's at night. This is because there are underground ice caves (lava tunnels) that never thaw and these act like a refrigerator as soon as the sun goes down. As long as you have Styrofoam insulation in your floor, walls, and ceiling, you will do very well, staying at least 10 degrees (or more) above the exterior night time temperatures. The insulation will also help keep your trailer cooler during the hot summer days, keeping your trailer the temperature of a shaded area, even when left closed up in full sun for hours. It quiets down noise, too.

Yes, set your ceiling spars uP for added strength. This also allows you to put two layers of 3/4" Styrofoam insulation in your ceiling area, where you need it the most. Styrofoam is inexpensive, easy to work with and adds almost no weight; so, why not?!

Thanks KC and Sharon that is good advice, I appreciate it.
Last edited by mariannf on Tue Aug 30, 2016 2:47 pm, edited 1 time in total.
User avatar
mariannf
Teardrop Master
 
Posts: 193
Joined: Wed Oct 28, 2015 3:13 am
Top

Re: First build 5x10 Rimple design

Postby mariannf » Wed Dec 09, 2015 1:22 pm

here is the underside of the frame floor coated in truck bed liner
Attachments
coated.jpg
coated.jpg (115.88 KiB) Viewed 6491 times
Last edited by mariannf on Tue Aug 30, 2016 2:47 pm, edited 1 time in total.
User avatar
mariannf
Teardrop Master
 
Posts: 193
Joined: Wed Oct 28, 2015 3:13 am
Top

Re: First build Sacramento 5x10 Rimple design

Postby mariannf » Mon Dec 21, 2015 3:20 pm

After a hiatus for some travel I started up again. Got the framing started. Used 1x4 glued to the floor and clamped then will use scews through the outside facing ply floor up through the 1x4s. Getting this framing joined and squared took 3 hours even though it is just 4 pieces of wood! Wanted to get this part right as the basis of the skeleton. There is a 3/4 inch perimeter for the walls.
Pics not posting will post soon.
User avatar
mariannf
Teardrop Master
 
Posts: 193
Joined: Wed Oct 28, 2015 3:13 am
Top

Next

Return to Build Journals

Who is online

Users browsing this forum: No registered users and 53 guests