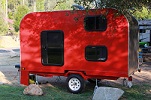
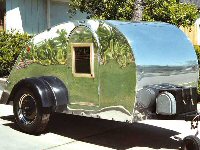
First build 5x10 Rimple design

...ask your questions in the appropriate forums BUT document your build here...preferably in a single thread...dates for updates, are appreciated....

Re: First build 5x10 Rimple design

Postby KCStudly » Tue Jan 19, 2016 12:12 am

Most people will clamp the two walls together and sand the edge as one. That way they are both the same and the roof ply will go on straight. I would also try not to have any significant dips. Better to have a continuous "positive" curve for a tight wall to roof join, than to have dips, or reversals, that the ply will have a harder time matching the contour of.
KC
My Build: The Poet Creek Express Hybrid Foamie

Poet Creek Or Bust
Engineering the TLAR way - "That Looks About Right"
TnTTT ORIGINAL 200A LANTERN CLUB = "The 200A Gang"
Green Lantern Corpsmen
User avatar
KCStudly
Donating Member
 
Posts: 9613
Images: 8169
Joined: Mon Feb 06, 2012 10:18 pm
Location: Southeastern CT, USA

Re: First build 5x10 Rimple design

Postby mariannf » Tue Jan 19, 2016 10:52 am

KCStudly wrote:Most people will clamp the two walls together and sand the edge as one. That way they are both the same and the roof ply will go on straight. I would also try not to have any significant dips. Better to have a continuous "positive" curve for a tight wall to roof join, than to have dips, or reversals, that the ply will have a harder time matching the contour of.

Got it! Thanks KC. I will do that.
One more question I'll soon be cutting the curves for the interior skin. By the same method (laying them under the cut wall and tracing). The interior skins are 3mm Baltic birch ply. It is really bendy. Any suggestions on best way to cut it?
User avatar
mariannf
Teardrop Master
 
Posts: 193
Joined: Wed Oct 28, 2015 3:13 am

Re: First build 5x10 Rimple design

Postby KCStudly » Tue Jan 19, 2016 11:31 am

Glue it onto the wall core first with extra hanging off of the profile edge, then route the excess off using a trim router (about $100 for the small Rigid one I use). If you don't have a router and can't justify the purchase, you might be able to cut the excess off close with a utility knife (at least score it prior to cutting) or small fine tooth hand trim saw; then hand sand the rest back to flush. (Confession: I usually prefer hand work for the delicate details, rather than power tools that can quickly turn things ugly.) If you want a nice clean wall to ceiling joint with no trim it would be worth the trouble. If you are going to add 1/4 round trim or welting/rope/trim, etc. then it probably isn't as critical.

My concern about using the jigsaw is that it will likely create splinters and chip out that would need to be hidden.
KC
My Build: The Poet Creek Express Hybrid Foamie

Poet Creek Or Bust
Engineering the TLAR way - "That Looks About Right"
TnTTT ORIGINAL 200A LANTERN CLUB = "The 200A Gang"
Green Lantern Corpsmen
User avatar
KCStudly
Donating Member
 
Posts: 9613
Images: 8169
Joined: Mon Feb 06, 2012 10:18 pm
Location: Southeastern CT, USA
Top

Re: First build 5x10 Rimple design

Postby mariannf » Tue Jan 19, 2016 12:11 pm

KCStudly wrote:Glue it onto the wall core first with extra hanging off of the profile edge, then route the excess off using a trim router (about $100 for the small Rigid one I use). If you don't have a router and can't justify the purchase, you might be able to cut the excess off close with a utility knife (at least score it prior to cutting) or small fine tooth hand trim saw; then hand sand the rest back to flush. (Confession: I usually prefer hand work for the delicate details, rather than power tools that can quickly turn things ugly.) If you want a nice clean wall to ceiling joint with no trim it would be worth the trouble. If you are going to add 1/4 round trim or welting/rope/trim, etc. then it probably isn't as critical.

My concern about using the jigsaw is that it will likely create splinters and chip out that would need to be hidden.


Got it thanks KC!
I will try the utility knife option first since I have one, and then will consider the investment in a router.
I haven't decided on whether to use trim yet. I was thinking i would depend on how good or bad things look once installed. it is strictly an aesthetic decision is what i understand.
User avatar
mariannf
Teardrop Master
 
Posts: 193
Joined: Wed Oct 28, 2015 3:13 am
Top

Re: First build 5x10 Rimple design

Postby mariannf » Wed Jan 20, 2016 12:03 pm

Question for anyone with experience: I am planning on having rear and front ply walls. If you go to the post with my hand drawn plan you will see the top curves of the side walls have a 19" radius. So I want to have a front and rear walls of 3/4 inch ply (same as sidewalls) that goes up 41 inches. I have been searchign the site, but can't find advice/examples on how best to join the sidewalls to the rear and front walls.
Any help appreciated!
User avatar
mariannf
Teardrop Master
 
Posts: 193
Joined: Wed Oct 28, 2015 3:13 am
Top

Re: First build 5x10 Rimple design

Postby KCStudly » Wed Jan 20, 2016 12:28 pm

Again, this is a great place to have a router. With a router and a straight edge as a guide, you could plow out dadoes (or rabbets) so that the bulkheads (front and galley walls) can key into the walls. Glue and pocket screw thru the bulkheads into the side walls to fasten.

If you don't want the screw pockets to show from the inside, and you plan to cover your outside, I suppose you could try "toeing" screws in at an angle from the outside, but you would need to take care to make sure the screws are the right length, the angle of the toe is not so great that the screws poke out of the faces of the bulkheads, you'd have to meter the depth of your pilot drilling (same reason), and that you actually get the screws started in the right location. In fact, forget that I mentioned it.

What you don't want to do is run the screws straight in from the outside into the edge of the bulkhead ply. That almost always splits the edge of the ply and seldom ever holds very well; it is similar to screwing into end grain, not desirable.
KC
My Build: The Poet Creek Express Hybrid Foamie

Poet Creek Or Bust
Engineering the TLAR way - "That Looks About Right"
TnTTT ORIGINAL 200A LANTERN CLUB = "The 200A Gang"
Green Lantern Corpsmen
User avatar
KCStudly
Donating Member
 
Posts: 9613
Images: 8169
Joined: Mon Feb 06, 2012 10:18 pm
Location: Southeastern CT, USA
Top

Re: First build 5x10 Rimple design

Postby mariannf » Wed Jan 20, 2016 5:40 pm

KCStudly wrote:Again, this is a great place to have a router. With a router and a straight edge as a guide, you could plow out dadoes (or rabbets) so that the bulkheads (front and galley walls) can key into the walls. Glue and pocket screw thru the bulkheads into the side walls to fasten.

If you don't want the screw pockets to show from the inside, and you plan to cover your outside, I suppose you could try "toeing" screws in at an angle from the outside, but you would need to take care to make sure the screws are the right length, the angle of the toe is not so great that the screws poke out of the faces of the bulkheads, you'd have to meter the depth of your pilot drilling (same reason), and that you actually get the screws started in the right location. In fact, forget that I mentioned it.

What you don't want to do is run the screws straight in from the outside into the edge of the bulkhead ply. That almost always splits the edge of the ply and seldom ever holds very well; it is similar to screwing into end grain, not desirable.


Thanks KC, appreciate it. What do you think of gluing at ends and using construction angle ties like this to set screws:
http://www.homedepot.com/p/Simpson-Stro ... 375043-_-N
It would add a few pounds, but is their a structural reason not to use these to join the walls?
User avatar
mariannf
Teardrop Master
 
Posts: 193
Joined: Wed Oct 28, 2015 3:13 am
Top

Re: First build 5x10 Rimple design

Postby KCStudly » Wed Jan 20, 2016 6:50 pm

Personally, I don't like them at all for what you are intending. They don't pull the joint together, so they don't really prevent movement that well.

Fit the joint tightly and the glue does all of the work. The screws are just there to pull the joint tight while the glue dries; in fact, some people take the screws out after the glue cures.

Don't be afraid to learn how to do woodworking, it isn't that hard and it will look much better w/o those galvanized metal clips.

Maybe if you listed the tools that you have available and are familiar with we could suggest a method that would work well for you. Said another way, if I didn't have a router or skil saw to plow out a dado or rabbet, I would score the dadoes/rabbets with a utility knife and chisel out a ply or two by hand to get a good solid glue joint, before I would use those brackets. It's a stronger joint and alignment is locked in.

An easier way would be to screw wooden cleats (2x2 nominal or even 1x1 actual, perhaps with the inner corners chamfered off using a table saw or block plane) to the wall to locate the bulkheads; then lean the bulkheads up to the cleats and screw them to. Use glue or construction adhesive between the joints. This won't pull the walls to the bulkheads so you will have to clamp them somehow. Long bar or pipe clamps work well, or you could make some temporary trammel bars and use wedges to pull them together.

In case that isn't clear, imagine a 2x4 that is a bit wider than your cabin sitting over the top of the bulkhead you want to glue and clamp. Now lap some short blocks of 2x4 using a few screws to each end of the longer piece. Place the blocks so that they hang down next to the side wall about 1/4 inch away from the outside. Now get some wedge shims from the hardware store (like the ones used for shimming windows and doors at installation) and install them between the faces of the side walls and the blocks on your trammel so that they force the walls together. You can do the same thing under the floor to push the bottoms of the walls together (assuming that you are building your cabin off of the trailer... highly advised). You just have to be careful not to over tighten so as not to warp the wall and bow it away from the middle of the bulkhead.
KC
My Build: The Poet Creek Express Hybrid Foamie

Poet Creek Or Bust
Engineering the TLAR way - "That Looks About Right"
TnTTT ORIGINAL 200A LANTERN CLUB = "The 200A Gang"
Green Lantern Corpsmen
User avatar
KCStudly
Donating Member
 
Posts: 9613
Images: 8169
Joined: Mon Feb 06, 2012 10:18 pm
Location: Southeastern CT, USA
Top

Re: First build 5x10 Rimple design

Postby mariannf » Wed Jan 20, 2016 7:55 pm

KCStudly wrote:Personally, I don't like them at all for what you are intending. They don't pull the joint together, so they don't really prevent movement that well.

Fit the joint tightly and the glue does all of the work. The screws are just there to pull the joint tight while the glue dries; in fact, some people take the screws out after the glue cures.

Don't be afraid to learn how to do woodworking, it isn't that hard and it will look much better w/o those galvanized metal clips.

Maybe if you listed the tools that you have available and are familiar with we could suggest a method that would work well for you. Said another way, if I didn't have a router or skil saw to plow out a dado or rabbet, I would score the dadoes/rabbets with a utility knife and chisel out a ply or two by hand to get a good solid glue joint, before I would use those brackets. It's a stronger joint and alignment is locked in.

An easier way would be to screw wooden cleats (2x2 nominal or even 1x1 actual, perhaps with the inner corners chamfered off using a table saw or block plane) to the wall to locate the bulkheads; then lean the bulkheads up to the cleats and screw them to. Use glue or construction adhesive between the joints. This won't pull the walls to the bulkheads so you will have to clamp them somehow. Long bar or pipe clamps work well, or you could make some temporary trammel bars and use wedges to pull them together.

In case that isn't clear, imagine a 2x4 that is a bit wider than your cabin sitting over the top of the bulkhead you want to glue and clamp. Now lap some short blocks of 2x4 using a few screws to each end of the longer piece. Place the blocks so that they hang down next to the side wall about 1/4 inch away from the outside. Now get some wedge shims from the hardware store (like the ones used for shimming windows and doors at installation) and install them between the faces of the side walls and the blocks on your trammel so that they force the walls together. You can do the same thing under the floor to push the bottoms of the walls together (assuming that you are building your cabin off of the trailer... highly advised). You just have to be careful not to over tighten so as not to warp the wall and bow it away from the middle of the bulkhead.


Thanks KC. You got it, I am shying away from woodworking that I think exceeds my skill level...which is minimal.

Tools I have: jig saw, circular saw, various hand saws, utility knife.

If I understand your first suggestion for working without a router; I could use a utility knife to score the perpendicularly aligned plywood pieces and create a rabbet joint (I feel slightly more confident with a rabbet over a dado) as in this picture. I would need to work out the exact right measurement which makes me worried:
rabbet.jpeg
rabbet.jpeg (9 KiB) Viewed 2932 times


I am wondering what you think of using dowels to strengthen the joint? it seems easier to me.
dowel-joint.jpeg
dowel-joint.jpeg (105.39 KiB) Viewed 2932 times


This may be hard to picture but the sidewalls run 120 inches, the bulkhead walls will be fit between the two sidewalls and are 58.5 inches (they are right now cut to 60 inches i haven't cut them to fit yet). Could I fit the walls, drill holes to accommodate dowels through the sidewall into what would be the edge of the bulkhead walls, fit a glued dowel through, then as you suggest create a trammel to force the walls together?

For your second suggestion i am having a hard time picturing it. Does this drawing look like the right idea? two walls joined and in interior a triangle shaped cleat that would allow for a screw to go into each wall?
cleats.png
cleats.png (134.57 KiB) Viewed 2932 times


As i think about this my main concern is measuring and cutting precisely enough to do the rabbet the right way and not ruin the plywood.
You help continues to be greatly appreciated! what do you think?
User avatar
mariannf
Teardrop Master
 
Posts: 193
Joined: Wed Oct 28, 2015 3:13 am
Top

Re: First build 5x10 Rimple design

Postby S. Heisley » Wed Jan 20, 2016 8:42 pm

There are several ways to join your walls. When I joined my walls, I indented the back and the top and that worked very well. I didn't do that with the front wall and still wish I had. It was so much easier with the indent. The back fit inside the side walls. I used PL construction glue and just a few holding screws. When the roof was inset, the screws went straight down from the top, into the frame of the walls. The exterior skin for the top and front went on after the walls were in place, sealing it all together to make it weather-tight. Below is the only picture that I could easily find that shows some of that:

Image

Below is a picture that I found of the back. Although this was before the interior skin was put on, while I was mapping the skeleton before I closed it up, it still shows the exterior skin along the edge. You can see that the exterior skin was already attached with the skeleton indented so that the outside skin would cover the ends of the side walls when the back was attached:

Image
Last edited by S. Heisley on Wed Jan 20, 2016 8:57 pm, edited 1 time in total.
User avatar
S. Heisley
Super Lifetime Member
 
Posts: 8774
Images: 495
Joined: Mon Sep 17, 2007 10:02 am
Location: No. California
Top

Re: First build 5x10 Rimple design

Postby KCStudly » Wed Jan 20, 2016 8:49 pm

Your sketch is very close to what I had in mind. Rather than a triangle shaped cleat, think of it more like a square with one corner flattened slightly. You need to leave enough meat for the screws to have something to bite into, and the screws would have to be staggered from side to side so that they don't run into each other. I would run flat head screws from the outside into the cleat. You will want a cordless drill and a countersink bit. I like the kind that can be flipped quickly to switch between pilot drilling and screwing, like this.

Using a measuring tape isn't that hard, just keep your pencil sharp and check twice. Another good practice is to use sticks as gauges or "story poles". Instead of trying to measure, use a stick and mark the length you want on it. You can transfer existing distances this way without ever worrying about numbers. You can even cut your stick to length and use it as a spacer during your dry fits to help hold things into position. I do this often.

For the rabbet (or dado) you could use a straight edge clamped on to guide your circular saw and set the blade shallow. If you are using 7-ply plywood I would try to set the depth for 2 plies. If 5-ply I might shoot for a single ply. Run the saw just inside the line for you groove and that will set a very accurate register for the edge of the rabbet. You could move the fence a blade width at a time and continue cutting, but once you have that reference cut made it might just be quicker and easier to use a wood chisel and mallet (or hammer) to chip away the rest. This is where setting the depth of the saw to match a seam in the plies helps, as it is easier to chisel to a ply seam than it is to split one. It won't be as clean as a router, but with a little practice and watching a tutorial video or two, you can get pretty good at using a chisel.

When you cut your end wall to final width just add twice the rabbet depth to the width; or do a dry fit and cut a stick to fit, then use the stick to mark where to cut the bulkhead. It is always a good idea to do a dry fit just to make sure everything fits well before adding the glue.

Mind you, I don't really recommend this at all. The router is the way to go. I'm just saying if you must be thrifty and you take your time, you could get a perfectly good result doing it the long way with simple tools.

There is a thread somewhere here, perhaps in the techniques forum, that talks about what are the basic (minimum) tools required to build a TD. Everybody has a different opinion on what they can't live without, but it can give you a better idea of how people get things done.

Let me take a look. Yep, here it is: http://www.tnttt.com/viewtopic.php?t=18728
KC
My Build: The Poet Creek Express Hybrid Foamie

Poet Creek Or Bust
Engineering the TLAR way - "That Looks About Right"
TnTTT ORIGINAL 200A LANTERN CLUB = "The 200A Gang"
Green Lantern Corpsmen
User avatar
KCStudly
Donating Member
 
Posts: 9613
Images: 8169
Joined: Mon Feb 06, 2012 10:18 pm
Location: Southeastern CT, USA
Top

Re: First build 5x10 Rimple design

Postby mariannf » Wed Jan 20, 2016 9:30 pm

KCStudly wrote:Your sketch is very close to what I had in mind. Rather than a triangle shaped cleat, think of it more like a square with one corner flattened slightly. You need to leave enough meat for the screws to have something to bite into, and the screws would have to be staggered from side to side so that they don't run into each other. I would run flat head screws from the outside into the cleat. You will want a cordless drill and a countersink bit. I like the kind that can be flipped quickly to switch between pilot drilling and screwing, like this.

Using a measuring tape isn't that hard, just keep your pencil sharp and check twice. Another good practice is to use sticks as gauges or "story poles". Instead of trying to measure, use a stick and mark the length you want on it. You can transfer existing distances this way without ever worrying about numbers. You can even cut your stick to length and use it as a spacer during your dry fits to help hold things into position. I do this often.

For the rabbet (or dado) you could use a straight edge clamped on to guide your circular saw and set the blade shallow. If you are using 7-ply plywood I would try to set the depth for 2 plies. If 5-ply I might shoot for a single ply. Run the saw just inside the line for you groove and that will set a very accurate register for the edge of the rabbet. You could move the fence a blade width at a time and continue cutting, but once you have that reference cut made it might just be quicker and easier to use a wood chisel and mallet (or hammer) to chip away the rest. This is where setting the depth of the saw to match a seam in the plies helps, as it is easier to chisel to a ply seam than it is to split one. It won't be as clean as a router, but with a little practice and watching a tutorial video or two, you can get pretty good at using a chisel.

When you cut your end wall to final width just add twice the rabbet depth to the width; or do a dry fit and cut a stick to fit, then use the stick to mark where to cut the bulkhead. It is always a good idea to do a dry fit just to make sure everything fits well before adding the glue.

Mind you, I don't really recommend this at all. The router is the way to go. I'm just saying if you must be thrifty and you take your time, you could get a perfectly good result doing it the long way with simple tools.

There is a thread somewhere here, perhaps in the techniques forum, that talks about what are the basic (minimum) tools required to build a TD. Everybody has a different opinion on what they can't live without, but it can give you a better idea of how people get things done.

Let me take a look. Yep, here it is: http://www.tnttt.com/viewtopic.php?t=18728


KC thanks again. I will go with the cleat idea. Two questions: how many cleats should I use for the 41 inch length of wall to be joined? Also in terms of what I use could i get the same effect by using 1x 2 framing that runs the length of the joint? Screw in from the sidewall in to the 1 side and in from the bulkhead wall in to the 2 side?
User avatar
mariannf
Teardrop Master
 
Posts: 193
Joined: Wed Oct 28, 2015 3:13 am
Top

Re: First build 5x10 Rimple design

Postby mariannf » Wed Jan 20, 2016 9:34 pm

S. Heisley wrote:There are several ways to join your walls. When I joined my walls, I indented the back and the top and that worked very well. I didn't do that with the front wall and still wish I had. It was so much easier with the indent. The back fit inside the side walls. I used PL construction glue and just a few holding screws. When the roof was inset, the screws went straight down from the top, into the frame of the walls. The exterior skin for the top and front went on after the walls were in place, sealing it all together to make it weather-tight. Below is the only picture that I could easily find that shows some of that:

Image

Below is a picture that I found of the back. Although this was before the interior skin was put on, while I was mapping the skeleton before I closed it up, it still shows the exterior skin along the edge. You can see that the exterior skin was already attached with the skeleton indented so that the outside skin would cover the ends of the side walls when the back was attached:

Image

Thanks Sharon! Just to clarify: what do you mean by indent and how did you do it?
Appreciate the advice!
User avatar
mariannf
Teardrop Master
 
Posts: 193
Joined: Wed Oct 28, 2015 3:13 am
Top

Re: First build 5x10 Rimple design

Postby S. Heisley » Thu Jan 21, 2016 12:39 am

Thanks Sharon! Just to clarify: what do you mean by indent and how did you do it?


Take, for instance, the back wall.....I drew a line on the exterior skin at the width that I expected the outside of my cabin would be. Then, I cut out the plywood shape, just a little outside those lines. (By cutting outside the lines, I kept from cutting too much off and allowed for any width irregularities that might have occurred when I joined the back wall to the sides. Then, I calculated the depth of what the side walls would be on each side, after the interior plywood, frame, Styrofoam, and exterior plywood of the side walls had been put together. (example: 1/8" interior ply + 3/4" frame & Styrofoam + 3/4" exterior ply = 1 & 5/8" depth) Using this example, I would then recess the back wall frame by 1 & 5/8" from the drawn line ( not the cut) on each side, leaving the exterior plywood unsupported by the back wall frame just enough on each side so that the interior ply, frame & Styrofoam would just slip in between the side walls; thus, supporting the side walls with the back wall frame; and, leaving that previously 1 & 5/8" unsupported exterior plywood on each side to meet up with the wall ends and frame and be supported by them. Now, since the exterior plywood was cut just outside of the drawn line, there will be some excess to sand down; but, you should end up with some nice, smooth wall corners and, the back is supporting the sides while the sides are supporting the back. I did the same for the top of the back and most of the top of the side walls. I calculated the depth of my ceiling and recessed the wall frame and interior plywood by that amount (for example: 1/8" interior plywood + 1 & 1/2" ceiling frame and Styrofoam +two 1/8" " plywood exterior ply sheets =1 & 7/8") so that the top would fit between the side walls, down onto the recessed frame, leaving the top skin to cap the walls, fitting snugly, with walls and ceiling supporting each other. And, again, sand off any small excess. The thing I liked about having the exterior plywood spanning over the top past the depth of the walls was that, heaven forbid, if a joining came loose up there, the resulting cracked surface would more likely be along the side and not on the roof top where water might lay or be drawn in by gravity.

Please remember that, with this method, the top's exterior plywood is added after the top frame and interior plywood has been installed because you will most likely want to run your electrical wires through the ceiling and complete and test your wiring before you put your exterior roof plywood on. Also,the Styrofoam is not added to the ceiling until your wiring is completed and tested. In the picture, below, please remember that my roof and wiring looks different than yours will because I have a lifting roof in the middle; so I ran all my wires along the outside edges of my stationary ceiling:

Image

If any of this doesn't make sense or if I miscalculated or did something screwy, please let me know and I will explain or fix it. Thanks.

The most important part of building is planning every step carefully, with lots of reading and lots of forethought.
Oh! And, of course, Measure twice, cut once!
User avatar
S. Heisley
Super Lifetime Member
 
Posts: 8774
Images: 495
Joined: Mon Sep 17, 2007 10:02 am
Location: No. California
Top

Re: First build 5x10 Rimple design

Postby noseoil » Thu Jan 21, 2016 7:04 am

A router is really a great tool to have & use. If you decide to get one, do some practice passes first, so you aren't butchering your panels or making mistakes on the finished work. Carbide cutters are a must, high speed steel won't last.

Image

Image
Build log: viewtopic.php?f=50&t=60248
The time you spend planning is more important than the time you spend building.........

137905
User avatar
noseoil
1000 Club
1000 Club
 
Posts: 1820
Images: 669
Joined: Sun Apr 27, 2014 8:46 am
Location: Raton, New Mexico, living the good life!
Top

PreviousNext

Return to Build Journals

Who is online

Users browsing this forum: No registered users and 17 guests