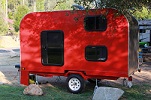
First build 5x10 Rimple design

...ask your questions in the appropriate forums BUT document your build here...preferably in a single thread...dates for updates, are appreciated....

Re: First build 5x10 Rimple design

Postby mariannf » Thu Jan 21, 2016 11:54 am

[quote="noseoil"]A router is really a great tool to have & use. If you decide to get one, do some practice passes first, so you aren't butchering your panels or making mistakes on the finished work. Carbide cutters are a must, high speed steel won't last.

Thanks Noseoil, i am thinking more about getting a router. My hesitation has less to do with the expense, than with worrying about hacking things up. Something along the lines of a cleat seems more inline with the skills I have.
I appreciate this and all the advice you all have offered, it is really helpful and this would be a much more difficult project with out it!
User avatar
mariannf
Teardrop Master
 
Posts: 193
Joined: Wed Oct 28, 2015 3:13 am

Re: First build 5x10 Rimple design

Postby mariannf » Thu Jan 21, 2016 12:14 pm

continuing work on the walls. To improve the sidewall curves, and better assure both sidewalls have the same curve, i laid the two walls on top of each other, clamped them and sanded them.
It is still not an exact perfect curve but is much, much better than after my first cut/sand.
photo (1).JPG
photo (1).JPG (110.42 KiB) Viewed 2615 times


I also took a practice cut using a utility knife on the 3mm baltic birch interior skin. it is very bendy, so i don't want to use the jigsaw on it. The utility knife worked great, and after about 10 passes with good amount of pressure it cut through...no chipping, nice straight line. so i will proceed with using the utility knife to make the interior skin cuts.

KC thanks for advice on both of these things!
User avatar
mariannf
Teardrop Master
 
Posts: 193
Joined: Wed Oct 28, 2015 3:13 am

Re: First build 5x10 Rimple design

Postby KCStudly » Thu Jan 21, 2016 2:01 pm

You're welcome. re: the length of the cleats, I would do full length. With multiple smaller blocks you would have to worry about lining them up. The cleat idea is an easy way to avoid rabbets and dadoes if you are building using simple ply construction. If you are doing a stick built wall or skeleton core, then Sharon's method would be better.

If I may, to simplify what Sharon was describing on her build, she used a frame built wall and let the outer skins overlap at the edges like a flap so that she could screw thru that flap into the abutting frame. Along the tops of the side walls she let the outer ply run high, then nested the ceiling and roof frame assembly down inside the outer skins up on top of the side wall frames; screwing thru the outer side wall skin flaps into the roof frame. Then she trimmed the excess side wall skin off flush to the roof frame and skinned over the whole roof and side walls. It's a good way to go for a stick built and makes a "knit" corner joint (my word for it anyway).

It's an easier way to make the same kind of joint as a rabbet without making a dedicated router cut (although a router with a flush cutting roller guided bit would be the perfect way to trim the little bit extra material left outside of the profile line before putting the roof skin on, or left hanging over the sides on the roof skin... it is a lot easier to trim a little off after assembly and make a joint perfectly flush than it is to try and cut and assembly it exactly; even harder to add back if things come up short. So leave a little extra on the side that is easy to trim or sand and take that off after things have cured.
KC
My Build: The Poet Creek Express Hybrid Foamie

Poet Creek Or Bust
Engineering the TLAR way - "That Looks About Right"
TnTTT ORIGINAL 200A LANTERN CLUB = "The 200A Gang"
Green Lantern Corpsmen
User avatar
KCStudly
Donating Member
 
Posts: 9616
Images: 8169
Joined: Mon Feb 06, 2012 10:18 pm
Location: Southeastern CT, USA
Top

Re: First build 5x10 Rimple design

Postby KCStudly » Thu Jan 21, 2016 3:05 pm

Re: the cleats, I should add that the strength is still coming from the glue joint as transmitted thru the cleat. you can't develop the same strength just gluing two edges together. So the full length cleat rules out any edges splitting open down the road. Again, PL Premium (PLP) construction adhesive, or similar, is probably the way to go for this type of joint and the grade of materials we are discussing.

The rabbet would accomplish essentially the same thing, giving a mechanical stop to help stabilize the glue joint and preclude relative motion from having a chance to work away at the joint. Remember, you are not just building for the strength where you can grab it and pull and say, "gee, that seems plenty strong", you also need to consider how it will be loaded going down the road with constant vibration and G-force accelerations in various directions. Kind of like the difference between steady state (a house holding itself up) or a single event (like a brief earthquake rumbling or a strong gust of wind), and long term weather erosion (the rigors of rain, snow and wind picking away at your house). You may never encounter a single situation that exceeds the initial strength of your build, but the stronger and tighter you build it (while still keeping things light weight), the longer it will last thru all of the little bumps and potholes.

Speaking of weight, for the sake of strength it is better to build smartly with lighter materials than it is to build heavy and clumsy. The heavier your materials the more weight they will have to carry, and when we are talking jarring loads (anything but the smoothest road conditions... which are rare in my part of the country), IMO, you have to make a tight ship regardless. With strong tight joints the whole structure becomes stronger. The extra strength and durability of tight construction makes lighter materials a suitable option to get the job done; and therefore the loads from acceleration (that constant changing in direction of the forces that the road bumps and jars put in) become subdued because there is less mass to try to change the direction of.

Heavy + loose = bad

Light + tight = good
KC
My Build: The Poet Creek Express Hybrid Foamie

Poet Creek Or Bust
Engineering the TLAR way - "That Looks About Right"
TnTTT ORIGINAL 200A LANTERN CLUB = "The 200A Gang"
Green Lantern Corpsmen
User avatar
KCStudly
Donating Member
 
Posts: 9616
Images: 8169
Joined: Mon Feb 06, 2012 10:18 pm
Location: Southeastern CT, USA
Top

Re: First build 5x10 Rimple design

Postby S. Heisley » Thu Jan 21, 2016 3:26 pm

KCStudly wrote:You're welcome. re: the length of the cleats, I would do full length. With multiple smaller blocks you would have to worry about lining them up. The cleat idea is an easy way to avoid rabbets and dadoes if you are building using simple ply construction. If you are doing a stick built wall or skeleton core, then Sharon's method would be better.

If I may, to simplify what Sharon was describing on her build, she used a frame built wall and let the outer skins overlap at the edges like a flap so that she could screw thru that flap into the abutting frame. Along the tops of the side walls she let the outer ply run high, then nested the ceiling and roof frame assembly down inside the outer skins up on top of the side wall frames; screwing thru the outer side wall skin flaps into the roof frame. Then she trimmed the excess side wall skin off flush to the roof frame and skinned over the whole roof and side walls. It's a good way to go for a stick built and makes a "knit" corner joint (my word for it anyway).

It's an easier way to make the same kind of joint as a rabbet without making a dedicated router cut (although a router with a flush cutting roller guided bit would be the perfect way to trim the little bit extra material left outside of the profile line before putting the roof skin on, or left hanging over the sides on the roof skin... it is a lot easier to trim a little off after assembly and make a joint perfectly flush than it is to try and cut and assembly it exactly; even harder to add back if things come up short. So leave a little extra on the side that is easy to trim or sand and take that off after things have cured.


Thanks, KC. You make sense of my long paragraph and got most of it right. Sorry if I confused you. I guess I was too detailed. Actually, I glued and screwed the roof frame down into the side frame, vertically, not horizontally. The outside skin of the sidewalls was not touched. That way, when the final exterior plywood roof went on, it covered up the screws and there were no holes to worry about filling on the side skins. Since the side walls were already sanded together to match each other and the exterior roof plywood was not, I overlapped the exterior roof plywood over the sides and then sanded that down to meet the side walls.

You're right about using a router to trim off excess. That might work as well or better than a sander. I used a lot of 80 grit sandpaper, followed by a smoother, finishing grit. 80 grit takes off the excess pretty fast; but, with much better control; and, for someone who hasn't used a router and doesn't want to purchase or learn to use a lot of tools, it's a good, safe bet. Having a router is almost a "must have" to trim Formica/WilsonArt types of counter tops; but, Mariann won't be making counter tops for her build. (While counter tops can be accomplished without a router, it's harder because if you sand Formica/WilsonArt, you have to worry more about possibly cracking the counter top surface material which is somewhat brittle.)
User avatar
S. Heisley
Super Lifetime Member
 
Posts: 8774
Images: 495
Joined: Mon Sep 17, 2007 10:02 am
Location: No. California
Top

Re: First build 5x10 Rimple design

Postby KCStudly » Thu Jan 21, 2016 3:41 pm

S. Heisley wrote: I guess I was too detailed.

Gee, I never have that problem. (Not) :o :R :R :? ;)
KC
My Build: The Poet Creek Express Hybrid Foamie

Poet Creek Or Bust
Engineering the TLAR way - "That Looks About Right"
TnTTT ORIGINAL 200A LANTERN CLUB = "The 200A Gang"
Green Lantern Corpsmen
User avatar
KCStudly
Donating Member
 
Posts: 9616
Images: 8169
Joined: Mon Feb 06, 2012 10:18 pm
Location: Southeastern CT, USA
Top

Re: First build 5x10 Rimple design

Postby dales133 » Thu Jan 21, 2016 4:13 pm

As KC said the most useful tool i found on my whole build was my little makita router with a flush trim.
It makes short work of alot of otherwise dificult steps and with a level of acuracy hard to duplicate any other way.
Belt sander was also very useful with the profile
User avatar
dales133
4000 Club
4000 Club
 
Posts: 4605
Images: 1
Joined: Mon Oct 13, 2014 5:26 pm
Top

Re: First build 5x10 Rimple design

Postby mariannf » Thu Jan 21, 2016 4:43 pm

KC, Sharon and Dale thank you as always!

To my very novice mind the cleat idea (got it KC running the whole length of the joint) sounds the most understandable and doable to me. I also got this reply in another thread:

"Probably the best way is to rout a channel,but not the easiest.I used 3/4 inch C channel aluminum attached to the outside wall with small screws and adhesive.
Then i slid the "bulkhead " in place and used small screws to secure to the C channel."

This too is an approach that I can see taking on: 3/4 c channel attached to the sidewalls, and then the bulkhead wall lowered in to it and screwed. I would value your opinions on this. Based on prior comment i could see how it might raise a similar issue as with the idea of using angle ties.
User avatar
mariannf
Teardrop Master
 
Posts: 193
Joined: Wed Oct 28, 2015 3:13 am
Top

Re: First build 5x10 Rimple design

Postby S. Heisley » Thu Jan 21, 2016 5:41 pm

mariannf wrote:
To my very novice mind the cleat idea (got it KC running the whole length of the joint) sounds the most understandable and doable to me. I also got this reply in another thread:

"Probably the best way is to rout a channel,but not the easiest.I used 3/4 inch C channel aluminum attached to the outside wall with small screws and adhesive.
Then i slid the "bulkhead " in place and used small screws to secure to the C channel."

This too is an approach that I can see taking on: 3/4 c channel attached to the sidewalls, and then the bulkhead wall lowered in to it and screwed. I would value your opinions on this. Based on prior comment i could see how it might raise a similar issue as with the idea of using angle ties.


Mariann, did I misunderstand you? Are you asking how to attach the sides to the deck or are you asking how to attach the sides to the front, back, and top? To attach the sides to the deck, I used PL construction glue and cleats; but, I did not use a continuous cleat, as that is not necessary. I strategically placed my cleats in places that would later be hidden from view. You can see them in the picture, previously posted. PL construction glue does a wonderful job of attaching as well as filling in any gaps. Remember that, while screws are good and often necessary, the more screws you put in the wood, the harder it will be to attach other things later on because you will have used up so much space with the screws that you have already put in; and, you could run into a screw when you try to attach something else. A few sturdy cleats (not continuous) can also be very helpful because they can help keep your wall at a 90 degree angle to the deck. Please remember also that metal, such as C channel, is quite heavy and adds weight.
User avatar
S. Heisley
Super Lifetime Member
 
Posts: 8774
Images: 495
Joined: Mon Sep 17, 2007 10:02 am
Location: No. California
Top

Re: First build 5x10 Rimple design

Postby S. Heisley » Thu Jan 21, 2016 5:49 pm

Here are some other wall to deck(floor) attachment options:

viewtopic.php?f=21&t=19442
User avatar
S. Heisley
Super Lifetime Member
 
Posts: 8774
Images: 495
Joined: Mon Sep 17, 2007 10:02 am
Location: No. California
Top

Re: First build 5x10 Rimple design

Postby mariannf » Thu Jan 21, 2016 6:06 pm

S. Heisley wrote:
mariannf wrote:

Mariann, did I misunderstand you? Are you asking how to attach the sides to the deck or are you asking how to attach the sides to the front, back, and top? To attach the sides to the deck, I used PL construction glue and cleats; but, I did not use a continuous cleat, as that is not necessary. I strategically placed my cleats in places that would later be hidden from view. You can see them in the picture, previously posted. PL construction glue does a wonderful job of attaching as well as filling in any gaps. Remember that, while screws are good and often necessary, the more screws you put in the wood, the harder it will be to attach other things later on because you will have used up so much space with the screws that you have already put in; and, you could run into a screw when you try to attach something else. A few sturdy cleats (not continuous) can also be very helpful because they can help keep your wall at a 90 degree angle to the deck. Please remember also that metal, such as C channel, is quite heavy and adds weight.


Hi Sharon, you understood correctly I believe. I was asking about wall to wall attachment. I referenced the link you sent in your follow up email when looking at methods for doing this so I am OK on that front.
Thanks!
User avatar
mariannf
Teardrop Master
 
Posts: 193
Joined: Wed Oct 28, 2015 3:13 am
Top

Re: First build 5x10 Rimple design

Postby S. Heisley » Thu Jan 21, 2016 7:29 pm

mariannf wrote:
S. Heisley wrote:
mariannf wrote:

Mariann, did I misunderstand you? Are you asking how to attach the sides to the deck or are you asking how to attach the sides to the front, back, and top? To attach the sides to the deck, I used PL construction glue and cleats; but, I did not use a continuous cleat, as that is not necessary. I strategically placed my cleats in places that would later be hidden from view. You can see them in the picture, previously posted. PL construction glue does a wonderful job of attaching as well as filling in any gaps. Remember that, while screws are good and often necessary, the more screws you put in the wood, the harder it will be to attach other things later on because you will have used up so much space with the screws that you have already put in; and, you could run into a screw when you try to attach something else. A few sturdy cleats (not continuous) can also be very helpful because they can help keep your wall at a 90 degree angle to the deck. Please remember also that metal, such as C channel, is quite heavy and adds weight.


Hi Sharon, you understood correctly I believe. I was asking about wall to wall attachment. I referenced the link you sent in your follow up email when looking at methods for doing this so I am OK on that front.
Thanks!


Okay then, I would not use a continuous cleat to join wall to wall because, if you put it on the outside, you'll have an uneven finish that can never be completely covered up nor sufficiently sanded down. If you put it on the inside, it will forever (IMO) look unfinished. This is in addition to what I already mentioned about using cleats. If you're going to use cleats at all, use them only where they can be hidden by mattresses, cupboards, etc. and only where they will never interfere with anything else that you may want to screw in. 'C' channel won't work because it is enclosed on three sides, like a square 'C' shape. Angle iron would work but would be as bad looking as cleats, not to mention the extra, unnecessary weight. That's my two cents worth.
User avatar
S. Heisley
Super Lifetime Member
 
Posts: 8774
Images: 495
Joined: Mon Sep 17, 2007 10:02 am
Location: No. California
Top

Re: First build 5x10 Rimple design

Postby KCStudly » Thu Jan 21, 2016 8:21 pm

I think we are trying to say that the router method, or knit corner is very much preferred. One really shouldn't be afraid of routers (except for a healthy dose of safety awareness, as with all power tools). The only real difference in handling a router is that it can go in any direction, whereas the tools you are already familiar with, such as the circular and jig saws, tend to go more in a line. So with a router you have to use straight edges, guide collar jigs, trammels and/or roller guided bits to get the cutting path to go where you want it. A little more setup time and effort, but all easy concepts to grasp, and well documented on the interwebs.

They are one of the most versatile wood working tools available. I have five of them. :D Can't count the number of times I have used them on my build, it's too many.

As Sharon has pointed out, building a box using full length cleats will result in a much less refined appearance that may be more utilitarian than some people would prefer, but is still a viable option for someone who has expressed a lack of design and fabrication skills.

On the flip side, Mariann, if I may be so bold as to speak for the group, we all have seen a lot of people (sometimes ourselves included) who come on here with some trepidation and end up finding out that they (we), too, can build a surprisingly impressive small camper. That's why we think you can do it, too.

So don't sell yourself short. As Henry Ford once said (paraphrased), "If you think you can't, you are right."
KC
My Build: The Poet Creek Express Hybrid Foamie

Poet Creek Or Bust
Engineering the TLAR way - "That Looks About Right"
TnTTT ORIGINAL 200A LANTERN CLUB = "The 200A Gang"
Green Lantern Corpsmen
User avatar
KCStudly
Donating Member
 
Posts: 9616
Images: 8169
Joined: Mon Feb 06, 2012 10:18 pm
Location: Southeastern CT, USA
Top

Re: First build 5x10 Rimple design

Postby S. Heisley » Thu Jan 21, 2016 11:02 pm

KCStudly wrote:I think we are trying to say that the router method, or knit corner is very much preferred. One really shouldn't be afraid of routers (except for a healthy dose of safety awareness, as with all power tools). The only real difference in handling a router is that it can go in any direction, whereas the tools you are already familiar with, such as the circular and jig saws, tend to go more in a line. So with a router you have to use straight edges, guide collar jigs, trammels and/or roller guided bits to get the cutting path to go where you want it. A little more setup time and effort, but all easy concepts to grasp, and well documented on the interwebs.

They are one of the most versatile wood working tools available. I have five of them. :D Can't count the number of times I have used them on my build, it's too many.

As Sharon has pointed out, building a box using full length cleats will result in a much less refined appearance that may be more utilitarian than some people would prefer, but is still a viable option for someone who has expressed a lack of design and fabrication skills.

On the flip side, Mariann, if I may be so bold as to speak for the group, we all have seen a lot of people (sometimes ourselves included) who come on here with some trepidation and end up finding out that they (we), too, can build a surprisingly impressive small camper. That's why we think you can do it, too.

So don't sell yourself short. As Henry Ford once said (paraphrased), "If you think you can't, you are right."


:thumbsup: Oh, KC, you write so eloquently! And, you're correct, too! :thumbsup:
User avatar
S. Heisley
Super Lifetime Member
 
Posts: 8774
Images: 495
Joined: Mon Sep 17, 2007 10:02 am
Location: No. California
Top

Re: First build 5x10 Rimple design

Postby mariannf » Fri Jan 22, 2016 12:51 am

KC I've been watching router tutorials and might give this a go todo the rabbet joint to join the walls. Question: for 3/4 ply what do you recommend the rout be in terms of width and depth?
User avatar
mariannf
Teardrop Master
 
Posts: 193
Joined: Wed Oct 28, 2015 3:13 am
Top

PreviousNext

Return to Build Journals

Who is online

Users browsing this forum: smeerkees and 14 guests