Dusty Mark's 5 x 10 Build

...ask your questions in the appropriate forums BUT document your build here...preferably in a single thread...dates for updates, are appreciated....

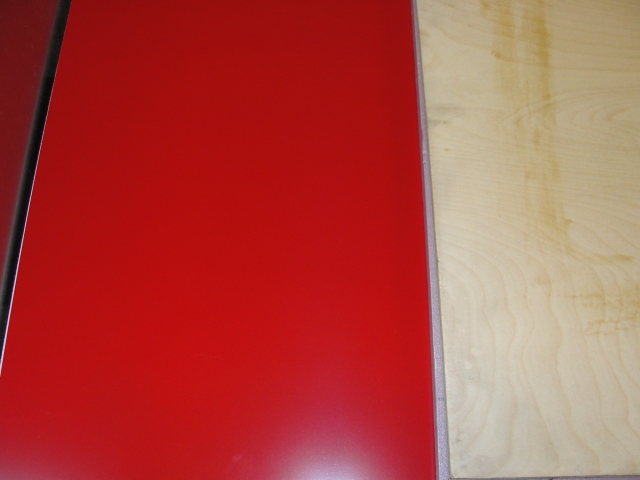
Picked Up the Aluminum

Postby Dusty Mark » Tue May 31, 2016 11:05 pm

I ordered aluminum for skinning through a very helpful local aluminum cabinet manufacturer. He was able to get the .040 red that I wanted for the sides and galley lid. His suppliers didn't stock .040 mill finish, so I had to go with .060 for the roof. 2 @ 4' x 10' red, 1 @ 4' x 8' red, 1 @ 5' x 10' mill finish, and 1@ 4' x 8' mill finish came to $447 with tax. He tacked my order in with his order for a recent big job he's about to start.

Image

Red!
Dusty Mark
Teardrop Master
 
Posts: 210
Images: 395
Joined: Mon Feb 29, 2016 6:57 pm

Re: Dusty Mark's 5 x 10 Build

Postby KCStudly » Wed Jun 01, 2016 1:02 pm

You are doing really nice, clean work.

If it's not too late you may want to consider a change to your circuitry. While it is perfectly acceptable to group multiple loads onto a single circuit (within the capacity of the wires) it is always a good practice to divide up services, such as lighting, onto separate circuits so that if one circuit goes down you are not left in the dark.

In other words, instead of putting all of your cabin inside lights on one circuit, and all of your outside lights on another, crisscross them; put one interior light and one porch light on one circuit and the other pair on the second. $0.02
KC
My Build: The Poet Creek Express Hybrid Foamie

Poet Creek Or Bust
Engineering the TLAR way - "That Looks About Right"
TnTTT ORIGINAL 200A LANTERN CLUB = "The 200A Gang"
Green Lantern Corpsmen
User avatar
KCStudly
Donating Member
 
Posts: 9615
Images: 8169
Joined: Mon Feb 06, 2012 10:18 pm
Location: Southeastern CT, USA

Re: Dusty Mark's 5 x 10 Build

Postby Dusty Mark » Wed Jun 01, 2016 5:56 pm

Thanks, that's great advice. If I hadn't already wired those lights twice, I would have made the change to how the circuits are shared. At this point, I'll be rolling with what I've got and headlamps as a backup. :)
Dusty Mark
Teardrop Master
 
Posts: 210
Images: 395
Joined: Mon Feb 29, 2016 6:57 pm
Top

Expert Plumber Secured!

Postby Dusty Mark » Thu Jun 02, 2016 1:06 pm

After reading many of the posts about plumbing LPG lines on this and other forums, I decided to hire a plumber to help with running the line from the tank on the tongue to the oven in the galley. I spoke with the plumber who plumbed our new construction two years ago and he'll swing by after I've done the prep work to inspect my work, flare the copper tubing, and leak check the system...YES! Besides welding the frame, this is the only other aspect of the build that I needed to contract out...
Dusty Mark
Teardrop Master
 
Posts: 210
Images: 395
Joined: Mon Feb 29, 2016 6:57 pm
Top

Re: Dusty Mark's 5 x 10 Build

Postby Mushin » Thu Jun 02, 2016 2:46 pm

Smart move, sometimes it's better to be safe than sorry

Sent from my SM-G920V using Tapatalk
User avatar
Mushin
Teardrop Master
 
Posts: 119
Joined: Tue Dec 15, 2015 2:21 pm
Top

Re: Dusty Mark's 5 x 10 Build

Postby Dusty Mark » Thu Jun 02, 2016 9:35 pm

Yep, and it likely won't cost me much more than a flaring tool!
Dusty Mark
Teardrop Master
 
Posts: 210
Images: 395
Joined: Mon Feb 29, 2016 6:57 pm
Top

Re: Dusty Mark's 5 x 10 Build

Postby KCStudly » Fri Jun 03, 2016 12:04 pm

Isn't copper subject to fracture when used in a vibration prevalent application? I suspect that your plumber will probably recommend black pipe with some sort of ready made flex hose for the final connections, perhaps of a corrugated metal variety.

Dunno, I'm not up on the latest materials and techniques, but to my understanding copper hard line (even the soft stuff) will work harden and crack with vibration.
Last edited by KCStudly on Sun Jun 05, 2016 9:03 pm, edited 1 time in total.
KC
My Build: The Poet Creek Express Hybrid Foamie

Poet Creek Or Bust
Engineering the TLAR way - "That Looks About Right"
TnTTT ORIGINAL 200A LANTERN CLUB = "The 200A Gang"
Green Lantern Corpsmen
User avatar
KCStudly
Donating Member
 
Posts: 9615
Images: 8169
Joined: Mon Feb 06, 2012 10:18 pm
Location: Southeastern CT, USA
Top

Re: Dusty Mark's 5 x 10 Build

Postby Dusty Mark » Sat Jun 04, 2016 11:08 am

Your reply got me to evaluate why I had switched from black pipe to copper. The only reason was that I had no way of threading black pipe after I found out that the local store no longer custom threaded pipe. I solved that this morning by ordering a Tektron ratcheting pipe threading kit and pipe cutter from Amazon. Another $100 spent is nothing on this expensive build...
Dusty Mark
Teardrop Master
 
Posts: 210
Images: 395
Joined: Mon Feb 29, 2016 6:57 pm
Top

Re: Dusty Mark's 5 x 10 Build

Postby noseoil » Sat Jun 04, 2016 11:20 am

"Another $100 spent is nothing on this expensive build..." Preaching to the choir there on this one!
Build log: viewtopic.php?f=50&t=60248
The time you spend planning is more important than the time you spend building.........

137905
User avatar
noseoil
1000 Club
1000 Club
 
Posts: 1820
Images: 669
Joined: Sun Apr 27, 2014 8:46 am
Location: Raton, New Mexico, living the good life!
Top

Roof Insulation Fit and Glued

Postby Dusty Mark » Sun Jun 05, 2016 12:18 am

I'm making steady progress on the teardrop. The 1/8" plywood roof panels are fitted and sealed. Today I fitted and glued in the roof insulation. This took way longer than I expected, but it turned out well.

Image

I insulated the front storage module first. Notice the vertical solid wood piece that will provide a solid mount for my LP gas regulator.

Image

Deep relief kerfs allow the foam to bend around the roof curves. I routed channels for the wiring.

Image

This is over the cabin dome light.

Image

This is the porch light junction.

Image

1/4" Baltic birch clamping boards screwed in with washer head screws provide enough pressure to hold the foam in position while the glue dries.

Image

I'll even out the plywood roof edge and the solid wood spacers with a hand plane tomorrow and then staple and glue the roof in place. I also need to install foam in the space on either side of the front storage module. The plan is to apply the aluminum sides on Tuesday afternoon!
Dusty Mark
Teardrop Master
 
Posts: 210
Images: 395
Joined: Mon Feb 29, 2016 6:57 pm
Top

Re: Dusty Mark's 5 x 10 Build

Postby retep » Sun Jun 05, 2016 7:28 am

Great work Mark. You are moving along really nicely and doing a fabulous job with your build. Very inspiring for me to get started. Cant wait to see the aluminium.

Thanks for sharing your work.

Peter
retep
Teardrop Master
 
Posts: 106
Joined: Wed Mar 16, 2016 3:55 pm
Top

Re: Dusty Mark's 5 x 10 Build

Postby Dusty Mark » Sun Jun 05, 2016 10:02 am

Thanks! I'm a retired Air Force pilot and substitute teach in the local schools. I blocked out two days per week for the build once I started and that helped me keep it moving. Now that school is out, I'm racing along at a "stupid" pace. You know that you're close when you're tripping over the aluminum for your teardrop's skin sitting on the garage floor! 8)
Dusty Mark
Teardrop Master
 
Posts: 210
Images: 395
Joined: Mon Feb 29, 2016 6:57 pm
Top

Roof Installed

Postby Dusty Mark » Sun Jun 05, 2016 11:38 pm

Mary helped me install the roof tonight. I used polyurethane construction adhesive and 3/8" crown staples to hold it down.

Image

It's looking more and more like a camper.

Image

It was a pretty uneventful assembly since I drew lines for where the staples should run and also laid tape where they were supposed to avoid the wiring in the ceiling.

Image

I smoothed the curve at the roofline with a hand plane before assembly and this helped give clean lines in the final assembly.

Image

I'll flush the edge with a router tomorrow and apply some CPES to the end grain. We'll then be ready to fit the aluminum skin for the sides!
Dusty Mark
Teardrop Master
 
Posts: 210
Images: 395
Joined: Mon Feb 29, 2016 6:57 pm
Top

Re: Dusty Mark's 5 x 10 Build

Postby KCStudly » Mon Jun 06, 2016 6:22 am

That's looking really nice! :thumbsup:
KC
My Build: The Poet Creek Express Hybrid Foamie

Poet Creek Or Bust
Engineering the TLAR way - "That Looks About Right"
TnTTT ORIGINAL 200A LANTERN CLUB = "The 200A Gang"
Green Lantern Corpsmen
User avatar
KCStudly
Donating Member
 
Posts: 9615
Images: 8169
Joined: Mon Feb 06, 2012 10:18 pm
Location: Southeastern CT, USA
Top

Re: Dusty Mark's 5 x 10 Build

Postby justageorgiaguy » Mon Jun 06, 2016 8:57 am

I love this build. Are you going to install a fan as well (fantastic, maxxair etc) or rely only on the A/C? I thought the cutout was for a fan, but then I read it was to pull the heat off the A/C rear. Thanks!
James Davidson
Photographer
http://www.jdavidsonphoto.com
User avatar
justageorgiaguy
Teardrop Advisor
 
Posts: 79
Joined: Wed Aug 04, 2010 8:50 am
Location: Cochran, GA
Top

PreviousNext

Return to Build Journals

Who is online

Users browsing this forum: No registered users and 3 guests