Dusty Mark's 5 x 10 Build

...ask your questions in the appropriate forums BUT document your build here...preferably in a single thread...dates for updates, are appreciated....

Unintended Innovation...

Postby Dusty Mark » Sun Jul 03, 2016 3:18 pm

We had enough material left over from the futon to make a storage bag for our comforter. Mary cranked it out pretty quick.

Image

Her initial thoughts on dimensions were a little big. I knew the comforter would scrunch down pretty good since it's filled with Primaloft. She made it 12" x 12" x 18".

Image

Once we placed the bag inside the teardrop cabin, Mary realized it would make a great ottoman...and it does! We move the remaining underfloor storage board to place the ottoman for maximum comfort. Glamping???
Dusty Mark
Teardrop Master
 
Posts: 210
Images: 395
Joined: Mon Feb 29, 2016 6:57 pm

Re: Dusty Mark's 5 x 10 Build

Postby Mushin » Sun Jul 03, 2016 8:44 pm

Really great build, something to be proud of for years. The couch is a cool idea.
One question, the spring stabilizers (is that what there called? )do you think they would still work holding a galley hatch at an angle, not straight up and down like yours?
I have a square back trailer and was considering them instead of gas struts, but they would have to be at an angle.


Sent from my SM-G920V using Tapatalk
User avatar
Mushin
Teardrop Master
 
Posts: 119
Joined: Tue Dec 15, 2015 2:21 pm

Re: Dusty Mark's 5 x 10 Build

Postby Dusty Mark » Mon Jul 04, 2016 1:02 am

Thanks. We first saw the couch idea on the Vistabule site. We adapted it to what I think is a simpler design. It's quite comfy.

I'm not sure if those springs would work at an angle. In all the photos I've found, they were mounted vertically. You could ask Frank at Vintage Technologies or the folks at Oregon Trail'r (where I bought mine) about mounting them at an angle. I like mine even more now that they're backed up with a safety strut...
Dusty Mark
Teardrop Master
 
Posts: 210
Images: 395
Joined: Mon Feb 29, 2016 6:57 pm
Top

Re: Dusty Mark's 5 x 10 Build

Postby brx017 » Mon Jul 04, 2016 3:29 pm

Hey Mark, I've been following your build closely as my design is similar to yours in a lot of ways. You've really done a great job on your build!

Would you mind sharing some more details on your bed/sofa design? If you check out my build thread, I've designed and built a prototype of a 3-piece folding sofa that is very similar to the vistabule or gidget, but I haven't committed to it yet in my build.

Sent from my Nexus 6P using Tapatalk
User avatar
brx017
Teardrop Master
 
Posts: 126
Images: 4
Joined: Wed Feb 24, 2016 4:28 am
Location: Taylorsville, NC
Top

Sofa Details

Postby Dusty Mark » Tue Jul 05, 2016 12:12 am

Thanks! Here's a little more detail about our sofa. It uses two of the three sections of the underfloor storage covers as a base. Those two sections are joined together by hinges. The covers are 1/4" Baltic birch with 1/2" Baltic birch stapled and glued around the edges and also additional reinforcement strips for the wider pieces. This keeps them light enough to manage while converting between bed and sofa mode.

Image

The short section which elevates your legs is 4" deep and the section you actually sit on is 21.5" deep. I insert a pin in front of the frame on each side to keep it from sliding forward and collapsing. A cleat with a dowel might work and look better, but I'm starting with the metal pin. I haven't seen a need to restrain the frame from rearward movement since the plywood base of the cushion is 25" and it contacts the floor solidly.

Image

I leave the underfloor storage divider in to support the pieces in the middle.

Image

Converting from bed to sofa involves folding the hinged pieces and moving/sliding them to the headboard area. I then lift the bottom cushion up and slide the underfloor storage covers in place. This can be done solo, but it's easier with two people. The hinged cushion that forms the backrest rests against the headboard area. The free cushion, which is normally the foot piece of the mattress becomes the cushion your back actually rests on.

I think the sofa is going to be a "game changer" for comfort. If you need more pictures or explanation, let me know. I hope this helps...
Last edited by Dusty Mark on Tue Jul 05, 2016 9:27 am, edited 1 time in total.
Dusty Mark
Teardrop Master
 
Posts: 210
Images: 395
Joined: Mon Feb 29, 2016 6:57 pm
Top

Spare Tire Holder

Postby Dusty Mark » Tue Jul 05, 2016 12:29 am

A good friend and I were surveying the teardrop and he suggested there was room for the spare under the galley. He was right!

Image

I used three 1/2" carriage bolts and drove them through the lower galley cupboard floor.

Image

The bolts weren't threaded quite far enough, so I used a bigger nut as a spacer. The nibs in the elastomeric paint are from a disintegrating roller. You're the only ones who will see that!

Image

I made a disc from scrap 3/4" Baltic birch to protect my rim from the washers. I coated it liberally with CPES.

Image

It's tricky getting the tire mounted, but it comes off real easy! I'll replace the plain nuts with lock nuts tomorrow.

Image

I've got 8" of clearance with the full-size spare mounted. I'm sure that will be enough, but if I'm wrong I can move the spare back to the car and cut the bolts flush with the nuts. (Nothing ventured, nothing gained.) Another plus is that it reduced my tongue weight!
Dusty Mark
Teardrop Master
 
Posts: 210
Images: 395
Joined: Mon Feb 29, 2016 6:57 pm
Top

Custom Screen for AC Intake Hatch

Postby Dusty Mark » Tue Jul 05, 2016 2:04 pm

The little details "kill" you as you try to finish up a build. I have a large marine hatch on the passenger's side to supply fresh air for the air conditioner. That's an entry point for bugs. I decided to make a friction fit screen and also a prop to hold the hatch open during AC operations.

Image

Frames were fabricated from scrap 3mm plywood from the ceiling/roof to sandwich screen material. I experimented with the first one until I had a "good enough" fit and traced the second one. A liberal coat of CPES was applied before assembly.

Image

The screen and prop slot were cut prior to assembly.

Image

A liberal coat of polyurethane construction adhesive was applied before stapling with 1/4" staples from the back side. The staple tips popped through a little on the front side, but not enough to be a problem.

Image

The prop is made from 1/8" thick aluminum and is designed to wedge into the AC side venting and the ribbing of the hatch.

Image

It looks like everything should hold well in the winds without any additional fastening. I'll paint the screen frame black once the glue sets up better.
Dusty Mark
Teardrop Master
 
Posts: 210
Images: 395
Joined: Mon Feb 29, 2016 6:57 pm
Top

Re: Dusty Mark's 5 x 10 Build

Postby brx017 » Tue Jul 05, 2016 3:26 pm

Thanks for the sofa info. I like the simplicity of your design. I may go back to the drawing board and decide of I really need to go with the folding bed concept. I work at a furniture factory, and modeled the dimensions and seat and back pitch after one of our smaller chairs that sits really comfortably.

http://www.mgbwhome.com/MAJOR-CHAIR-SATIN-BRASS-FINISH-LEATHER-P9739.aspx

For your back, are you just leaning the cushion against your front wall/cabinet? With my trailer's side profile I think I need to be off the front cabinet/wall about a foot to keep enough headroom while sitting.

Another thought I have is splitting the sofa into two chairs, so one person could be sitting while the other is laying down. Also, it would make setting up easier for one person. I like your removable divider idea too. How deep is your storage box? Looks like you maybe used 1x6s?

Sent from my Nexus 6P using Tapatalk
User avatar
brx017
Teardrop Master
 
Posts: 126
Images: 4
Joined: Wed Feb 24, 2016 4:28 am
Location: Taylorsville, NC
Top

Re: Dusty Mark's 5 x 10 Build

Postby Dusty Mark » Tue Jul 05, 2016 4:13 pm

Yes, the back cushion with the plywood bottom rests against front camper wall. I was concerned about headroom, but using the third cushion as a back cushion pushed my head away from the wall another 4". We toyed with the idea of splitting the cushion for the same reasons you discussed, but decided in favor of less cushions and against that center gap. My underfloor storage has 6" of usable depth.

The chair you shared in the link looks comfy. You could duplicate the angles with either of our designs...
Dusty Mark
Teardrop Master
 
Posts: 210
Images: 395
Joined: Mon Feb 29, 2016 6:57 pm
Top

Weigh-In Results

Postby Dusty Mark » Wed Jul 06, 2016 1:46 pm

I took the teardrop to the local transfer station and it weighed in at 1,520 pounds. That's with a stocked galley, empty cooler, and a full 20-pound propane tank. The only things we'll add to that will be our screen tent, folding table, folding chairs, clothes and fill the cooler. I'm pleased with this weight since it includes a large battery, air conditioner, oven/stove, heavy cooler, and a full-size spare.
Dusty Mark
Teardrop Master
 
Posts: 210
Images: 395
Joined: Mon Feb 29, 2016 6:57 pm
Top

Propane System Plumbed

Postby Dusty Mark » Wed Jul 06, 2016 2:50 pm

I plumbed the propane system plumbed last week, but didn't post about it until I had it free of leaks. On my first attempt, I stripped the regulator while installing the hose from the tank to the regulator. That was the only joint that leaked when I sprayed leak detector on every joint. Since the regulator is mounted tight against the front storage module, that meant I had to drop all the pipes to replace the regulator and supply hose...ouch! I replaced the stripped components this morning. The system is leak free and the oven and stove work great.

Image

I bought the propane stand on e-Bay. The tank is a 20 pounder. The regulator is a Camco vertical two-stage.

Image

Seeing the previous picture reminded me to go out and re-install the protective plastic covers on the regulator! The output is 3/8" black pipe. The brackets are pieces of 1/8" aluminum stock that is screwed to the regulator via it's pre-threaded mount holes. This provided a secure means to screw the regulator to the front storage module.

Image

While framing the storage module, I pre-positioned a 3/4" thick piece of wood in the front wall to provide a place to securely screw in the regulator.

Image

This elbow transitions the system from 3/8" to 1/2" just under the regulator. I couldn't find long lengths of 3/8" black pipe locally, so I was forced to use 1/2" black pipe under the trailer. The support blocks are UHMW plastic that won't rot.

Image

This is the leading edge of the underfloor storage. It was a convenient place to change direction and work closer to the floor.

Image

The pipe routes over the axle and then back under the next frame crossmember.

Image

This aluminum bracket from Oregon Trail'r is pretty handy. The pipe goes through the galley floor to the back side of the stove. The elbow transitions from 1/2" back to 3/8".

Image

It makes good sense to have a shut-off valve at both ends of the system. The simple bracket and hose clamp hold the pipe solidly.
Last edited by Dusty Mark on Wed Jul 06, 2016 9:18 pm, edited 3 times in total.
Dusty Mark
Teardrop Master
 
Posts: 210
Images: 395
Joined: Mon Feb 29, 2016 6:57 pm
Top

Re: Dusty Mark's 5 x 10 Build

Postby Nobes » Wed Jul 06, 2016 4:11 pm

Excellent work! Thanks for sharing and well done.
Nobes
Teardrop Master
 
Posts: 214
Images: 508
Joined: Sun Dec 20, 2015 5:01 am
Top

Re: Dusty Mark's 5 x 10 Build

Postby Dusty Mark » Wed Jul 06, 2016 8:39 pm

You're welcome. Other builders' journals are a good source of ideas when you're in the middle of planning or executing your own build. For instance, propane is kind of the "boogey man" for a lot of people, so I figured it might be helpful to share my experience to include the first setback.
Dusty Mark
Teardrop Master
 
Posts: 210
Images: 395
Joined: Mon Feb 29, 2016 6:57 pm
Top

Put it to Use!

Postby Dusty Mark » Wed Jul 13, 2016 1:48 pm

Mary and I have camped in our teardrop twice now and really like it.

Image

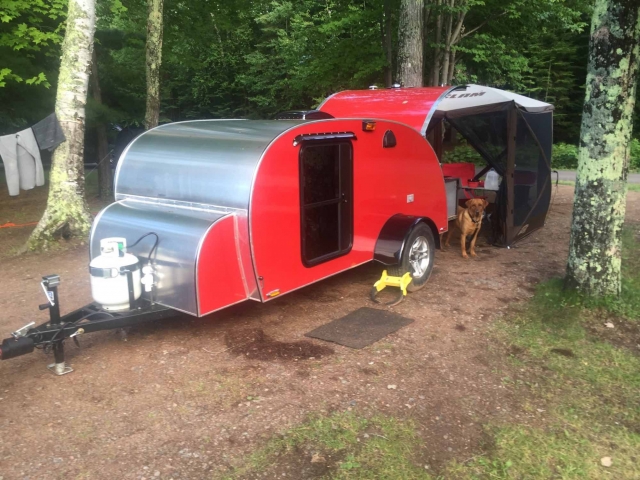
Our first trip was two nights at Little Sand Bay Campground on the Apostle Islands National Lakeshore in WI. We combined camping with sea kayaking. The kennel system and vent worked well for Copper to be secure and comfortable back at camp for a little while as we paddled.

Image

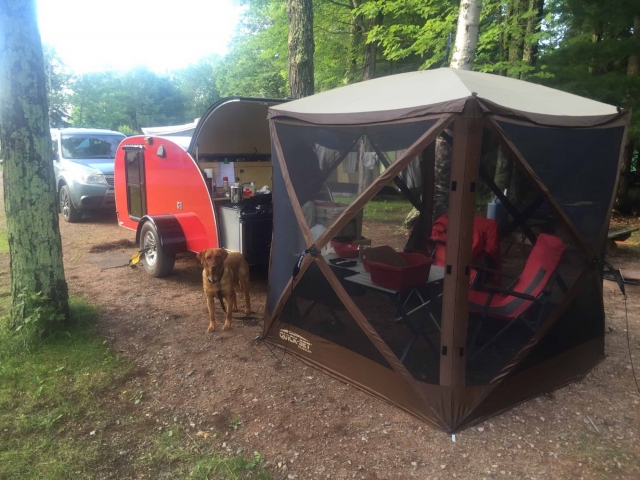
We really like how easily the Clam 6' by 6' screen house sets up. Our plan is to fabricate a tunnel that connects the teardrop galley to the screen house. I'll be ordering material for that tomorrow.

Image

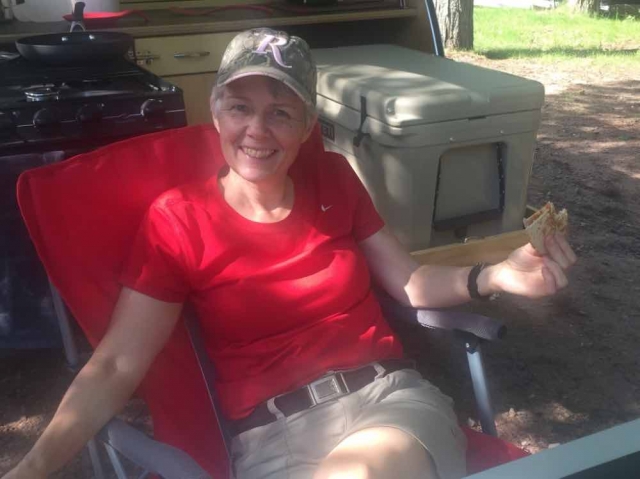
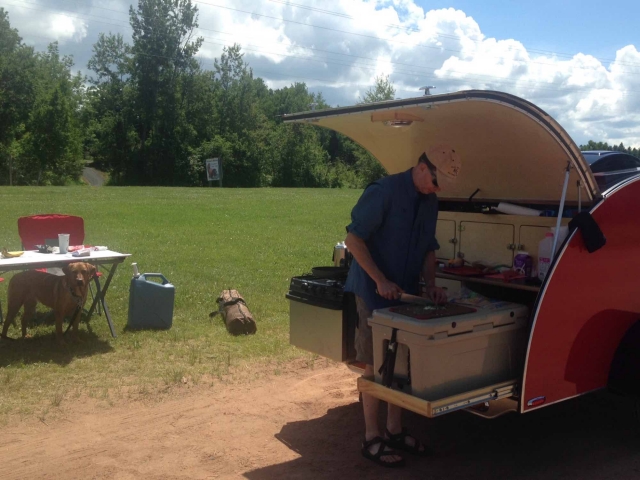
I made Mary a quesadilla for our first meal from the galley. She liked it...

Image

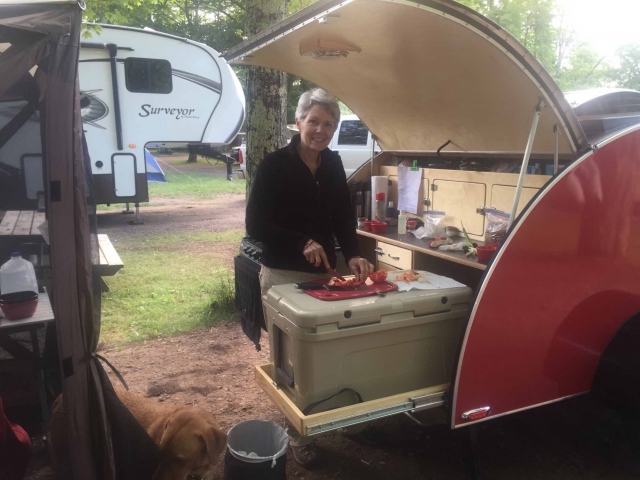
Mary prepping ingredients for stir fry. Our mini wok worked well. However, we need to make some wind screens from scrap aluminum to keep the wind from robbing all the heat.

Image

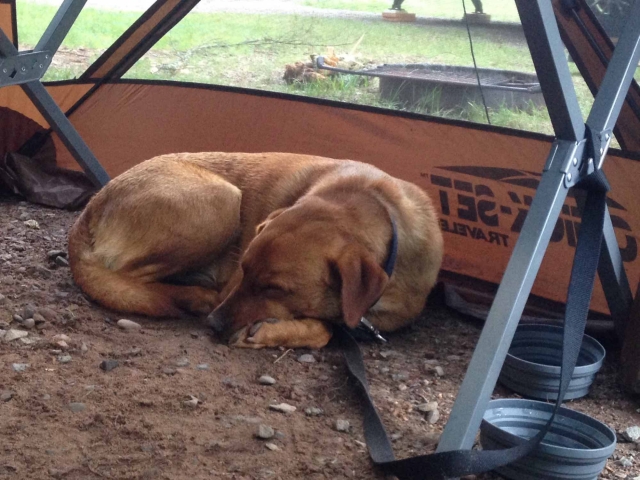
Copper likes to be near us, so the area under the table is a good spot for him. We'll bring his outdoor pad next time.

Image

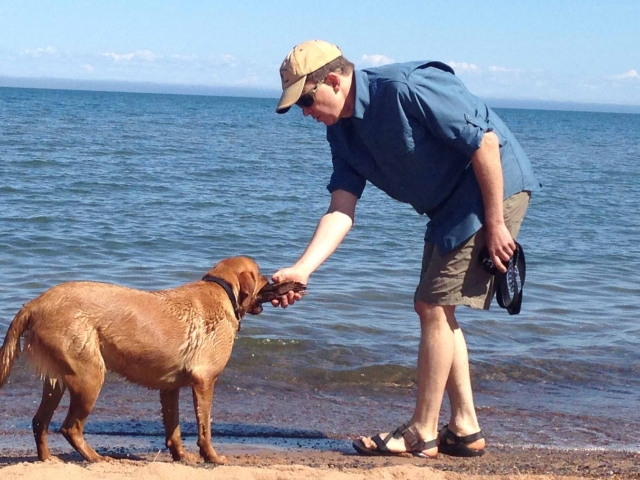
Copper probably did about 30 retrieves in Lake Superior over the course of two days. He was tired after all that swimming.

Image

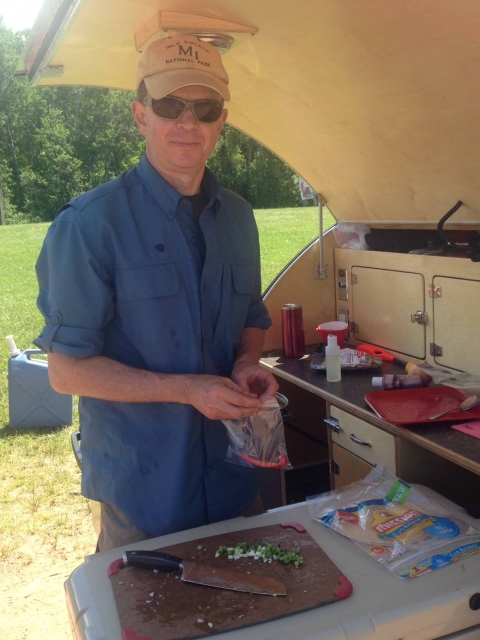
On the way home from the first trip we stopped at Cornucopia, WI and bought some locally smoked lake trout and smoked Gouda cheese. We set up at a wayside rest along Lake Superior and made some quesadillas.

Image

We gave a lot of tours of the teardrop at that stop!

Image

We've had 30 mph winds up here and are finding that the camper tows super stable. There is no sway and the winds don't even make it wander. Our Subaru Forester with a manual transmission tows the 1,700 pound load well. I need to build spacers to raise the A-frame jack about 1.5". It rides dangerously close to the road. I'll start that modification today.

Image

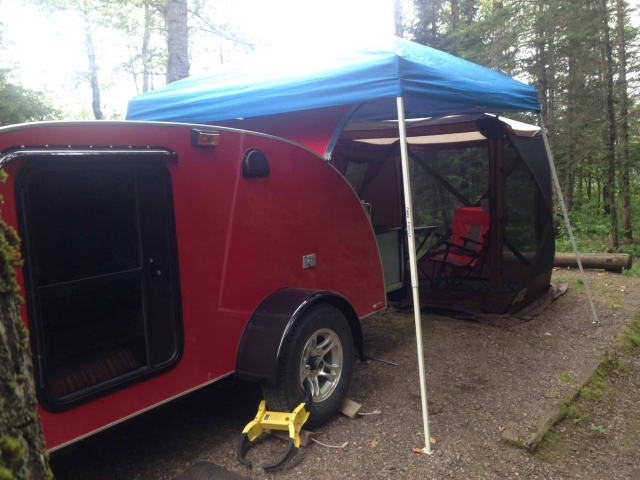
Our second trip was two nights and called for heavy rains, so we brought the EZ-Up canopy. It worked well to keep us dry while working in the galley. I do have a small leak in the hurricane hinge that wets the upper galley shelf. I'll start by caulking that to see if I can stop it without removing the hinge entirely.

Image

The Clam screen house did well at keeping the bugs out at a buggy campsite at Cadotte Lake in the Superior National Forest in northern MN.

I plan to keep journaling our improvements to the teardrop build.
Dusty Mark
Teardrop Master
 
Posts: 210
Images: 395
Joined: Mon Feb 29, 2016 6:57 pm
Top

Re: Dusty Mark's 5 x 10 Build

Postby KCStudly » Wed Jul 13, 2016 2:11 pm

Nice job! Thanks for sharing your adventure. :thumbsup:

There has been some discussion about hurricane hinges leaking thru the extrusion, especially when in the open position. One solution was to line the gap in the 'C' shape of the extrusion with weatherstripping. Have you seen this/these thread(s) and are you sure this is not the same problem you are having? More caulk may not be the solution.
Last edited by KCStudly on Wed Jul 13, 2016 9:56 pm, edited 1 time in total.
KC
My Build: The Poet Creek Express Hybrid Foamie

Poet Creek Or Bust
Engineering the TLAR way - "That Looks About Right"
TnTTT ORIGINAL 200A LANTERN CLUB = "The 200A Gang"
Green Lantern Corpsmen
User avatar
KCStudly
Donating Member
 
Posts: 9611
Images: 8169
Joined: Mon Feb 06, 2012 10:18 pm
Location: Southeastern CT, USA
Top

PreviousNext

Return to Build Journals

Who is online

Users browsing this forum: No registered users and 9 guests