And it begins... Generic Benroy Build

...ask your questions in the appropriate forums BUT document your build here...preferably in a single thread...dates for updates, are appreciated....

And it begins... Generic Benroy Build

Postby phanslin » Wed Apr 06, 2016 9:34 pm

I received my NT trailer on Friday, and put it together. I'll have my lumber on Monday, and will begin construction! Here is my final design. I would love any input.

Thanks for all of the resources here!
Attachments
Screen Shot 2016-04-06 at 7.18.32 PM.png
Screen Shot 2016-04-06 at 7.18.32 PM.png (50.92 KiB) Viewed 3129 times
phanslin
Teardrop Builder
 
Posts: 25
Images: 1
Joined: Sun Jun 08, 2014 8:19 am

Re: And it begins... Generic Benroy Build

Postby azgreg » Thu Apr 07, 2016 2:43 pm

Are you using a single door?
User avatar
azgreg
Donating Member
 
Posts: 135
Joined: Mon Jan 21, 2008 10:30 pm

Re: And it begins... Generic Benroy Build

Postby phanslin » Fri Apr 08, 2016 9:58 am

I am using a single door.
phanslin
Teardrop Builder
 
Posts: 25
Images: 1
Joined: Sun Jun 08, 2014 8:19 am
Top

Re: And it begins... Generic Benroy Build

Postby phanslin » Wed Apr 13, 2016 8:33 pm

Today I framed out the floor, and cut the pieces for sub-floor storage. I plan on having 1/2" CDX above the frame, and sanded 1/4" Arauco on top of that. I will insulate the floor, and want to know if I should cover it with 1/4" or will Henry's be enough?

Tomorrow I plan on putting the storage boxes together. The front (closest to TV) will be 32"x21", and other will be 48"x21". They're 9" deep.
Attachments
Floor.jpg
Floor.jpg (185.73 KiB) Viewed 2885 times
Frame.jpg
Frame.jpg (211.67 KiB) Viewed 2885 times
phanslin
Teardrop Builder
 
Posts: 25
Images: 1
Joined: Sun Jun 08, 2014 8:19 am
Top

Re: And it begins... Generic Benroy Build

Postby tony.latham » Wed Apr 13, 2016 11:56 pm

Is that shelf a sleep platform for a child? (Otherwise I think it'll be in the way.)

I'd suggest you build the non-door wall so that you can add a second one later. Putting two people in a teardrop with one door, is like pushing a bed for two into a corner. Plus you really need lots of ventilation in a 'drop.

But it looks good!

Tony
User avatar
tony.latham
Gold Donating Member
 
Posts: 6900
Images: 17
Joined: Mon Jul 08, 2013 4:03 pm
Location: Middle of Idaho on the edge of nowhere
Top

Re: And it begins... Generic Benroy Build

Postby phanslin » Thu Apr 14, 2016 10:43 am

Tony,

It is a bunk for our son. It will fold up when he is not with us. I like the idea of building the wall to support the addition of another door.

I hope to get the wall construction underway next week. I plan on Titebond ii for the core of the walls, and PL around the edges. My question is will that be enough? Should I use Brad nails, or screw them down at all?

Thanks again for everyones input!
phanslin
Teardrop Builder
 
Posts: 25
Images: 1
Joined: Sun Jun 08, 2014 8:19 am
Top

Re: And it begins... Generic Benroy Build

Postby tony.latham » Thu Apr 14, 2016 9:29 pm

phanslin wrote:Tony,

It is a bunk for our son. It will fold up when he is not with us. I like the idea of building the wall to support the addition of another door.

I hope to get the wall construction underway next week. I plan on Titebond ii for the core of the walls, and PL around the edges. My question is will that be enough? Should I use Brad nails, or screw them down at all?

Thanks again for everyones input!


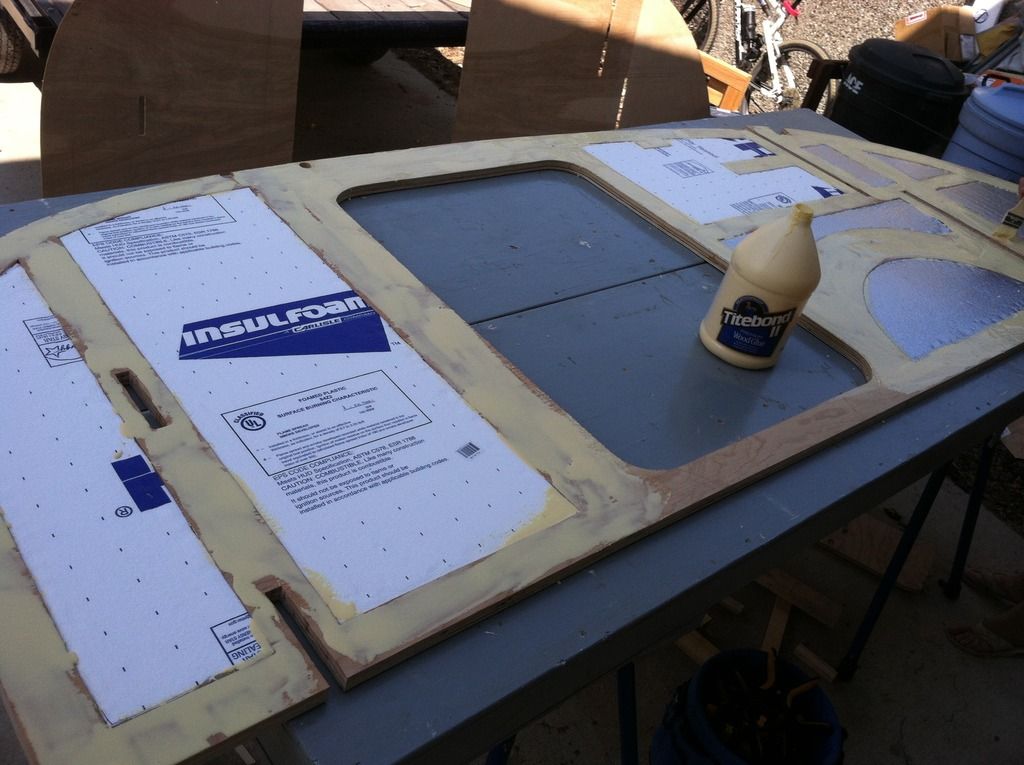
Put the Titebond on with two people working with dixie cups and chip brushes. You have to work fine. Really slop it on. (What's a little squeeze out?)

Image

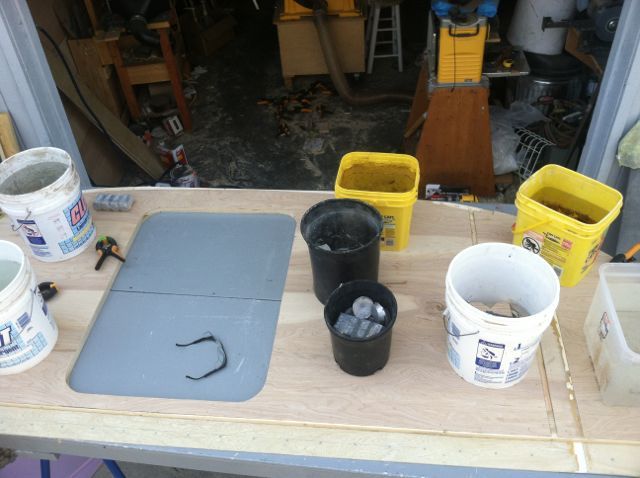
I like to use both weight and a 1/4" crown stapler (push hard, and then thunk a staple in).

Image

You can't have too much weight. The weight alone in that photo wasn't enough to push down the open areas.

I'd suggest you attach–-with screws or clamps––wood blocks on your exterior so that when you set it on your skeleton, it keys to where it needs to end up. Otherwise it'll want to slide around on the glue. Once the weight and staples (or grabber screws) are on, remove the key blocks.

It also helps to set your skeleton on your exterior and pencil in where your cutouts are––so you don't have to guess where your screws/staples need to be.

Tony
User avatar
tony.latham
Gold Donating Member
 
Posts: 6900
Images: 17
Joined: Mon Jul 08, 2013 4:03 pm
Location: Middle of Idaho on the edge of nowhere
Top

Re: And it begins... Generic Benroy Build

Postby phanslin » Tue Apr 19, 2016 10:45 pm

tony.latham wrote:
phanslin wrote:Tony,

It is a bunk for our son. It will fold up when he is not with us. I like the idea of building the wall to support the addition of another door.

I hope to get the wall construction underway next week. I plan on Titebond ii for the core of the walls, and PL around the edges. My question is will that be enough? Should I use Brad nails, or screw them down at all?

Thanks again for everyones input!


Put the Titebond on with two people working with dixie cups and chip brushes. You have to work fine. Really slop it on. (What's a little squeeze out?)

Image

I like to use both weight and a 1/4" crown stapler (push hard, and then thunk a staple in).

Image

You can't have too much weight. The weight alone in that photo wasn't enough to push down the open areas.

I'd suggest you attach–-with screws or clamps––wood blocks on your exterior so that when you set it on your skeleton, it keys to where it needs to end up. Otherwise it'll want to slide around on the glue. Once the weight and staples (or grabber screws) are on, remove the key blocks.

It also helps to set your skeleton on your exterior and pencil in where your cutouts are––so you don't have to guess where your screws/staples need to be.

Tony


Tony,

Thanks for your reply. I've been following some of your posts, and would love to see a build journal if you have one available.

Take care,

Parker
phanslin
Teardrop Builder
 
Posts: 25
Images: 1
Joined: Sun Jun 08, 2014 8:19 am
Top

Re: And it begins... Generic Benroy Build

Postby KCStudly » Wed Apr 20, 2016 8:58 am

Tony is the proverbial "Phantom Builder". :lol:
KC
My Build: The Poet Creek Express Hybrid Foamie

Poet Creek Or Bust
Engineering the TLAR way - "That Looks About Right"
TnTTT ORIGINAL 200A LANTERN CLUB = "The 200A Gang"
Green Lantern Corpsmen
User avatar
KCStudly
Donating Member
 
Posts: 9613
Images: 8169
Joined: Mon Feb 06, 2012 10:18 pm
Location: Southeastern CT, USA
Top

Re: And it begins... Generic Benroy Build

Postby phanslin » Wed Apr 20, 2016 9:09 am

KCStudly wrote:Tony is the proverbial "Phantom Builder". :lol:


I know it! I've looked all over these forums, and see posts of awesome pictures detailing questions I've had. If only they were all available in a single resource;)
phanslin
Teardrop Builder
 
Posts: 25
Images: 1
Joined: Sun Jun 08, 2014 8:19 am
Top

Re: And it begins... Generic Benroy Build

Postby azgreg » Wed Apr 20, 2016 11:59 am

KCStudly wrote:Tony is the proverbial "Phantom Builder". :lol:

If I'm not mistaken Tony has one of his builds on Instructables.
User avatar
azgreg
Donating Member
 
Posts: 135
Joined: Mon Jan 21, 2008 10:30 pm
Top

Re: And it begins... Generic Benroy Build

Postby phanslin » Wed Apr 20, 2016 3:30 pm

Greg, I did a quick search and didn't find anything. If you have a link, that would be great..

Here are a few updates from today.

The floor is getting closer to completion. I mocked up the storage, and will mount them this afternoon (after my little guy gets his nap). I want it covered in the black stuff by days end so it'll be dry by the weekend.

I would love to hear any thoughts.

Take care,

Parker
Attachments
floor 3.png
floor 3.png (209.85 KiB) Viewed 2618 times
floor 2.png
floor 2.png (213.26 KiB) Viewed 2618 times
Floor.png
Floor.png (207.87 KiB) Viewed 2618 times
phanslin
Teardrop Builder
 
Posts: 25
Images: 1
Joined: Sun Jun 08, 2014 8:19 am
Top

Re: And it begins... Generic Benroy Build

Postby phanslin » Fri Apr 22, 2016 1:44 pm

Got some work in this morning. I was able to get the floor to a place where I am ready for some Henry's 107. I would like to know if you guys leave the underside of the floor (w/insulation) exposed, or cover it with 1/8 ply?

Ready to start on the walls Monday.
Attachments
IMG_1341.jpg
IMG_1341.jpg (186.73 KiB) Viewed 2514 times
phanslin
Teardrop Builder
 
Posts: 25
Images: 1
Joined: Sun Jun 08, 2014 8:19 am
Top

Re: And it begins... Generic Benroy Build

Postby KCStudly » Fri Apr 22, 2016 3:16 pm

I think that really depends on your region, the climate and conditions that you plan to do most of your traveling in. Some people have posted that they sealed the underside first and glued or fastened the insulation in afterwards with no outer protection and it has held up just fine.

I live in New England where there is a range of weather from hot and humid in the summer to dry and freezing in the winter; plenty of moisture and road sand debris year round. Plus I plan to travel long distances on dusty forest service roads, so for my build I wanted as few "chinks in the armor" as possible and went with a full skin under the floor. No place for dust, dirt or water to try and get in, and less likely to rip, tear or snag on sticks or branches that may get driven over (tree falls are fairly common on the Magruder).

To me this also allowed me to build the floor as a composite, or SIP like panel, using a much thinner skin on top (5mm (3/16 inch) top and bottom) yet still having plenty of strength.
KC
My Build: The Poet Creek Express Hybrid Foamie

Poet Creek Or Bust
Engineering the TLAR way - "That Looks About Right"
TnTTT ORIGINAL 200A LANTERN CLUB = "The 200A Gang"
Green Lantern Corpsmen
User avatar
KCStudly
Donating Member
 
Posts: 9613
Images: 8169
Joined: Mon Feb 06, 2012 10:18 pm
Location: Southeastern CT, USA
Top

Re: And it begins... Generic Benroy Build

Postby Mushin » Fri Apr 22, 2016 3:19 pm

Left mine with the insulation glued to underside of floor and then did 4 layers of tar over that, so far so good, had it in deep water without any issues....that I can see....

Sent from my SM-G920V using Tapatalk
User avatar
Mushin
Teardrop Master
 
Posts: 119
Joined: Tue Dec 15, 2015 2:21 pm
Top

Next

Return to Build Journals

Who is online

Users browsing this forum: No registered users and 31 guests