1947 Kenskill TD pseudo-restoration

...ask your questions in the appropriate forums BUT document your build here...preferably in a single thread...dates for updates, are appreciated....

Re: 1947 Kenskill TD pseudo-restoration

Postby lee senn » Fri Jun 10, 2016 2:21 pm

Great post and an even greater build. First as to kids at gatherings I think they would be a great addition. Kids have a tendency to add an enjoyable air to campouts and would certainly be welcome. As Woodbutcher said available space limgits their attendance but a tent for them should work well. I highly recommend Walk the Winds. I have attended all the previous ones but unfortunately will have to miss this year. Next year we will have Twain and Tears in Unionville Nevada, it is an every other year event. might be a longish drive for you but a great gathering. Thanks for the link to the Teardrop parts site as I am always in need of something. Hope to see you at one of the gatherings. Lee
lee senn
Donating Member
 
Posts: 199
Joined: Sat Aug 14, 2010 8:03 pm
Location: Twin Falls, Idaho

Re: 1947 Kenskill TD pseudo-restoration

Postby 3GKnight » Thu Jun 16, 2016 12:56 pm

lee senn wrote:Great post and an even greater build. First as to kids at gatherings I think they would be a great addition. Kids have a tendency to add an enjoyable air to campouts and would certainly be welcome. As Woodbutcher said available space limits their attendance but a tent for them should work well. I highly recommend Walk the Winds. I have attended all the previous ones but unfortunately will have to miss this year. Next year we will have Twain and Tears in Unionville Nevada, it is an every other year event. might be a longish drive for you but a great gathering. Thanks for the link to the Teardrop parts site as I am always in need of something. Hope to see you at one of the gatherings. Lee


Thanks Lee. I like taking the kids camping but really only if we're all by our lonesomes. My youngest is a 3 year old boy who is a handful. I don't mind putting a fluorescent shirt on him and letting him roam but don't like him disturbing neighbors. Most neighbors probably don't care, but you never know...
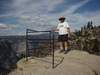
User avatar
3GKnight
Donating Member
 
Posts: 174
Images: 0
Joined: Wed May 28, 2014 3:43 pm
Location: Cheyenne, WY

Re: 1947 Kenskill TD pseudo-restoration

Postby 3GKnight » Thu Jun 16, 2016 1:06 pm

More and more progress made.

I'd rolled it onto the street to check for level. Was just able to get it back into the garage before a torrential downpour hit. This picture has also convinced me to clock the hubs down on the axles to give it a little more height.
Image

Go ahead, chuckle at my paint booth(s). It worked...almost.
Image

Got the sides primered (which made me decide to have a pro finish the paint,) doors hung and weatherstripped, and the inside painted. I also have an inquiry out to a vinyl decal maker about a custom graphic to go on the side. We'll keep that a surprise.
Image

Should I polish the doors? To match the chrome wheels & lights.

And I found a water jug that will fit the existing location. The lid even keeps it held in place!
Image
User avatar
3GKnight
Donating Member
 
Posts: 174
Images: 0
Joined: Wed May 28, 2014 3:43 pm
Location: Cheyenne, WY
Top

Re: 1947 Kenskill TD pseudo-restoration

Postby brx017 » Thu Jun 16, 2016 2:44 pm

3GKnight wrote:So I mad the mistake of putting in a 14 hour day on this thing last Saturday. A mistake in that it wiped me out and made me not like it...

I also made a pretty significant construction sequence mistake. The sides were not quite plumb without something in the galley pulling it together, and I thought I could get away with pulling the sides in after I built the countertop, shelves, and drawers. That was a wrong assumption. I built everything, pulled the sides in, and then the drawers didn't fit.

The pictures make it look much better than it really is...

Image

The water jug will be up on a little platform:
Image

The stove hides in that drawer when not in use, leaving a countertop extension otherwise.
Image

This is mid-fight with the drawer fitting. Grrrrrrrrr...
Image

It's certainly salvageable but still frustrating.

Would it be too much to ask for you to share your CAD files, at least of your galley? I'm thinking of doing the same basic layout minus the sink, I even want to use the same cooler. I can send you my email address if you wouldn't mind.

Sent from my Nexus 6P using Tapatalk
User avatar
brx017
Teardrop Master
 
Posts: 126
Images: 4
Joined: Wed Feb 24, 2016 4:28 am
Location: Taylorsville, NC
Top

Re: 1947 Kenskill TD pseudo-restoration

Postby 3GKnight » Thu Jun 16, 2016 3:27 pm

brx017 wrote:Would it be too much to ask for you to share your CAD files, at least of your galley? I'm thinking of doing the same basic layout minus the sink, I even want to use the same cooler. I can send you my email address if you wouldn't mind.


Certainly. I'll have to pull them off my laptop when I get home though. And fair warning, the galley with stove and cooler pulled out are for skinny butts only. :) The whole trailer is only a 4'er and that center sink/drawer section is only 1' wide.
User avatar
3GKnight
Donating Member
 
Posts: 174
Images: 0
Joined: Wed May 28, 2014 3:43 pm
Location: Cheyenne, WY
Top

Re: 1947 Kenskill TD pseudo-restoration

Postby brx017 » Thu Jun 16, 2016 10:49 pm

3GKnight wrote:
brx017 wrote:Would it be too much to ask for you to share your CAD files, at least of your galley? I'm thinking of doing the same basic layout minus the sink, I even want to use the same cooler. I can send you my email address if you wouldn't mind.


Certainly. I'll have to pull them off my laptop when I get home though. And fair warning, the galley with stove and cooler pulled out are for skinny butts only. :) The whole trailer is only a 4'er and that center sink/drawer section is only 1' wide.


Great, Thanks! I intend to build a 5x10, so that would give me a little more wiggle room... that or I could just make my skinny wife start doing all the cooking when we camp!

brx017 at gmail dot com is my email address.

I like the idea of a sink, but I'm scared to make a commitment to one and give up the counter space. Maybe I could work in a removable cutting board cover for it or something. Your build is looking good, I've been following it for a while. Keep it up! :thumbsup:

While I've got your attention, I'm curious if you've used the cooler yet. I'd like to know what the real world performance is. I'm hoping it would keep ice for 3 days or so. That would get me through most campouts we do.
User avatar
brx017
Teardrop Master
 
Posts: 126
Images: 4
Joined: Wed Feb 24, 2016 4:28 am
Location: Taylorsville, NC
Top

Re: 1947 Kenskill TD pseudo-restoration

Postby 3GKnight » Mon Jun 20, 2016 10:32 am

brx017 wrote:Great, Thanks! I intend to build a 5x10, so that would give me a little more wiggle room... that or I could just make my skinny wife start doing all the cooking when we camp!

brx017 at gmail dot com is my email address.

I like the idea of a sink, but I'm scared to make a commitment to one and give up the counter space. Maybe I could work in a removable cutting board cover for it or something. Your build is looking good, I've been following it for a while. Keep it up! :thumbsup:

While I've got your attention, I'm curious if you've used the cooler yet. I'd like to know what the real world performance is. I'm hoping it would keep ice for 3 days or so. That would get me through most campouts we do.


I apologize. Completely forgot about the CAD file. I've made a reminder now...

The upper left drawer houses the stove and has a lid to create another section of countertop when the stove isn't being used. If counter space is an issue on our first couple of runs, I plan on building some side tables. One that hangs out behind the cooler and another behind the stove table.

The cooler works well but I haven't used it in very high temps. Over a few days, I'll have ice left but the highs might have reached the mid 80's and the lows were in the low 40's, or even lower a couple of times. I camp in high country, usually around 10,000 ft, so the day/night temp swings are pretty large.
User avatar
3GKnight
Donating Member
 
Posts: 174
Images: 0
Joined: Wed May 28, 2014 3:43 pm
Location: Cheyenne, WY
Top

Re: 1947 Kenskill TD pseudo-restoration

Postby 3GKnight » Mon Jun 20, 2016 11:11 am

We're in the home stretch! Just a few more wrinkles to iron out. A couple of pieces of trim, the battery charge wire, lug repair (dumb story,) clock the hubs for a little more height, a system cut-off switch, drawer adjustments and then it'll be ready to outfit. I attempted to veneer the sidewalls of the galley but that didn't work. They'll get painted at some point. Our goal is to get out with it this weekend, at least for a night.

Yes, it's crooked and not just picture perspective. I'd cut something wrong somewhere and yadda, yadda, yadda...I'm not going to fix it. It'll bug the crap out of me every time I lay down but it'll go away once I fall asleep. It had a monochrome white paint job but that made it seem a lot smaller. This 2-tone scheme makes it feel a little bit larger.
Image

Modeling the shiny things.
Image

"Helping"
Image

The windows all turned out ok. The hardware is another matter. No picture here but I recreated the original notched bar setup. The problem is that unless the window is open all the way, the bar sticks out into the cabin way too much. Not sure what to do about it...
Image
User avatar
3GKnight
Donating Member
 
Posts: 174
Images: 0
Joined: Wed May 28, 2014 3:43 pm
Location: Cheyenne, WY
Top

Re: 1947 Kenskill TD pseudo-restoration

Postby ELM » Mon Jun 20, 2016 11:50 am

We all have something on our teardrops that are a little out of wack. But on your shelf you could put a fascia trim piece that is a little wider and have it up on one side and hanging down on the other side to give it the illusion that it's level and no one will no the difference. ;) It's looking great and it looks like the hole family is having fun.
My Build journal. viewtopic.php?f=50&t=65395
User avatar
ELM
Teardrop Master
 
Posts: 277
Images: 176
Joined: Thu Nov 26, 2015 5:49 am
Location: Sutter Creek CA
Top

Re: 1947 Kenskill TD pseudo-restoration

Postby 3GKnight » Wed Jun 22, 2016 10:53 am

Dangit! I keep forgetting the galley cad file. My reminder landed right when the forum was down. Made a new reminder...

It's 95% done. Got the drawer pulls on:
Image

And the roof rack:
Image

Still haven't solved the window hardware issue. I found a vent crank locally but it's too deep.

I'm thinking this thing would look pretty sharp if the aluminum was polished. We'll see how the paint looks before tackling that though.

The battery charging system isn't working but it's a continuity issue on the trailer. Probably not grounded properly.

Found out the electric brake line on the new 7 wire connector doesn't actually work unless there's a brake controller as well. Found one for $45. I suppose I'll have to do it if I want the $32 marker light to work as a brake light too. Dangit....

Besides paint, the only other major exterior change will be to add the jerry can brackets to the sides of the front box.

The goal is to go camping this weekend. I think we can do it!
User avatar
3GKnight
Donating Member
 
Posts: 174
Images: 0
Joined: Wed May 28, 2014 3:43 pm
Location: Cheyenne, WY
Top

Re: 1947 Kenskill TD pseudo-restoration

Postby 3GKnight » Wed Jun 22, 2016 6:21 pm

Ok. Finally. Here's the link to the galley CAD file. https://www.dropbox.com/s/cuwqy6fu2tjriyr/Galley.skp?dl=0
User avatar
3GKnight
Donating Member
 
Posts: 174
Images: 0
Joined: Wed May 28, 2014 3:43 pm
Location: Cheyenne, WY
Top

Re: 1947 Kenskill TD pseudo-restoration

Postby brx017 » Thu Jun 23, 2016 10:04 am

3GKnight wrote:Ok. Finally. Here's the link to the galley CAD file. https://www.dropbox.com/s/cuwqy6fu2tjriyr/Galley.skp?dl=0

You Sir, are a gentleman and a scholar. Thank you kindly.

Sent from my Nexus 6P using Tapatalk
User avatar
brx017
Teardrop Master
 
Posts: 126
Images: 4
Joined: Wed Feb 24, 2016 4:28 am
Location: Taylorsville, NC
Top

Re: 1947 Kenskill TD pseudo-restoration

Postby 3GKnight » Mon Jun 27, 2016 1:02 pm

Had our maiden voyage this last Friday. After fiddling with the drawer slides & breaking one, I got those as well adjusted as I care to. As we're all a little out of whack in this family, it fits right in.

Glad I made that cutout in the lower drawer before we left. It came in very handy.
Image

I do not like the lack of organization in the drawers. I wish I had pre-cut some slots in the inner drawer walls to allow for drop in partitions.
Image

Mostly outfitted.
Image

Fully outfitted...for this trip anyway.
Image

Found a nice campsite near Vedauwoo. (Pronounced Vee-da-voo.) We had some wind and rain for the 1st hour or so but it cleared up nicely.
Image

The leveling jacks came in handy. (And no, she's not pointing the gun at her sister. They're a good 30' apart. The girl in the orange shirt is very small. And apparently we were breaking the law by shooting an air rifle. On our way out, I read a poster about recreational shooting. Even air rifles aren't allowed during the busy season.)
Image

This would be the 2nd time this has happened. Before taking this picture, the jack popped off, letting the tongue fall and catching my hand between my foot and the tongue. Could have been worse, but the frame material is taller than the receiver so it would have to be at a really steep angle for the very end of the receiver to actually hit the ground. Not to justify my stupidity in thinking I could catch it though. I'm trying to think up some sort of gimbaled tri-pod instead of the jack foot but there isn't much clearance. The real problem is the pressure put on the snap ring. Not sure how to eliminate that except to keep it absolutely straight all the time.
Image

Problems:
    - Was so wrapped up in outfitting the camper, I forgot my toiletries...including my allergy meds.
    - The bike rack failed. Completely. We were dragging the bikes behind the camper at one point. We were able to strap the whole contraption on and get home. The kids didn't even ride them so the bikes aren't invited next time.
    - The cooler drawer settled on its screws, dropping it just enough to drag and not close completely. Fixable.
    - While I knew the front box would be the catch-all for anything non-galley related, it needs to be far more organized. I had to repack it while breaking camp. I'm thinking velcro straps on the underside of the lid to hold some of smaller things will help a lot.
    - While the window hardware isn't great, it's mostly usable. The problem is that the window hinges aren't laterally fixed so they slide out enough so the windows can't close. That'll piss you off when you're nice and cozy in bed and can't close the dang window.
    - Not a problem this trip, but the camper slept warm. That'll probably be a good thing for 90% of the trips we take, as we like the high country Rockies, but it could be uncomfortable if night temps don't drop below 50.
    - The interior door latches weren't screwed on well enough. The doors stayed shut so it wasn't a complete failure.
    - The mattress slept good but the cheap cover it came with was like a dirt magnet. Like actual velcro to dirt. Needs to be replaced with something that can be wiped off.
    - The screws through the walls into the galley countertop are popping. Will have to address that before paint.
    - Setup time needs a lot of help. The whole point of this thing was fast setup. 1. Should have delegated more to the kids. 2. Not bringing kids would have helped. lol 3. Organizing the front box will help. 4. We needed it this time, but not using the awning would help. I wish it were quicker to set up. It uses those plastic clips instead of sleeves for the poles. I wonder why they did that. Sleeves are significantly faster.
    - And a tips 'n tricks for fellow builders: make sure your griddle is level to the camper. Leveling the camper was easy but I had to fix it in the morning after noticing the bacon grease was puddling to one end of the griddle. It's the little things...

All in all, the camper is good. I would have done it differently had I known about this forum though. Start from absolute scratch and made a complete plan first, but my more critical mistakes were fabrication and not necessarily design.

Here some pics of the surrounding area. We were right next to a tall hill and had a great view after a climb.

Looking down at the campsite:
Image

Image

Image

Image
User avatar
3GKnight
Donating Member
 
Posts: 174
Images: 0
Joined: Wed May 28, 2014 3:43 pm
Location: Cheyenne, WY
Top

Re: 1947 Kenskill TD pseudo-restoration

Postby ELM » Mon Jun 27, 2016 1:38 pm

Glad your family had a nice camping trip. Thanks for sharing the good and not so good things it helps.
My Build journal. viewtopic.php?f=50&t=65395
User avatar
ELM
Teardrop Master
 
Posts: 277
Images: 176
Joined: Thu Nov 26, 2015 5:49 am
Location: Sutter Creek CA
Top

Re: 1947 Kenskill TD pseudo-restoration

Postby 39Ratrod » Mon Jun 27, 2016 6:27 pm

Camper looks great and looks like it was a huge success!

Set up time will improve after a few runs. I am usually set up in about 15min. My kids a bit older, 14 and 17 so they get lots of tasks to help out with.

I used to go up in that area when I was at Wyotech in Laramie. Great scenery!
The biggest difference between a dreamer and a doer is the follow through.
User avatar
39Ratrod
Teardrop Master
 
Posts: 159
Images: 71
Joined: Sun Feb 15, 2015 4:08 pm
Location: Bighorn Mountains, Wyoming
Top

PreviousNext

Return to Build Journals

Who is online

Users browsing this forum: No registered users and 28 guests