DaBearSox Weekender Build

...ask your questions in the appropriate forums BUT document your build here...preferably in a single thread...dates for updates, are appreciated....

Re: DaBearSox Weekender Build

Postby DaBearSox » Mon Oct 10, 2016 4:20 pm

KCStudly wrote:I'm not seeing the images for the two previous posts, though that last one looks good. :thumbsup:


Thanks, alright think that should take care of the pictures not showing up. Was using a link from google plus before now I just figured out the gallery on the site.
DaBearSox
Teardrop Advisor
 
Posts: 71
Images: 116
Joined: Tue Jul 05, 2016 3:43 am

Re: DaBearSox Weekender Build

Postby DaBearSox » Fri Oct 14, 2016 11:02 am

Well Denver gave me a gift and we're are having 3 days straight of 75+ weather so I wanted to get my epoxy done on the pieces I cannot do in the house. I went with Duckworks DWX and have to say although the whole process was not the funnest thing the product worked great. (Epoxy newb) There were no face burning fumes or extremely terrible odor like I have read about. The fast hardener gave me enough time to do all my coats with one mix per coat. After the winter I will sand down to smooth it out and possibly do one more coat (did 3 yesterday) or just sand down and do some coats of UV Protecting varnish.

Image
Image
Before (2 coats of indigo aniline dye)

Image
Image

After (lighting in the garage not the greatest this morning)
DaBearSox
Teardrop Advisor
 
Posts: 71
Images: 116
Joined: Tue Jul 05, 2016 3:43 am

Re: DaBearSox Weekender Build

Postby retep » Sat Oct 15, 2016 7:35 am

Now that is looking very nice. I really like the shape. Great work so far. I look forward to your progress.
Cheers
Peter
retep
Teardrop Master
 
Posts: 106
Joined: Wed Mar 16, 2016 3:55 pm
Top

Re: DaBearSox Weekender Build

Postby DaBearSox » Sat Oct 22, 2016 12:39 pm

Taking a long weekend to get some stuff done while the weather is still nice. Progress so far...

Image

Walls up!

Image

Using a helping hand to position the spars

Image

Making sure the fantastic fan supports are spaced correctly

Image

Pocket hole jig really coming in handy

Image

2nd set of spars added to support the solar panel

Image

Underside

Image

Done for the day
DaBearSox
Teardrop Advisor
 
Posts: 71
Images: 116
Joined: Tue Jul 05, 2016 3:43 am
Top

Re: DaBearSox Weekender Build

Postby les45 » Sat Oct 22, 2016 12:57 pm

DaBearSox wrote:
Image

Using a helping hand to position the spars


Great minds must think alike. I called mine my "third hand". Working alone forces you to get creative.
Image
User avatar
les45
500 Club
 
Posts: 974
Images: 605
Joined: Sat Feb 25, 2012 8:57 am
Location: Aiken, South Carolina
Top

Re: DaBearSox Weekender Build

Postby DaBearSox » Sat Oct 22, 2016 1:05 pm

les45 wrote:
DaBearSox wrote:
Image

Using a helping hand to position the spars


Great minds must think alike. I called mine my "third hand". Working alone forces you to get creative.
Image

Yep! Took the idea straight from your build thread. Plus never using a pocket hole jig before I wanted to test it out.

Sent from my VS986 using Tapatalk
DaBearSox
Teardrop Advisor
 
Posts: 71
Images: 116
Joined: Tue Jul 05, 2016 3:43 am
Top

Re: DaBearSox Weekender Build

Postby DaBearSox » Wed Oct 26, 2016 9:29 pm

The rest of the long weekend:

Image

Installing the front spars

Image

After spacing making a hole in the sidewall for my shore power inlet I decided to install it on the nose so added a panel that will hold it. I was planning on having my PD4045 and solar controller located in the front cabinets so it works out...

Image

called it a day while the glue dried

Image

front

Image

side

Image

back

Image

Making sure door fits.
DaBearSox
Teardrop Advisor
 
Posts: 71
Images: 116
Joined: Tue Jul 05, 2016 3:43 am
Top

Re: DaBearSox Weekender Build

Postby KCStudly » Thu Oct 27, 2016 5:36 pm

Coming right along! :thumbsup:
KC
My Build: The Poet Creek Express Hybrid Foamie

Poet Creek Or Bust
Engineering the TLAR way - "That Looks About Right"
TnTTT ORIGINAL 200A LANTERN CLUB = "The 200A Gang"
Green Lantern Corpsmen
User avatar
KCStudly
Donating Member
 
Posts: 9611
Images: 8169
Joined: Mon Feb 06, 2012 10:18 pm
Location: Southeastern CT, USA
Top

Re: DaBearSox Weekender Build

Postby DaBearSox » Mon Nov 07, 2016 11:04 am

Started on the front interior. I decided to have my power centers in the middle of the front shelving with open shelves on the sides. I am planning on having the side panels that box in the wiring to be removable so that I can have access to the back of the panel. Just need to figure out how I am going to do that.

Image

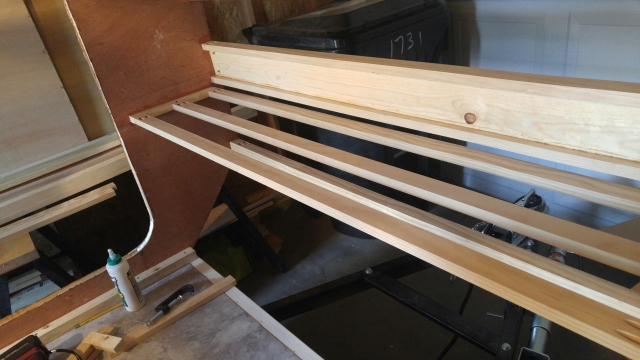
Framing out the shelf
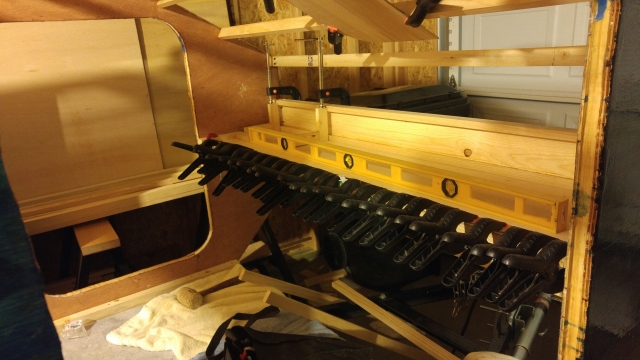
Image

Gluing on the shelf

Image

Positioned my busbars, the covered ones will be hot distribution and the uncovered is the grounding busbar. Hole cut in the front panel for the shore power inlet.

Image
Image

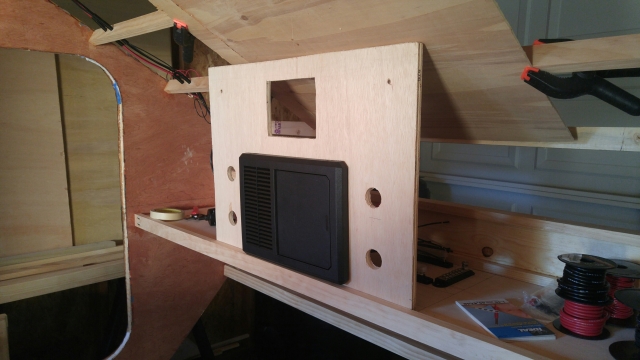
PD4045, cutout above is for my solar panal controller, the top holes are for 2 reading lights, the middle holes are for switches that will control the porch lights, and the bottom holes are one 12V inlet, and one USB plug. The clamped 1/8 ply is just for planning purposes.

Image

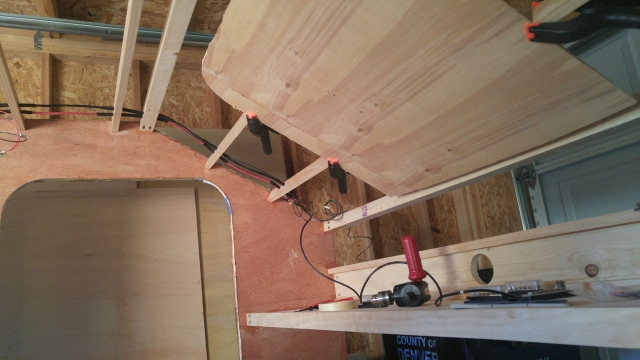
Started running some wiring, split wire loom added through the spars. The rest of the wiring will be covered as well before insulation and roofing.
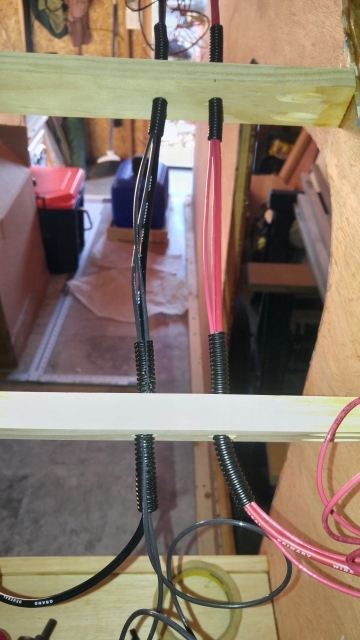
Image

closeup
DaBearSox
Teardrop Advisor
 
Posts: 71
Images: 116
Joined: Tue Jul 05, 2016 3:43 am
Top

Re: DaBearSox Weekender Build

Postby les45 » Mon Nov 07, 2016 5:11 pm

Looking good!!
User avatar
les45
500 Club
 
Posts: 974
Images: 605
Joined: Sat Feb 25, 2012 8:57 am
Location: Aiken, South Carolina
Top

Re: DaBearSox Weekender Build

Postby DaBearSox » Tue Nov 08, 2016 12:14 am

Thanks Les!

I have a small 12V 8aH battery coming so I am going to test my circuits before I seal everything up. I have Thursday and Friday off so I am hoping to get most of the electrical done and get back to working with wood. If i can get a heater that will keep the garage warm enough to cure epoxy I should be done by mid spring. Word of advice to any non-wood working person who likes to think a lot on projects...building a teardrop trailer takes a good bit of time...
DaBearSox
Teardrop Advisor
 
Posts: 71
Images: 116
Joined: Tue Jul 05, 2016 3:43 am
Top

Re: DaBearSox Weekender Build

Postby DaBearSox » Fri Nov 18, 2016 12:48 am

Electrical full speed ahead. I picked up a little 8aH 12 volt battery to start testing my circuits and got my front panel installed.

Image

Image

Image

Image

Image

Image
DaBearSox
Teardrop Advisor
 
Posts: 71
Images: 116
Joined: Tue Jul 05, 2016 3:43 am
Top

Re: DaBearSox Weekender Build

Postby Alan_H » Wed Nov 23, 2016 9:07 pm

DaBearSox wrote:Electrical full speed ahead. I picked up a little 8aH 12 volt battery to start testing my circuits and got my front panel installed.

Image


Won't the cooling fan in that PD4045 bother you at night?
Alan_H
Lifetime member
 
Posts: 245
Images: 17
Joined: Mon Dec 02, 2013 4:44 pm
Top

Re: DaBearSox Weekender Build

Postby DaBearSox » Thu Nov 24, 2016 12:21 pm

Alan_H wrote:
DaBearSox wrote:Electrical full speed ahead. I picked up a little 8aH 12 volt battery to start testing my circuits and got my front panel installed.

Image


Won't the cooling fan in that PD4045 bother you at night?


I am one of those people that needs a fan at night to sleep so not at all. I plan on having a little .3amp USB fan going at night as well.

Also, most of the time I will probably be boondocking so from what I have heard the little fan does not operate if the converter is not operational. I have been testing circuits by clipping in a little 8aH battery to the PD and the fan didn't budge while running the fantastic fan and 6 lights. (if this is a problem some one let me know)
DaBearSox
Teardrop Advisor
 
Posts: 71
Images: 116
Joined: Tue Jul 05, 2016 3:43 am
Top

Re: DaBearSox Weekender Build

Postby DaBearSox » Mon Nov 28, 2016 1:32 pm

Got almost 100% of my wiring complete and checked. All circuits work and I tested my DC plugs for both the TV and the Bluray and watched a little Batman Begins off of the 12V 8aH tester battery. Back to some woodworking...

Image

Adding some trim to the front panel

Image

Got side panels to cover the electrical area. These walls will be removable to I can have access to the wiring if need be. I also got all my in ceiling wiring covered in split loom tube and taped up.

Image

Positioning check before gluing in the side shelf supports.

Image
Image

Front and side view of completed front shelves and electrical center.
DaBearSox
Teardrop Advisor
 
Posts: 71
Images: 116
Joined: Tue Jul 05, 2016 3:43 am
Top

PreviousNext

Return to Build Journals

Who is online

Users browsing this forum: No registered users and 16 guests