A 'learn as I go' trailer

...ask your questions in the appropriate forums BUT document your build here...preferably in a single thread...dates for updates, are appreciated....

A 'learn as I go' trailer

Postby antalog » Thu Jul 14, 2016 3:32 am

As the title suggests, this is my first major undertaking as far as a build. Not just on a teardrop, but on anything of this nature. I made a chest for the foot of our bed and well, it doesn't have a bottom now. :/ So this is going to be a pretty massive learning experience for me, and I'm super excited about that!

I have a lot of the ideas and wants in motion. And since I'm very much a kinesthetic learner, I need to get my hands on things before I can fully get my head around it. In that vein I went ahead and just decided to go with the Northern Tool 5x8. I was thinking of fabricating my own trailer (metalworking is something I have a bit of experience with) but for the sake of time and safety I just went the store bought route on this one.

So, the boxes showed up.
Image

And had it together that same day.
Image
^this picture is before I had the tongue squared up.

First step down, now I'm "finalizing" my sketches and possible Sketchup renders (if need be).
antalog
Teardrop Advisor
 
Posts: 69
Joined: Mon Aug 03, 2015 5:50 pm
Location: Portland, OR

Re: A 'learn as I go' trailer

Postby 3GKnight » Thu Jul 14, 2016 9:50 am

Have fun! Keep up the pictures. :)
User avatar
3GKnight
Donating Member
 
Posts: 174
Images: 0
Joined: Wed May 28, 2014 3:43 pm
Location: Cheyenne, WY

Re: A 'learn as I go' trailer

Postby Alan_H » Thu Jul 14, 2016 11:58 am

Nice!! I got a NT 5X8 aluminum, just picked it up from the store yesterday (Free freight to the store :applause: )
I'll be selling my axle, as I'm going with a torsion axle for the ride, brakes and to let it ride a little lower.

Good luck with the build!!
Alan_H
Lifetime member
 
Posts: 245
Images: 17
Joined: Mon Dec 02, 2013 4:44 pm
Top

Re: A 'learn as I go' trailer

Postby antalog » Mon Jul 18, 2016 1:18 am

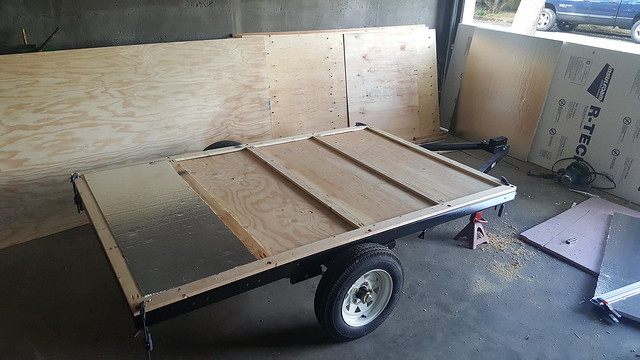
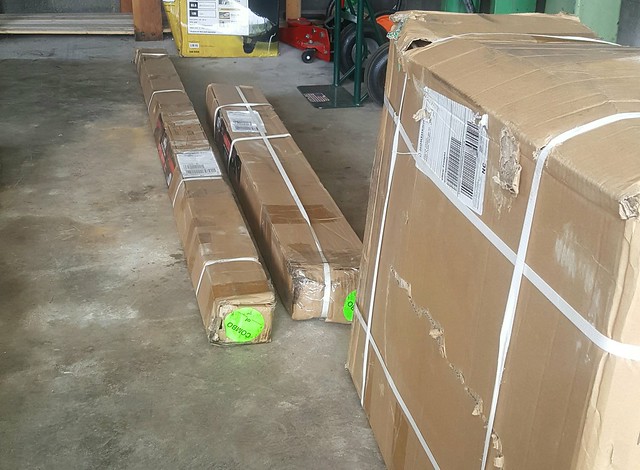
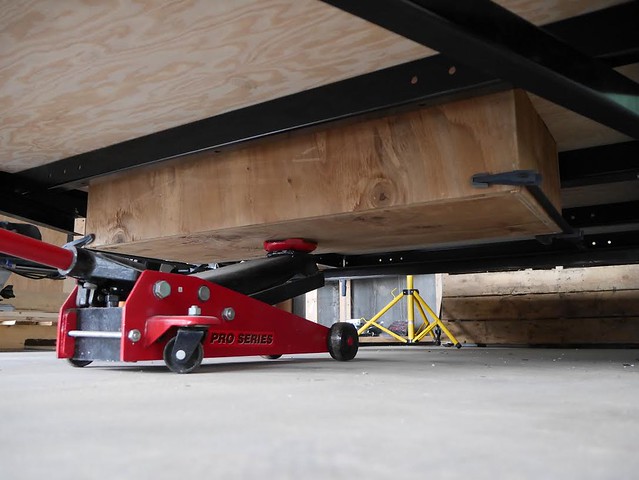
I was able to spend a few hours yesterday on the trailer and made some headway.

Here we go!

Image
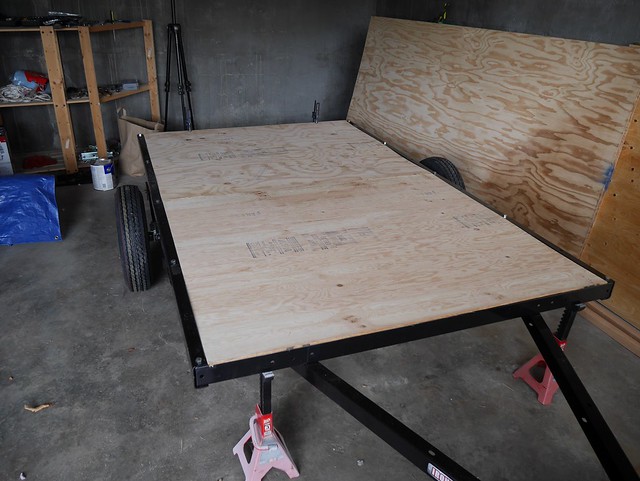
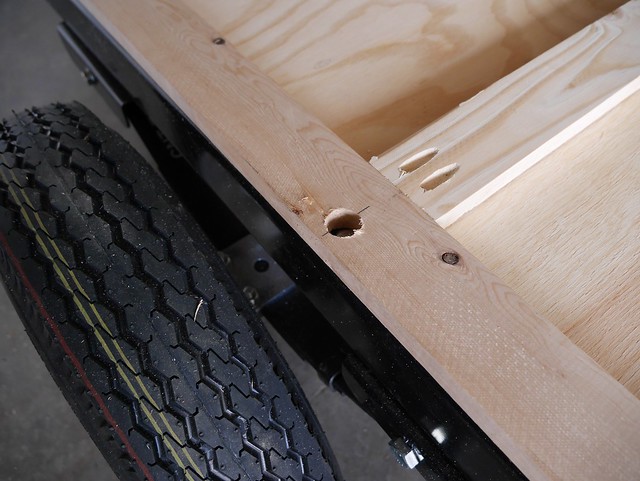
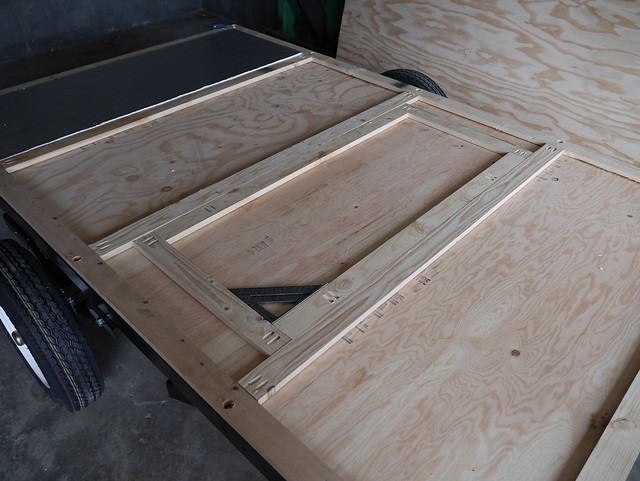
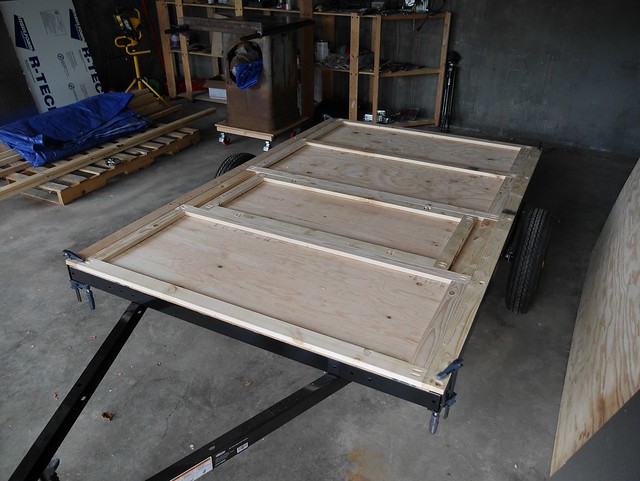
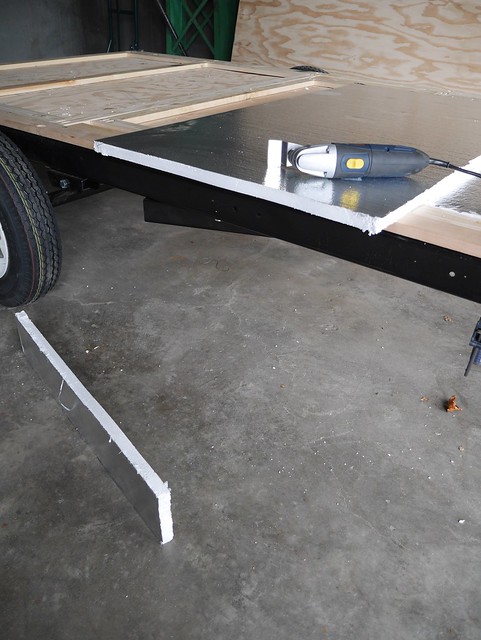
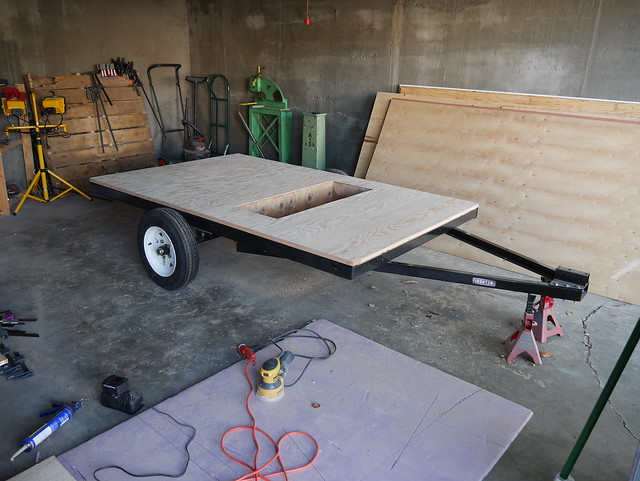
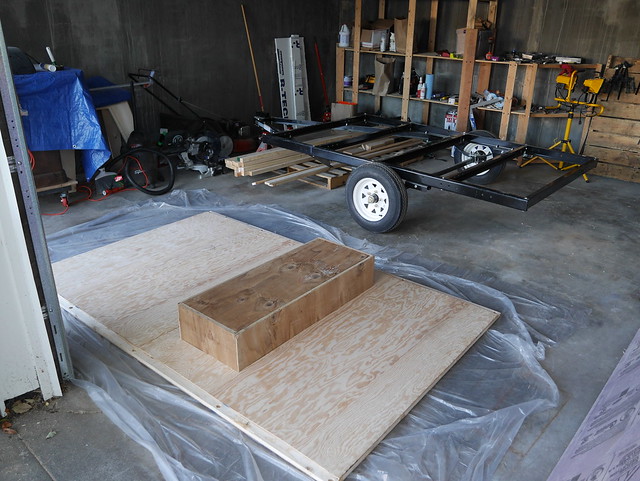
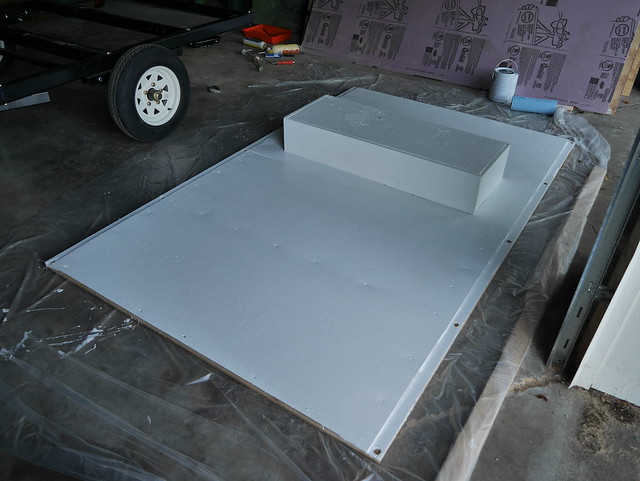
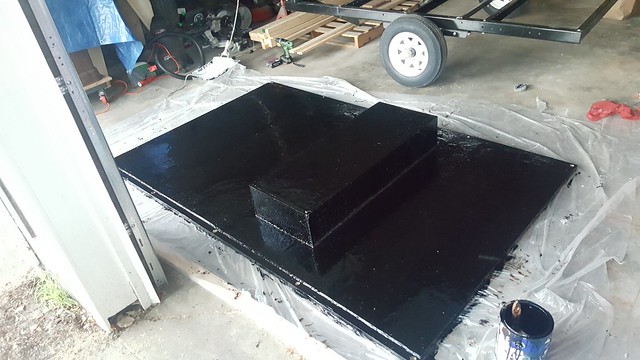
I cut the 1/4" ply so that it would sit in between the siderails and sit only on the cross supports. My thought with that was it would make the floor sit more flush on the trailer.

Image
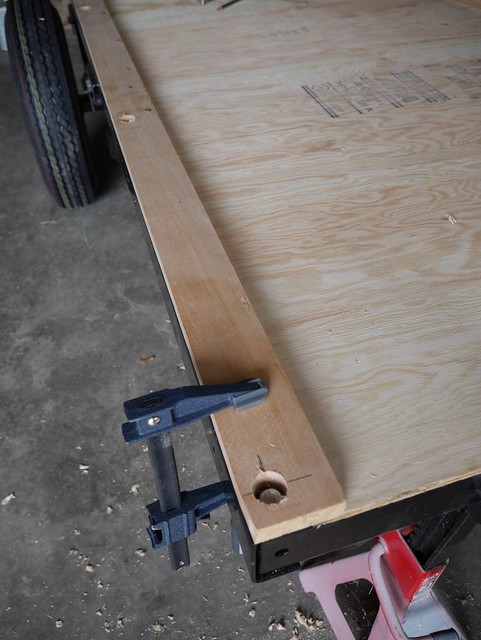
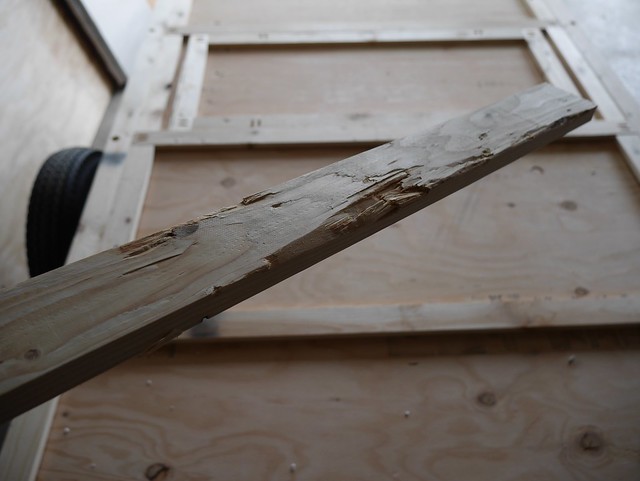
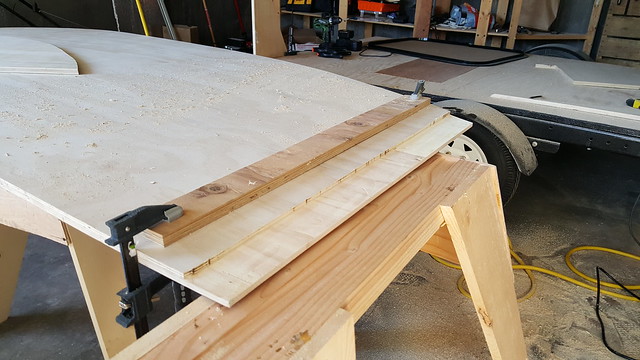
Drilled holes in the 1x3 again for the idea of keep the floor flush.

Image
Those beautiful Kreg pocket hole jigs. Everyones favorite tool!

Image
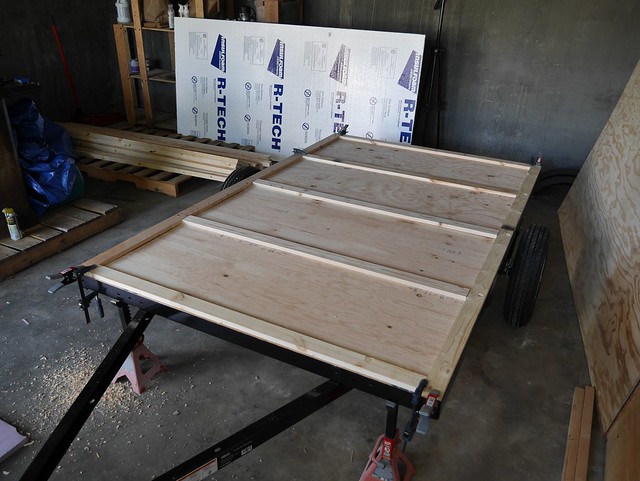
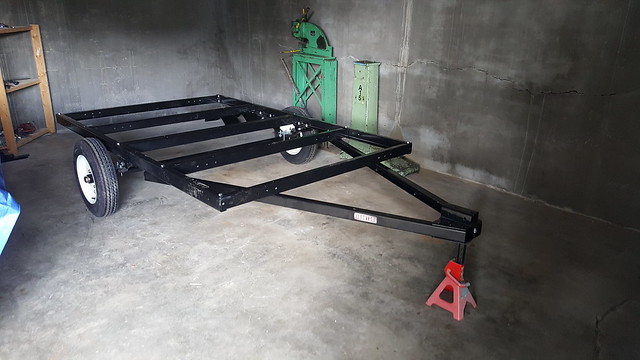
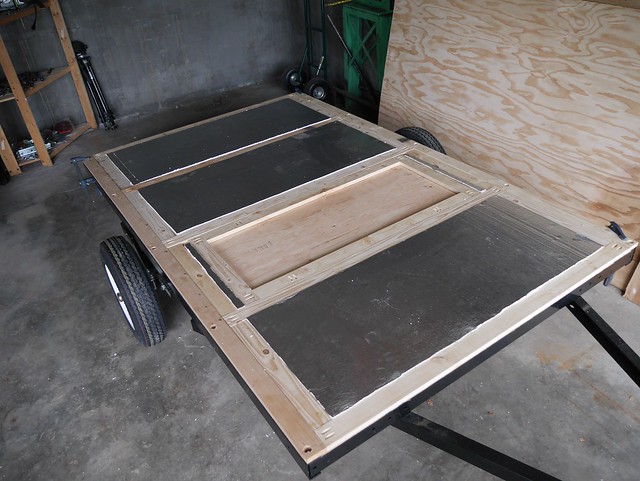
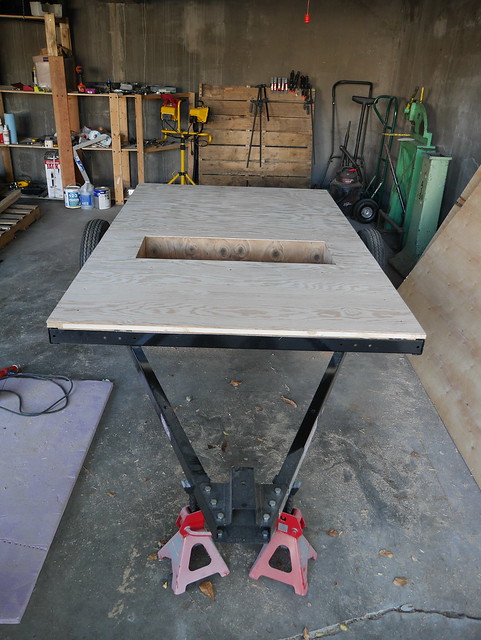
Floor frame coming up.

Image
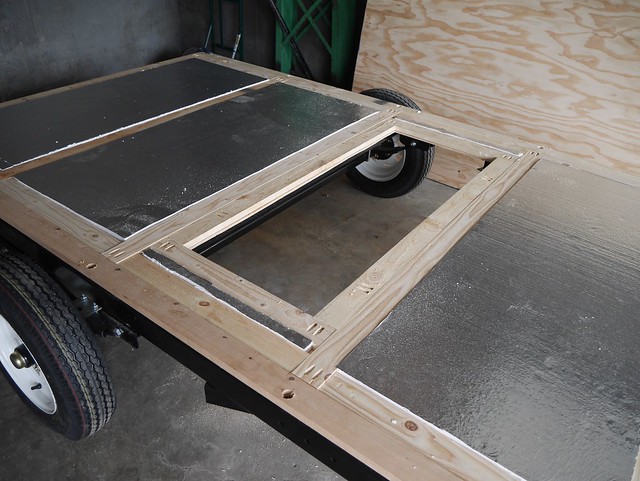
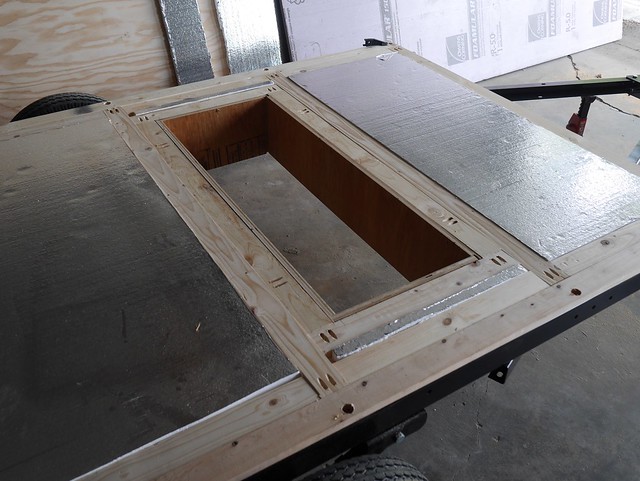
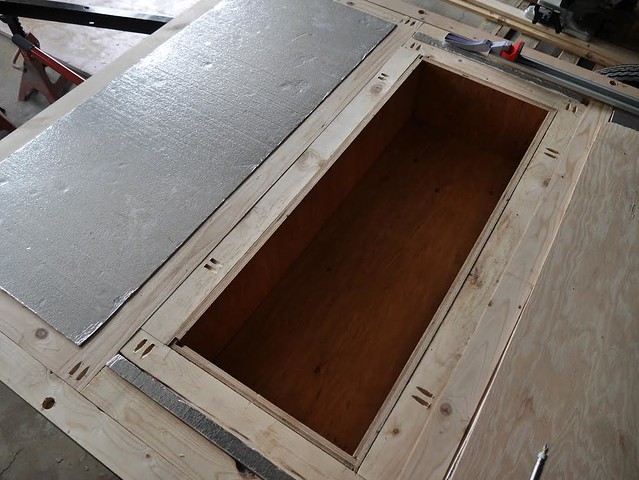
And the insulation starts to go in. I plan on putting an in-frame storage box within the second section. Im thinking of building the box out of 18ga or 20ga steel for some semi-paranoid safety reason. But maybe wood would be just as fine? Any thoughts on this from the members is welcome. I don't think there would be much of a weight difference.

On that note, I feel like I may have made my first mistake! :) That first 1/4" ply that I cut to sit in between the side rails of the frame, since its not actually sitting on the sides of the frame, it dips pretty easily when I put a little weight on it. Im thinking :fingers-crossed: that when I glue, screw and seal the floor all together it will be strong. Does that sound like this may be an issue going forward?

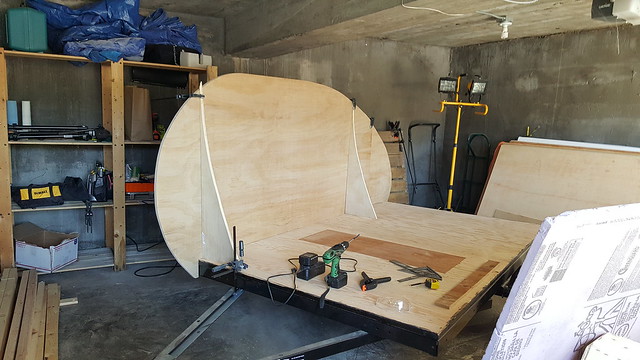
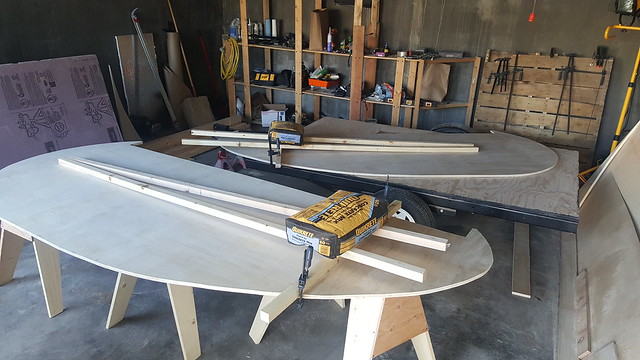
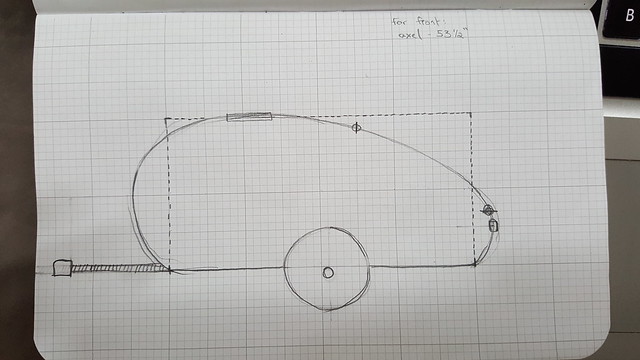
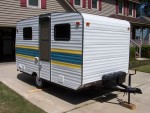
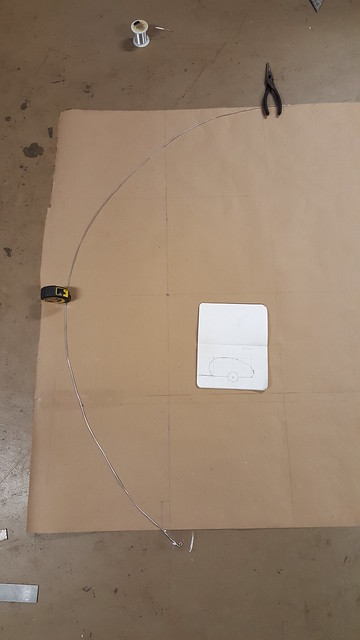
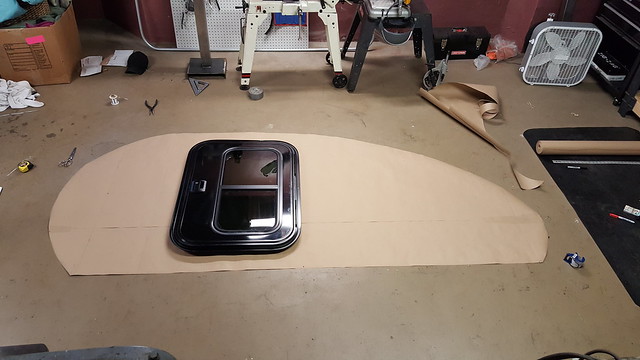
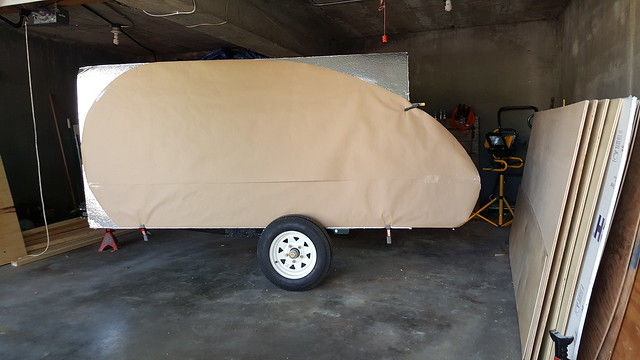
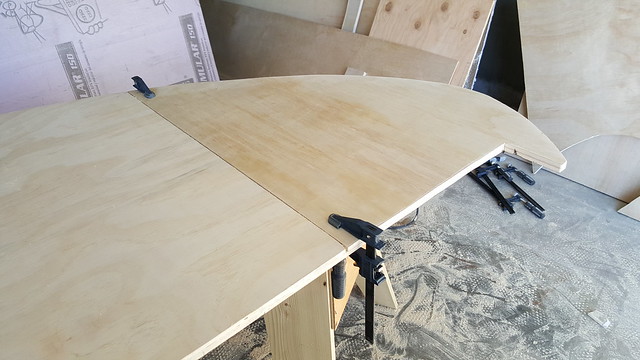
And here was my initially quick sketch of the shape we're going for. I did this quick when I first starting making actual plans to build the trailer. Although I thought up some other styles/designs as time went on, I always came back to this look and even this drawing. So this is where we're going!
Image


I have the next couple days off so more updates soon to follow. :twisted:
antalog
Teardrop Advisor
 
Posts: 69
Joined: Mon Aug 03, 2015 5:50 pm
Location: Portland, OR
Top

Re: A 'learn as I go' trailer

Postby les45 » Mon Jul 18, 2016 6:38 am

antalog wrote:
On that note, I feel like I may have made my first mistake! :) That first 1/4" ply that I cut to sit in between the side rails of the frame, since its not actually sitting on the sides of the frame, it dips pretty easily when I put a little weight on it. Im thinking :fingers-crossed: that when I glue, screw and seal the floor all together it will be strong. Does that sound like this may be an issue going forward?


A few things to consider:
As long as the 1/4 ply is fastened to the 1X3 between the cross members it should be OK since it really doesn't take any load (it's just sealing the bottom). The real load will be on your top layer (floor deck). I would recommend something a little heavier than 1/4 for that but it all depends on how much point load you will be putting on the floor. If it is totally covered with a mattress, then it doesn't have to be very thick. If you plan to stand on it to access your proposed box, then it needs to be a little thicker (maybe 1/2"). The thickness of your insulation will also determine how thick the top layer should be. If your insulation is less than 3/4" then you could have some sag between your cross pieces.

It is not obvious how you plan to fasten the wood structure to your metal frame. The 1X3's along the side rails will be critical to fastening your side walls so they should be bolted to the frame somehow.

Also, you might want to seal your bottom while you can access it and then flip it over before fastening to the frame. If you plan to use something like Henrys to seal the bottom, I would recommend a couple of coats of primer since Henrys and similar asphaltic coatings will delaminate plain plywood.
User avatar
les45
500 Club
 
Posts: 974
Images: 605
Joined: Sat Feb 25, 2012 8:57 am
Location: Aiken, South Carolina
Top

Re: A 'learn as I go' trailer

Postby antalog » Mon Jul 18, 2016 3:22 pm

les45 wrote:I would recommend a couple of coats of primer since Henrys and similar asphaltic coatings will delaminate plain plywood.


I did not know that, so that's good to know! Thanks for that heads up.

My plan going forward from where the photos left off were to install the frame box, insulate, install top layer (was going to be 1/4" but now may be 1/2"), seal with Henrys, then drill mounting holes through the entire floor to bold it to the frame. Wasn't sure if I needed to bolt it to all the available open holes in the frame. I read another builder mention he only bolted in 4 locations. Was going to cut a larger spade hole in the top layer ply and use a hex bolt and washer to keep it all flush.
antalog
Teardrop Advisor
 
Posts: 69
Joined: Mon Aug 03, 2015 5:50 pm
Location: Portland, OR
Top

Re: A 'learn as I go' trailer

Postby antalog » Mon Jul 18, 2016 6:06 pm

Monday - 7.18.16

So, I framed up my in-frame storage box. Decided to put it plumb in the middle and have it hinge on the long side, with one hardy handle.

Image
I have an idea of how Im going to create the handle part. So Im excited to get to that point. Im about the construct the box. 1/2" ply and am going to try to create a tongue and groove for the first time, so we'll see how it plays out :)

I also came up with a solution to reinforce the floor. In an attempt to save a little money (and a trip to the lumber yard) I decided to take my extra 1x3 scraps and one gnarly piece I wasn't planning on using, and lay them along the outer edge to double up on those edges of the floor. I think once those are glued & screwed into place within the floor it will be rock solid. Plus it cuts down on some extra weight.

Image
The discarded 1x3 as it came in the bundle.

Image
Cut to fit, it doesn't have a ton of the chop left

Image
Flipped over and put into place it looks real nice... for a piece that no one will ever see. :lol:

Image

All layed in (but not attached to anything) I feel like that should do the trick.
antalog
Teardrop Advisor
 
Posts: 69
Joined: Mon Aug 03, 2015 5:50 pm
Location: Portland, OR
Top

Re: A 'learn as I go' trailer

Postby antalog » Mon Jul 18, 2016 8:48 pm

Image
Got the insulation cut and put in.

First time cutting the insulation I used a serrated knife and it left a bloody mess and an ugly cut. This time I pulled out my humble Harbor Freight oscillating multi-tool and it was a game changer. It was smooth quick and clean!

Image
What you see on the floor is what it left behind! :thumbsup:
antalog
Teardrop Advisor
 
Posts: 69
Joined: Mon Aug 03, 2015 5:50 pm
Location: Portland, OR
Top

Re: A 'learn as I go' trailer

Postby antalog » Tue Jul 19, 2016 7:51 pm

Tuesday - 7.19.16

Image
Cut the floor out for the storage box

Image
And got the side walls put in. Gunna flush up the edges and put the bottom in.

After that Im going to add all the adhesive and top surface and screws. Also set up the top of the box and add the hinges.
antalog
Teardrop Advisor
 
Posts: 69
Joined: Mon Aug 03, 2015 5:50 pm
Location: Portland, OR
Top

Re: A 'learn as I go' trailer

Postby antalog » Mon Jul 25, 2016 9:54 pm

Day Unknown

Image
Floor up in place

Image
And screwed in!


Monday 7.25.16

Got the top floor on and hunkered down.
Image
Image


Image
One of those moments I wish I had another set of hands, I was able to get the floor off, and all screwed together on the underside.

Image
Coming up on the end of the day (as you can see by the lighting) got the first layer of primer on.

So far still movin'!
antalog
Teardrop Advisor
 
Posts: 69
Joined: Mon Aug 03, 2015 5:50 pm
Location: Portland, OR
Top

Re: A 'learn as I go' trailer

Postby KennethW » Tue Jul 26, 2016 1:13 pm

Just food for though. I bolted the last two rails of my trailer under the side rail facing each other and slid plywood in from the side to make a drop floor in the galley. Make a lot more space in the galley. And if the galley hatch leads water does not run under the galley wall.
KennethW
1000 Club
1000 Club
 
Posts: 1188
Images: 82
Joined: Wed Feb 20, 2013 8:01 pm
Top

Re: A 'learn as I go' trailer

Postby antalog » Thu Jul 28, 2016 11:17 am

Image
Sealed all the seams with polyurethane and then laid on Henrys.
antalog
Teardrop Advisor
 
Posts: 69
Joined: Mon Aug 03, 2015 5:50 pm
Location: Portland, OR
Top

Re: A 'learn as I go' trailer

Postby antalog » Thu Jul 28, 2016 11:19 am

KennethW wrote:Just food for though. I bolted the last two rails of my trailer under the side rail facing each other and slid plywood in from the side to make a drop floor in the galley. Make a lot more space in the galley. And if the galley hatch leads water does not run under the galley wall.


Thanks for the idea Kenneth. I think I understand what you're explaining, for now Im going to run with the galley at the same base as the trailer.
antalog
Teardrop Advisor
 
Posts: 69
Joined: Mon Aug 03, 2015 5:50 pm
Location: Portland, OR
Top

Re: A 'learn as I go' trailer

Postby antalog » Sun Aug 07, 2016 2:57 am

8.5.16 - I had flipped the bed over and bolted it down in 4 places. One in the front, one in the back and one on each side in the first set of holes after the tongue.

8.6.16
Image
Created the template. I used wire to get the front curve close enough

Image
Right now this is laid out like its the driver side, but the door will actually be on the passenger side.

Image
The general idea. Although I feel like the flat spot on the top isnt a long in real life.

Time to start making some strides.
antalog
Teardrop Advisor
 
Posts: 69
Joined: Mon Aug 03, 2015 5:50 pm
Location: Portland, OR
Top

Re: A 'learn as I go' trailer

Postby antalog » Fri Aug 12, 2016 7:59 pm

8.9.16
I cut out all the pieces needed to make the sides and just made sure they all lined up pretty close.

8.12.16

Image
Here are the two pieces that make up each side. This is before the splice

Image
Routing

Image
Routed

Image
Pre-joined. And this was a bummer because after I laid it out like this I realized that the two pieces are now laying cross grain :x 
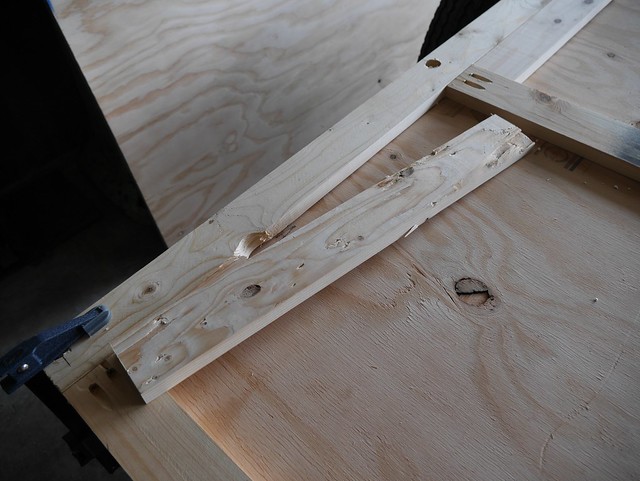
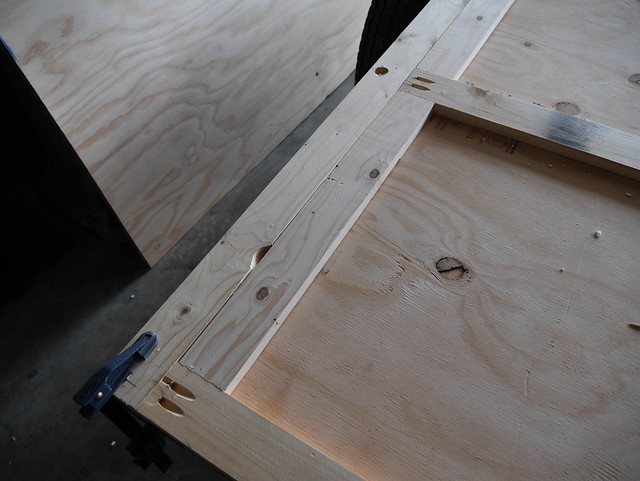
on both sides. Is there anything I should do to make sure these stay secure, or does it seem like it most likely wont be an issue?

Image
Heres a picture of the opposite wall cut and dry jointed

Image
Here they are ready to glue the night away.
antalog
Teardrop Advisor
 
Posts: 69
Joined: Mon Aug 03, 2015 5:50 pm
Location: Portland, OR
Top

Next

Return to Build Journals

Who is online

Users browsing this forum: No registered users and 15 guests