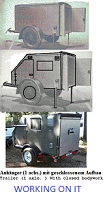
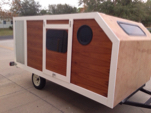
Wanted to get my lights put on but won't stop raining and going to be a job, he didn't cut ports for wiring before he welded tubes to trailer.
Plus side he completely rebuilt the tongue, trailer is much stiffer now. And I like the added weight since the camper itself will be rather light. Keep the CG as low as possible.
Really debating on going 5 lug hubs now so I have more wheel/tires options.
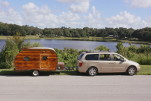
Can't wait to start the build, mother nature needs to cooperate so I can!

(Took the pic while sitting at a train crossing for 15 minutes, only chance for a pic before we got poured on)
Sent from my XT1565 using Tapatalk