Tom & Shelly's build

...ask your questions in the appropriate forums BUT document your build here...preferably in a single thread...dates for updates, are appreciated....

Re: Tom & Shelly's build

Postby tony.latham » Tue Jun 09, 2020 11:32 am

Will the nuts loosen?


Obviously they can. You might put a smidgen of blue Loctite on that stud for peace of mind, or a Nylock nut.

It looks clean with the lid on. :thumbsup:

Tony
User avatar
tony.latham
Gold Donating Member
 
Posts: 6900
Images: 17
Joined: Mon Jul 08, 2013 4:03 pm
Location: Middle of Idaho on the edge of nowhere

Re: Tom & Shelly's build

Postby Tom&Shelly » Tue Jun 09, 2020 8:11 pm

tony.latham wrote:
Will the nuts loosen?


Obviously they can. You might put a smidgen of blue Loctite on that stud for peace of mind, or a Nylock nut.

It looks clean with the lid on. :thumbsup:

Tony


Good idea about the Loctite, Tony. I'd rather not have an intermittent connection to the trailer brakes (or anything else).

I did it this afternoon. Some say don't use Loctite on electrical connections because when you use too much (as I did--it comes out of the tube as it comes out) it can get between the O lugs. I figure if I have continuity, I'll always have it. (The stuff don't flow after it dries.) If it turns into a problem, I'll clean them off and use M5 nylocks (which sounds like an even better idea, but I don't have any at the moment).

Tom
172912 170466 173366
Tom&Shelly
Palladium Donating Member
 
Posts: 2205
Images: 1961
Joined: Tue Sep 05, 2017 3:27 pm
Location: Upstate New York/New Mexico

Re: Tom & Shelly's build

Postby Tom&Shelly » Tue Jun 09, 2020 8:19 pm

After gluing the studs, I spent the rest of the afternoon attaching the front utility door

162206 162203

162205 162204

Drilled holes in the Challenger cargo door behind the weather seal in the aluminum frame. Fit it to the front and drilled into the plywood. Right now it's held in with ten 1 1/2" stainless pan head screws. When the side doors are ready (I need to add some blocking), I'll seal them all with black OSI sealant, and then run a bead around the edges.

That door is on gas struts. The idea is to open it up when we are in a camp with shore power and running the Climate Right AC.

Tom
172912 170466 173366
Tom&Shelly
Palladium Donating Member
 
Posts: 2205
Images: 1961
Joined: Tue Sep 05, 2017 3:27 pm
Location: Upstate New York/New Mexico
Top

Re: Tom & Shelly's build

Postby KCStudly » Wed Jun 10, 2020 5:24 am

Tom&Shelly wrote:So, I'm surprised, but haven't been able to find discussion on this: What is the best way to tie the tether to the tongue?

162191

I'd rather not drill holes if possible. I've ordered some heavy duty wire ties and plan to try holding it with those, but is there a better way?

Tom


Perhaps a single Adel clamp (or plastic equivalent), using a single fastener near the front. These are sometimes called "single hole P-clamps" by the trades.

If using a plastic one make sure it is black nylon (white will not be UV resistant... same for wire tie wraps).

I've used this method on a couple of trailers now, and it works very well as a strain relief. Just make sure the grip size fits your cable snug.

Build is looking great! :thumbsup:
KC
My Build: The Poet Creek Express Hybrid Foamie

Poet Creek Or Bust
Engineering the TLAR way - "That Looks About Right"
TnTTT ORIGINAL 200A LANTERN CLUB = "The 200A Gang"
Green Lantern Corpsmen
User avatar
KCStudly
Donating Member
 
Posts: 9613
Images: 8169
Joined: Mon Feb 06, 2012 10:18 pm
Location: Southeastern CT, USA
Top

Re: Tom & Shelly's build

Postby swoody126 » Wed Jun 10, 2020 10:14 am

i keep some of these around for situations like this

OIP.69T2pJTZ6MRAG2vWcwb64gHaHa.jpeg
OIP.69T2pJTZ6MRAG2vWcwb64gHaHa.jpeg (8.35 KiB) Viewed 2253 times


OIP.4XdcrfgbmGwYuuG27nC7UgHaHa.jpeg
OIP.4XdcrfgbmGwYuuG27nC7UgHaHa.jpeg (6.87 KiB) Viewed 2253 times


i think i got my last bag @ Ace

sw
"we are the people our parents warned us about" jb
swoody126
500 Club
 
Posts: 769
Joined: Mon Feb 22, 2016 6:11 pm
Location: north of Ft Worth
Top

Re: Tom & Shelly's build

Postby tony.latham » Wed Jun 10, 2020 1:18 pm

If it were me, I'd go ahead and drill and use self-tapping screws to attach adele clamps –-but I'd squeeze some grease in the hole after adding the screw.

:thinking:

Tony
User avatar
tony.latham
Gold Donating Member
 
Posts: 6900
Images: 17
Joined: Mon Jul 08, 2013 4:03 pm
Location: Middle of Idaho on the edge of nowhere
Top

Re: Tom & Shelly's build

Postby Tom&Shelly » Sat Jun 13, 2020 6:47 pm

Thanks guys. I'm leaning towards the adele clamps, but I'd rather not drill into the tongue. Think I'll try and make (or find) a clamp that will bolt around the 2" x 3" tube and hold the adele clamp.

Tom
172912 170466 173366
Tom&Shelly
Palladium Donating Member
 
Posts: 2205
Images: 1961
Joined: Tue Sep 05, 2017 3:27 pm
Location: Upstate New York/New Mexico
Top

Re: Tom & Shelly's build

Postby Tom&Shelly » Sat Jun 13, 2020 7:18 pm

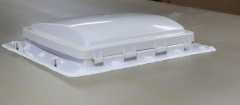
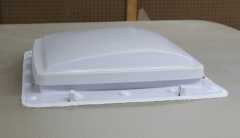
Did a few things in the past few days (nothing too spectacular). Used some OSI Quad max sealant to seal the fan
162223 162222

I was trying to make a sort of neat job of it and put masking tape around the fan, 3/16" from the edge of the fan, with the thought of pulling it up leaving a sharp edge. I think it would have worked with Masterseal, but not OSI (first time I've used it). They warn not to try and shape it, but just squeeze it out (3/8" bead recommended). I now know why: It sticks to itself and my fingers better than the surface I want it to seal. Anyway, now I know why others haven't used masking tape that way. And the roof is the place to try it, since at least some of us are just a little too short to see it.

I'm going to use their black sealant for the doors, and I think one lesson is to cut the nozzle narrower to get a smaller bead. I plan to use it under the flange in the cargo doors. Was then going to seal around the edges of the flanges, but I may not, or may use Masterseal, to attempt to make it neater looking. The passenger doors are designed differently--they take screws from the outside to mount. So for those, I plan to use butyl tape and then possibly seal around the doors with OSI or Masterseal.

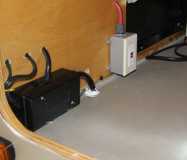
With what was left in the tube, I first sealed around the cable to the tow vehicle
162221

Incidently, I was able to make the cables a little neater. I tugged from the galley, while Shelly pushed from this front utility compartment, and moved the slack to the back. The wires inside the box still look ugly, so I'll leave the cover on! I also added a few low voltage clips to keep the 22 gauge speaker wire (to the front running lights) out of the way. (The AC outlet is for the air conditioner, when we have shore power.)

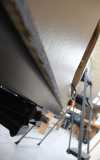
When we put the walls on a year and a half ago, the PL Premium pushed them away from the floor a little, and we didn't notice as we put the screws in. The result was about a 1/16" gap between the floor and walls in some places, where the wood was bare (to better adhere to the PL Premium). I tried brushing some epoxy up in there, but wasn't sure I covered everything. So I used most of the rest of the OSI sealant under there
162224

What a job that was! At first I tried applying it with my fingers. After they glued together, I decided our box of latex gloves (coincidentally purchased from Home Depot a week before the you-know-what and associated shortages of anything perceived to be PPE) might be the answer. Took about a dozen gloves, since once the stuff starts to dry, it builds up, and begins to get in places I don't want it. Anyway, done now!

The side cargo doors are deeper than the walls, and so will require some blocking behind the door openings. I made those out of scrap pine this morning, and applied varnish for water proofing
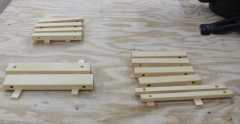
162225

Tom
172912 170466 173366
Tom&Shelly
Palladium Donating Member
 
Posts: 2205
Images: 1961
Joined: Tue Sep 05, 2017 3:27 pm
Location: Upstate New York/New Mexico
Top

Re: Tom & Shelly's build

Postby Tom&Shelly » Sat Jun 13, 2020 7:32 pm

Starting to consider the cabinet drawers in the teardrop cabin

162228

This was going to be a project for after our first few camp outs, but with the dang-panic, I may as well do it as we finish the rest of the cabin. (The only other things left in there are the trim around the cabinet, and screwing in the coat hooks next to the porch light switches.)

Instead of simply varnishing the Baltic birch doors, we're considering applying maps that, while not detailed enough to navigate with, would at least help orient us as we travel. One possibility would be a map of the US on one side, Canada on the other, and possibly Alaska on the back of the US map. (If Mexico ever opens up, we can make more doors!)

I like this one of the US National Forests. It also includes major roads

162232

I've looked at various maps of US National parks on-line, but haven't found any that really appeal, for the size available. Parks Canada has this one, that also includes major roads

162229

(We may trim it in the North--anything past roads is beyond our capability!)

Then, for Alaska, we have a few possibilities

162231 162230

Our major goal, after the teardrop is finished, is to live long enough to need all of these maps! :beer:

Tom
172912 170466 173366
Tom&Shelly
Palladium Donating Member
 
Posts: 2205
Images: 1961
Joined: Tue Sep 05, 2017 3:27 pm
Location: Upstate New York/New Mexico
Top

Re: Tom & Shelly's build

Postby Tom&Shelly » Tue Jun 16, 2020 6:58 pm

Installed blocking for the side cargo doors today, and then the doors. Decided to go ahead and install the cabin doors as well. Still need to take all of them out to seal. We'll wait on doing it with the cabin doors until I finish the interior trim and we've wrestled the mattress in. I also have to install the rain gutter above both cabin doors.

162257 162256

Tom
172912 170466 173366
Tom&Shelly
Palladium Donating Member
 
Posts: 2205
Images: 1961
Joined: Tue Sep 05, 2017 3:27 pm
Location: Upstate New York/New Mexico
Top

Re: Tom & Shelly's build

Postby Tom&Shelly » Sat Jun 20, 2020 1:46 pm

Went down this morning to try and figure out how to install the drip guards on our Challenger passenger doors

162291

Problem is, while there are four pre-drilled holes in the drip guards that are nice and evenly spaced, the holes in the doors themselves appear to be arbitrarily spaced (different on each door).

162292

This leaves a big problem--sometimes the holes for the drip guard are over the heads of the screws holding the door on

162293

Challenger loses a few points with us over this!

Also, you may notice it the last photo, the end of the drip guard looks like it might just catch someone someday on the side of the door and tear a shirt sleeve, or skin.

So what to do?

We talked about either filling the pre-drilled holes in the drip guard, or putting in dummy screws, to keep the water out, and then drilling our own holes.

We also talked about trying to make some spring clips that would go into the channel in the door where the screws are, and attach the drip guard to those. Problem with that idea is that most spring steel is not stainless.

I considered various possibilities involving making our own drip guards out of pine, and using epoxy to water-proof. This might involve trying to move the porch lights over a few inches, if the home made drip guards were designed to go over the tops of the doors.

For now, we decided to order some of this

https://www.dawn-ent.com/Exterior-Accessories/Extruded-Moldings-Trim/Rain-Gutter-Molding/DW20G-KT-Drip-Rail-Rain-Gutter-Guards

The plan is to stick it in the channel on the door where the screws are, screwing those screws through both the rubber and aluminum door to hold the door on. Not necessarily my favorite solution, but we've ordered the rubber rain gutter and we'll see if it's likely to work.

Shelly also want to put something like that on the bottom of our hatch, since it will slope down slightly when open, to keep rain off her back when using the galley.

As always, thoughts, comments, and suggestions are most welcome! :worship:

Tom
172912 170466 173366
Tom&Shelly
Palladium Donating Member
 
Posts: 2205
Images: 1961
Joined: Tue Sep 05, 2017 3:27 pm
Location: Upstate New York/New Mexico
Top

Re: Tom & Shelly's build

Postby Graniterich » Sat Jun 20, 2020 5:30 pm

I had the same problem, redrilled holes, but was disappointing. How are yours closing? The last ones I got you have to lean your shoulder into to close all the way, barely doable from the inside. Had to remove striker plate. Any issues on your end?

Sent from my KFKAWI using Tapatalk
User avatar
Graniterich
Donating Member
 
Posts: 501
Joined: Tue Sep 16, 2014 3:39 pm
Top

Re: Tom & Shelly's build

Postby tony.latham » Sat Jun 20, 2020 6:20 pm

I'll be curious to see your solution...

Shelly also want to put something like that on the bottom of our hatch, since it will slope down slightly when open, to keep rain off her back when using the galley.


You know... it may not be a problem. Or at least something you can add down the road if it is.

Image

:thinking:

Tony
User avatar
tony.latham
Gold Donating Member
 
Posts: 6900
Images: 17
Joined: Mon Jul 08, 2013 4:03 pm
Location: Middle of Idaho on the edge of nowhere
Top

Re: Tom & Shelly's build

Postby Tom&Shelly » Sat Jun 20, 2020 7:12 pm

Graniterich wrote:I had the same problem, redrilled holes, but was disappointing. How are yours closing? The last ones I got you have to lean your shoulder into to close all the way, barely doable from the inside. Had to remove striker plate. Any issues on your end?

Sent from my KFKAWI using Tapatalk


They don't seem to be too bad. The one on the starboard side (mine) seems like it needs a little force, which I'd be hesitant to do at 3 am. I noticed the bolt seems to have some sort of dried lubricant on it, so I'll clean that off and see how it works.

Tom
172912 170466 173366
Tom&Shelly
Palladium Donating Member
 
Posts: 2205
Images: 1961
Joined: Tue Sep 05, 2017 3:27 pm
Location: Upstate New York/New Mexico
Top

Re: Tom & Shelly's build

Postby Tom&Shelly » Sat Jun 20, 2020 7:18 pm

tony.latham wrote:I'll be curious to see your solution...

Shelly also want to put something like that on the bottom of our hatch, since it will slope down slightly when open, to keep rain off her back when using the galley.


You know... it may not be a problem. Or at least something you can add down the road if it is.

Image

:thinking:

Tony


I saw the discussion on those tents a few weeks ago, and they look interesting. After we've tried out the teardrop a few times, I may suggest it.

Shelly is hesitant because of the set up/tear down, and a perceived problem with wind. On the other hand, she made me design the front utility compartment to hold the (nearly 5 foot long) Eazy-up for similar use. She has experience with them (I don't) and she says they are terrible in wind. The solution you show looks to me like it might work pretty well.

Tom
172912 170466 173366
Tom&Shelly
Palladium Donating Member
 
Posts: 2205
Images: 1961
Joined: Tue Sep 05, 2017 3:27 pm
Location: Upstate New York/New Mexico
Top

PreviousNext

Return to Build Journals

Who is online

Users browsing this forum: smeerkees and 41 guests