A huge Thank You, and a really great tip!

Canvas covered foamies (Thrifty Alternatives...)

Moderator: eaglesdare

A huge Thank You, and a really great tip!

Postby MatBirch » Sun Sep 15, 2019 10:44 am

Hi gang, if any of you remember, I was starting my project early this past spring. Well, things changed, the project grew, funds dwindled, and we went in a new direction. Admittedly, I was and still am hesitant about a foamie in the size I wanted. An 8’x 12’ section of roof is a lot to span without more support. Anyway, I redesigned and went with wood. I framed it in with 1-1/2” thick walls, and 2-1/2” thick roof. I sheeted the entire thing with 1/8” Luaun. I will be spraying the inside with 2# expanding urethane foam. That will add a lot of stiffness and really lock everything together. I can get it done for free, so it ultimately will save me several hundred dollars. Going this direction has also allowed us to spread the expenses out over a few paychecks.
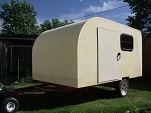
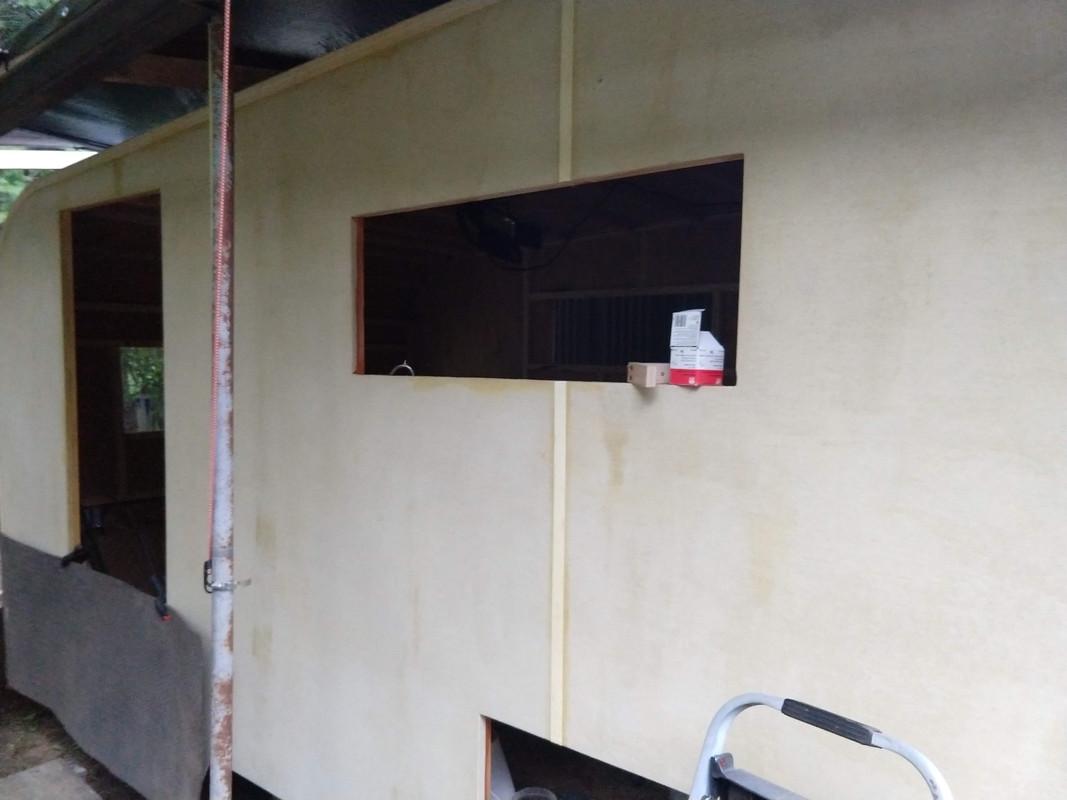
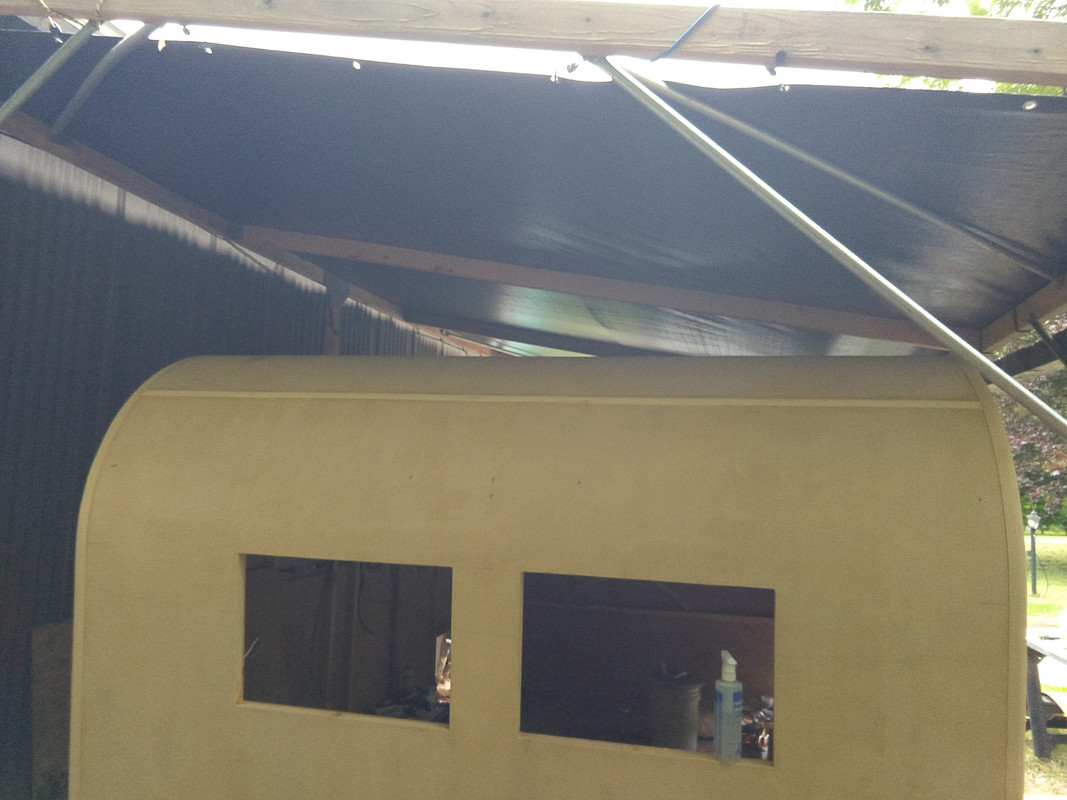
I went ahead with PMF for my skin using all the tips and tricks and resources that you all have shown here. I used the TB2 “System”. I bought the TuffBoy canvas tarps from amazon. 12’x15’ seamless for the sides and 9’x12’ seamless for the top. I knew I would wind with up a seam on the roof, but I’m ok with that. I actually wound up with two seams up there, as a little less than 24’ linear feet didn’t reach the running length of “up, over, and down” for the front, back and roof. I had a chunk of the harbor freight tarp I had picked up for testing that was perfect size, so it became my filler piece.
All in all, it was pretty easy. I will say, I totally let the task worry me way more than need be! I just simply clamped it overhead, climbed under the “curtain”, and started rolling on glue. The spray bottle of water and laminate roller made quick work of smoothing and sealing. The roof and front/back were a little more difficult, mostly from working space constraints. I had hoped to just pull the tarp off of my awning for the job, but it hasn’t stopped raining much here in months. Crawling around up under that roof was a real b*tch!
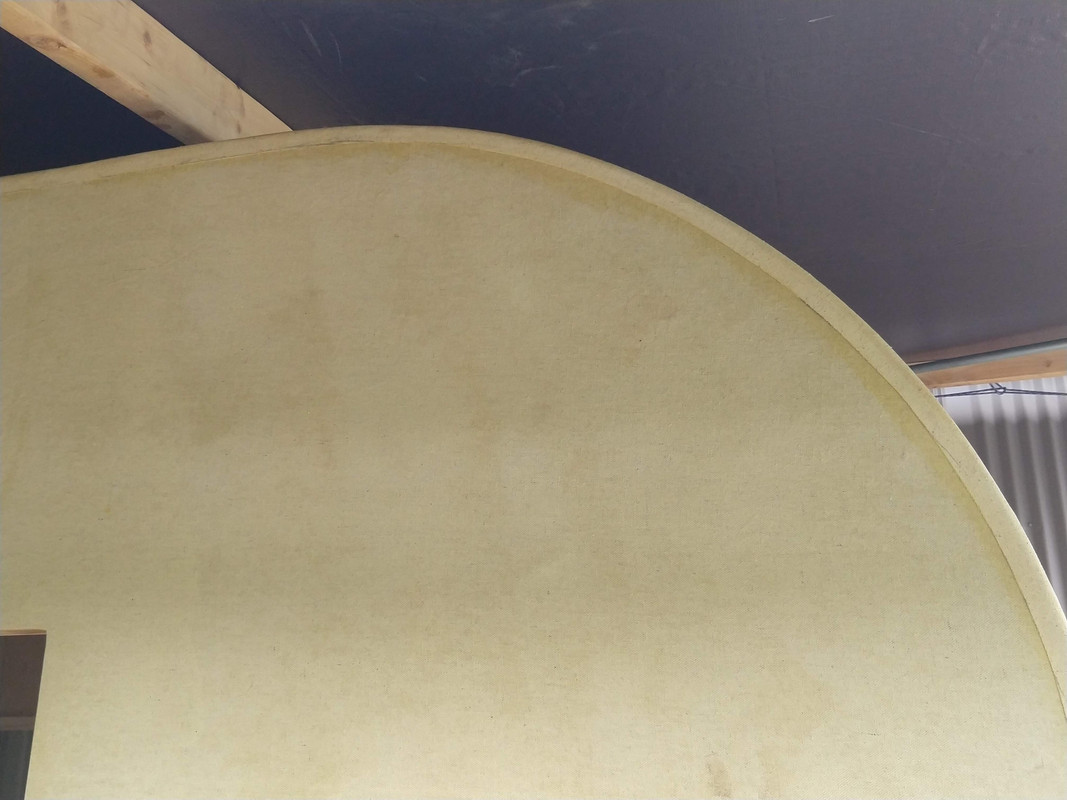
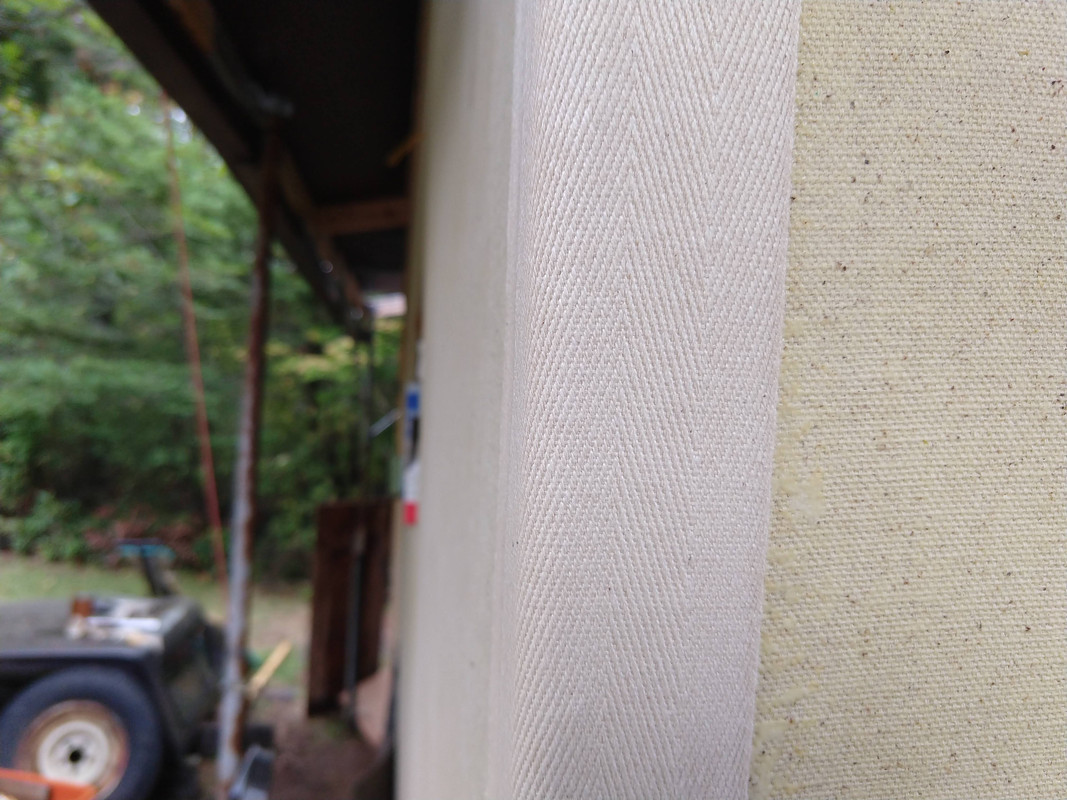
Here comes my big tip! When it comes to the edges and trimming out the canvas, I think most will agree that George (gcoe) has cornered the market on workmanship. I tried to follow his tips and it turned out great...ish. Lol. I wasn’t too worried about it though because I had an Ace up my sleeve.
Twill Tape!
https://ribbonfactory.com/store/display_item/1094.html
The wife and I wanted a little bit more contrast to differentiate the wall/roof joint, but I really didn’t want to drill a bunch of holes it my trailer, or pay the high prices for crappy RV trim. I also had two spots where my plywood seams didn’t come together quite as pretty as I’d have liked, so the twill tape covers those as well. By ADDING a piece, rather than drawing attention to the problem, the tape makes it look intentional, and the eye just looks right past it.
I bought a roll of 3”, as well as 1”.
I applied it just as I did all the other canvas. The last step was ironing it all down to smooth and seal it really it really well.
(I actually ironed the entire trailer with a piece of parchment paper between iron and canvas. It really smoothed out all the nubs and bits. Should cut down on a lot of sanding to get a smooth finish!)
Image
Image
Image
Image

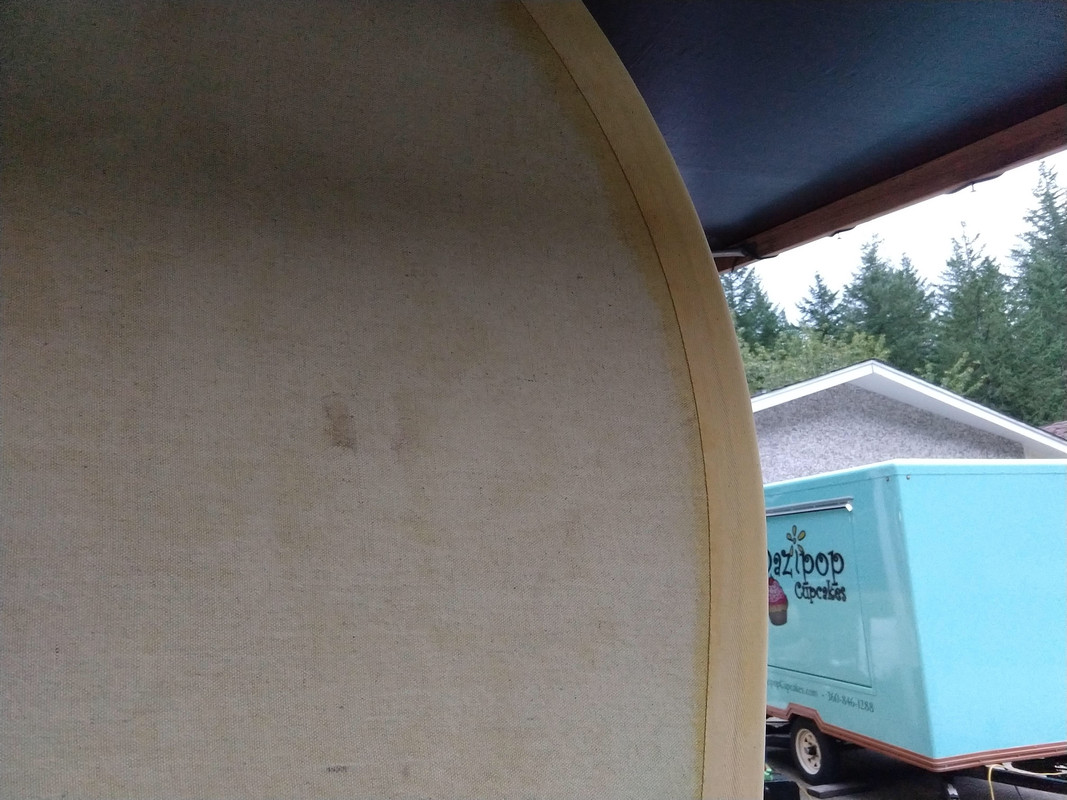
I think it came out amazing! As you see, the overlap is still visible under the tape, but if one wanted to, a bead of caulk or filler prior to taping would hide it even more. I kind of like the look. It just adds detail.

You can find my whole build thread over in Canned Hams. I moved over there when I changed course on my build, since it no longer really fit here.
viewtopic.php?f=53&t=71911

Again, I want to thank you all for the time and effort you put into this community! If it wasn’t for the effort you put in to showing us all what you have done, people like me would never even attempt to build something like this!
MatBirch
Teardrop Advisor
 
Posts: 88
Images: 0
Joined: Mon Feb 11, 2019 3:54 pm

Re: A huge Thank You, and a really great tip!

Postby me&z » Sun Sep 15, 2019 11:05 am

Twill trim looks very nice.
me&z
Teardrop Master
 
Posts: 128
Joined: Sat Apr 23, 2016 4:46 am

Re: A huge Thank You, and a really great tip!

Postby ghcoe » Sun Sep 15, 2019 12:37 pm

Looks Great!

Thanks for the kind comments on the PMF.

I looked at the ribbon and found that they do offer a 4" wide ribbon. This should not affect you, but for foamie construction you would want the ribbon twice the width of the foam you are working with. I have found that the expansion and contraction of the foam you will get a seam line where the walls are glued together. Usually it is more noticeable the closer you get to the floor since the floor, if made of wood, has a different expansion/contraction rate as foam does. To hide this line I overlap the canvas around the corners to the wall glue line line.
George.

Gorrilla Glue, Great Stuff and Gripper. The three G's of foamie construction.

My build viewtopic.php?t=54099
Working with flashing for foamie construction viewtopic.php?f=55&t=60303
Making a hot wire http://tnttt.com/viewtopic.php?f=55&t=55323
User avatar
ghcoe
1000 Club
1000 Club
 
Posts: 1943
Joined: Fri Dec 11, 2009 11:20 pm
Location: SW Idaho
Top

Re: A huge Thank You, and a really great tip!

Postby RJ Howell » Sun Sep 15, 2019 3:38 pm

I have to say, I really like the ribbon! Very clean look! Like how it stretched through the curves. :thumbsup:

I probably missed it, yet where did you get that? Never-mind, found it...
RJ Howell
1000 Club
1000 Club
 
Posts: 1161
Images: 36
Joined: Sat Jul 27, 2019 6:08 am
Top

Re: A huge Thank You, and a really great tip!

Postby RJ Howell » Sun Sep 15, 2019 3:46 pm

ghcoe wrote:L This should not affect you, but for foamie construction you would want the ribbon twice the width of the foam you are working with. I have found that the expansion and contraction of the foam you will get a seam line where the walls are glued together.


I lapped over on my seams before canvas and faired it a bit so not to show. I like this as a molding of sorts and added corner protection. And of course the clean lines!
Being done as I said I've done.. This looks pretty nice to me. Your thoughts? I could add this and clean up my lines.
RJ Howell
1000 Club
1000 Club
 
Posts: 1161
Images: 36
Joined: Sat Jul 27, 2019 6:08 am
Top

Re: A huge Thank You, and a really great tip!

Postby ghcoe » Sun Sep 15, 2019 4:58 pm

RJ Howell wrote:
ghcoe wrote:L This should not affect you, but for foamie construction you would want the ribbon twice the width of the foam you are working with. I have found that the expansion and contraction of the foam you will get a seam line where the walls are glued together.


I lapped over on my seams before canvas and faired it a bit so not to show. I like this as a molding of sorts and added corner protection. And of course the clean lines!
Being done as I said I've done.. This looks pretty nice to me. Your thoughts? I could add this and clean up my lines.


The way I cut the canvas along the edges I get a clean line anyway. This would be nice if you wanted some contrast on the build. Might be a bit tricky to apply it straight though.
George.

Gorrilla Glue, Great Stuff and Gripper. The three G's of foamie construction.

My build viewtopic.php?t=54099
Working with flashing for foamie construction viewtopic.php?f=55&t=60303
Making a hot wire http://tnttt.com/viewtopic.php?f=55&t=55323
User avatar
ghcoe
1000 Club
1000 Club
 
Posts: 1943
Joined: Fri Dec 11, 2009 11:20 pm
Location: SW Idaho
Top

Re: A huge Thank You, and a really great tip!

Postby MatBirch » Sun Sep 15, 2019 8:41 pm

ghcoe wrote:
The way I cut the canvas along the edges I get a clean line anyway. This would be nice if you wanted some contrast on the build. Might be a bit tricky to apply it straight though.


I just made a quick and dirty tool to mark the body. The first hole is to mark the canvas the first time around, then I drilled a second hole for the 3” tape. It was pretty easy to keep straight.

Image

Most of my first edges turned out pretty descent anyway, but we also really just wanted some “trim” as opposed to the smooth monocoque look. For a vintage inspired build, it just looked like it was missing something. The side edge looks nice, but the front/back/top looked nekkid. 8)

Image
MatBirch
Teardrop Advisor
 
Posts: 88
Images: 0
Joined: Mon Feb 11, 2019 3:54 pm
Top

Re: A huge Thank You, and a really great tip!

Postby GPW » Mon Sep 16, 2019 4:19 am

Great Covering Job !!! 8) :thumbsup:
There’s no place like Foam !
User avatar
GPW
Gold Donating Member
 
Posts: 14911
Images: 546
Joined: Thu Feb 09, 2006 7:58 pm
Location: New Orleans
Top

Re: A huge Thank You, and a really great tip!

Postby tac422 » Mon Sep 16, 2019 7:52 am

The twill tape is a great idea !
That looks really good.
User avatar
tac422
500 Club
 
Posts: 639
Images: 224
Joined: Sun Mar 17, 2013 11:39 am
Top


Return to Foamies

Who is online

Users browsing this forum: No registered users and 23 guests