Teardrops n Tiny Travel Trailersor t n ttt for short (tnttt.com) |
Superlegerra -ish 5x9 foamy - First Trip!
Moderator: eaglesdare
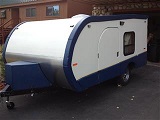
Re: Superlegerra -ish 5x9 foamy - roof started
![]() by atahoekid » Fri May 16, 2014 11:54 pm
by atahoekid » Fri May 16, 2014 11:54 pm
I had a few months of no work when I had shoulder surgery during the middle of my build. It is a great time to contemplate next steps. You'll come back refreshed and energized. One week will fly by!!!
Mel
"Believe in your abilities... Remember amateurs built the ark, professionals built the Titanic"
"Indecision may or may not be my problem" Jimmy Buffet
The Road Foamie Build Thread: viewtopic.php?t=45698
"Believe in your abilities... Remember amateurs built the ark, professionals built the Titanic"
"Indecision may or may not be my problem" Jimmy Buffet
The Road Foamie Build Thread: viewtopic.php?t=45698
-

atahoekid - Platinum Donating Member
- Posts: 1773
- Images: 158
- Joined: Sat Jul 24, 2010 2:49 am
- Location: Incline Village, NV
Re: Superlegerra -ish 5x9 foamy - roof started
![]() by lthomas987 » Sun May 18, 2014 11:49 pm
by lthomas987 » Sun May 18, 2014 11:49 pm
I got back into town Friday, to discover my TV had developed a click not start issue. So that and car shopping for my partner's new car ate most of my Saturday. Laundry and flyball practice ate most of today. I did get the second roof section glued down. I didn't get any photos because it was too dark in the garage by the time I got done. I'll try and snap a few on my way out to work in the morning.
I have a bit of a thing to think over now. I have about exactly 8ft of roof/hatch to go. However if I just split it in half I think the hatch opening will be too low and too far back. So I need to decide where the hatch hinge is going and cut the roof pieces and get it glued in place.
Then internal structure building, and door cutting and window cutting. Adding hard points. Canvas.. and I'm almost done! I am thinking about my hatch area some.. and the bottom of the galley seal. Hopefully some day this week I'll be able to take pictures in the light and get the input of this august body. Ya'll are my brains you know.
I did manage to score an old solder gun to use as a foam cutter. I am thinking of following in the steps of allan1 and his foam cutting with a solder gun and ground wire. http://www.tnttt.com/viewtopic.php?p=909609#p909609
Laura
Bike-Drop a Micro-Foamy Build Journal http://www.tnttt.com/viewtopic.php?f=50&t=59274
My first Superlegarra-ish Foamy build http://www.tnttt.com/viewtopic.php?f=55&t=59049
Bike-Drop a Micro-Foamy Build Journal http://www.tnttt.com/viewtopic.php?f=50&t=59274
My first Superlegarra-ish Foamy build http://www.tnttt.com/viewtopic.php?f=55&t=59049
-

lthomas987 - Donating Member
- Posts: 357
- Images: 204
- Joined: Sun Feb 02, 2014 2:41 pm
- Location: Minneapolis, MN, USA
 See Laura....if you build it (and post pictures
  ) they WILL come out of the " foamwork ".


 , because I needed that 1" of height. Then it occurred to me I had just made awesome hot foam cutting tools. So I've added that to my agenda. (I might make a custom one for that purpose that takes out a wider slightly deper swath and is closer to the edge of the wood block so I can get right up against things and leave less to chip out by hand.
  ) Use the hot wire tools to cut insulation out of the bottom of the trailer to leave room for the fenders. A smart person would have just not glued foam in those spots or would have cut out for them first.