Another foam standie...

Canvas covered foamies (Thrifty Alternatives...)

Moderator: eaglesdare

Re: Another foam standie...

Postby Wobbly Wheels » Sat Nov 17, 2012 1:21 pm

GPW wrote:...you’ll be the envy of all the SF people ....


That's a bit of a dubious distinction, isn't it ?
Kinda like getting the 'Most Paranoid' Award at the Conspiracy Nuts' Convention ?
:lol: :lol:


I haven't started thinking very seriously about color schemes yet, but I'm thinking of white for the body and black tint for the windows...so it is a workable theme
User avatar
Wobbly Wheels
Donating Member
 
Posts: 1080
Joined: Tue Mar 15, 2011 9:51 am

Re: Another foam standie...

Postby Wobbly Wheels » Sat Nov 24, 2012 10:38 pm

The trailer's progressing a bit this weekend: I got the glassed roof panel cleaned up and glued in.
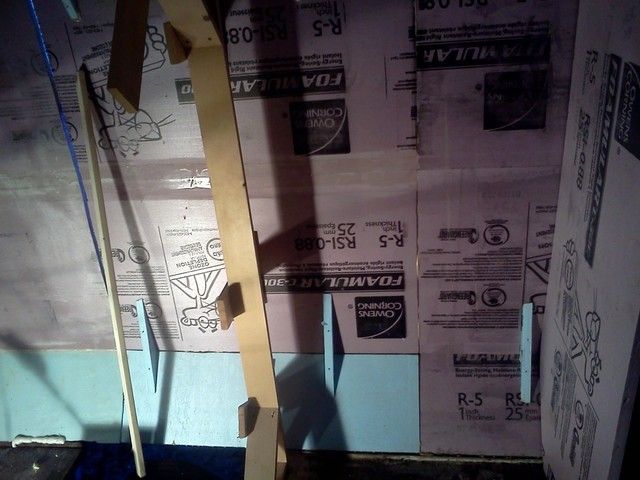
The next task is to tab it in (glass the seams between it and the adjacent panels). This weekend I'm looking to get that done and to tab the floor seams on the side panels as well. That will mean that I have the back half of the shell completely glassed all the way around and I can remove the straps preventing the back wall from flexing backward. The next side panel on each side will also mean that I can get rid of the next 1X4 former.
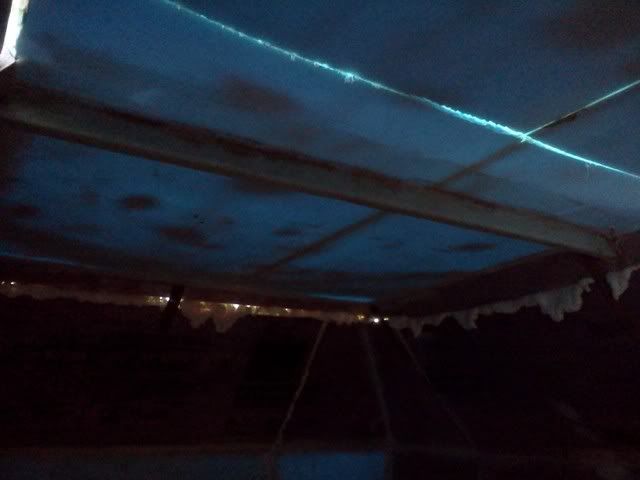
I must be making progress if I'm measuring it by the temporary jig work I get to take out, right ? :lol:

There are 3 more side panels to glass, then I'm working on the nose - I haven't decided if I'm going to tackle that one in place or not. The more I think about it, the more I think I'll cut it in half to give me two corner sections (like how I did the two back corners, but without the center panel).

The project might be hung up for a bit - I need to buy the rest of the glass and resin for the shell. Thanks to a knee injury last year, I can't keep on with the job I've been doing so I'm beating the streets again. Hopefully it won't be too long before I get into something that's a little easier on the beat-up joints.
My wife jokes that I'm barely over 40 but I have the knees of someone twice my age...

Enuff whining, on to the pics...
Image
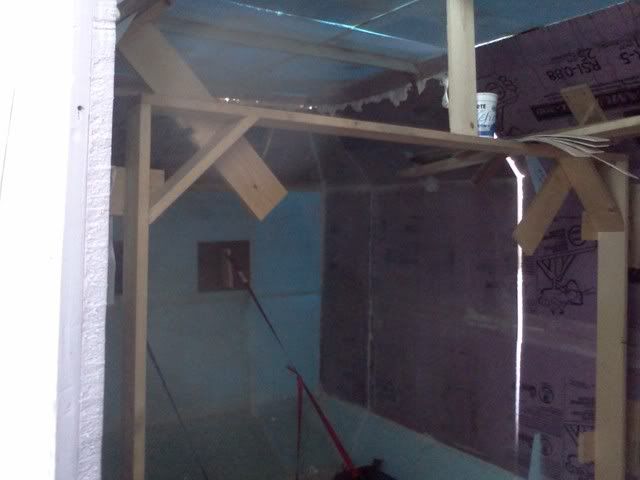
This is looking in through the door - the back section of roof is what just got glued in. The former in the foreground is the next one that'll come out. There's one more in front of that that holds the nose panels in place and it'll need to stay until the forward roof section (with the curb for the vent) gets glassed into place. The crack of daylight shows where the next side panel starts.

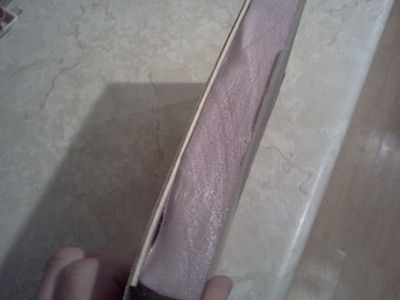
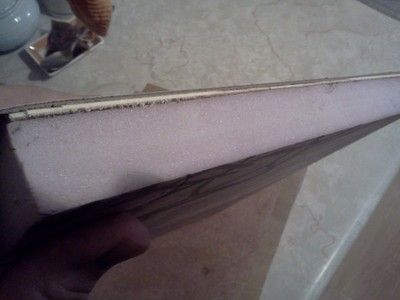
And...here's the roof panel itself. The foam has since finished its expansion and been trimmed down. I ought to be able to glass those seams with the cloth I have left.
Image
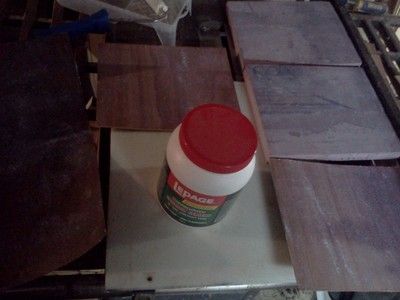
I can't say enough good things about canned foam as a styrofoam adhesive. The biggest advantage in my build is that it's exactly the same density as the styro so when I sand it, I don't have a hard glue line that's trying to stand proud like with GG.
Not that GG isn't wonderful stuff, of course :thumbsup:
This particular can is the dregs of the same can as my post on Oct 2. It may not have been new then, so it shows how long you can keep the stuff if you get all the glue out of the valve.

-----------------------
Feel free to tune at this point, the rest is mostly just a ramble to get down some ideas for later: it's about where the 'build journal' becomes more 'journal' than 'build'. I promise there won't be a quiz on it later. :lol:

It was pretty close to freezing when I was out there tonight and a propane lantern saw me working in a t shirt. I plugged the door into its hole, but the door's window and the wheel wells were still open. I have been tossing around a couple ideas for heat, but I think I'll just go with a small propane catalytic heater (and a CO monitor of course !). There was a pretty obvious stratification of warm air up high, so I'm thinking a small circ fan will be needed to keep the heat distributed.
That said, I have a lot of glass still to go in and that's going to make a big difference (especially the 2 jalousie windows !)

At least I have other little stuff to work on while production is delayed.

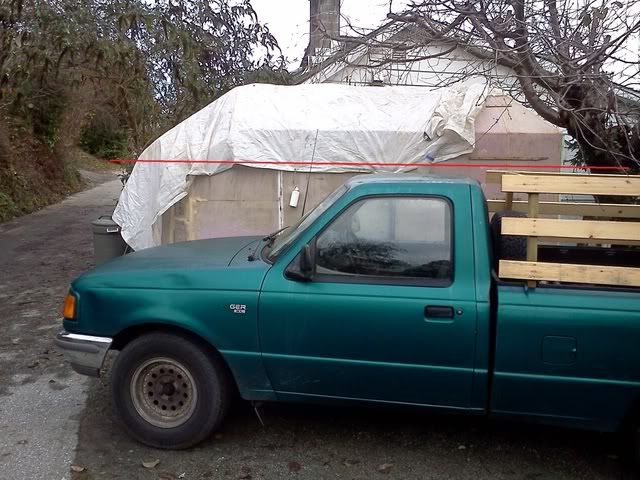
I had another neighbour stop by today while I was working: she came and had a look inside and we chatted about it for a bit. I live on a pedestrian route, so people are always walking by. We talk for a bit, and they are blown away by how light it is when they lift the tongue. As I've been lifting the glassed panels into place and securing them with a few drywall screws, I can't see how the whole shell could weight more than 1-200 lbs...then add 2-250 for the trailer and deck.
It'll put on a lot of weight once I start loading it up - the fridge and stove must be 200lbs together, water, batteries (2X10⁵#).
I think I'm still going to make my 1000lb mark, though. My axle is 2000# and the GVW on my reg is 1400# (700kg), so I do still have a margin....but I need to keep the weights in mind. I am pulling it with a 4cyl pickup after all....

As far as sidewinds go, the trailer is 8' high and 13'4" long. The track is 5' and the width is 7'. I have canted the upper corners (see avatar) and sacrificed the convenience of upper cabinets in favour of fixed windows there.
Personally, I don't see any problems with wind loading....but I'm sure Catherine didn't either....

At one point, I was going to use a two burner LPG cooktop and mount it in the counter above the fridge, but now I'm fixed on a 3 burner stove w/oven so it and the fridge will take up separate floorspace. I have room to put the fridge under the counter at the aft end of the galley (which will be along the port wall) but I would like to mount it up high to make it a little easier on the knees...it's about 100lbs and its CG would be right in line over the wheel. Given the other concessions I've made for weight and the ballast I'll have down low, I don't see it being a problem. I will have probably 100# of solar on the roof -

The rigging at this point is 2X Gp31 deep cycles at 105# each installed on the floor under the dinette seat on the starboard side right behind the wheel.
I have four 15W solar panels with an octopus to connect them into an array and a 7A controller. The rule of thumb is 60W of solar for every 100A*h of battery. Though I will have twice the battery capacity, it will be mainly for maintenance while stored and to extend the batteries' capacity rather than fully replenish it. Besides, I have booster cables until I get a genny.... :wink:

For water, I have a plastic bladder (~45gal) I want to use to line a water tank - it will eliminate the need for a tank vent, I have it already, and it doesn't weigh anything. With bladders, you build a tank as normal - it doesn't have to be watertight but it needs to support the bladder without risk of puncturing it and the bladder contains the fluid. If you've ever been in a helicopter, you've probably sat on top of a bladder full of jet fuel, so the idea is sound...that will be about 350# (if filled all the way) over the wheel on the port side - and definitely on the floor !!!

I have though about the blue 5 gallon spigot cans on the floor while driving and then moved to the counter top. That would be fine for me, but my wife is a non-camper who prefers hotel rooms...she likes the 'idea' of camping but it's incumbent on me to make sure the 'experience' is at least as pleasant as the 'idea', so a kitchen faucet is in order. I'll likely use a regular faucet when connected to city water on our first few trips but use a galley foot pump to draw from the tank. I was going to use a pump, but it's only for the galley sink: there's no running water in the head, just a portapotti and a Solar Shower fed through a window.

The galley sink will drain into a 4 gallon container which I will empty manually. The toilet is a portapotti with a detachable black tank I can dump into a toilet. The shower drain is already installed in the head floor - it terminates in a hose barb through the toilet pedestal to the underside of the trailer so I can attach a 1 1/4" hose to drain it away from the trailer or just let it drain free onto the ground (if appropriate).
User avatar
Wobbly Wheels
Donating Member
 
Posts: 1080
Joined: Tue Mar 15, 2011 9:51 am

Re: Another foam standie...

Postby GPW » Sun Nov 25, 2012 6:13 am

Really coming along now !!! :thumbsup: 8)
There’s no place like Foam !
User avatar
GPW
Gold Donating Member
 
Posts: 14912
Images: 546
Joined: Thu Feb 09, 2006 7:58 pm
Location: New Orleans
Top

Re: Another foam standie...

Postby eaglesdare » Sun Nov 25, 2012 9:18 am

yes it really is coming along. that is going to be another big one.
Louella
May the foam be with you.
User avatar
eaglesdare
Donating Member
 
Posts: 3168
Images: 13
Joined: Tue Aug 26, 2008 7:06 pm
Top

Re: Another foam standie...

Postby GPW » Sun Nov 25, 2012 12:31 pm

looks positively HUGE with that cup for comparison ... :o :thumbsup: 8)
There’s no place like Foam !
User avatar
GPW
Gold Donating Member
 
Posts: 14912
Images: 546
Joined: Thu Feb 09, 2006 7:58 pm
Location: New Orleans
Top

Re: Another foam standie...

Postby Wobbly Wheels » Sun Nov 25, 2012 2:07 pm

Hehe...yeah, I can't wait till I can strip out all the forming. Right now it's a little awkward to work inside...but there's certainly lots of elbow room !

Here's a pic with the truck for scale. Can't really see it with the tarp on, but the red line marks where the nose is faired down to keep the air moving smoothly over the top of the truck and onto the trailer. Those bed sides have a tarp over them to keep the weather off the dogs while driving. That will help the air flow over the bed like a canopy. We'll see if it works...
Image

It'll fill up fast though, given the pile o' parts I have to put in it:
Image

In looking at that pic, it's certainly not big by RV standards but it looks HUGE compared to most of the projects here... :lol:
User avatar
Wobbly Wheels
Donating Member
 
Posts: 1080
Joined: Tue Mar 15, 2011 9:51 am
Top

Re: Another foam standie...

Postby GPW » Sun Nov 25, 2012 3:56 pm

Really , that’s too COOL , sure looks like it will work huh !!! 8) :thumbsup:
There’s no place like Foam !
User avatar
GPW
Gold Donating Member
 
Posts: 14912
Images: 546
Joined: Thu Feb 09, 2006 7:58 pm
Location: New Orleans
Top

Re: Another foam standie...

Postby Wobbly Wheels » Mon Nov 26, 2012 2:37 pm

Thx Glen, it's done entirely by "TLAR" engineering (cheers, KC!) so we'll see how noticeable it is back there while towing....
The proof's in the pudd'n.
User avatar
Wobbly Wheels
Donating Member
 
Posts: 1080
Joined: Tue Mar 15, 2011 9:51 am
Top

Re: Another foam standie...

Postby eaglesdare » Mon Nov 26, 2012 3:24 pm

wow, that is big, especially with the truck in the pic.
Louella
May the foam be with you.
User avatar
eaglesdare
Donating Member
 
Posts: 3168
Images: 13
Joined: Tue Aug 26, 2008 7:06 pm
Top

Re: Another foam standie...

Postby atahoekid » Mon Nov 26, 2012 10:36 pm

Looking good. Can't wait to see it in use
Mel

"Believe in your abilities... Remember amateurs built the ark, professionals built the Titanic"

"Indecision may or may not be my problem" Jimmy Buffet

Image

The Road Foamie Build Thread: viewtopic.php?t=45698
User avatar
atahoekid
Platinum Donating Member
 
Posts: 1773
Images: 158
Joined: Sat Jul 24, 2010 2:49 am
Location: Incline Village, NV
Top

Re: Another foam standie...

Postby GPW » Tue Nov 27, 2012 6:02 am

“ To go where no foam has gone before !” 8)
There’s no place like Foam !
User avatar
GPW
Gold Donating Member
 
Posts: 14912
Images: 546
Joined: Thu Feb 09, 2006 7:58 pm
Location: New Orleans
Top

Re: Another foam standie...

Postby Wobbly Wheels » Tue Nov 27, 2012 9:32 am

Thx guys (and gal). I used masking tape on the floor to map out where the appliances, bulkheads, bed etc would be on the inside, and it still closed the space up pretty quickly.
I actually wish I had cantilevered the floor back another foot :lol:
I don't think it'll be long before I cut into it to put the slideout in the back wall...but first things first, lol.
User avatar
Wobbly Wheels
Donating Member
 
Posts: 1080
Joined: Tue Mar 15, 2011 9:51 am
Top

Re: Another foam standie...

Postby GPW » Thu Nov 29, 2012 7:21 am

Could you possibly condense your "appliances, bulkheads, bed etc” ? Even a couple inches here and there adds up ... Less is More !!!! :thinking:
There’s no place like Foam !
User avatar
GPW
Gold Donating Member
 
Posts: 14912
Images: 546
Joined: Thu Feb 09, 2006 7:58 pm
Location: New Orleans
Top

Re: Another foam standie...

Postby Wobbly Wheels » Thu Nov 29, 2012 9:41 am

Once I get the shell done and pull out the forms from inside, I think I'll use cardboard boxes the size of the appliances and mock up the bed so I can see how much floor space it takes up. I am close to kiboshing the fridge anyway in favour of a top loading icebox like on a boat - WAY more efficient. The box can be an irregular shape to fit whatever space I have rather than a square box of a fixed size. It's less critical to get the trailer level that way too.

Instead of going with a seatbox for the dinette, I'm using a pedestal mounted barrel chair.
It only saves me a couple inches...but it's a couple inches I can certainly put to good use. It also allows me to remove the chair, which will make it easier to get big things like mattresses and coolers in and out the door.
User avatar
Wobbly Wheels
Donating Member
 
Posts: 1080
Joined: Tue Mar 15, 2011 9:51 am
Top

Counter top tests

Postby Wobbly Wheels » Sun Jan 13, 2013 3:46 am

I mentioned in another thread that I'm getting to the point where I need to see if my foam laminate galley counter top idea will work or not.
I made up a couple test pieces the same way I'll build the real thing:
Image
Because normal (solvent-based) contact cement will melt the foam, I went with a latex based cement. I've never liked latex cements much, but it was the most feasible option for this application. There are two pieces of foam, 2 pieces of 1/8 luan, and 2 scraps of laminate. Everything got a coat of cement and the wood got two coats per side.

The finished panels ready for destruction about 2 hrs after gluing them up:
Image
I set a pot of water on the stove to boil. One panel was going to cover the pot as a lid for five minutes - that would be overkill for what it could expect to see in use, but I would be able to watch it deform as the foam started to melt.
The other piece would be a trivet for the pot when it came off the stove until it cooled on its own.

The one exposed to the steam deformed as one would expect, but not as severely as I would have thought:
Image
You can see the heat obviously penetrated through to the foam, but the cement survived.

The one used as the trivet showed absolutely no deformation:
Image

Tomorrow I'll pull the pieces apart to make sure there aren't any voids where the foam melted in the center, but I didn't feel any when I pressed on it where the heat had been applied. Barring any foam-pocalyptic melting I find, this is how I'll be doing the counter top. I'll have cedar hard points where the sink and faucet cutouts are going. The longest unsupported span will be the sink section at 16", so I'll make the sink stringers long enough to carry the weight of a sink full of water (or beer & ice !) to the gable at the stove and the fridge on the other end. The underside of the foam will be glassed to the gable at the forward (stove) end, which I might build the same way using aluminum roll flashing instead of laminate (a future test). The obvious worst case there is damage from the stove's heat, so I may just use a couple of studs to carry the counter's weight to the floor and skin it with the metal to close it.
At the same time, I'll make a piece to use as a drop board over the stove to increase counter space - but only when the stove's cold !

That will be clearer once it's all together.

And...I finally came up with an absolute, definite, etched-in-stone floor plan.
No, really !!
:lol:

I'm going with a convertible dinette after all because there just isn't the space to have a permanent queen bed in there. I've shelved the rear slide out for now, but the beauty of glass is that I can add it in later if I want to without having to strip off the skin and frame it like with a stick-and-staple RV. That will give me the permanent bed (while parked) and dinette.

I've also got the epoxy/ply water tank just about done: I just sealed the edges of the removable top piece and dealt with a couple pinhole leaks in the corners. I'll leak-test it tomorrow and then drill for fittings and plumb it as the counter top is going in. The drawback to building it this way is that I need to make sure I allow for everything so I'll be mocking up the galley with the stove and fridge so I can lay out the counter top once the water tank is ready...but that's another post.
I'll put up some pics of the tank construction too.

Till then, here's a teaser of roughly where the galley will be. The vertical stick on the left is about where the edge of the bed is and the forward bulkhead is sitting loosely on its mark (the head compartment is up forward of there).
Image
User avatar
Wobbly Wheels
Donating Member
 
Posts: 1080
Joined: Tue Mar 15, 2011 9:51 am
Top

PreviousNext

Return to Foamies

Who is online

Users browsing this forum: No registered users and 8 guests