The Poet Creek Express - Foamie Hybrid

Canvas covered foamies (Thrifty Alternatives...)

Moderator: eaglesdare

Re: The Poet Creek Express - Foamie Hybrid

Postby GPW » Wed Mar 04, 2015 7:03 am

Spring is here .... going into the 80’s today , won’t take long for the heat to spread up North .. ;)
There’s no place like Foam !
User avatar
GPW
Gold Donating Member
 
Posts: 14912
Images: 546
Joined: Thu Feb 09, 2006 7:58 pm
Location: New Orleans

Re: The Poet Creek Express - Foamie Hybrid

Postby Wolffarmer » Wed Mar 04, 2015 8:45 am

It is about 5 degrees here this morning. That is in F degrees. At least we do not have any real snow. should be up in the 50s by the weekend.
"these guys must be afraid of the dark"
User avatar
Wolffarmer
Donating Member
 
Posts: 4612
Images: 309
Joined: Wed May 02, 2007 1:32 pm
Location: Idaho Rupert

Re: The Poet Creek Express - Foamie Hybrid

Postby KCStudly » Sun Mar 08, 2015 1:53 am

It was a good day to get back into the groove. Not warm out, but the sun was shining and I got enough solar gain midday-afternoon that I actually shut down the heaters once it got up to 52 deg F in the loft (my comfort zone while I’m working).

Once the sun started past the trees the temps started dropping back pretty fast, but I made a big step today.

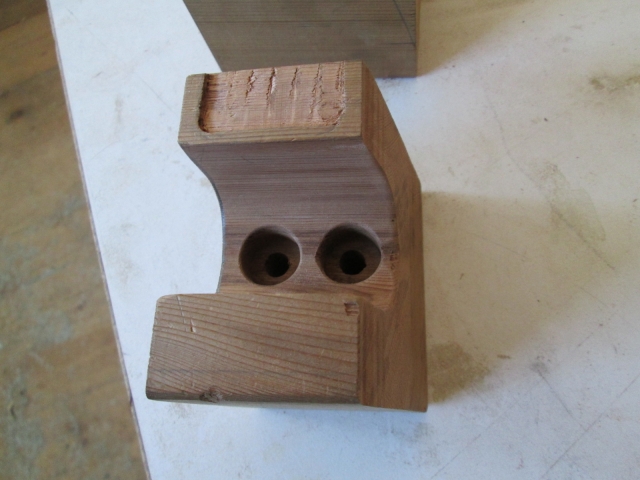
Had a couple of pics in the camera from before. Here’s the first upper shovel mount in progress. It ended up a little shorter than originally planned, so the bolt hole counterbores were closer to the edges and I got some chip out. A ding here and there, and I put the hinge mortise too close to the valley. That made it so the moving part of the hinge dragged some (which I could have clearanced for), and would have made it very difficult to round the edges over w/o breaking the lip on the mortise. I also didn’t like how I had cut the slope at the top too deeply toward the back. I would rather have this plateau out leaving the back edge squared off.
Image

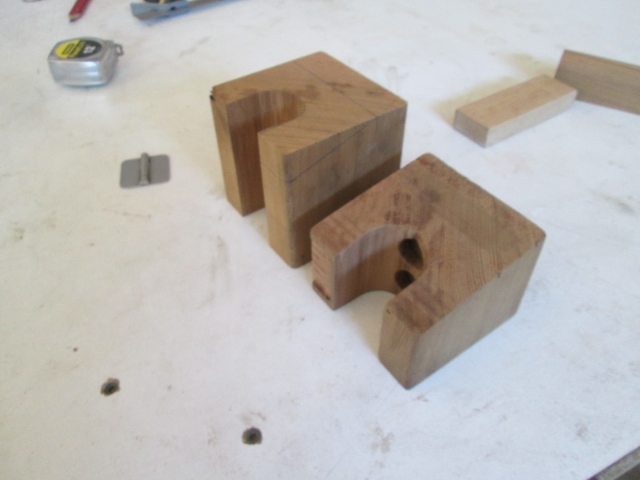
So I cut another longer blank and started a do over. Got the valley rough cut and hand sanded to fit the shovel better than the first attempt.
Image

So back to today. Finally stopped waffling and figured that I needed to be doing “mechanical” work that doesn’t need bonding or finishing. No sense trying to hang the cabin doors until after the canvas goes on; I might need to shave the doors down a tad to allow for the canvas. And the hatch hinge is sort of in the same boat, since the canvas will go under it. But I thought I was going to have to tune up the tops of the hinge spars with the plane; the forward hinge spar had rolled forward a hair on the rabbet for the ceiling skin making the rear edge a little higher than the hatch (or so I thought). Anyway, I test fit the hatch again and found that the spars weren’t really that far off.

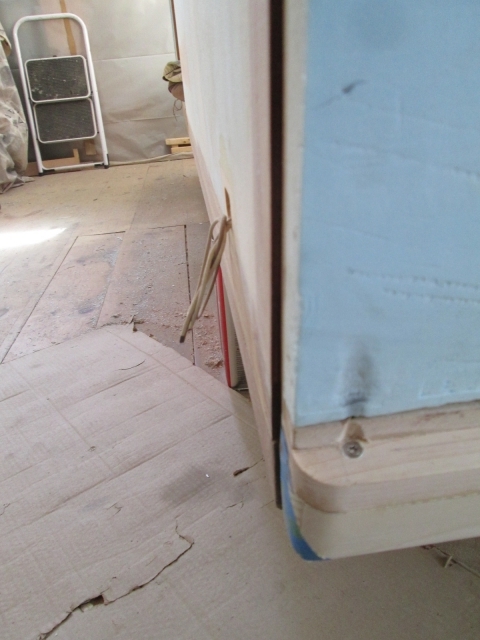
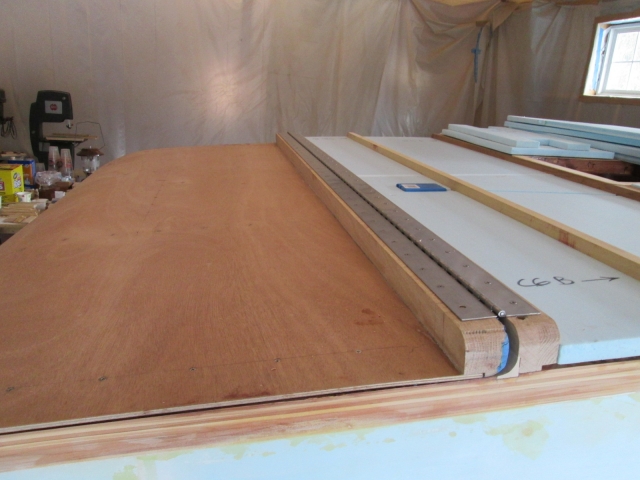
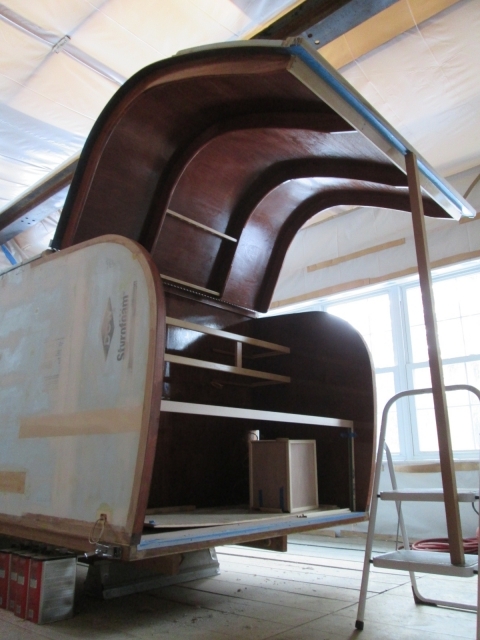
Here you can see how I have used 1/4 inch thk shims to clamp the spars together and the gap along the curb side at the hatch skin to wall edge. Later I swapped these out with narrower ones that didn’t stick up above the spar, so they wouldn’t interfere with fitting the hinge.
Image

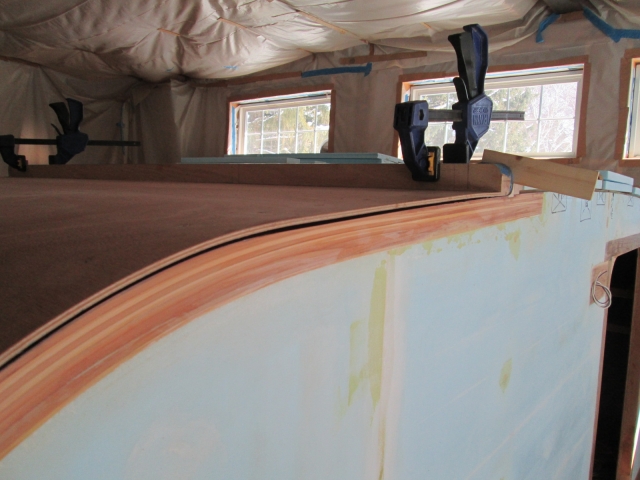
The gap appears to be from the hatch skin curling up slightly outside of the right hand hatch rib; it wings up slightly. Not sure if I noticed this before, or if it has warped up in the meantime. I’ll try to compensate for this when I get to fine tuning the wall edges and fit the seal.

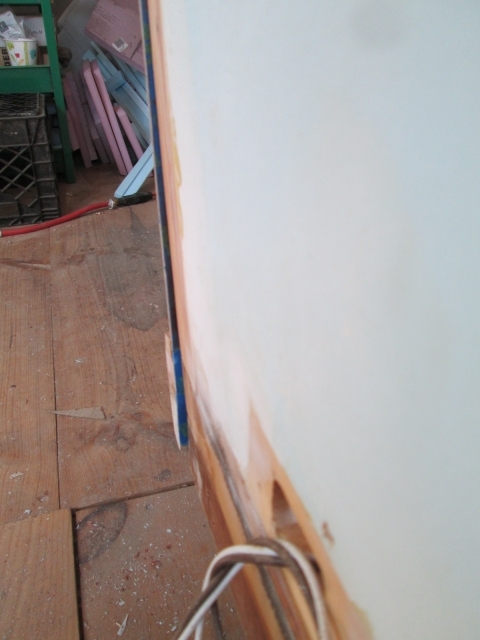
I started out shimming the spar 1/4 inch on each side reminding myself that it needed to be a little more on the curbside for best fit. Here you can see that the bottom of the hatch is sticking out on the curb side by about 1/8 inch, and is under flush on the street side by the same.
Image
Image

Like I had noted earlier, somewhere in the hatch construction I found that the best fit came with the street side of the hinge spars set at 1/4 inch gap and the curb side set closer to 3/8 inch (maybe a fat 5/16 inch). Once I swapped the 1/4 inch thk shim on the top of the curb side for a couple of cut down wedge shims, I was able to shift the bottom right back in to flush without putting any sideways force into the bottom or twisting the hatch frame.

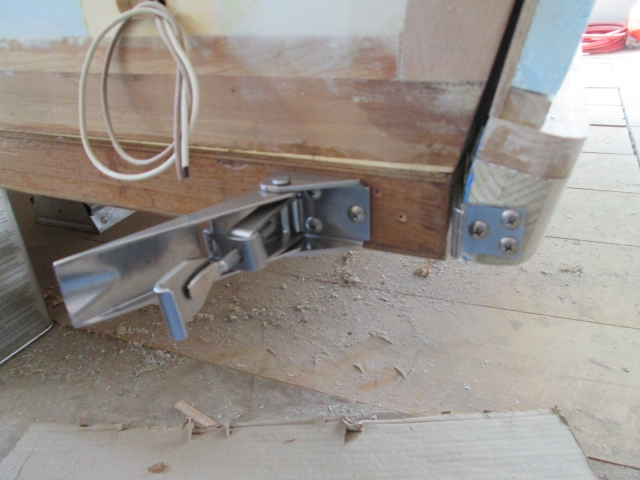
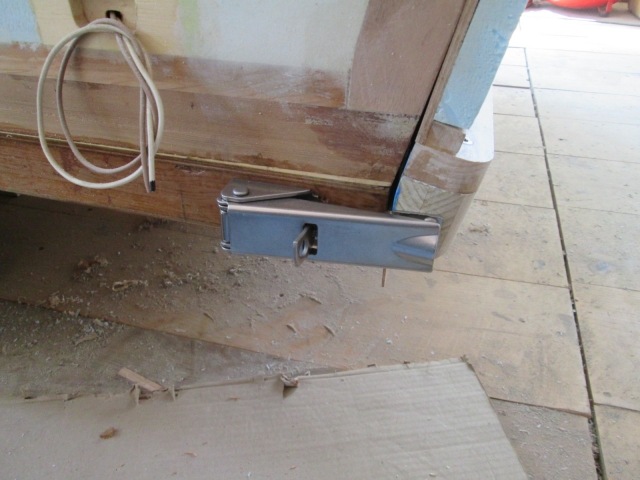
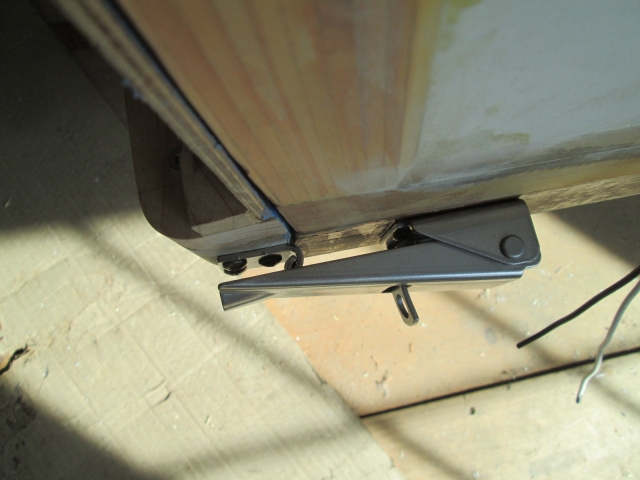
Once I was happy with that I figured the best way to hold the bottom in position would be to go ahead and install the draw latches. That way I will be able to pull the hatch in reliably and securely as I go thru the process of tuning up the wall edges. Out of the box I had to screw the adjustable hooks on the latches in quite a way to be sure that the handle covered the screws on the tab when it was latched; so that the screws weren’t exposed making it easier for someone to bypass the padlock feature by unscrewing them. I used #8 truss head screws. The end of the bumper wasn’t a very big target to secure the tab to, but I had enough leeway to position it slightly overhanging the forward edge; my thinking being that the rolled edge of the tab might help keep the hatch aligned sided to side, if that is ever an issue.
Image
Image
Image

Next I cut the hinge to length, tuned up the cut edge with my small fine file to remove the burr, and screwed it down. I don’t have one of those tools that center the drill in the holes, but I found that if I used one of the screws as a center prick and ran it with the drill in reverse, I could make a fairly accurate registration mark that kept the pilot drill from wandering off.
Image

Of course this is just a preliminary dry fit. I still need to punch the second set of holes for the trim and screws that will hold the rubber strip over the hinge.

And now a significant milestone, opening the hatch for the first time!
Image
Image
Image
Image

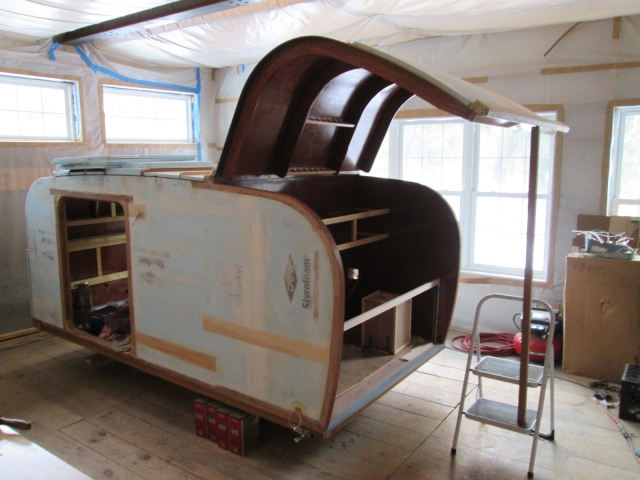
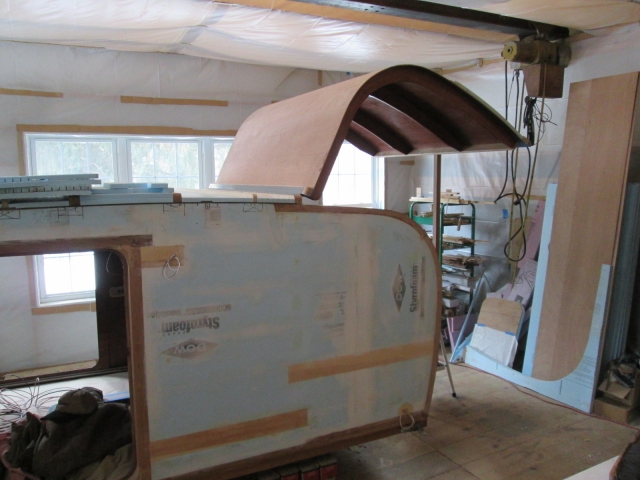
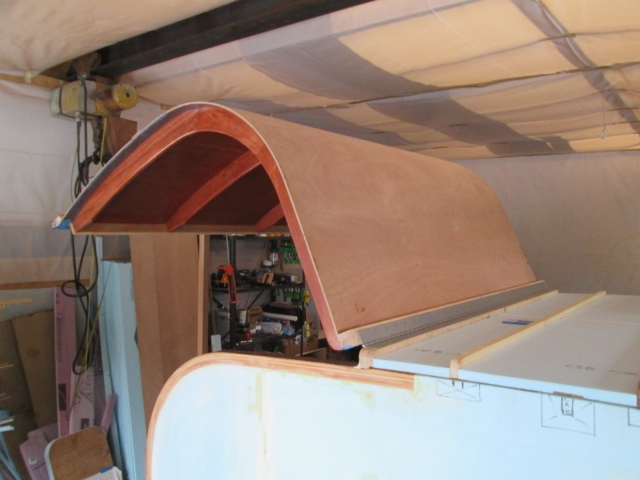
Without the foam and canvas the hatch is still flexible enough that I can shift the bottom enough to make the outer ribs hit the wall on either side, but if I just pick it up in the middle, like the actuators will, it clears just fine and goes right back flush each time. I expect this will be a non-issue, or at least significantly improved once the foam and canvas go on.

All in all it was a good day... and it didn't snow!!!
KC
My Build: The Poet Creek Express Hybrid Foamie

Poet Creek Or Bust
Engineering the TLAR way - "That Looks About Right"
TnTTT ORIGINAL 200A LANTERN CLUB = "The 200A Gang"
Green Lantern Corpsmen
User avatar
KCStudly
Donating Member
 
Posts: 9616
Images: 8169
Joined: Mon Feb 06, 2012 10:18 pm
Location: Southeastern CT, USA
Top

Re: The Poet Creek Express - Foamie Hybrid

Postby Wobbly Wheels » Sun Mar 08, 2015 2:25 pm

Looking great KC - a heady time indeed when the hatch goes on.

I still need to punch the second set of holes for the trim and screws that will hold the rubber strip over the hinge.

FWIW, I'll say here and now that I'm blatantly and un-apologetically stealing this idea :lol:
My question is how thick the aluminum strip needs to be to get a good clamp between the screws without bowing up. I've got a 3" hinge (1 1/2" leaves) so I'm thinking 3/4" wide by 3/16 thick. Sound about right ?

Re: your clearances between the hatch ribs and walls - are you going to put anything in that space for anti-chafe or do you figure the clearance alone is sufficient to prevent contact as the trailer is going down the road (or goat trail...) ?
User avatar
Wobbly Wheels
Donating Member
 
Posts: 1080
Joined: Tue Mar 15, 2011 9:51 am
Top

Re: The Poet Creek Express - Foamie Hybrid

Postby KCStudly » Sun Mar 08, 2015 9:39 pm

Thanks WW.

It's not so much a lack of clearance, it's more about the fact that the hatch is still fairly flexible. I guess I assumed that the draw latches will hold it snugly into the seal when the hatch is down and latched, and that it won't squirm around in that state, but you bring up a good point that it might. That's one of the reasons I tried to have the latch tabs register on the edges of the walls. If it doesn't stiffen up as much as I hope when the foam and canvas go on I can add a couple of nylon scuff pads on the sides of the rib tails, and SS wear plates on the inside lower corners of the walls to register it.

I did lose a little bit of clearance when I pulled the walls in to compensate for the hatch skin having marginal overlap, but that is more of an issue at the middle, not at the bottom.

On the hinge, mine is also 3 inches wide x 1/16 thk. The screws did pucker the leaves ever so slightly when drawn snuggly, but the oak backs it up well. The reason for the second set of holes is because I want the hinge mounted down hard with a full set of screws first, rather than having the hinge be allowed to squirm around between the screws and rubber.

I'm thinking my backer will be 1 x 1/8 thk aluminum with screws on 2 inch centers (like the existing holes in the hinge). With goop (sealant) between rubber and hinge, and between rubber and trim, shouldn't require too much force to affect a seal, so it probably doesn't need the extra thickness, but 3/16 wouldn't hurt. I kind of want to keep the whole hinge install as streamlined visually as possible so as not to interrupt the line of the profile any more than necessary.

Spent the afternoon chasing the galley wall edges. More details and a few pics after I load pics.
KC
My Build: The Poet Creek Express Hybrid Foamie

Poet Creek Or Bust
Engineering the TLAR way - "That Looks About Right"
TnTTT ORIGINAL 200A LANTERN CLUB = "The 200A Gang"
Green Lantern Corpsmen
User avatar
KCStudly
Donating Member
 
Posts: 9616
Images: 8169
Joined: Mon Feb 06, 2012 10:18 pm
Location: Southeastern CT, USA
Top

Re: The Poet Creek Express - Foamie Hybrid

Postby tony.latham » Mon Mar 09, 2015 2:20 pm

:thumbsup:

T
User avatar
tony.latham
Gold Donating Member
 
Posts: 6915
Images: 17
Joined: Mon Jul 08, 2013 4:03 pm
Location: Middle of Idaho on the edge of nowhere
Top

Re: The Poet Creek Express - Foamie Hybrid

Postby Mary C » Mon Mar 09, 2015 10:19 pm

wow you are really moving along, details can be so time consuming, but worth the result. it is looking good.

Mary C.
User avatar
Mary C
1000 Club
1000 Club
 
Posts: 1776
Images: 473
Joined: Mon Oct 15, 2012 6:29 pm
Location: Waco, Georgia
Top

Re: The Poet Creek Express - Foamie Hybrid

Postby KCStudly » Mon Mar 09, 2015 11:51 pm

Thank you Tony and Mary. Your feedback is encouraging as always.

As promised, a little more detail about how I am “gapping” the galley walls to the hatch underside. To recap, in the plan I never made any allowance for canvas thickness between the underside of the hatch skin and the tops of the wall edges. While the foam weather strip gasket will be set into a rabbet along the edge of the wall (where the wall canvas will wrap into, and that I can set by adjusting the depth of the rabbet), the canvas on the hatch will wrap all the way back to the edge of the first rib, so it needs to be able to fit over the wall without holding the hatch up. I’m not sure how many folds and overlaps there might end up being, but I figure I need at least 1/16 inch, and perhaps closer to 1/8.

On top of that, I want the reveal at the gasket to be nice and uniform all the way along the profile; and since the rabbet for the seal will be made with a rabbeting bearing bit following the top edge of the wall (same surface as the canvas clearance gap), I need to get this clearance gap dialed in accurately.

So with the hatch drawn up tight using the draw latches shimmed out by 1/16 inch, I used the cheesy little compass with a carpenter’s pencil strapped on to step off a line.
Image

You can kind of see how the pencil line continues away from the area that already has a gap.
Image

Next I propped the hatch up and I used the hand held power belt sander with 36 grit to work to the line. Used a small combination square to check that I was keeping the surface square to the face of the wall, and hand working with the large board and small block.

Here is an area at the top of the street side after the first round.
Image

And a look at the edging after all of the stain and poly (that I had let spill over from finishing the inside skin) was gone.
Image

So after doing that on both sides the hatch bumper was no longer sprung away from the back edge of the floor (apparently the places where the skin was touching the wall had been holding the hatch up), but I still had areas where the skin was touching.

I wasn’t happy using the little compass as a gauge. It didn’t want to close up small enough and was susceptible to being held at off angles. I started to monkey around with how to fit a rectangular pencil into a block of wood, and then fixing a tab on to one end of the block, when I realized that the simplest method was just to shim the pencil and tape it to the side of the block. I also made sure to sharpen the pencil to a chisel point against one side of the pencil. That way as the lead wears it doesn’t change the registration.
Image

Marked the gap again and went thru another round of sanding. It’s getting there, but there are still some tight spots. On the curb side where the skin is winged up, I have the clearance I want at the outside edge, but I can’t slip a piece of the ever present wax paper box shim all the way into the rib; so I may have to sand the top of the wall on a slight bevel to match the angle of the underside of the skin and not open the outside edge up any more.

Although I missed today, we are having a warm spell into the 40’s for a few days, so am looking for more progress on Wednesday.
KC
My Build: The Poet Creek Express Hybrid Foamie

Poet Creek Or Bust
Engineering the TLAR way - "That Looks About Right"
TnTTT ORIGINAL 200A LANTERN CLUB = "The 200A Gang"
Green Lantern Corpsmen
User avatar
KCStudly
Donating Member
 
Posts: 9616
Images: 8169
Joined: Mon Feb 06, 2012 10:18 pm
Location: Southeastern CT, USA
Top

Re: The Poet Creek Express - Foamie Hybrid

Postby S. Heisley » Tue Mar 10, 2015 12:52 am

Mary C wrote:wow you are really moving along, details can be so time consuming, but worth the result. it is looking good.

Mary C.


:yes: Yes, absolutely!
User avatar
S. Heisley
Super Lifetime Member
 
Posts: 8774
Images: 495
Joined: Mon Sep 17, 2007 10:02 am
Location: No. California
Top

Re: The Poet Creek Express - Foamie Hybrid

Postby KCStudly » Tue Mar 10, 2015 5:39 pm

Thank you Sharon!

Isn't it interesting how all of the little steps add up to one big feature? I mean, all I really did was heft the hatch on, fiddle a bit and drive a bunch of screws; and voila, it's a hatch! :lol:
KC
My Build: The Poet Creek Express Hybrid Foamie

Poet Creek Or Bust
Engineering the TLAR way - "That Looks About Right"
TnTTT ORIGINAL 200A LANTERN CLUB = "The 200A Gang"
Green Lantern Corpsmen
User avatar
KCStudly
Donating Member
 
Posts: 9616
Images: 8169
Joined: Mon Feb 06, 2012 10:18 pm
Location: Southeastern CT, USA
Top

Re: The Poet Creek Express - Foamie Hybrid

Postby Wobbly Wheels » Fri Mar 13, 2015 9:27 pm

It's not "voila" to anyone who has followed along and knows how much time you've put into getting everything 'just right'. :thumbsup:

It sounds like you need one of these.
I have to warn you: the link takes you to Lee Valley's site where, if you're not familiar with them, you'll lose a couple hours to browsing.

It looks like you're doing what I'll be onto in a week or two. I'll have to pace myself so I can see how it's done and pretend I knew it the whole time (just like Bob Vila did to Norm Abrams for years) :lol:
User avatar
Wobbly Wheels
Donating Member
 
Posts: 1080
Joined: Tue Mar 15, 2011 9:51 am
Top

Re: The Poet Creek Express - Foamie Hybrid

Postby KCStudly » Fri Mar 13, 2015 11:30 pm

WW, thanks for the kind words. I’m curious about your Lee Valley link; it took me to a search page where I didn’t see anything in particular (I'm assuming that there was something in particular that you were wanting to share :D ).

I’m happy that you are able to find useful stuff from my build and make use of it in yours. Makes the effort of documentation worth it! 8)

I had a couple of days this week where I worked over on the day job, so was not able to fully capitalize on the warm weather, but did make more progress on the hatch fit, vis-a-vis gapping. After the second major round of sanding, with some additional touch ups the hatch skin to wall edge gap was starting to shape up pretty nicely.

Street side top
Image

Street side bottom
Image

Curb side top
Image

Curb side bottom
Image

At the bottom of the street side where I had already started attaching the foam I had to make another pencil gauge with a thicker shim to reference on the foam. Also, the sander was easy to work right to the pencil line, but sometimes I would get a strong 1/16 inch or more out of square. If it was just a little I would hand sand it with the blocks, but where it was worse I used the top bearing bit in the trim router and followed the line to square it up. The bit was a little shorter than the thickness of the wall by about 5/16 inch, but rather than run the router shoe on the good inside finish, I just blocked the raised part down to match. Funny thing is that there were some areas that were under the profile that I had filled with body filler, and those are gone now.

Unfortunately I also had one of “those” router incidents where a moment of inattention results in a false cut boo boo. When starting at the bottom of the street side wall bent over, at about the time I transitioned to a standing position the bearing slipped off and I put a pretty good divot in the back edge of the wall. Frustrating, but it could have been worse. Nothing a little more filler won’t take care of, and most of the trouble spot will be removed when I rabbet for the seal seating area.

I got the hatch actuator mounting brackets back from powder coat. If they look the same, that is intended. I wanted to maintain the look of billet aluminum w/o risking corrosion, so had them coated in a fine metallic silver; same as the rear edge guard on the galley floor.
Image

Uppers installed (hopefully for good).
Image

Lowers installed (also, hopefully for good).
Image

Tomorrow afternoon we are going to see Yvette’s god daughter act in a school play, so not sure that I will get out to Mecca, but probably Sunday.

Thanks for watching.
KC
My Build: The Poet Creek Express Hybrid Foamie

Poet Creek Or Bust
Engineering the TLAR way - "That Looks About Right"
TnTTT ORIGINAL 200A LANTERN CLUB = "The 200A Gang"
Green Lantern Corpsmen
User avatar
KCStudly
Donating Member
 
Posts: 9616
Images: 8169
Joined: Mon Feb 06, 2012 10:18 pm
Location: Southeastern CT, USA
Top

Re: The Poet Creek Express - Foamie Hybrid

Postby GPW » Sun Mar 15, 2015 6:51 am

This has just got to end up the Best TD EVER !!! ... :thumbsup: 8) :applause:
There’s no place like Foam !
User avatar
GPW
Gold Donating Member
 
Posts: 14912
Images: 546
Joined: Thu Feb 09, 2006 7:58 pm
Location: New Orleans
Top

Re: The Poet Creek Express - Foamie Hybrid

Postby dales133 » Sun Mar 15, 2015 7:28 am

Certainly is a thing of beauty KC.
I'm still deciding on my hatch style and sealing method, how are you doing yours?
That timber contrast looks wicked
Was curious to the specs on you actuators as well
User avatar
dales133
4000 Club
4000 Club
 
Posts: 4605
Images: 1
Joined: Mon Oct 13, 2014 5:26 pm
Top

Re: The Poet Creek Express - Foamie Hybrid

Postby Wobbly Wheels » Sun Mar 15, 2015 10:37 am

KC Studly wrote:I’m curious about your Lee Valley link


The link was to one of their marking guages that I've got on the way. I used one in a shop I worked at a while ago and I found myself always reaching for it because it's so handy.

Image

I was thinking about your hatch still being flexible and I wonder if some of that is because you didn't use blocking between the ribs ?
With my (blocked) hatch, it seemed locked together pretty tightly (despite my joinery, hehe). When I did the tongue box, I didn't block the ribs and the frame seems like it would be a lot less rigid if scaled up to the size of the hatch. Once your foam goes on and the canvas weave gets locked in with glue/paint, I expect it will stiffen up considerably.
User avatar
Wobbly Wheels
Donating Member
 
Posts: 1080
Joined: Tue Mar 15, 2011 9:51 am
Top

PreviousNext

Return to Foamies

Who is online

Users browsing this forum: No registered users and 7 guests