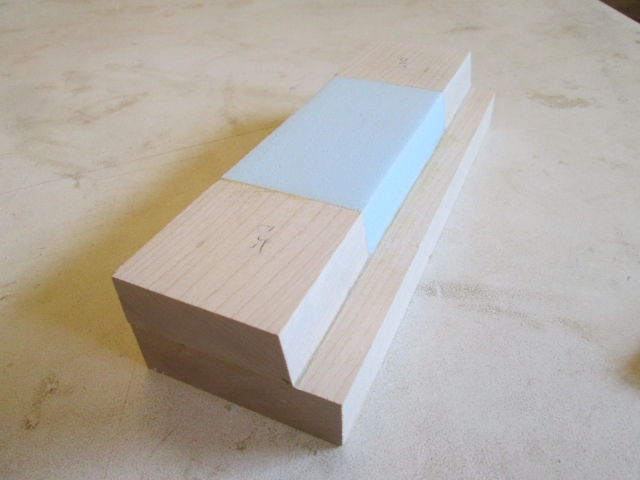
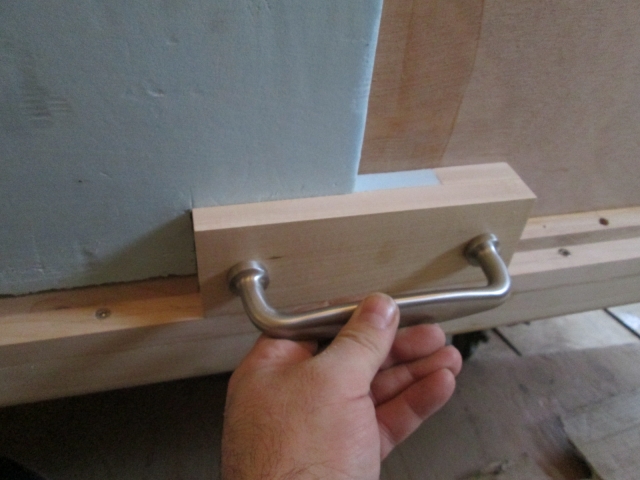
The Poet Creek Express - Foamie Hybrid

Canvas covered foamies (Thrifty Alternatives...)

Moderator: eaglesdare

Re: The Poet Creek Express - Foamie Hybrid

Postby KCStudly » Sun Apr 26, 2015 9:31 am

Thanks guys! :D

Yeah, my wife has started in with the hacking and sniffling now, too.
KC
My Build: The Poet Creek Express Hybrid Foamie

Poet Creek Or Bust
Engineering the TLAR way - "That Looks About Right"
TnTTT ORIGINAL 200A LANTERN CLUB = "The 200A Gang"
Green Lantern Corpsmen
User avatar
KCStudly
Donating Member
 
Posts: 9616
Images: 8169
Joined: Mon Feb 06, 2012 10:18 pm
Location: Southeastern CT, USA

Re: The Poet Creek Express - Foamie Hybrid

Postby OP827 » Sun Apr 26, 2015 9:27 pm

Really nice work and some progress is always good. I have that kind of day almost every day, because of too much time spent thinking :thinking:
User avatar
OP827
Donating Member
 
Posts: 1560
Images: 405
Joined: Fri Apr 25, 2014 7:27 pm
Location: Bruce County Ontario

Re: The Poet Creek Express - Foamie Hybrid

Postby Atomic77 » Mon Apr 27, 2015 12:50 pm

As always, great work KC... you're building quite an heirloom.
Michael

"The Strength is in the Sum of the Parts..."

The Astroliner

Follow The Astroliner Blog Here!

Check out our YouTube video
User avatar
Atomic77
1000 Club
1000 Club
 
Posts: 1463
Images: 309
Joined: Tue Oct 08, 2013 5:29 pm
Location: Fort Wayne Indiana
Top

Re: The Poet Creek Express - Foamie Hybrid

Postby KCStudly » Mon Apr 27, 2015 10:17 pm

Thanks for the kind words of support, OP827 and Michael. Much appreciated.

I blew yesterday off. Oh well, that doesn’t happen too often so I guess I shouldn’t feel too guilty, but I do.

I was back at it with new vigor tonight.

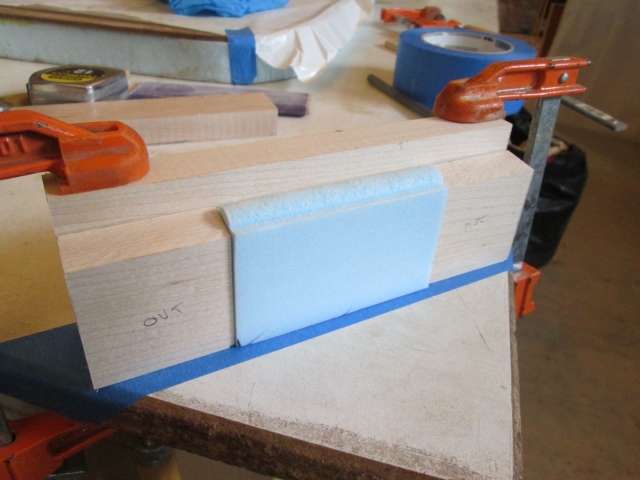
Gluing up the hatch handle blocking (upside down): here, as I do a dry run thru, you can see the larger “knuckle knocker” piece standing on edge at the back; the two beveled spacer pieces on either side; and the foam filler piece in the middle. The foam is proud on purpose. The tape on the bench underneath is a to keep glue off the bench.
Image

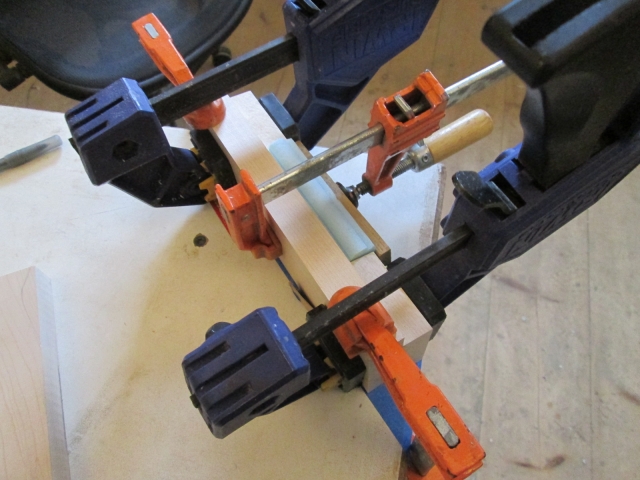
First I clamped the larger piece to the bench, then brushed a thin coat of TB2 everywhere, then clamped the three smaller pieces in place on the larger one using the bench as a jig reference and a wood backer to spread the clamp load onto the foam.
Image

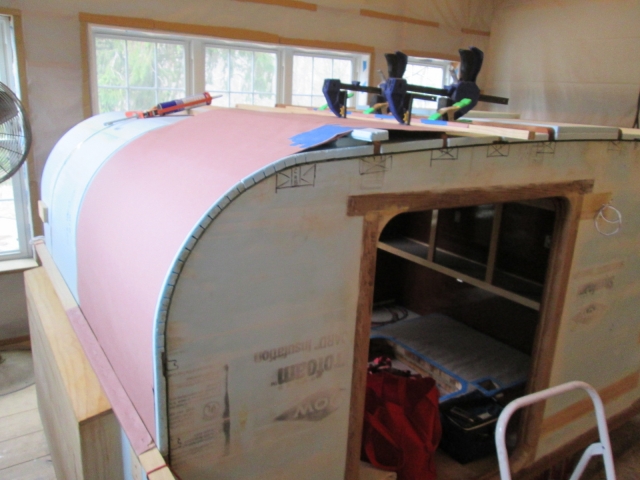
While that was curing I spread some more PL300 and got the last of the first layer of foam on to the cabin, street front upper.
Image

I know for a fact that a good amount of the adhesive squeezed up between the joint to the next piece down. I wiped it pretty well with a damp rag, but it will be interesting to see how it goes unsticking the rosin paper.

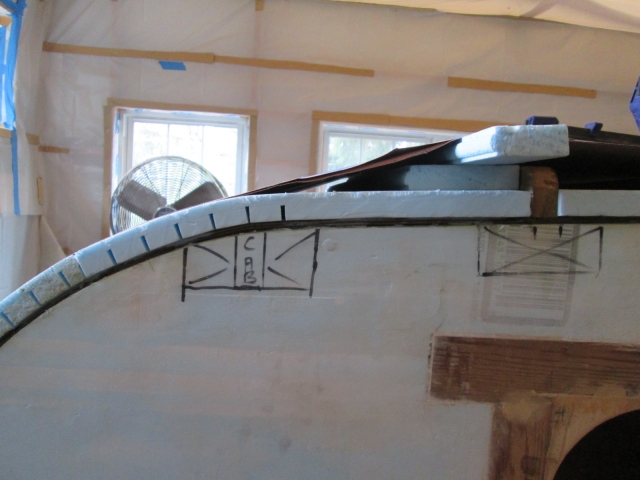
Here is a little closer look at the edge showing how snug the stretcher gets the joint. The extra foam strips are temporary spacers to make up for the top layer of foam.
Image

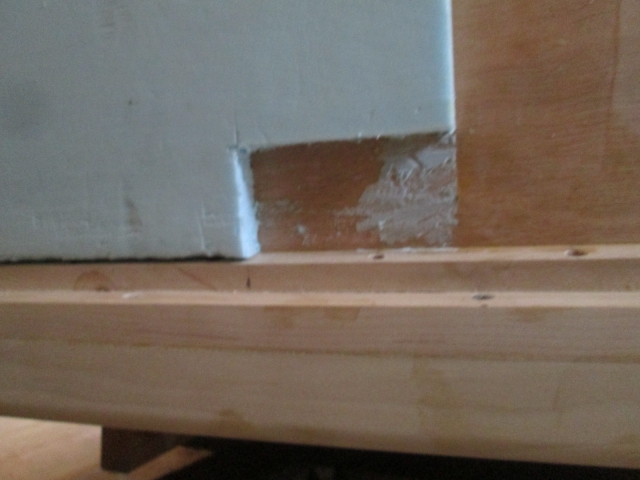
Back on the hatch, way back when I got ahead of myself, got gung ho and glued the left lower first layer of foam on. Now I had to cut some of that away to make room for the handle blocking. Laid it out by measuring carefully and marking with the small square. Cut the lines with the steak knife and straight edge, and slid the blade in underneath the piece to be removed several times to get it to pop free. You may recall that I had used TB2 to glue this piece on and only pressed it in place by hand. So despite only having about 50/ct good contact on this removed piece, I was quite impressed with how much effort it took to get it to pop.
Image

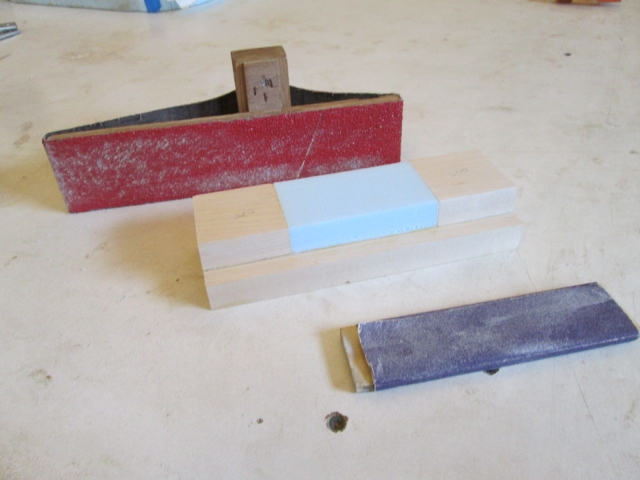
Did a little sanding cleanup in that area and by that time the handle blocking had enough time to cure that I could handle it… carefully. Used the big/80 grit coarse sanding block to knock the foam down and the smaller/100 grit finer one to fair it off.
Image
Image

Hopefully, if it wasn’t already, this picture clears up where I am heading with this.
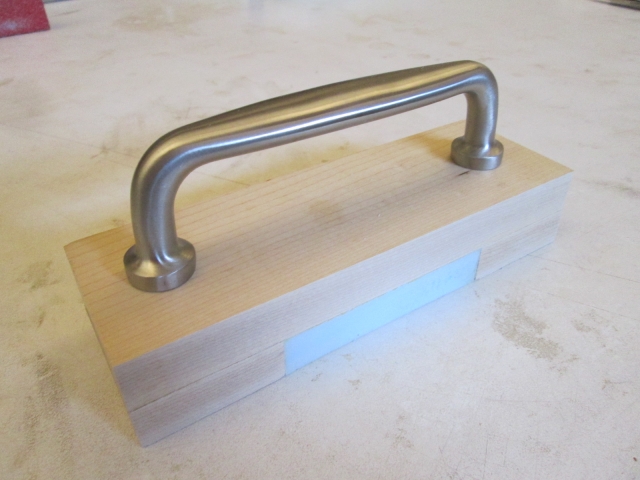
Image

I won’t drill the bolt holes or mount the handle, but the blocking will be there if it is ever needed.

A little more sanding to go from a very snug fit to a merely snug fit and it fits.
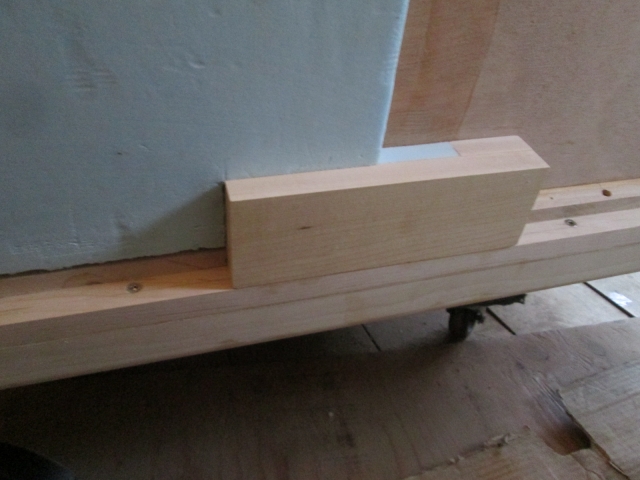
Image

Someday maybe this.
Image

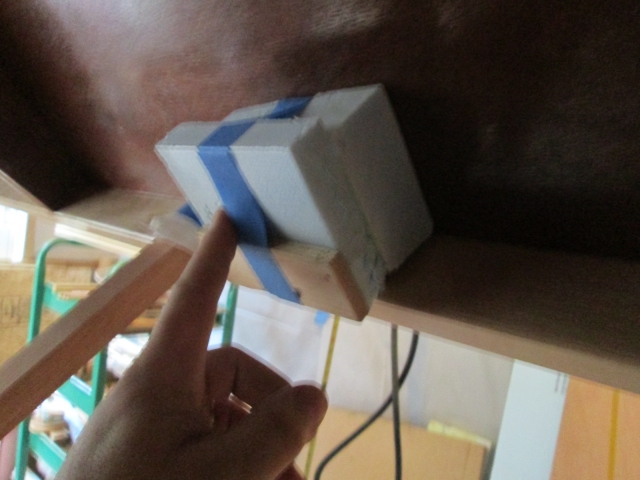
Now to clamp this in place I will need some large clamps with 5 inches of reach in order to get around the bumper, panel cleat, and lower rib sill. And I will need some temporary spacers to fill the step between the inner hatch skin and the lower rib sill.
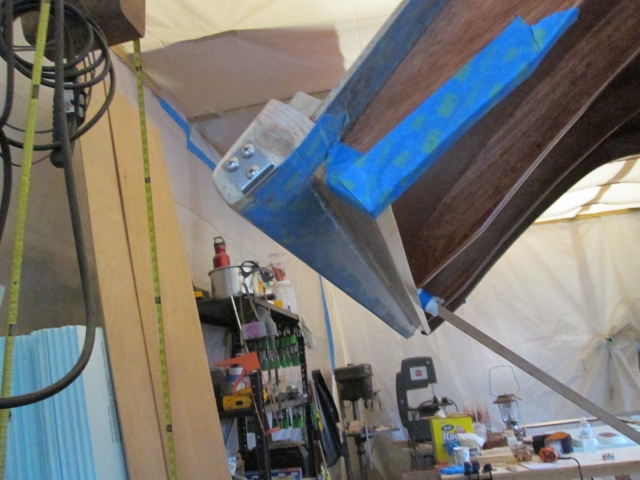
Image

Need something soft that will not harm the finish on the skin, so I knocked these spacers together out of foam and a hard backer.
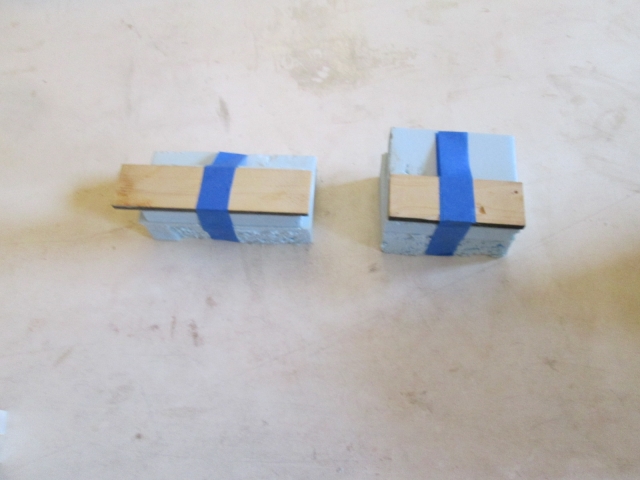
Image

This is looking up under the sill showing where the temp spacers will back up the inner skin under the clamps. (Sorry for the blurry pic.)
Image

Kind of wish the tractor swap meet was here so I could look for some large wooden clamps, but I guess I am off to look for options. I know Karl has some big adjustable metal clamps that I can use, but I kind of like something like these from Matthais Wandell’s Woodengears.ca site.
KC
My Build: The Poet Creek Express Hybrid Foamie

Poet Creek Or Bust
Engineering the TLAR way - "That Looks About Right"
TnTTT ORIGINAL 200A LANTERN CLUB = "The 200A Gang"
Green Lantern Corpsmen
User avatar
KCStudly
Donating Member
 
Posts: 9616
Images: 8169
Joined: Mon Feb 06, 2012 10:18 pm
Location: Southeastern CT, USA
Top

Re: The Poet Creek Express - Foamie Hybrid

Postby KCStudly » Mon Apr 27, 2015 10:22 pm

Well what'ya know, the tractor swap is May 1 thru 3, right around the corner.

Hey Wolffarmer, send a pic of that fuel separator fitting you need for the old girl and I will get you one! :thumbsup:
KC
My Build: The Poet Creek Express Hybrid Foamie

Poet Creek Or Bust
Engineering the TLAR way - "That Looks About Right"
TnTTT ORIGINAL 200A LANTERN CLUB = "The 200A Gang"
Green Lantern Corpsmen
User avatar
KCStudly
Donating Member
 
Posts: 9616
Images: 8169
Joined: Mon Feb 06, 2012 10:18 pm
Location: Southeastern CT, USA
Top

Re: The Poet Creek Express - Foamie Hybrid

Postby KCStudly » Mon Apr 27, 2015 10:39 pm

Here's another long reach clamp option that doesn't look too difficult to make work with your basic Irwin quick clamps.

Jack Houweling's Long Reaching Wooden Clamp Extensions (YouTube)
KC
My Build: The Poet Creek Express Hybrid Foamie

Poet Creek Or Bust
Engineering the TLAR way - "That Looks About Right"
TnTTT ORIGINAL 200A LANTERN CLUB = "The 200A Gang"
Green Lantern Corpsmen
User avatar
KCStudly
Donating Member
 
Posts: 9616
Images: 8169
Joined: Mon Feb 06, 2012 10:18 pm
Location: Southeastern CT, USA
Top

Re: The Poet Creek Express - Foamie Hybrid

Postby KCStudly » Wed Apr 29, 2015 10:59 pm

Peeled the stretcher off of the upper front curb side tonight. It was stuck pretty well along the seam and tore taking it off. The first two pics were after I sanded the seam fair and removed most of the stuck on paper.
Image
Image
Image

When they built Karl’s barn they used Tyvek wrap under the siding, and he has a bit leftover that I can use for the next stretcher go around. Should be more durable and may even release easier from incidental glue contact. We’ll see.

With sanding block in hand and looking to see what was next on the hatch, I faired the lower edge of the street side foam to bring it back flush to the rear face of the cleat. Boring pic, but it reminds me what I did.
Image

Next I fit the corresponding piece for the lower curb side of the hatch, including the central filler strip. This included the rabbet for the inner skin splice backer and the cut out for the hatch handle blocking.
Image

Still kicking myself, I had already prepped this piece but somehow used it for something else: all parts get labels now.

I used the trim router for the rabbet on the bigger piece, but just used the steak knife to trim the detail into the end of the filler strip.
Image

Started working on the marker plate and marker plate light mount. 5 mm ply that will be backed by smaller blocks where the fasteners go. I’ll use threaded T-nuts for the plate bolts and a small piece of maple for the light screws.
Image
Image

The plan was to mount the plate more or less between the taillights.

Now I have some decisions to make and would like your input. First let me remind you that I have made no provisions for clearance lights up high on the side of the cabin; no wire routes in the walls. I am set up for marker lights front and rear at the wall sill. So here’s the deal, since I will be over 80 inches wide at the fenders I will need to run the 3-light bar on the rear. Technically this is supposed to be “as high as possible” and is supposed to be flanked by rear facing marker lights on the upper rear corners. My concern is if I put the light bar up high on the hatch it will draw attention to the fact that I don’t have the corner lights; and if I add the corner lights up high on the hatch (which I can do relatively easily, tho I would have to buy more lights) it will bring attention to the fact that I don’t have the high side lights… which I really do not want to add.

I did look at the possibility of adding the high side lights. I could jumper from the lower front side lights; route wire grooves from these side light pockets along the wall sills a few inches forward to the grooves between the roof foam and walls; run the wires up thru the grooves on either side and route over to spots on the walls; pocket in screw blocks for the lights; then fill over the wire grooves with GS (likely making it impossible to replace wires in the future). At the rear I would probably go with the small bull’s eye lights and imbed them into the edge of the hatch, otherwise I would have to route wire grooves in the outside face of the side walls to jumper up from the rear side marker lights (same problem filling the grooves and with future maintenance).

So here is my question, if I were to mount the 3-light bar between the taillights and lower the marker plate between the light bar and hatch handle, do you think I could get away without having the high clearance lights, or do you think it would look odd and draw attention to the fact that the high lights aren’t there? The other option would be to mount the light bar down low on the trailer frame, under the hatch, as it would be for a utility trailer.

I am also trying to avoid putting clearance lights on the fenders. The inspectors didn’t say anything about not having them on The Briq, so I’m thinking I can get by on these, but they would be easier to add if I have already run marker light wiring to the light bar down on the frame; otherwise there is no reason to run any trailer wires (except brakes) under the trailer. All other wiring is thru the TB and cabin.

I guess I don’t mind putting the light bar toward the top of the hatch, or even adding rear corner clearance lights up high, but I would hate to have the canvas on and painted only to have some DMV drudge tell me that I have to add high side clearance lights. Patchwork fix at best at that point.
KC
My Build: The Poet Creek Express Hybrid Foamie

Poet Creek Or Bust
Engineering the TLAR way - "That Looks About Right"
TnTTT ORIGINAL 200A LANTERN CLUB = "The 200A Gang"
Green Lantern Corpsmen
User avatar
KCStudly
Donating Member
 
Posts: 9616
Images: 8169
Joined: Mon Feb 06, 2012 10:18 pm
Location: Southeastern CT, USA
Top

Re: The Poet Creek Express - Foamie Hybrid

Postby Sheddie » Thu Apr 30, 2015 5:48 am

Hi KC. Well I have finally done it. l have caught up to date with your build thread. I have to admit that I haven't read it word for word, it sure is a detailed account.
I was sorry to here about your cat, unfortunately our fur children don't live long enough, but we wouldn't be without them.
You have been doing a fabulous job and the in depth look you are sharing is much appreciated.
User avatar
Sheddie
1000 Club
1000 Club
 
Posts: 1499
Images: 1129
Joined: Mon Jul 01, 2013 3:26 pm
Location: Whangarei, New Zealand
Top

Re: The Poet Creek Express - Foamie Hybrid

Postby KCStudly » Thu Apr 30, 2015 7:10 am

Thanks Sheddie, I appreciate your comment. Sometimes I wonder if it is all just a bunch of blather (and the unintelligible parts must surely be :? ), so it means a lot to me when someone confirms that the details are useful, or are at least entertaining.

I will keep keeping on. :thumbsup:
KC
My Build: The Poet Creek Express Hybrid Foamie

Poet Creek Or Bust
Engineering the TLAR way - "That Looks About Right"
TnTTT ORIGINAL 200A LANTERN CLUB = "The 200A Gang"
Green Lantern Corpsmen
User avatar
KCStudly
Donating Member
 
Posts: 9616
Images: 8169
Joined: Mon Feb 06, 2012 10:18 pm
Location: Southeastern CT, USA
Top

Re: The Poet Creek Express - Foamie Hybrid

Postby GPW » Thu Apr 30, 2015 7:24 am

Oh, but they are BOTH ... useful and entertaining :thumbsup: 8)
There’s no place like Foam !
User avatar
GPW
Gold Donating Member
 
Posts: 14912
Images: 546
Joined: Thu Feb 09, 2006 7:58 pm
Location: New Orleans
Top

Re: The Poet Creek Express - Foamie Hybrid

Postby OP827 » Thu Apr 30, 2015 9:25 am

At the risk of being a smart arse, BUT in a honest attempt to help, there is this link of trailer lights requirements:

http://www.nhtsa.gov/cars/rules/standards/conspicuity/Trlrpstr.html

Will this setup from the table work for you?

Image


They give ranges for required dimensions and locations of the lights. Hope it helps with your question KC. I still feel i may not be helping here, as you would have already looked at all that info, but I would personally stick to the rules, the "musts" and leave no room for an inspector interpretation, just from experience. Hope you will figure this one out, I have a good feeling that you will, KC.
User avatar
OP827
Donating Member
 
Posts: 1560
Images: 405
Joined: Fri Apr 25, 2014 7:27 pm
Location: Bruce County Ontario
Top

Re: The Poet Creek Express - Foamie Hybrid

Postby tony.latham » Thu Apr 30, 2015 11:57 am

do you think I could get away without having the high clearance lights, or do you think it would look odd and draw attention to the fact that the high lights aren’t there?


KC:

Lighting on an over-80 teardrop. I lost sleep over this too.

It's clear, under federal requirements, what the lights on a cargo trailer should be but how that equates to an over-80" teardrop is a different deal. ("as high as practicable" - what does that mean? Practicable doesn't equal possible.)

I think it boils down to what the tilting (or inspection) process is in your state covers. What does the inspector check for? In Idaho, they make sure it's not a stolen trailer and that you hand them a check for the items you didn't pay sales tax on. I recall her saying "as far as whether your trailer's lights are legal or not, you can find a deputy or some other officer to look at that." (Connecticut?)

Take a look at Camp-Inn's Raindrop 560. It's an eighty-incher of course. Marker lights are on the bottom of the trailer (with the exception of an amber door light that is also a marker light). There are no lights above the hatch. The only visible lights from the rear are the taillights and possibly the two bubble-like rear markers.

So-Cal Teardrops? Again, the only thing visible from the rear are the tailights. Marker lights are on the chassis.

I carried a badge for twenty-two years. Other than DUIs and imminent threats such as passing on a double yellow, we could –but didn't– do traffic enforcement. My agency had different priorities. Not being a retired traffic guy, it's my belief that law enforcement doesn't look at trailer lighting (other than no lights at night). I have never heard an officer say, "I pulled him over 'cause he had a marker light out on his trailer." Unless there are no working lights and it's an articulable safety issue or it's at a mandatory truck stop (and they've got bigger fish to fry) it's not going to happen. Two-bits says that most highway officers were shown the federal trailer lighting rules at their academy and don't carry copies in their cruisers. I suspect most states have a law that says vehicles must be in compliance federally –in order to receive federal highway funds (and thus their state troopers could enforce the federal rules). It may get looked at a bit at the truck weigh stations but I don't think anyone is going to get a ticket on a small camp trailer. (Sure, somebody might tell you that "a couple of years ago my cousin's buddy got pulled over and he was pulling a trailer and...") I can't imagine someone getting pulled over and the deputy says, "I pulled you over 'cause your trailer looks wider than eighty inches and those marker lights don't look as high as practicable. I'm gonna have to measure your trailer."

I hope this takes a bit of tension out of your build. :thinking:

Tony

p.s. I put a third tail light above my hatch on my over-80" after it was more or less done. I did this for my own peace of mind in traffic. My taillights are on the fender and not on the hatch. For my build, it was an easy add on. Easy? Three days easy? On this build I have going right now, I put the same third tail light (and blinker-running lights in it) down on the chassis.
User avatar
tony.latham
Gold Donating Member
 
Posts: 6908
Images: 17
Joined: Mon Jul 08, 2013 4:03 pm
Location: Middle of Idaho on the edge of nowhere
Top

Re: The Poet Creek Express - Foamie Hybrid

Postby dales133 » Thu Apr 30, 2015 12:22 pm

This is something I've been deliberating on mine to as I'd rather not have clearance lights and I'm borderline requiring them .
I guess it's so close to needing them , depending on interpretation that I might add them because as you've said be just my luck to be pulled up on it later if I dont
I guess I don’t mind putting the light bar toward the top of the hatch, or even adding rear corner clearance lights up high, but I would hate to have the canvas on and painted only to have some DMV drudge tell me that I have to add high side clearance lights. Patchwork fix at best at that point.[/quote]
User avatar
dales133
4000 Club
4000 Club
 
Posts: 4605
Images: 1
Joined: Mon Oct 13, 2014 5:26 pm
Top

Re: The Poet Creek Express - Foamie Hybrid

Postby KCStudly » Thu Apr 30, 2015 2:44 pm

You hit it on the head, OP. I have seen that but figured I would have plenty of lighting and did not want to clutter the nice lines of the camper with a bunch of bumps and warts, so I kind of skipped over that stuff when the time was right.

Now I'm having second thoughts. :thinking: :NC

Thanks, Tony. That's pretty much the attitude Karl and I both had when we talked about leaving them off way back when I was building the walls.

Right now I'm thinking that I will put the 3-light up on the hatch where I can still tunnel it in a little to get it plumb and reduce the amount of blister needed, and I might have a look and see what my options are for rear facing clearance lights. Subject to change.
KC
My Build: The Poet Creek Express Hybrid Foamie

Poet Creek Or Bust
Engineering the TLAR way - "That Looks About Right"
TnTTT ORIGINAL 200A LANTERN CLUB = "The 200A Gang"
Green Lantern Corpsmen
User avatar
KCStudly
Donating Member
 
Posts: 9616
Images: 8169
Joined: Mon Feb 06, 2012 10:18 pm
Location: Southeastern CT, USA
Top

Re: The Poet Creek Express - Foamie Hybrid

Postby KCStudly » Thu Apr 30, 2015 2:47 pm

Dale, if you can incorporate them into your design early and make them look like an integrated part of the plan, then I agree with the theory of "why not comply".
Last edited by KCStudly on Sat Mar 06, 2021 3:39 pm, edited 1 time in total.
KC
My Build: The Poet Creek Express Hybrid Foamie

Poet Creek Or Bust
Engineering the TLAR way - "That Looks About Right"
TnTTT ORIGINAL 200A LANTERN CLUB = "The 200A Gang"
Green Lantern Corpsmen
User avatar
KCStudly
Donating Member
 
Posts: 9616
Images: 8169
Joined: Mon Feb 06, 2012 10:18 pm
Location: Southeastern CT, USA
Top

PreviousNext

Return to Foamies

Who is online

Users browsing this forum: No registered users and 4 guests