Another foam standie...

Canvas covered foamies (Thrifty Alternatives...)

Moderator: eaglesdare

Re: Another foam standie...

Postby Wobbly Wheels » Fri Apr 05, 2013 12:19 am

Thx for the compliment bonnie - and yeah, that knife definitely gets used. The blade shape is called a tanto and is normally reserved for tactical and traditional Japanese knives, but I've found it to be a surprisingly capable bush knife.

I've been moving forward using materials at hand and have made up the wheel well boxes.
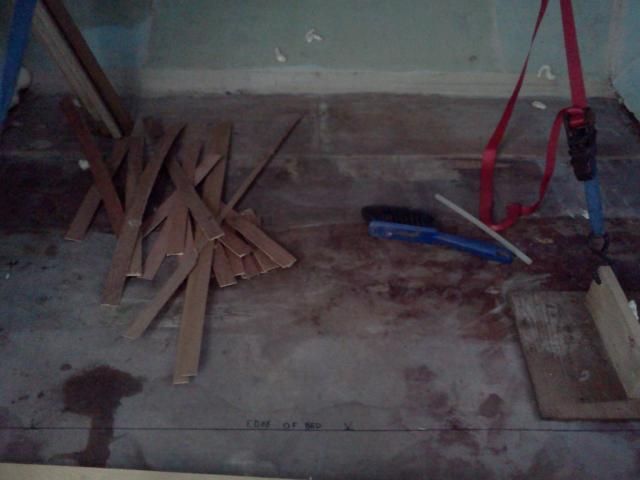
I started by making a stick pattern using scrap pieces of 1/8 doorskin scrap ripped into 1" wide strips and a hot glue gun.
Image
It's a quick and easy way to make a 2D pattern that one can use repeatable and consistently. This one is for the end plates of the boxes - if I've done my job right, the pattern will be work for all four plates.
The pattern:
Image
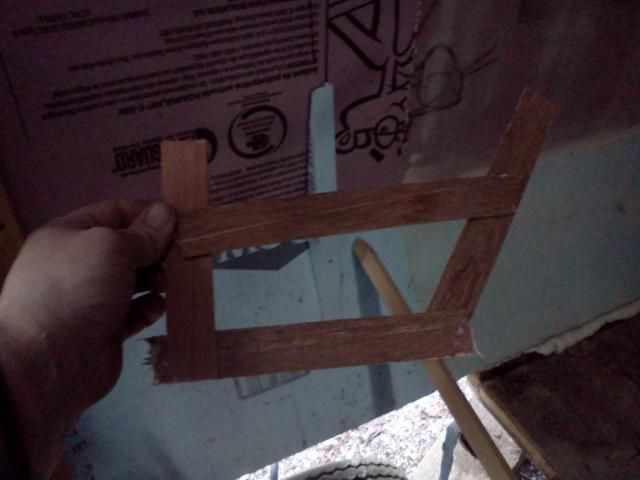
The top of the pattern is deliberately crooked so that I don't mistakenly measure from it when I'm down in the shop, since I haven't yet fixed the height of the boxes.

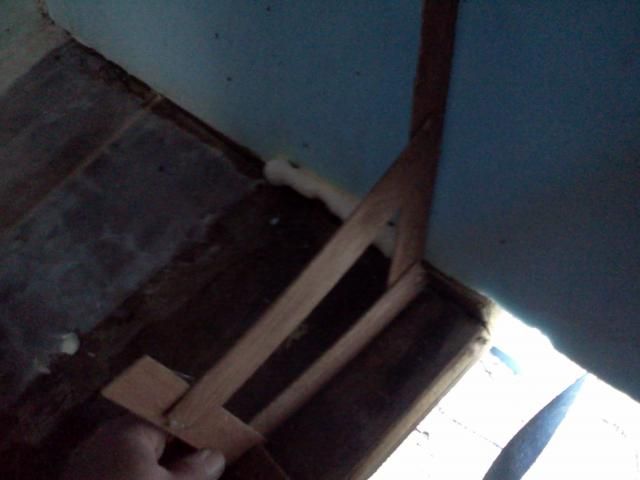
Checking it on the the other side - perfect fit (I love it when a plan comes together):
Image


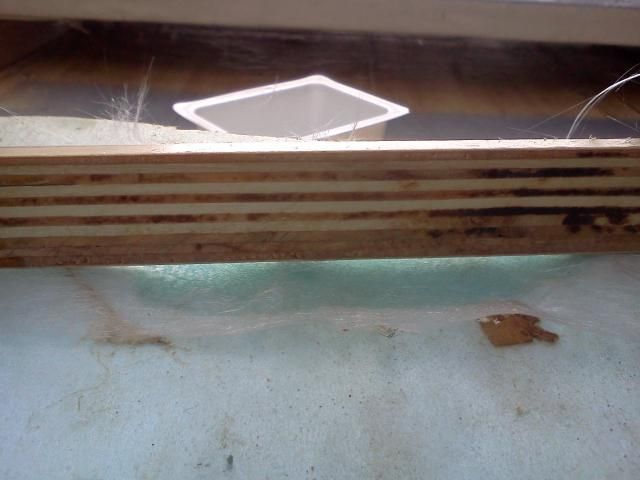
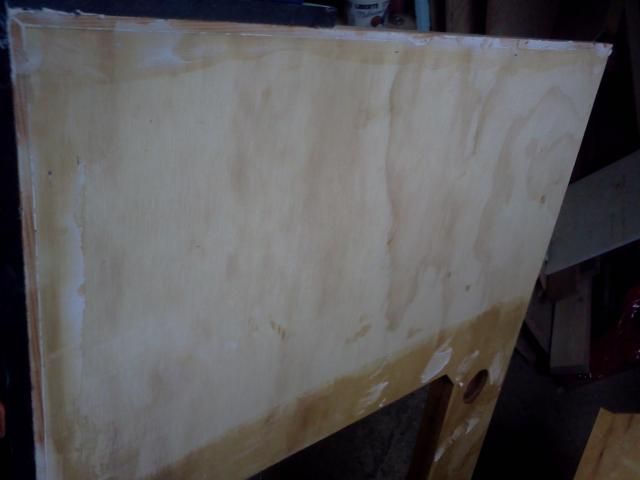
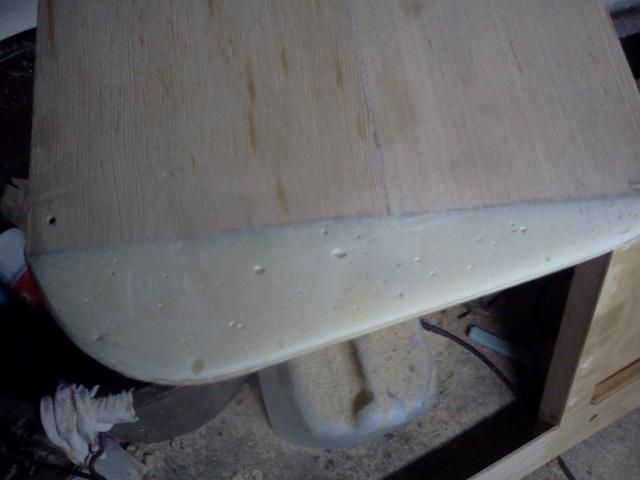
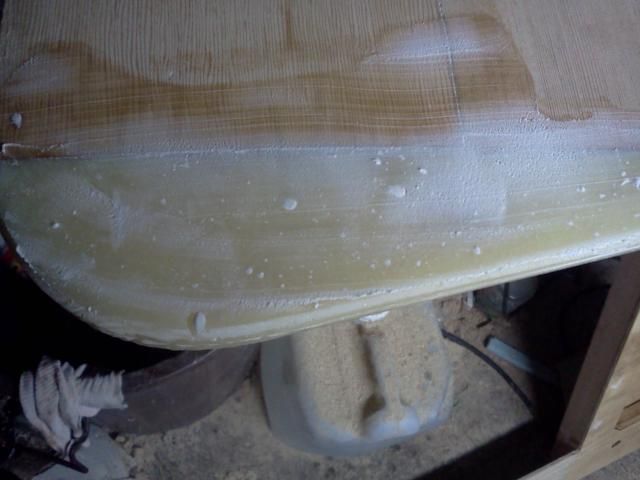
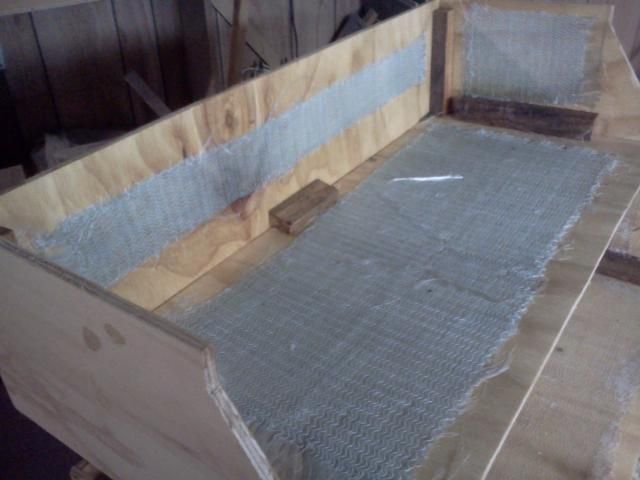
The boxes are 1/4" ply with 18oz Dynel cloth to provide a little more strength in the event of a blowout. The glass is mainly to add some structural strength to the ply and isn't normally used with epoxy resin, so I did the underside (road side) of the wheel wells with conventional styrene-based fiberglass resin. I thinned the first pot of resin 10% with acetone as a flood coat to absorb into the ply, then used full strength resin to wet out the cloth. The idea of the Dynel strips is to provide some tensile strength that the plywood doesn't have in the event of pieces of rubber hitting it at highway speed.
Nevermind that my truck doesn't make 'highway speed' even without a trailer... :lol:
Image

And offered up into place:
Image
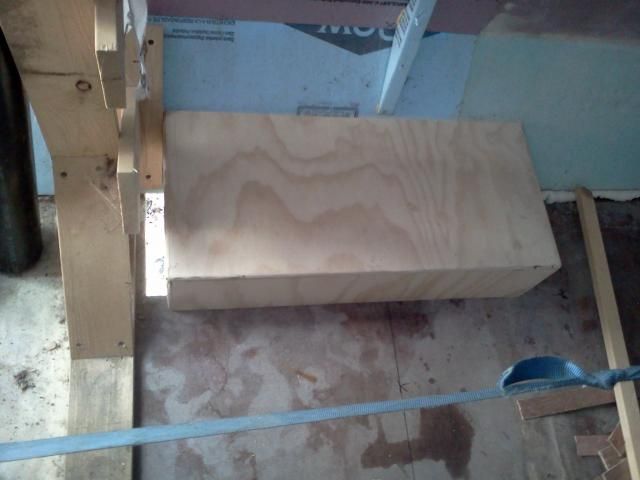
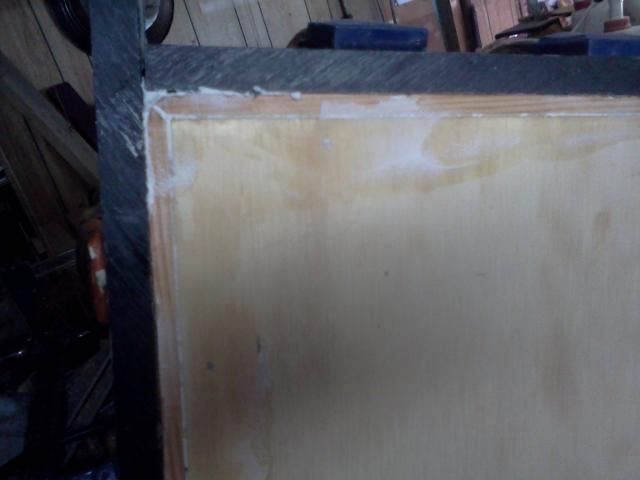
The box is sitting a couple inches off where it would normally be - you can see the plate on the former that's holding the wall in place. That's a drawback to this style of 'mold': you need to get the shell done and rip those things out because they're in the way for everything else.
Soldiering on, the fit between the box and the canted sidewall:
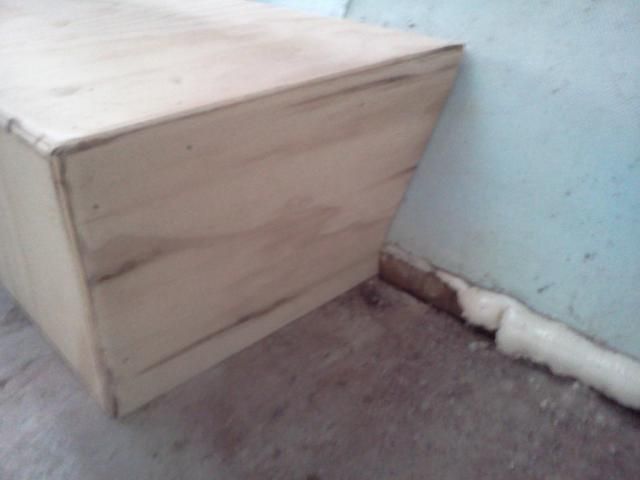
Image
Like a glove...
They will get filleted and glassed in, but not until there's some glass on those sidewalls to tape them to.

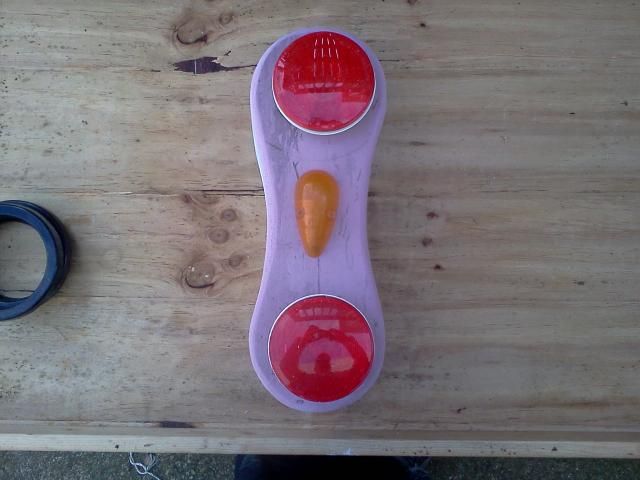
Another thing I'm kicking around is the tail lights. I want to change them out eventually for automotive ones that wrap around the rear corners, but that's a mod for a later date. I have some conventional round lights I want to use for the time being, so my thought is to build a surface-mounted pod for each side to house the lights. That way, the only wall penetration is for the screws holding the pods on. I figure I'll shape the pod in foam with a base plate of 1/4" ply. I read somewhere about thinned TB3 as a primer to prevent polystyrene foam from being eaten by polyester resins. Since I want to use the foam as a plug from which I'll make a mold and lay up two identical gel-coated parts, it's the perfect opportunity to put that bit of info to a practical (and hopefully NON destructive...) test.

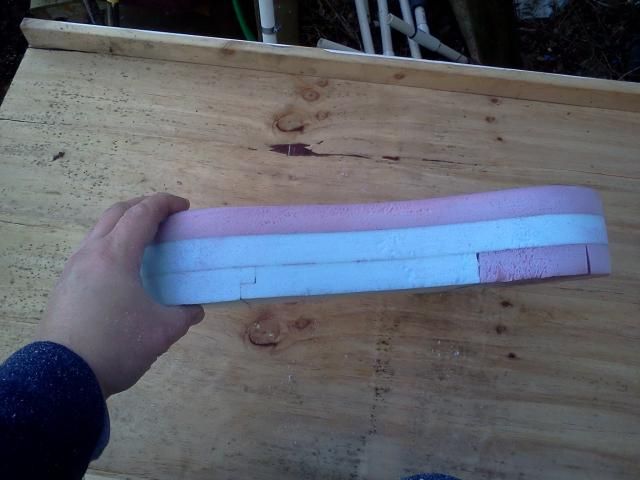
This is the shape I'm kicking around but I don't have nearly the artistic eye that many here do, so ideas/inspiration are always more than welcome.

The teardrop lens is in there only because I had it handy - I don't much like it.
Image

And without the black grommets
Image

Side view - built up from bits of scrap bonded with latex contact cement
Image

What I'd really like to do is tail fins with bullet lenses like an old Caddy, but that's another build...
Image

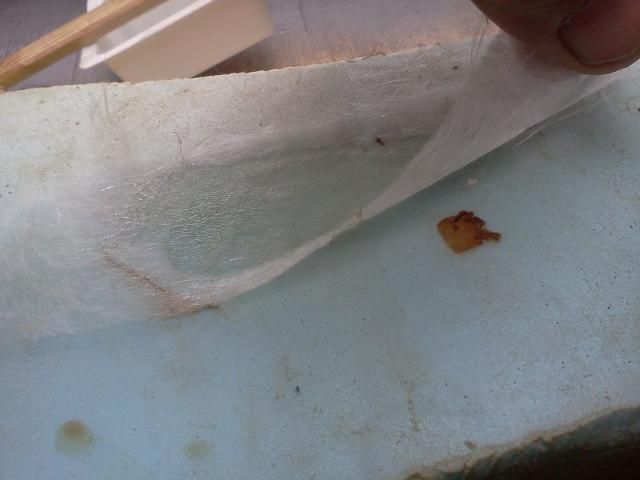
Tonight I got the top (cabin side) of the wheel well boxes epoxied and the corners taped and put a coat of thinned glue onto the 'pod'. When I was making up the wheel well boxes, I also made up a test piece by laminating a piece of the Dynel to a flat scrap of ply. I have a couple tests planned for it and I don't expect it to survive them all...
:twisted:
Stay tuned.
User avatar
Wobbly Wheels
Donating Member
 
Posts: 1080
Joined: Tue Mar 15, 2011 9:51 am

Re: Another foam standie...

Postby GPW » Fri Apr 05, 2013 4:43 am

Wheel wells look Good !!! We have to make some too and will follow your lead !!! :thumbsup: 8) Everybody wants those Caddy lights !!! The sequential T-bird lights would be Cool too ... But seeing your Foamie light housings gives me a few ideas... 8)
There’s no place like Foam !
User avatar
GPW
Gold Donating Member
 
Posts: 14912
Images: 546
Joined: Thu Feb 09, 2006 7:58 pm
Location: New Orleans

Re: Another foam standie...

Postby Wobbly Wheels » Fri Apr 05, 2013 8:44 am

Thank you, sir. Any ideas/design thoughts you'd care to share are more than welcome.
This one will tell me whether or not the glue protects the foam, I'm not married to that particular shape at all. I'd like to use those lights because they're what I have, but...

As I poke through the galleries, I'm drawn to some of the trolley tops, the Roswells, etc: all the stuff that looks like something that might have been in my toybox when I was a kid :lol:
So far, the only 'hard' design element for a smaller TD build is the have fenders shaped from 2" foam stuck on the outside of the wall (like a regular fender) and ending in tailfins that stick out the back a bit and capped with the bullet lights.


Or 'schmaybe' even a 'Batmobile' theme...?

Good thing foam is cheap !!
:lol: :lol:
User avatar
Wobbly Wheels
Donating Member
 
Posts: 1080
Joined: Tue Mar 15, 2011 9:51 am
Top

Re: Another foam standie...

Postby GPW » Fri Apr 05, 2013 4:55 pm

Tanto , wasn’t that the Lone ranger’s sidekick ??? :roll: :lol: :lol: :lol:
There’s no place like Foam !
User avatar
GPW
Gold Donating Member
 
Posts: 14912
Images: 546
Joined: Thu Feb 09, 2006 7:58 pm
Location: New Orleans
Top

Re: Another foam standie...

Postby Wobbly Wheels » Fri Apr 05, 2013 8:14 pm

Groan...... :lol:
User avatar
Wobbly Wheels
Donating Member
 
Posts: 1080
Joined: Tue Mar 15, 2011 9:51 am
Top

Re: Another foam standie...

Postby GPW » Sat Apr 06, 2013 7:38 am

OK, sorry for that , it was “painful” :oops:
You know certain parts never get any “wear and tear “ , so may not need the surface protection as the other parts that do “wear” ... Just a real good smooth sanding job and some paint would suffice on the ornamental bits ... a couple coats of good paint really hardens the foam surface a bit (skin) ... Much as seen on new homes that use foam moldings for the exterior trim .... Now you have me thinking about light bars, taillights , rain diverters, vents , all manner of tasty’ decorative things made of foam (scraps) ... if you glassed’ them or applied a thin skin (bedsheet) they would be more or less “permanent” ... :thinking:

Next time you take pics , would you please take a couple shots from afar too ... just for those curious... ?
There’s no place like Foam !
User avatar
GPW
Gold Donating Member
 
Posts: 14912
Images: 546
Joined: Thu Feb 09, 2006 7:58 pm
Location: New Orleans
Top

Re: Another foam standie...

Postby Wobbly Wheels » Sat Apr 06, 2013 10:24 am

Next time you take pics , would you please take a couple shots from afar too ... just for those curious... ?


Yeah, for sure...but of what - the parts or the whole rig ? The entire shell doesn't look any different than a couple pages ago, but it'll start progressing pretty quick (for a glacier, at least) once I get the glass cloth to finish it.
And when I do...oh yes, there will be pics: I have a camera and I'm not afraid to use it... :lol:

In the meantime, it looks like I'm building a 'crooked playhouse' for a local daycare to raffle off as a fundraiser. I built this one for my niece and a friend from the daycare has been raving about it after seeing the pics. It'll be all SIP panels to make it light and flat enough to ship on a pallet and anyone can set it up. One of the hardware chains here wants some hard costs but are interested in ordering a bunch of them...

Image

Image

The wall panels ought to be pretty straightforward, but I think I'm going to do the roof as two panels hinged along the ridge sort of like the hatch hinge on a TD. I figure I'll use cleats to catch the tops of the walls and close the hinge with a ridge cap.
Then I've got a friend who wants the cheap plastic shower enclosure in their $100k 5th wheel replaced with a more solid fiberglassed shower pan, then I've got to get back to work on the rowboat in the background of some of the pics.
But first I need to clone myself so I can get it all done before summer, lol.
User avatar
Wobbly Wheels
Donating Member
 
Posts: 1080
Joined: Tue Mar 15, 2011 9:51 am
Top

Re: Another foam standie...

Postby Wobbly Wheels » Sun Apr 07, 2013 3:49 pm

Today I tried polyester ester on my TB3-coated foam with less than ideal results.
After putting three coats of glue (thinned 50%) onto the tail light 'pod' and giving it plenty of time to dry, I catalyzed an ounce or so of resin and poured it onto the back side of the pod. I pressed a scrap of veil (a thin glass finishing mat) into the resin so that it would be easier to peel off the foam after it cured.
Image

Well, after about 10 minutes, the resin had begun to eat the foam - not as badly as it would have had the foam not been treated, but ate it nonetheless.
Image

The next step is to apply a coat or two of glue full strength. I suspect that will work, but I don't know that the cost savings of using styrene based foam and resin would be there once the cost of a coat or two of TB3 over the entire shell is included.
I do want to build a fiberglass TD at some point, but Klegecell or Divinycell might be a better option overall despite the higher initial cost of the foam.

As far as this build goes, I mixed up some epoxy filler to fill the gap in the counter top edging left by the wobble that my table saw seems to have acquired recently.
Once that cures and is sanded, I can glue the laminate on. Before that, though, I need to rip a piece of ply that will form the face of the backsplash/wire chase so that I can glue it in as well. The same piece of laminate will also cover the drop board for the stove (which will be made from the off cut).
Image

When I initially edged the counter top, the fir was going to be painted as the final edging, so I rounded over the one exposed corner. Now that I'm going to pin another piece of trim (prob the walnut) over it and up above the laminate a little to act as a fiddle rail, that corner needs to be squared up again. Well, it doesn't really need to...
I buttered the corner liberally with the filler mix, clamped a piece of Starboard (plastic) along the long edge and then a shorter scrap to close up the 90. Those strips are actually cut for the grate for the bottom of the cooler to keep the ice from sitting in water, but they're great for this because the epoxy doesn't stick to it.
Image

I had some filler left over, so I had another project at the ready to use up the leftovers rather than letting them go to waste.
This is a rudder I'm making for a rowboat that I'm doing a sail rig for.
Image

The epoxy wear cap at the bottom is a high density filler that needs to be smooth before glassing
Image

This mix is just the ticket
Image
Image

The rudder and counter top will go back onto the shelf until the next sanding session and I'll spend the rest of the afternoon cleaning up one of the benches so I can work on the SIPs for the playhouse next week...
User avatar
Wobbly Wheels
Donating Member
 
Posts: 1080
Joined: Tue Mar 15, 2011 9:51 am
Top

Re: Another foam standie...

Postby eaglesdare » Mon Apr 08, 2013 5:40 am

Love your little house! :wine:
Louella
May the foam be with you.
User avatar
eaglesdare
Donating Member
 
Posts: 3168
Images: 13
Joined: Tue Aug 26, 2008 7:06 pm
Top

Re: Another foam standie...

Postby GPW » Mon Apr 08, 2013 7:22 am

W2 , from our humble experience , polyester resin and foam never got along !!! It will work with the Urethane foams ... but that presents other problems ..like , you don’t want to hot wire/burn Urethane foam ... Toxic ! :frightened:
Building with foam now for many years (RC) , it’s always a test to see if something’s “foam -friendly “ ...
There’s no place like Foam !
User avatar
GPW
Gold Donating Member
 
Posts: 14912
Images: 546
Joined: Thu Feb 09, 2006 7:58 pm
Location: New Orleans
Top

Re: Another foam standie...

Postby Wobbly Wheels » Mon Apr 08, 2013 8:12 am

Thanks Louella, I built that for my niece last summer - she loves it. She has a little battery-operated BMW convertible for it as well, so she's set...

I hear ya on the foam GPW, that's why I was itching to try the glue thing when I heard about it. There are PVC based foams as well used as coring for boats. You can get it as thin as 1/4", which would be good for a TD roof if you have spars. And yeah, they are pricey - but the resin you use with them is about a third the price of epoxy so it's a trade off.
Styro, Gripper, and canvas still beat them both for cost by a wide margin though !
User avatar
Wobbly Wheels
Donating Member
 
Posts: 1080
Joined: Tue Mar 15, 2011 9:51 am
Top

Re: Another foam standie...

Postby GPW » Mon Apr 08, 2013 8:34 am

W2 , the Beauty of it all is we can take it as far as we want to eh ... from just a foam box on a trailer , to a rolling palace ...allowing much interpretation in between ... 8) Something for everybody !!! And the initial costs are inconsiderable because it will likely last a lifetime ... or more , and be very low maintenance , unlike the “other “ trailer offerings , which only add to the maintenance/ upkeep costs every year ... :frightened: Nothing to Rot eh ? No worries !!! ;)
Good to see your’s coming along ... much anticipating the finishing !!! ;)
There’s no place like Foam !
User avatar
GPW
Gold Donating Member
 
Posts: 14912
Images: 546
Joined: Thu Feb 09, 2006 7:58 pm
Location: New Orleans
Top

Re: Another foam standie...

Postby nhstt » Mon May 06, 2013 6:23 am

In the meantime, it looks like I'm building a 'crooked playhouse' for a local daycare to raffle off as a fundraiser. I built this one for my niece and a friend from the daycare has been raving about it after seeing the pics. It'll be all SIP panels to make it light and flat enough to ship on a pallet and anyone can set it up. One of the hardware chains here wants some hard costs but are interested in ordering a bunch of them...

Image

Image

Love this! how about a thread for this! My 12 and 10 years old are building a scrap fort this summer.
I'd love them to learn some things :applause:
Karen
nhstt
Teardrop Master
 
Posts: 153
Joined: Sat Jan 26, 2013 1:31 pm
Top

Re: Another foam standie...

Postby GPW » Mon May 06, 2013 6:34 am

W2, just a word of advice ... We have a friend who was making a similar product at the request of a local business... He was doing well and they were selling his product regularly ... Then they asked for Plans ...Which he willingly supplied ... After that "the business" found someone else to make His product , at a cheaper price , and cut him out of the picture entirely ... So don’t give anybody the plans ... Just sayin’ ... :roll:
There’s no place like Foam !
User avatar
GPW
Gold Donating Member
 
Posts: 14912
Images: 546
Joined: Thu Feb 09, 2006 7:58 pm
Location: New Orleans
Top

Re: Another foam standie...

Postby Wobbly Wheels » Mon May 06, 2013 8:52 am

Thx Karen. As far as a thread goes, I figured I'd journal it like a trailer build...probably on a blogger site somewhere. But alas, thanks to some unrealistic expectations I won't be doing this for the daycare. I told them that they would need to buy/find a trailer to move it around to events with and they said they wanted an agreement in writing. I told them I'd need it by May 1st to get the construction done in time for the summer events they want to display it at. May 1 came and went without a word despite reminders.
GPW, thanks for the tip !
There are a list of measurements and some modified build methods necessitated by the geometry, but I carry that in my head. So, unless someone's going cut open the top of my skull and peek inside... :lol:
I'd like to start doing these as a sideline...but there's just too much on my plate right now.

Just as well that project fell through, we've got a push on at work right now and I've been working 6X12s a week. At least I'm banking lots of time: much of it will be a 'build holiday' around the May long weekend. Even so, I've been able to get the salvaged gravity furnace fixed (runs like a champ now!) and have been plugging away on the door jamb. I think I've also figured out a good (and cheap & easy!) way to make hatches and lockers in foam...and it should work for you guys using canvas as well. I've got to update this thread, but it likely won't happen till the weekend when the push will be over...
User avatar
Wobbly Wheels
Donating Member
 
Posts: 1080
Joined: Tue Mar 15, 2011 9:51 am
Top

PreviousNext

Return to Foamies

Who is online

Users browsing this forum: No registered users and 7 guests

cron