The Poet Creek Express - Foamie Hybrid

Canvas covered foamies (Thrifty Alternatives...)

Moderator: eaglesdare

Re: The Poet Creek Express - Foamie Hybrid

Postby dales133 » Mon Oct 12, 2015 4:47 am

Verry nice work mate,your making short work of the FG.... looking like a seasoned pro
User avatar
dales133
4000 Club
4000 Club
 
Posts: 4605
Images: 1
Joined: Mon Oct 13, 2014 5:26 pm

Re: The Poet Creek Express - Foamie Hybrid

Postby KCStudly » Mon Oct 12, 2015 6:16 am

Thanks guys, your kind words and support are very reassuring. I appreciate it. :thumbsup:
KC
My Build: The Poet Creek Express Hybrid Foamie

Poet Creek Or Bust
Engineering the TLAR way - "That Looks About Right"
TnTTT ORIGINAL 200A LANTERN CLUB = "The 200A Gang"
Green Lantern Corpsmen
User avatar
KCStudly
Donating Member
 
Posts: 9616
Images: 8169
Joined: Mon Feb 06, 2012 10:18 pm
Location: Southeastern CT, USA

Re: The Poet Creek Express - Foamie Hybrid

Postby KCStudly » Mon Oct 12, 2015 10:42 pm

As planned, I went by Defender after work today and picked up supplies: enough glass for two plies of the 6oz (30 yds, three laps of their 10 yd cutting table); a gallon of 105 resin, the “quart” size 205 fast hardener (27oz’s actually, the evenings have been under 60 deg F, and I still have some of the 206 slow so I will pick and choose depending on the job and climate); a can of 410 micro light fairing filler; and one of those aluminum disc rollers for wetting out. I figure the roller may come in handy for wetting 2 plies at a time (plus it is one of those neat tools that gearheads find alluring).

We are officially way over our original budget, but I am in this ‘til the end.

Back at the shop I used the utility knife to trim out the FG flash and a couple of loose strings on the BB; opened the vent holes up; cut out the battery tray nutserts; and sanded the cut edges back. Touched a few areas with the sanding block and a little scrap of 100 grit using my finger to get rid of any prickly edges. All in all I am very pleased with the result. I sanded back the worst of the loose glass along the jamb, that had lifted from the crisp inside edge, and it was much easier than I thought it would be. That area will get wrapped again from the outside, so no worries.

One thing I will do differently (and will fix here) is the way I did the nutserts masking. The packing tape created a minor delam issue around the bolt holes. I’ll trim those areas out a little larger, wax and install some temporary bolts, paint with neat epoxy then use slurry to pot around the bolt as per the West System recommendations. That way all of the wood around the top of the nutserts will be filled, and the filled epoxy will actually extend the threads, sealing completely. As it is now, where I trimmed thru the glass to the tape, it left little pockets of exposed wood and in some cases pulled the tape from between the glass and wood.

I started to make a template for the reverse side of the BB inside of the TB storage area, but decided that I should fit and glue a foam filler piece into the acute angled area where that off brand spray foam failed so miserably.

Also, I am finding some less than great bodywork on the outside of the TB. Coming back to this from before I must have planned to cover it with aluminum rock guarding, or just thought it was good enough for the time being. That or my skill level and “threshold of pain” has improved to the point where what once was good enough now looks sketchy.

And there is the issue of latches and hinges. I need to source those and install some blocking before I glass the outside of the box.

I have given some more thought to how I will handle the hatch. I wasn’t sure how I would deal with three things: keeping a relatively crisp edge on the inside ply; being able to get the temporary deck screws out and glass over them at the same time; and how to glass over the draw latch areas with the draw latches holding the hatch in its proper place.

The solution lies in the fact that I will have to pull the hatch to do a proper masking job anyway. So the plan now is to pull the hatch off; remove the draw latch tabs from the ends of the bumper; mask off all of the finished work (bounded by the hinge spar front face, the outsides of first ribs, and under the sill at the bottom of the ribs); layup the underside sealing edge with the very fine glass tape wrapping onto the side of the hatch edge; wrap bias tape around the bumper and up onto the lower rear face of the hatch (making it easy to overlap from above w/o having to fully warp under once the hatch is back in place). Then I can put the hatch back in place and lay up the main part wrapping down over the side radius onto the tape, and layer it out just above the bumper.

I’m sure I can stuff something down in the holes over the temporary deck screws at the top (maybe foam earplugs wrapped in stretch wrap) that would allow me to dig them out easily afterward, then fill the holes with thickened epoxy before fairing and finishing.

That’s the plan at the moment, anyway.

I’ll plug away at the TB during the week, and do a test of the tape to see if it will take the hatch edge as is.

In other news, Karl went on a bit of a tool bender buying spree, including one of those magnetic feather boards for the table saw (very cool and much handier than my homemade setup).
KC
My Build: The Poet Creek Express Hybrid Foamie

Poet Creek Or Bust
Engineering the TLAR way - "That Looks About Right"
TnTTT ORIGINAL 200A LANTERN CLUB = "The 200A Gang"
Green Lantern Corpsmen
User avatar
KCStudly
Donating Member
 
Posts: 9616
Images: 8169
Joined: Mon Feb 06, 2012 10:18 pm
Location: Southeastern CT, USA
Top

Re: The Poet Creek Express - Foamie Hybrid

Postby aggie79 » Tue Oct 13, 2015 9:24 am

Whoa Nellie! I had checked in awhile and missed the entire PMF / epoxy-fiberglas discussion. Awesome work!

I'm a big F1 auto racing fan - I especially enjoy the engineering and construction of the cars - so I'm familiar with pre-preg carbon fiber process. I had not heard of the DIY epoxy glass pre-preg process before. Thank you for the discussion and construction how-tos.

Keep up the good work!
Tom (& Linda)
For build info on our former Silver Beatle teardrop:
Build Thread

93503
User avatar
aggie79
Super Duper Lifetime Member
 
Posts: 5405
Images: 686
Joined: Tue Aug 07, 2007 5:42 pm
Location: Watauga, Texas
Top

Re: The Poet Creek Express - Foamie Hybrid

Postby KCStudly » Tue Oct 13, 2015 11:53 am

Thanks Tom, will do. :thumbsup:
KC
My Build: The Poet Creek Express Hybrid Foamie

Poet Creek Or Bust
Engineering the TLAR way - "That Looks About Right"
TnTTT ORIGINAL 200A LANTERN CLUB = "The 200A Gang"
Green Lantern Corpsmen
User avatar
KCStudly
Donating Member
 
Posts: 9616
Images: 8169
Joined: Mon Feb 06, 2012 10:18 pm
Location: Southeastern CT, USA
Top

Re: The Poet Creek Express - Foamie Hybrid

Postby KCStudly » Tue Oct 13, 2015 6:12 pm

Another little tidbit I forgot to mention (because I accidentally deleted the pic), Karl frequently visits up scale job sites subbing work for Rover Mike. Latest project was some SS brackets for a cedar gazebo. With permission, Karl scrounged and brought me several large off cuts of clear 4x4 cedar post; about 6 pieces, most over 2 ft long. No plans for them at the moment but... :twisted: still a great score!
KC
My Build: The Poet Creek Express Hybrid Foamie

Poet Creek Or Bust
Engineering the TLAR way - "That Looks About Right"
TnTTT ORIGINAL 200A LANTERN CLUB = "The 200A Gang"
Green Lantern Corpsmen
User avatar
KCStudly
Donating Member
 
Posts: 9616
Images: 8169
Joined: Mon Feb 06, 2012 10:18 pm
Location: Southeastern CT, USA
Top

Re: The Poet Creek Express - Foamie Hybrid

Postby KCStudly » Fri Oct 16, 2015 11:10 pm

All week I have been feeling like I have hardly been getting anything done. Late starts due to errands and misc. distractions (not the least of which have included reading long-EZ build blogs on the premise that it is research into composite techniques… but mostly because it is fascinating and probably the ultimate “foamie” homebuilt project I can think of), and with the change in the colors of the leaves on the trees the chunkin’ blood starts to circulate in the veins, so there are some responsibilities to attend to there, too.

Anyway, tonight I finished back filling the tuff spots in the TB with foam strips. I probably should have just filleted everything with epoxy filler, or micro, but the largish step under the TB rim, and the acute angle at the battery box bulkhead would have taken a lot of material. I have plenty of scraps of foam, so it made some sort of sense to try this method.

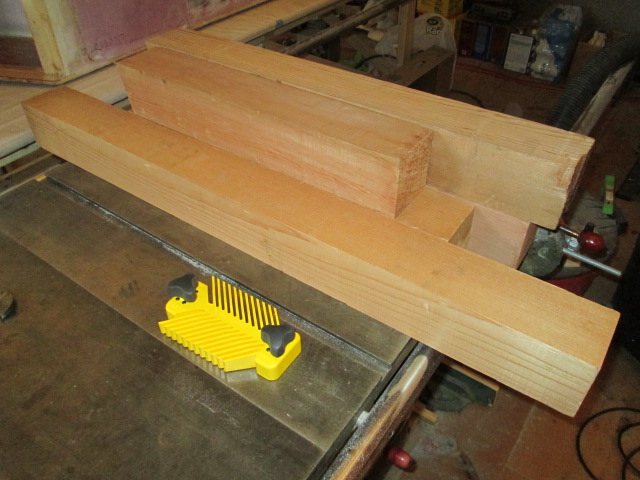
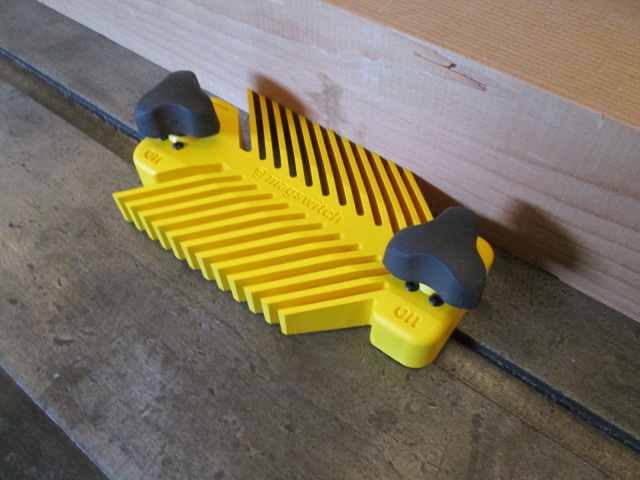
But before we get into the details of that, let’s get caught up on a few pics that have been sitting in the camera. Here is that pile of cedar 4x4 drops that Karl brought me. Good stuff. In front is the magnetic feather board that Karl got for us.
Image

The feather board is pretty nifty. Just a quarter turn on the knobs to release or apply the magnets, and it holds very well on the cast iron top.
Image

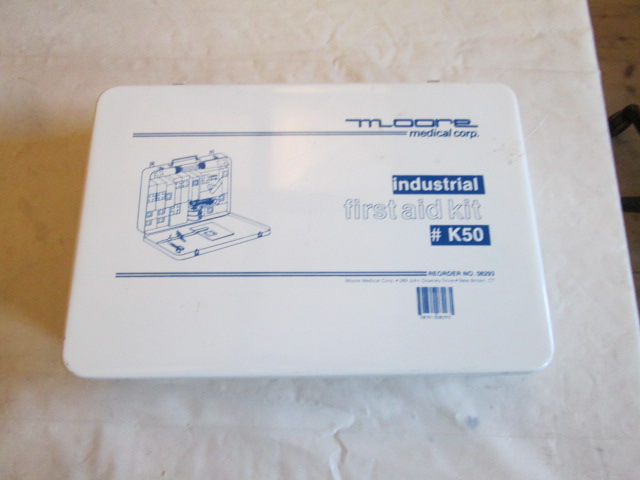
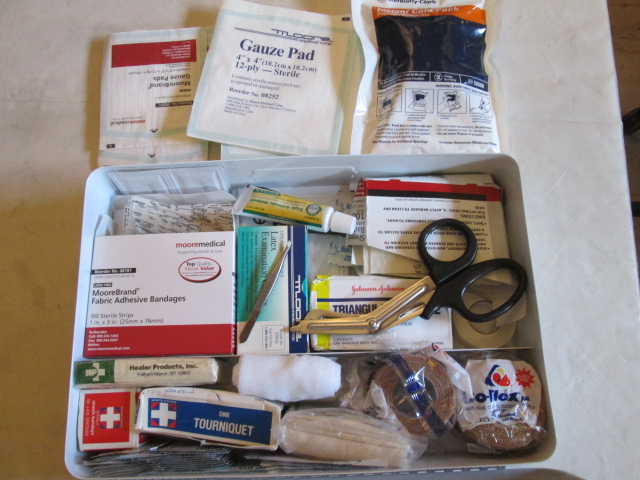
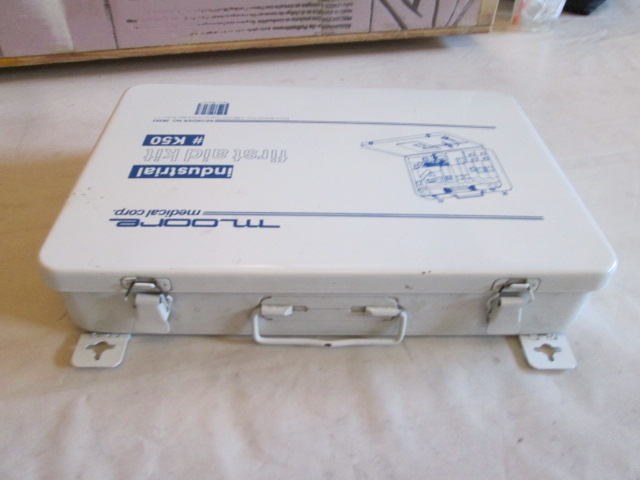
At work they updated all of the first aid kits throughout the plant, so the old ones, including their contents, became obsolete. I took my pick and restocked it from the others that had been removed from service. Nice metal box with draw latches, bail handle and folding hinged tabs for wall mounting if desired. I’ll keep it in the loft for the remainder of the build and then find a place for it in the camper.
Image
Image
Image

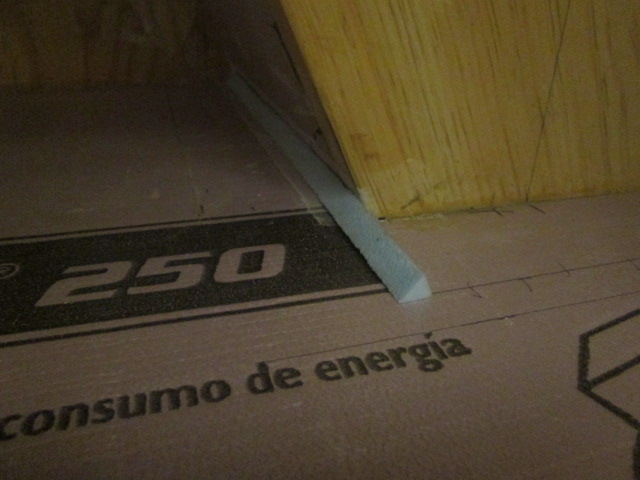
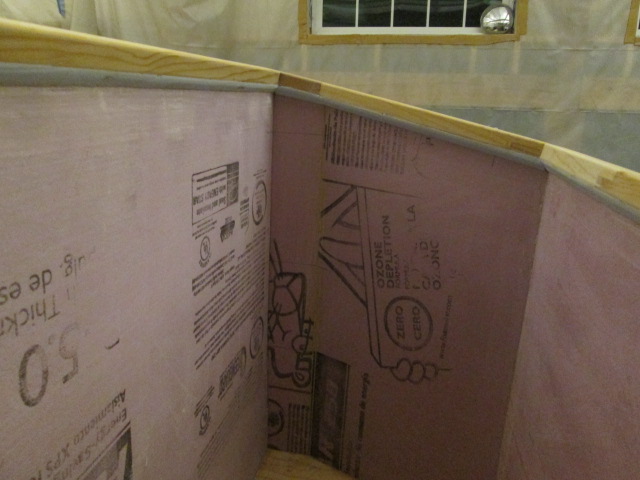
Okay, dry fitting foam corner bits so that the fiberglass can make the turns. I will still use a bead of filled epoxy in the corners of these strips, but it will take a lot less filler to get the job done.
Image

Here it is the next day after trimming to length, gluing in with TB2 and a little touchup sanding.
Image

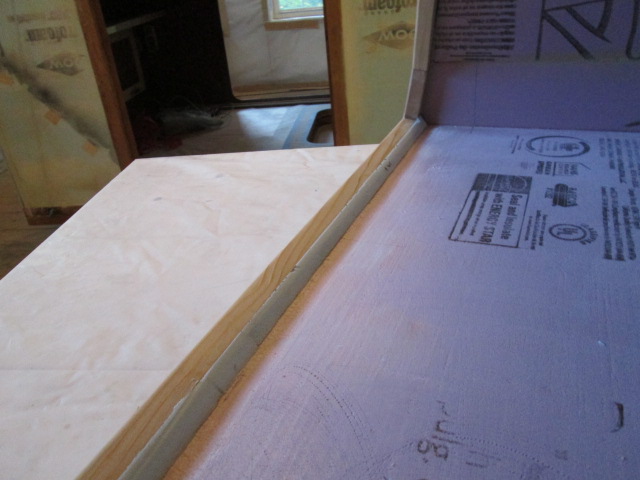
The best way I can figure to do the TB layups is to cover the inside of the main compartment wrapping up at least to the inside edges of the top frame, if not out onto the top flat portion of the top rim frame. Then when I wrap the outside it can overlap onto the frame top, or even wrap down just to the lower inside edge of the top frame.

The top frame overlaps the edges of the TB side panels resulting in a soffit like lip all around the inside edge of the frame. In order to get the glass to “walk” over this inverted lip it will need a pretty good fillet, especially on the back panel where the angle is acute due to the forward pitch of the lid.

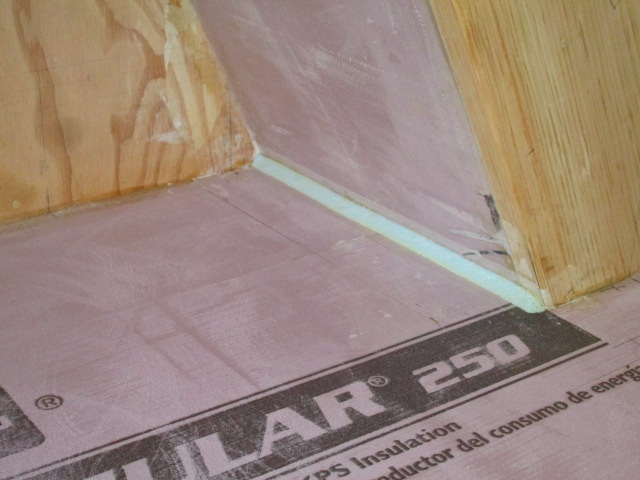
After digging out the excess PLP squeeze out from under the rim of the box (all the while thinking that it would be far easier to just sand the back corner of the foam triangle, but not seeming to be able to switch gears… obsessive detail chasing), I used my angle finder tool to set the table saw and cut this triangle piece of foam from the edge of a larger panel. I used TB2 with blue tape clamps to glue it in. This is the top back lip of the TB shown with the TB laying on its back on the bench.
Image

The next night, last night, I pulled the tape and sanded the extra sharp point down flush with a little round over.
Image
Image
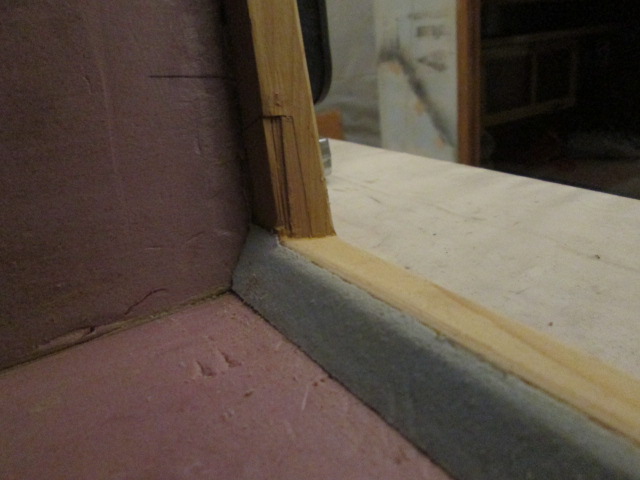
I’ll fill that little chip out of the cedar with epoxy filler later during the layup.

For some reason I had momentarily forgotten about the double fence technique that I had been using with the mini bandsaw; a lot easier to set up and run the slender flexible strips. So, since the front, back and side triangle profiles are all different angles, and I had plenty of slender trimmings that can’t be pushed thru the table saw, it finally dawned on me to use the little bandsaw. Here’s another look at that set-up.
Image

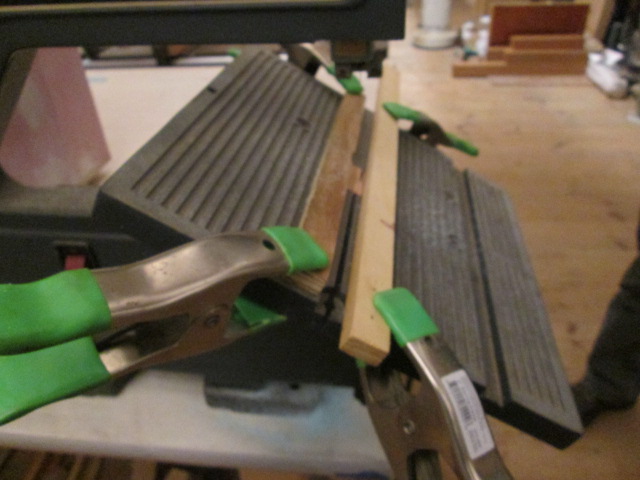
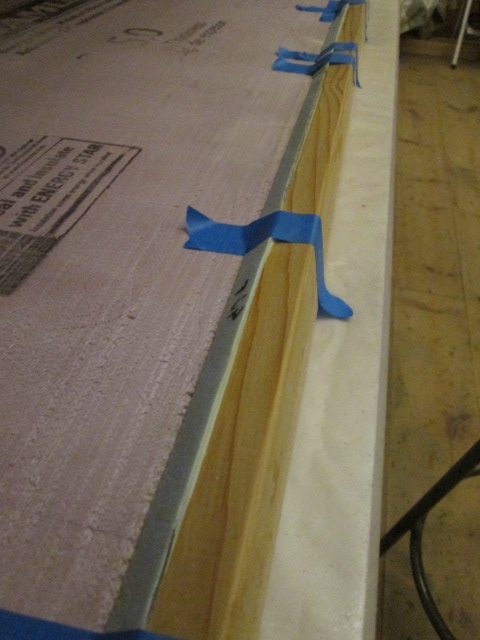
Also, to move things along, I decided to give the hot glue gun a try instead of the TB2.

The hot glue worked fine so long as I kept the hot nozzle away from the foam. Also, if I put too much glue all directly on the foam it would melt it. If I deposited the glue on the edge of the cedar it would cool just enough to still stick, but not be so hot to melt the foam.

That allowed me to bang out the other 3 sides, including mitering the ends so that they blended well.
Image
Image

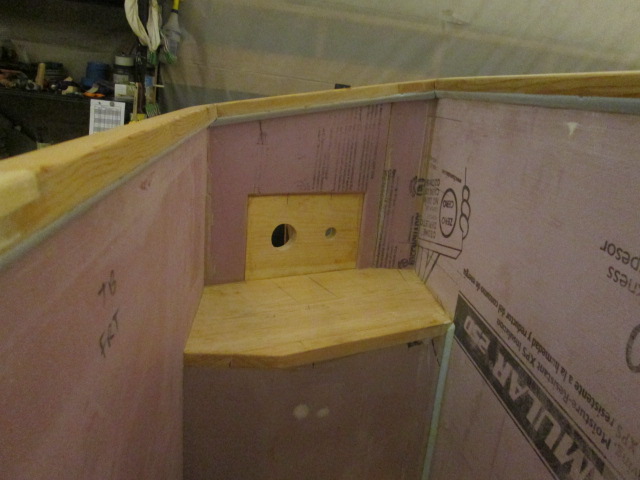
During all of this I also made sure to scuff the gloss off of the foam.

So what’s next? Well, tomorrow Karl and I go north to prep for the hurl. And Sunday morning is supposed to be sub-freezing temps, so I’ll have to watch and either set the TB back up as a hot box, or haul susceptible supplies to warmer locations.

Plugging along here, slowly but surely.
Last edited by KCStudly on Tue Mar 09, 2021 11:39 pm, edited 1 time in total.
KC
My Build: The Poet Creek Express Hybrid Foamie

Poet Creek Or Bust
Engineering the TLAR way - "That Looks About Right"
TnTTT ORIGINAL 200A LANTERN CLUB = "The 200A Gang"
Green Lantern Corpsmen
User avatar
KCStudly
Donating Member
 
Posts: 9616
Images: 8169
Joined: Mon Feb 06, 2012 10:18 pm
Location: Southeastern CT, USA
Top

Re: The Poet Creek Express - Foamie Hybrid

Postby OP827 » Sat Oct 17, 2015 12:23 am

All these little things take time, but it does move the build forward. Looking good KC :thumbsup:
User avatar
OP827
Donating Member
 
Posts: 1561
Images: 405
Joined: Fri Apr 25, 2014 7:27 pm
Location: Bruce County Ontario
Top

Re: The Poet Creek Express - Foamie Hybrid

Postby KCStudly » Sat Oct 24, 2015 8:30 pm

Thanks OP. Sorry for the delay in responding, have been busy trying to hurl modest sized gourds great distances.

Mr. B shot 1031 ft up onto a large berm, perhaps 75 ft high out at 550 ft range, with shorter arms and compounded bow string. This was the first time with the machine assembled with the shorter arms so we spent last night reweaving bow line splice ends and reinforcing the pouch with Kevlar thread hand stitching. The arms survived. Second shot the pumpkin heaved out the side of the newly stitched pouch and pied in a shower of pulp and chunks when it collided with one of the rope bundle uprights. Bad fit between the pouch and pumpkin having not seen the ammo prior to arriving. We have since modified the pouch, modified the bow string extenders to tighten up the bow string after seating in the new splices, and had to jack up and weld a huge crack in the dump frame that we use to tilt the ballista up to firing angle.

Having fun away from the build this weekend. :D
KC
My Build: The Poet Creek Express Hybrid Foamie

Poet Creek Or Bust
Engineering the TLAR way - "That Looks About Right"
TnTTT ORIGINAL 200A LANTERN CLUB = "The 200A Gang"
Green Lantern Corpsmen
User avatar
KCStudly
Donating Member
 
Posts: 9616
Images: 8169
Joined: Mon Feb 06, 2012 10:18 pm
Location: Southeastern CT, USA
Top

Re: The Poet Creek Express - Foamie Hybrid

Postby OP827 » Sat Oct 24, 2015 11:06 pm

Sounds like a lot of fun you had there, :pictures: to share here maybe?
User avatar
OP827
Donating Member
 
Posts: 1561
Images: 405
Joined: Fri Apr 25, 2014 7:27 pm
Location: Bruce County Ontario
Top

Re: The Poet Creek Express - Foamie Hybrid

Postby Sheddie » Sun Oct 25, 2015 5:25 am

Yes, we have to see the :snappy: of that one.
User avatar
Sheddie
1000 Club
1000 Club
 
Posts: 1499
Images: 1129
Joined: Mon Jul 01, 2013 3:26 pm
Location: Whangarei, New Zealand
Top

Re: The Poet Creek Express - Foamie Hybrid

Postby Funluvin001 » Mon Oct 26, 2015 5:41 pm

Man I'm in total awe of the craftsmanship and effort you're giving this project. I admire your patience and dedication, and then there's the end results!

Stellar!
Funluvin001
Teardrop Advisor
 
Posts: 55
Images: 145
Joined: Sun Aug 16, 2015 6:40 pm
Location: P.E.I. Canada
Top

Re: The Poet Creek Express - Foamie Hybrid

Postby KCStudly » Tue Oct 27, 2015 12:28 am

Thanks a bunch FL1. I do appreciate the recognition and kind words. :D

Okay, rather than plug up the server here, I put together a compilation video (5:15 min with still pictures and video clips) from the chunk.

I’m still a complete novice making videos, so it is really low in production value, but it should give you an idea of what the event was like. I didn't take that many pics because I wanted to "live the moment".

Here’s a link to local news coverage with some good action shots.

These guys set an unofficial world record in the catapult division: Chunk Norris’ Facebook page.

We shot 1031 ft on our first shot; pied our second shot when the pumpkin came out the left side of the pouch and contacted the bundle stanchion; shot something like 968 ft for our 3rd shot (on Sunday); and got an unofficial 1100 ft demonstration shot with an unweighed pumpkin.

Had today, Monday, off as a “day of recovery”. Spent about 8 hrs completing the patterns for the glass work inside the TB; cutting plastic sheets and glass BID plies for PMPP (poor man’s pre-preg); and did some prep work inside the box.

More build details and pics as soon as I get some time.
Last edited by KCStudly on Mon Nov 09, 2015 11:08 am, edited 1 time in total.
KC
My Build: The Poet Creek Express Hybrid Foamie

Poet Creek Or Bust
Engineering the TLAR way - "That Looks About Right"
TnTTT ORIGINAL 200A LANTERN CLUB = "The 200A Gang"
Green Lantern Corpsmen
User avatar
KCStudly
Donating Member
 
Posts: 9616
Images: 8169
Joined: Mon Feb 06, 2012 10:18 pm
Location: Southeastern CT, USA
Top

Re: The Poet Creek Express - Foamie Hybrid

Postby Sheddie » Tue Oct 27, 2015 4:33 am

Thanks for the pictures KC, looks like a really fun event :applause:
User avatar
Sheddie
1000 Club
1000 Club
 
Posts: 1499
Images: 1129
Joined: Mon Jul 01, 2013 3:26 pm
Location: Whangarei, New Zealand
Top

Re: The Poet Creek Express - Foamie Hybrid

Postby KCStudly » Tue Oct 27, 2015 8:00 am

Yeah, it was a good time. Team Captain, Eric, posted up some pics and videos here.
KC
My Build: The Poet Creek Express Hybrid Foamie

Poet Creek Or Bust
Engineering the TLAR way - "That Looks About Right"
TnTTT ORIGINAL 200A LANTERN CLUB = "The 200A Gang"
Green Lantern Corpsmen
User avatar
KCStudly
Donating Member
 
Posts: 9616
Images: 8169
Joined: Mon Feb 06, 2012 10:18 pm
Location: Southeastern CT, USA
Top

PreviousNext

Return to Foamies

Who is online

Users browsing this forum: No registered users and 4 guests