Web Sites w/ Foam Info For Tools, Techniques, Sources Etc..

Canvas covered foamies (Thrifty Alternatives...)

Moderator: eaglesdare

Postby atahoekid » Fri Jan 13, 2012 7:03 am

Thanks GPW, I kinda missed that point at this early hour of the am (4 am here on the west coast, normally sleep time for me but the pain in my shoulder won't let me sleep) but I do want the structure to be water tight. You are right about waterproof. For me that was one of a foamies characteristics that sold me on the concept. Minimal wood rot issues...
Mel

"Believe in your abilities... Remember amateurs built the ark, professionals built the Titanic"

"Indecision may or may not be my problem" Jimmy Buffet
Image

The Road Foamie Build Thread: viewtopic.php?t=45698
User avatar
atahoekid
Platinum Donating Member
 
Posts: 1773
Images: 158
Joined: Sat Jul 24, 2010 2:49 am
Location: Incline Village, NV

Postby bonnie » Fri Jan 13, 2012 7:15 am

hwff wrote:
bonnie wrote:If I'm understanding the foamcoat/bounce method, we would have to have the foamie completely assembled and this would be the final finish? In other words, no applying the finish in sections at different time?

Hmmmm. :thinking:


Applying it in sections would be easiest, as the Foam Coat/Bounce only has a 20-30 minute work time before it starts to set up. If you will have help applying it, you can cover more area quicker. As far as it being assembled or not assembled - that's up to you. You can achieve a smoother finish if you are able to lay the pieces flat and allow them to dry flat.


thank you for the reply. This keeps me thinking. I would be building and finishing as much as possible in sections, so this would be great. :)
Remember, the turtle won. :)
User avatar
bonnie
Donating Member
 
Posts: 1390
Images: 107
Joined: Sun Jul 24, 2011 4:14 pm
Location: Roxana, IL

Postby eaglesdare » Fri Jan 13, 2012 8:25 am

i am not sure if this is even proper to ask, but could a free sample of this stuff be sent out for us to test it? i still have lots of foam out back. i could make some joined foam and coat with this stuff to see how it works.
i have video camera's also, so i could record what i do, to let all the foamlings know and see how it works.

just a thought.
Louella
May the foam be with you.
User avatar
eaglesdare
Donating Member
 
Posts: 3168
Images: 13
Joined: Tue Aug 26, 2008 7:06 pm
Top

Postby atahoekid » Fri Jan 13, 2012 12:08 pm

eaglesdare wrote:i am not sure if this is even proper to ask, but could a free sample of this stuff be sent out for us to test it? i still have lots of foam out back. i could make some joined foam and coat with this stuff to see how it works.
i have video camera's also, so i could record what i do, to let all the foamlings know and see how it works.

just a thought.


The Hot Wire Foam Factory is ahead of you on that. They contacted me and asked if I would be willing to test their Styroplast, since I had already played with their Foam Coat with Boost and Bounce additives. They are sending me a sample on the condition that I share my results with all of you. I am expecting the shipment today or Tuesday, since Monday is a holiday. I will keep all of you posted on the test and results.

Thanks to Chelsea at HWFF for stepping up and and letting us test their product to see if it fits our needs. If in the meantime if you want a preview there are videos on their website showing a modeler who used the Styroplast and his results. His scale is obviously different than ours and his criteria for the product are a bit different but he too also looks for strength, durability and flexibility in his finished product, so it sounds encouraging.

Here's the link: http://hotwirefoamfactory.com/customer/video/video.htm
Mel

"Believe in your abilities... Remember amateurs built the ark, professionals built the Titanic"

"Indecision may or may not be my problem" Jimmy Buffet

Image

The Road Foamie Build Thread: viewtopic.php?t=45698
User avatar
atahoekid
Platinum Donating Member
 
Posts: 1773
Images: 158
Joined: Sat Jul 24, 2010 2:49 am
Location: Incline Village, NV
Top

Postby linuxmanxxx » Fri Jan 13, 2012 12:34 pm

The foam coat is a cement so if you don't get smooth edges it would be a bit more difficult to seal the foam edges you glue together is what I'm thinking of being an issue. With how light the full cabin is assembled, I don't see why the whole foam assembly couldn't be glued together and then the foam coat applied sectionally on a flat surface as the cabin is flipped around. Uniform no lines or seam issues and guaranteed to have good glue edges. Otherwise if you did do the sections before assembly, I'd recommend to leave an edge around the perimeter with just foam and coat it after glued and assembled to make sure there is glue adhesion and no leaks. Even if it is foam, if it leaks into our sleeping area that totally will not be pleasant on any level as well as if you finish the interior with any wood it wouldn't be any good either.

Even with foam watertight should always be the goal in case you need to temporarily use a foamy boat some day lol.
User avatar
linuxmanxxx
500 Club
 
Posts: 798
Images: 10
Joined: Fri Sep 10, 2010 1:50 am
Location: Abilene TX
Top

Postby hwff » Fri Jan 13, 2012 2:38 pm

swampjeep wrote:
hwff wrote:
bonnie wrote:If I'm understanding the foamcoat/bounce method, we would have to have the foamie completely assembled and this would be the final finish? In other words, no applying the finish in sections at different time?

Hmmmm. :thinking:


Applying it in sections would be easiest, as the Foam Coat/Bounce only has a 20-30 minute work time before it starts to set up. If you will have help applying it, you can cover more area quicker. As far as it being assembled or not assembled - that's up to you. You can achieve a smoother finish if you are able to lay the pieces flat and allow them to dry flat.

if done in sections like this, will it still appear as if done all at once, or will you see a witness line at the edges of the sections?


I think you will want to fill in the gaps even if they are small so the trailer will be fully encapsulated. I suppose you could use silicone caulking.

If you're going to use Styroplast, just remember that nothing sticks to Styroplast after it dries unless you paint or primer it within a few hours after it sets up.
Hot Wire Foam Factory - USA Made Cutting Tools & Coating Products for Polystyrene Foam
User avatar
hwff
Teardrop Inspector
 
Posts: 14
Joined: Wed Jan 04, 2012 5:53 pm
Top

Postby linuxmanxxx » Fri Jan 13, 2012 3:01 pm

hwff wrote:If you're going to use Styroplast, just remember that nothing sticks to Styroplast after it dries unless you paint or primer it within a few hours after it sets up.
Quick question on the styroplast. Since you would only have a short window for paint or primer to adhere and even shorter in hot summer time, how about just tinting the styroplast? Can you guys come up with tinting additive or point us in the direction of compatible ones? Be a lot easier to put it on the color you want and be done with it.
User avatar
linuxmanxxx
500 Club
 
Posts: 798
Images: 10
Joined: Fri Sep 10, 2010 1:50 am
Location: Abilene TX
Top

Postby atahoekid » Fri Jan 13, 2012 4:04 pm

linuxmanxxx wrote:The foam coat is a cement so if you don't get smooth edges it would be a bit more difficult to seal the foam edges you glue together is what I'm thinking of being an issue. With how light the full cabin is assembled, I don't see why the whole foam assembly couldn't be glued together and then the foam coat applied sectionally on a flat surface as the cabin is flipped around. Uniform no lines or seam issues and guaranteed to have good glue edges. Otherwise if you did do the sections before assembly, I'd recommend to leave an edge around the perimeter with just foam and coat it after glued and assembled to make sure there is glue adhesion and no leaks. Even if it is foam, if it leaks into our sleeping area that totally will not be pleasant on any level as well as if you finish the interior with any wood it wouldn't be any good either.

Even with foam watertight should always be the goal in case you need to temporarily use a foamy boat some day lol.


I see what you mean. I think attention to detail would help ensure better edges but also your recommendation of being slightly short of the edge is a good idea. I don't think I want to try to turn my shell around and upside down since mine is a good bit larger than GPW's

No matter what you sleep in, if it leaks it sucks...
Mel

"Believe in your abilities... Remember amateurs built the ark, professionals built the Titanic"

"Indecision may or may not be my problem" Jimmy Buffet

Image

The Road Foamie Build Thread: viewtopic.php?t=45698
User avatar
atahoekid
Platinum Donating Member
 
Posts: 1773
Images: 158
Joined: Sat Jul 24, 2010 2:49 am
Location: Incline Village, NV
Top

Postby linuxmanxxx » Fri Jan 13, 2012 7:37 pm

Even large builds, if you use a sandwich core principle for the floor it will be stronger and lighter than if you use solid plywood like everyone keeps using here on the foamies. I have put sandwich floors and walls in my campers and it is massively strong and weight savings are amazing over solid floors and walls.

Do the sandwich and then it will be light enough to flip around to your heart's content and just anchor it after the outer coating is finished. If not I'd still recommend further weight savings on going sandwich construction. Amazing how you can stand and walk on a floor that is made with 1 x 2 runners and just foam between them and mine was 9 ft x 6 ft in size.
User avatar
linuxmanxxx
500 Club
 
Posts: 798
Images: 10
Joined: Fri Sep 10, 2010 1:50 am
Location: Abilene TX
Top

Postby GPW » Fri Jan 13, 2012 8:14 pm

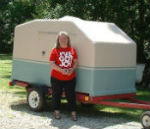
These things are amazingly Light!!! Heaviest thing on mine was the crap plywood floor from HD ... HEAVY Heavy!!! :o the entire shell was lighter and the floor acted as a low center of gravity so I could easily flip it over for access to the bottom .... I found this out because I forgot to put the nasty black stuff on first... :oops: With a foam sandwich floor , even a Bigger one would be easy to flip... they Are STRONG enough !!!! No troubles !!!! Once I got the basic box glued it was rigid , the skin just made it much stronger ... :thumbsup:
There’s no place like Foam !
User avatar
GPW
Gold Donating Member
 
Posts: 14912
Images: 546
Joined: Thu Feb 09, 2006 7:58 pm
Location: New Orleans
Top

Postby linuxmanxxx » Sat Jan 14, 2012 12:43 am

Thanks Glen that is correct and even better with the sandwich floor, you keep the insulation factor intact for the complete camper and not leaving a surface that isn't even close to thermal protective like all the other walls/ceiling.
User avatar
linuxmanxxx
500 Club
 
Posts: 798
Images: 10
Joined: Fri Sep 10, 2010 1:50 am
Location: Abilene TX
Top

Postby atahoekid » Sat Jan 14, 2012 12:35 pm

I never thought of doing it that way, for me as I said it's the size not the weight issue (12 ft long, 5 ft high and 6 1/2 feet wide), and I've already gotten far enough into the build that interior bulkheads (galley wall and cabinetsand front shelving) and plywood floor are already in place so I am past the point where I could build a shell, secure in place than add interior fittings. So I am committed to either completing the outside and finishing in place or finishing the panels individually and then putting them in place and joining the pieces. I think I will be doing the latter. Oh well, more than one way to skin a cat er... foamie 8) 8)
Mel

"Believe in your abilities... Remember amateurs built the ark, professionals built the Titanic"

"Indecision may or may not be my problem" Jimmy Buffet

Image

The Road Foamie Build Thread: viewtopic.php?t=45698
User avatar
atahoekid
Platinum Donating Member
 
Posts: 1773
Images: 158
Joined: Sat Jul 24, 2010 2:49 am
Location: Incline Village, NV
Top

Postby linuxmanxxx » Sat Jan 14, 2012 6:32 pm

Wow tahoe you are building on the outer limits of scale of size of any builds I've seen on here. Gonna be cool to see what your final weight will be with going so large and a sounds like a decent amount of wood on the interior.
User avatar
linuxmanxxx
500 Club
 
Posts: 798
Images: 10
Joined: Fri Sep 10, 2010 1:50 am
Location: Abilene TX
Top

Postby atahoekid » Sat Jan 14, 2012 11:06 pm

To be honest, weight was never a huge issue for me since I'll be pulling with a full size pickup truck. On the other hand, I did not want to build a monster trailer. The size was dictated by a couple of issues. I wanted wheels to be inboard and the frame I have is what it is, so that dictates width. The other issue is that wife insisted on a queen size bed so since it doesn't fit between the frame wheels, it has to be elevated which makes the trailer taller than I originally wanted. The length was pretty much dictated by length of the frame too. I feel pretty confident about things as I look at my progress to date. I'm itching to get back to the build but my shoulder will only get well so fast. In the meantime, I try to pick the collective brains of the group here.
Mel

"Believe in your abilities... Remember amateurs built the ark, professionals built the Titanic"

"Indecision may or may not be my problem" Jimmy Buffet

Image

The Road Foamie Build Thread: viewtopic.php?t=45698
User avatar
atahoekid
Platinum Donating Member
 
Posts: 1773
Images: 158
Joined: Sat Jul 24, 2010 2:49 am
Location: Incline Village, NV
Top

Postby GPW » Sun Jan 15, 2012 7:41 am

Mel , I think your trailer is very Cool and just the right size for my needs ... :thumbsup: My next one will hopefully be larger like this ... 8)
There’s no place like Foam !
User avatar
GPW
Gold Donating Member
 
Posts: 14912
Images: 546
Joined: Thu Feb 09, 2006 7:58 pm
Location: New Orleans
Top

PreviousNext

Return to Foamies

Who is online

Users browsing this forum: No registered users and 13 guests