Another foam standie...

Canvas covered foamies (Thrifty Alternatives...)

Moderator: eaglesdare

Re: Another foam standie...

Postby GPW » Mon May 06, 2013 10:33 am

“ some unrealistic expectations “ ... You mean where they wanted you to Donate everything ... :o Typical !!! :roll: No loss , no worries eh !!! ;)
There’s no place like Foam !
User avatar
GPW
Gold Donating Member
 
Posts: 14912
Images: 546
Joined: Thu Feb 09, 2006 7:58 pm
Location: New Orleans

Re: Another foam standie...

Postby Wobbly Wheels » Wed May 08, 2013 9:20 am

GPW wrote:You mean where they wanted you to Donate everything ...


True dat...I was to supply the labor to build it, set it up and take it down at events, and deliver it to the winner and set it up in their yard. I wouldn't mind that so much because I was going to build it on a trailer...but I was supposed to supply the trailer as well.

Then I found a cedar playhouse kit that would cost them only $500 plus whatever it took to make it 'crooked' (a few 2X4's and a couple extra pieces of siding) instead of my quote for almost double that.
The response ?
"Well, I'll have to run that by the board because they thought it would be a one-of-a-kind custom playouse, not something that anyone could buy for $500"

Then they wanted a written agreement, which they never got around to providing by my deadline of May 1 to start building, so it's their loss.
There isn't time now to have have it ready and, even if I did have a spare trailer, it would be earmarked for another foamie...besides, I could spend every free minute of my summer working on boats and getting paid for it...

Anyway, enough of my whining...on to the pix !
The little bit of free time I've had over the past couple weeks (two Saturdays...when I'm not catching up on sleep), I tackled the forming and glassing of the door jamb and getting the gravity furnace running - that's the one that I salvaged from that old camper I stripped mainly for the appliances...none of which I'm actually using now !
:lol:
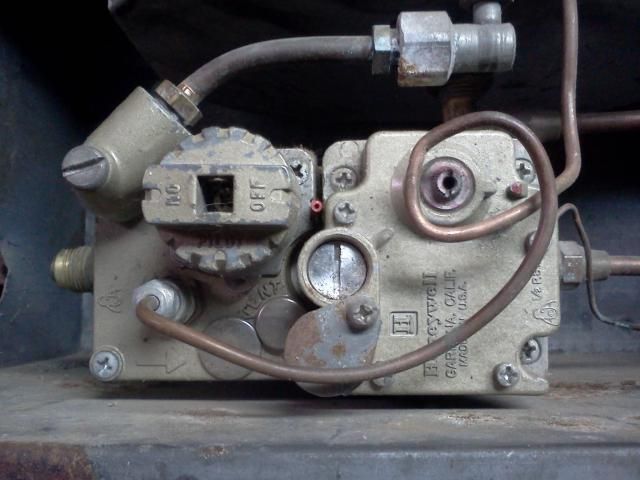
Anyway, the furnace is a "FlameMaster TR12R", built by a defunct company in Edmonton in about 1971, judging from the data plate. Had it been an Attwood or a Suburban, I could have gotten some help with it but, once I tucked into it, it was pretty straightforward to figure out how it worked (and why it didn't). I was getting no gas flow into the burner.

I checked my online gallery and it appears that the overall frontal pic didn't make it into the album, so I'll post one here later.

This is the valve body. I check the thermocouple with a heat gun and got a voltage, so it works. When I took the bottom of the burner can off after removing the pilot and main fuel lines, I checked to see if I had gas coming out of the valve. I cobbled a bbq pigtail hose to a length of copper pipe with a flare fitting on it.
The obvious warning here is to be very, very careful if you are using gas to test valve operation.
First was the pilot system - I had gas flow out of the valve body with the knob at the 'pilot' setting. I blew threw the short length of pipe connecting the valve body to the burner, and that was clear.
The valve body:
Image

Then I checked out the pilot diffuser that holds a flame on the Tcouple and found it to be blocked solid. It has a tiny orifice and the deign is such that the diffuser fitting will act like a catch basin for all sorts of soot and gunk:
Image
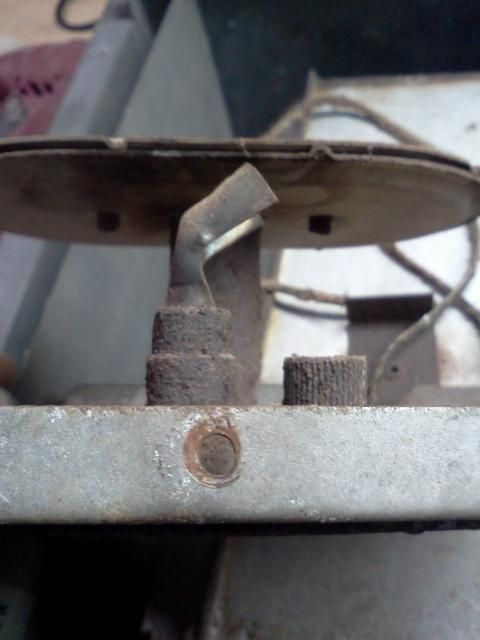
That's it on the left (foreground). On the right is the Tcouple housing and in behind is the primary burner.

I soaked it in penetrant over a few day to try and get it off but no dice. It will snap before it comes off, so I cleaned it in situ by filling it up with 1/2 oz or so of mineral spirits and leaving it for a couple days to try and soften the blockage. I used most of a can of air (my compressor is on loan, otherwise I would have used it for testing instead of gas) but was able to blow out a bit of soot. I still couldn't see through the orifice when I backlit it with a flashlight, but I reattached it to the valve body temporarily and Presto!, I had gas flow.
Notice how the flame is nice and even ?
The Tcouple is there to keep the pilot lit while I check the valve body for leaks.
Once it burned off the residue from the mineral spirits, the flame was pretty good. You can see it's running a little bit lean, but we aren't dealing with a precision metering system here.
Image

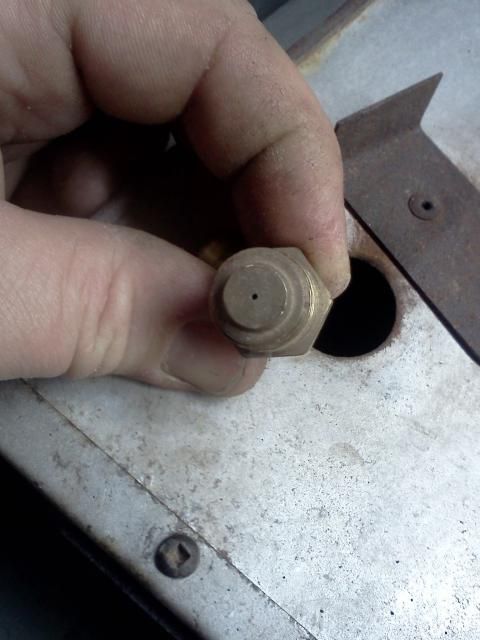
I checked the main burner the same way and cleaned up the orifice as well, since I had it apart...
Image

I did a test burn over several hours. I was surprised how little gas it used in about four hours despite running wide open. Obviously it came off the bench and outside for that test.
I checked the Tstat by alternately resting the temperature bulb on top of the warm (not hot) case, and dipping it in a cup of water. It worked as it should.
Image
Not a great clip because my cam was reading the light outside rather than inside the can, but by the time it got dark enough to get a good video, I was already asleep !

So now I have a running furnace and nowhere to use it. I can sell it on CL or (more likely) hang onto it for the next build. I've already decided not to use the fridge for lack of space. For the same reason (and weight) I've also decided to kibosh the stove/oven as well. The counter cutout will now be a shallow shelf for a two burner stove that takes spin-on cans. I can also move the heat of cooking out to the picnic table that way and don't have the problem of where I'm going to mount a 20lb bottle. Because of the canted upper corners of my walls, the regular range hood wouldn't fit without some major mods. I picked up some 24" roll flashing to fab up one that fits properly anyway, so I don't need the range hood either.

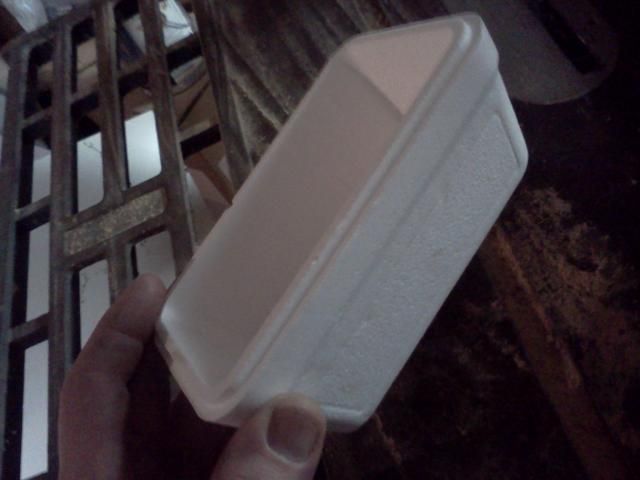
I'll post pics of the door jamb in an update of it's own when I'm done, but here's another idea I had for a hatch box for my shore power inlet.
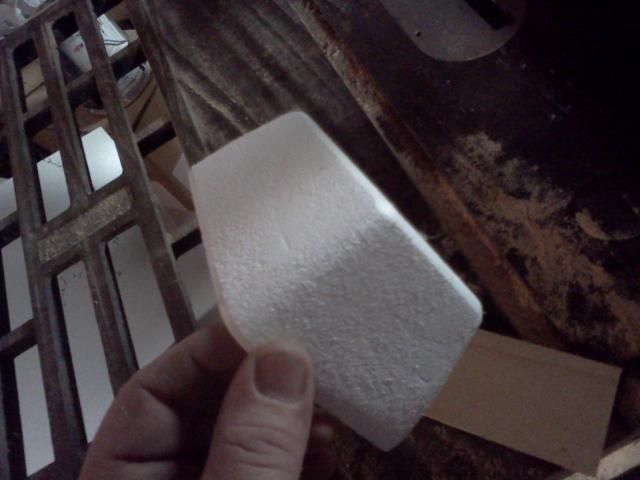
My wife picked up some gelato recently and I started eyeballing the styrofoam container. We made short work of the tastiness inside and I cleaned it out:
Image

I sanded off all the lumps and bumps so it would accept glass:
Image

Then I mixed up some epoxy, wood flour and microballoons and cut a scrap of ply for the inside to screw the shorepower fitting to. Well truth be told, I cut the ply first...you always want to mix up the resin last :wink:
Image
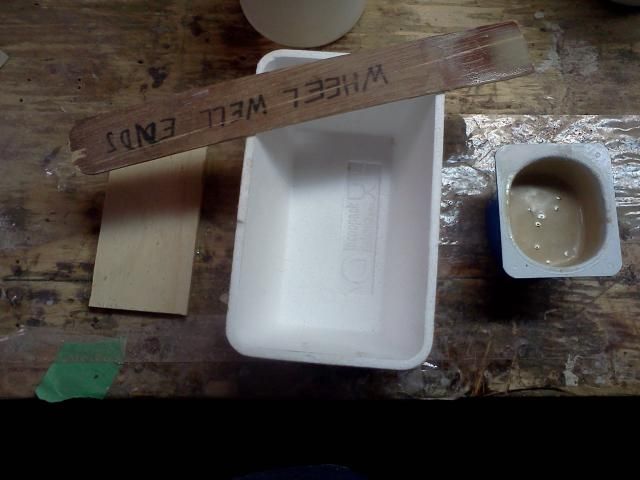
You can see one of the doorskin scraps repurposed from a stick pattern to a stir stick - I get my $7 worth out of doorskins !!

Image

Image

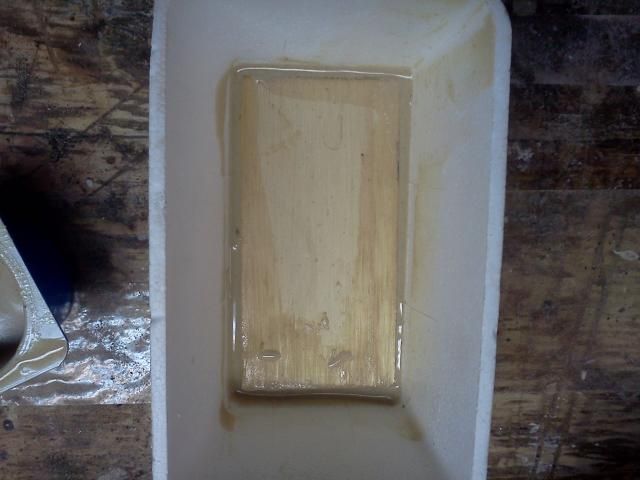
I'll glass it inside and out with scraps and leftovers from doing the bigger panels, then I'll glass it to the wall when I decide where it's going and cut it out from the outside. I'll also give it some wood to give me something to screw a hinge to for the access hatch.

More later, gotta head off to work. an 8 hour day is gonna go by so quick after the last few weeks !
:thumbsup:
User avatar
Wobbly Wheels
Donating Member
 
Posts: 1080
Joined: Tue Mar 15, 2011 9:51 am

Re: Another foam standie...

Postby GPW » Wed May 08, 2013 9:31 am

QUOTE: “ because they thought it would be a one-of-a-kind custom playouse, not something that anyone could buy for $500” “ ... and they wanted it for FREE... :roll: What the **** ? Seems the board must be smelling the furnace fumes ... or some other fumes ... :R

Nice SALVAGE !!!! Furnace and SP inlet !!! :thumbsup: 8) 8) 8) :applause:
There’s no place like Foam !
User avatar
GPW
Gold Donating Member
 
Posts: 14912
Images: 546
Joined: Thu Feb 09, 2006 7:58 pm
Location: New Orleans
Top

Re: the Glacier advanceth.

Postby Wobbly Wheels » Sat May 25, 2013 9:49 am

I haven't been too happy with trying to shoehorn the stove/oven in and I've been thinking pretty critically about how I'll be using the trailer. Given that some of my favorite spots get stupidly hot during the summer, I like the option of being able to take the cooking outside of where we sleep. To that end, I have remodeled the galley a little bit to make space for a two burner stove rather than the three-burner-plus-oven hob over the water tank. That will give me a bit of storage below and will save me probably 50 lbs...even with half a dozen canisters rolling around. So it looks like I'll be trying out one of those Coleman ovens when it comes time for the breakfast bikkies !
Image

I still need to get rid of the heat and humidity of cooking and it didn't make sense to use the range hood since it goes with the stove. Besides, I can do better than a squirrel cage and an incandescent lamp with my 12V...like a PC fan and fluorescent or LED cooktop lighting. As it is, the range hood I have is meant for a vertical wall where mine needs to hit an angled wall section. I could just extend the ducting, but then the front of the hood would be proud of the edge of the counter: an ergonomic no-no. The solution: I'll build one !

First I had to make up a pattern for the end plates. Mostly I just needed the angle from the sidewall to the canted upper portion where it meets the roof (which I could get with a T-bevel and a few measurements) but I thought I'd detail a neat trick for pattern making. Just like the wheel well end plates, I started with a sheet of 1/8" doorskin ($5-10) and rip it into 1" strips. I use a fair bit of the stuff so I always have scraps I can rip for pattern making, then 'repurpose' them into stir sticks for resin when I'm done with the pattern. Add a hot glue gun and you're off to the races and no one can say I don't my $8 worth out of a doorskin :lol:


This is where I'm starting - I want the range hood to start at the corner where the sidewall meets the upper section and go up from there. Click on pics to enlarge.
Image

I laid in the first strip, glued to the temporary foam gusset in the back, leveled it across the bulkhead to establish the bottom line and glued in the front.
Image

Keep following around the contours you want to match by gluing in more 'sticks' and presto: one robust, ready-to-trace pattern that matches exactly.
Image

The finished pattern, cleaned up and ready for action.
Image

I picked up 5' of roll flashing and that's as far as I've gotten with it so far. The range hood will be 22" deep (the counter's 24" deep) so a standard 24" roll will will leave me an inch at each end to fold tabs over to rivet to the top: perfect !
Image

My plan is to make up the two ends (sides) and pop rivet them to the top. I will seal the whole thing (though I haven't yet decided with what - prob just SikaFlex) and will make it so that the end plates don't show the rivets, since they will be visible but the top won't.

I've also been working on the door frame, having lined it with cedar and glassed the outer face. Being only a couple inches wide, the inner face will get glassed with the inside wall when I join it all together but I a bit of extra cloth on the outside won't be a bad thing. I may have to rip the door down a little as I build the glass up, but I allowed for that when I was making the door. This is the frame as cut out of the wall for glassing with the door wedged in.
Image

And here it is laid out on the bench with the fir threshold clamped down. Once I got it all square, I ran drywall screws through the underside of the bench (1/2" ply) and into the foam to hold it. No fuss, no muss, no clamps to work around nor screws to pull as you go.....I just gotta remember to pull them before trying to flip it over to do the other side ! :)
Image
Then I let in the blocks and glued them with PU glue. Once that had hardened, I glued in the cedar strips (the actual wood jamb) with thickened epoxy. I wrapped the outside edge of the door in packing tape so the epoxy wouldn't stick to it and used it to hold the strips in place until the epoxy set up.
Image

The 'rough opening' in the foam wall was just that: I needed it tight enough that I could use the door to plug the hole and a bit of a taper to the opening so the door would wedge tight. Of course, I want the finished jamb to be square so it meant I would inevitably have some material to replace. Being that this is a structural component, I filled it with a high density mix of resin, wood flour, and cabosil so that the filler would be of similar density (at least) to the wood.
Styrene based resins do this too, but epoxies generate quite a bit of heat while they're curing. I filled the deep gaps in three separate 'pours' to keep the heat from building up.

Here is the first fill on the biggest gap - you can see the amount of bevel I put on the foam to get a decent seal.
Image

The cedar block in the pic is the uppermost (of three) hard points for securing the door hinges. You can see why I wanted to match or exceed the density of the wood between the jamb and the blocking - a lighter fairing compound wouldn't survive under the compression of a screw as the door is repeatedly opened and closed.

I have a pic of the finished product but, because the glass is clear, it doesn't look all that different from the first pic of it leaning against the wall...

That's it for now, this weekend's project (and into next week) is the next wall panel. This is the last (yay!) panel on the right (curb) side. Because it incorporates the door jamb, it has a couple funny angles on it: nothing that's impossible to glass by any means but it makes it fun to glass. Once it's done I'll be able to work on the dinette seatbox on that side and I can start working on the battery box/storage locker that will be at the end of the seat.

The electrical panel will also be there. I laid up the panel in fiberglass like a sheet of Filon. This panel is a free standing piece and is better in (styrene-based) fiberglass than epoxy. I have a piece of ply covered with Formica that I use for laying up small parts: that served as my 'mould' for this flat panel. First I gave it a generous helping of gelcoat, then some glass veil to back up the gel and a unit of 1oz mat. Once I've laid out where everything will be in the panel, I'll add cedar reinforcements where I'll need fasteners and around the edges to stiffen it then I'll finish laying it up in mat and roving (and maybe core-mat) to build up mass.
You may remember that frame from when I was doing the countertop a few pages back to see if I could fit a top loading icebox in the counter. That option is still open, but it won't be with that frame. I'll try and reuse the frame for the electrical panel but it depends on whether it's going to be more work to cut it down or just bang up a new one. It won't go to waste because if it's still around I'll use it for a hatch on the back wall where I'll be stowing fishing gear. The rods will stow in a 4" PVC 'duct' that runs up the left side under the bunk and galley. In a 13' trailer, it's tough to find a home for a few 10' fly rods where you can still get them out the door.
Image


I got the panel blocked up on the table and fastened down so I can take out the temporary gussets for glassing and not have to worry about the angles changing on me. I also sanded them and got spray foam into the inside corners so I can get in there tomorrow with a drum sander on the drill and give them a rounded fillet. Then I'll skim it with putty and the glass will go on.
Here's a teaser of the panel on the bench. I'm looking forward to glassing it: flat square panels are just boring !
Image

And here's the gaping hole it came from
Image

Since the roof is glassed from the back up to where this panel starts, it made sense to incorporate the roof into this panel. I'll do the same with its mates on the other side. You can see on each side of the roof vent (square half-opening on the top) I've staggered the seam so they don't line up. I don't know that it'll make a huge difference but it certainly isn't going to hurt...even if it is asymmetrical :)

I'll post up as the panel progresses. In the meantime, know anyone who needs a complete set of RV appliances (all working) ?
Just kidding, I'm saving them for the next build......
User avatar
Wobbly Wheels
Donating Member
 
Posts: 1080
Joined: Tue Mar 15, 2011 9:51 am
Top

Re: Another foam standie...

Postby Wobbly Wheels » Sun May 26, 2013 11:45 pm

The inside of the ceiling and wall are glassed now. You can't really see much in the pic since the glass is so clear, but here the side laying on the table is glassed up to where the vertical piece of blue foam starts. You'll see the addition of fairing compound along the center seam and in the corners: you can see the white vs the yellowish of the spray foam.

Image

To do the ceiling (blue) I rotated the piece after that glass had hardened and stood it up so that the blue would now be horizontal. I blocked the wall up so it was 90 degrees to the table and ran a couple drywall screws in so it couldn't slide around. I faired the corner fillets with some more compound and glassed that surface too.

Image

I'm working the next couple days (mad money into the build fund!!) so when I get back to it I'll flip it over and start fairing the outside. Once it's glassed, it's back onto the trailer to be glassed into place and the curb side wall is structurally complete.

I have one more side job to do after tomorrow's and that should get me the glass and resin I need to finish the shell: Yay!
Coming up on two years :oops: but still having fun.
User avatar
Wobbly Wheels
Donating Member
 
Posts: 1080
Joined: Tue Mar 15, 2011 9:51 am
Top

Re: Another foam standie...

Postby Ned B » Thu Jul 25, 2013 6:38 am

Hey W2,
just re-read your thread the past couple of days... can't wait to see what you've been up to!

Cheering along, not trying to 'pick'... hope that busy elsewhere mean's making more mad $ for the build!
User avatar
Ned B
1000 Club
1000 Club
 
Posts: 1036
Joined: Sat Apr 16, 2011 10:25 am
Location: Syracuse NY (ish)
Top

Re: Another foam standie...

Postby Wobbly Wheels » Fri Jul 26, 2013 10:30 am

Thanks for checking in, Ned !

While not glassing, I've been plugging away on smaller stuff like laminating the frames for the stargazer windows. I'll update the thread with some pics shortly.

Congrats on the new job becoming official :thumbsup:
I'm looking forward to seeing your Wanderer take shape - that's one of my favorite designs and it's one that I used as a starting point.
User avatar
Wobbly Wheels
Donating Member
 
Posts: 1080
Joined: Tue Mar 15, 2011 9:51 am
Top

Re: Another foam standie...

Postby Wobbly Wheels » Wed Oct 29, 2014 10:51 pm

Howdy all !

I haven't disappeared, life just got in the way for a while. I started a new job in the spring and have been smokin' busy...and adding to the build budget :P

Project Glacier has been put on hold - I simply don't have room to continue building where I am now. I wasn't happy with how I had done the floor anyway, so it seemed like a good chance to go back to the drawing board. I cut the shell away from the floor and kept the pieces safely stored under the deck and out of UV until we move to a bigger place in the spring (planning for an April Fool's Day move, lol). The floor got cut up and taken to the dump and the trailer frame is now going under a 4X8 Benroy whose panels I can build in the basement. The appliances I reworked are still going to go into the foamie, but some of the windows and some of the electrical will go into the Benroy.

Here is that build - I'm trying to remember to take pix but you all know how it is when the sawdust starts flying :)

I went with a smaller trailer for the time being for a couple reasons - mostly being that "she-who-camps-with-me" doesn't do so because she actually enjoys camping...but would never say so. What can I say - she's a keeper...
Long story short: at present I need a smaller trailer with far fewer amenities - a galley that's ready for action and a comfortable bunk that's already made up will give me more time for fishing,hunting, etc and less time setting up camp.

Project Glacier is definitely living up to its name, but it's not 'receding' by any stretch. I now have a boat trailer axle (2000#?) with bearing buddies and springs and...now that I have access to a welder :)...will be able to weld up a frame to accommodate some of the compromises I made to be able to use the frame I had.
I can now put in underslung fresh and grey water tanks and batteries and the dropped center section in the floor :dancing :dancing

While it looks like the up-and-down work cycle of the past few years might finally be gone, though it's the same old conundrum of now having a bit of money to build but not the time...although we are shutting down for a month over Xmas. I'm on the wet coast so we won't see snow, but sawdust will do nicely instead :)
When I'm not camping, that is.

Cheers for now fellow foamlings and, once Project Glacier is on the march again in the spring, I'll pick this up.
Last edited by Wobbly Wheels on Sat Nov 01, 2014 11:08 am, edited 1 time in total.
User avatar
Wobbly Wheels
Donating Member
 
Posts: 1080
Joined: Tue Mar 15, 2011 9:51 am
Top

Re: Another foam standie...

Postby KCStudly » Wed Oct 29, 2014 11:09 pm

Thanks for the update. Sounds like things are working out for you. :thumbsup:

Don't be such a stranger. ;)
KC
My Build: The Poet Creek Express Hybrid Foamie

Poet Creek Or Bust
Engineering the TLAR way - "That Looks About Right"
TnTTT ORIGINAL 200A LANTERN CLUB = "The 200A Gang"
Green Lantern Corpsmen
User avatar
KCStudly
Donating Member
 
Posts: 9613
Images: 8169
Joined: Mon Feb 06, 2012 10:18 pm
Location: Southeastern CT, USA
Top

Re: Another foam standie...

Postby Wobbly Wheels » Sat Nov 01, 2014 11:07 am

Thx KC, the winds of fortune are indeed a tailwind for a change :lol:

I've put a few pics (and a thousand words lol) in a thread for the other build here
User avatar
Wobbly Wheels
Donating Member
 
Posts: 1080
Joined: Tue Mar 15, 2011 9:51 am
Top

Previous

Return to Foamies

Who is online

Users browsing this forum: No registered users and 22 guests