Another foam standie...

Canvas covered foamies (Thrifty Alternatives...)

Moderator: eaglesdare

Re: Another foam standie...

Postby GPW » Sun Jan 13, 2013 9:56 am

Coming along !!! :thumbsup:
There’s no place like Foam !
User avatar
GPW
Gold Donating Member
 
Posts: 14911
Images: 546
Joined: Thu Feb 09, 2006 7:58 pm
Location: New Orleans

Re: Another foam standie...

Postby PcHistorian » Tue Jan 15, 2013 8:24 pm

Coming along. My condolences that you didn't get to take it out and play last year.
I hadn't thought to glass the studs to the walls. I was thinking screw and glue only. But the glassing to the wall, that is "solid man!"

I've been thinking of the star trek shuttle foamie, probably a next generation shape, but that star gate atlantis design for the puddle jumper is a pretty cool shape. I think I'd go with a dutch hobbit door in the back though instead of the ramp.

I'm still considering a free-form-foamie also. Made by chicken wire and spray foam, then shaped with a bondo plane and epoxied, then painted. I'll wait to meet yours in person first. :-)
Elf Cottage
Image

Build Documentary
https://sites.google.com/site/pchistorian/home/hobby/camping/elf-build
Build Forum
http://www.tnttt.com/viewtopic.php?t=48462
Build Album
http://www.tnttt.com/gallery/album.php?album_id=42

progress is progress. (don't look a gift "progress" in the mouth.)
User avatar
PcHistorian
The 300 Club
 
Posts: 354
Images: 198
Joined: Fri Dec 09, 2011 1:06 pm
Location: S.E. Michigan

Re: Another foam standie...

Postby Wobbly Wheels » Sat Mar 16, 2013 9:49 pm

It's been a while since my last update so I figured I'd share where I'm at. There are plenty of pics, so this will be a long one.

I'm still waylaid on glassing the outer shell and realistically it'll probably be another month at least before I can continue thanks to other priorities. Fortunately, I have loads of wood laying around in the shop and this is the type of project that is perfect for using up scrap and offcuts from other jobs so I've been forging ahead with the galley even though the wall that it sits against still needs to be glassed.

If you look at the galley in most RVs, there is a cupboard under the stove/oven with the flip-down door becomes sort of a catch-all. My wife and I both have back issues so for us it's a space that would be used for junk that one rarely needs to get at. For us, a better use of that space would be to house a water tank, so I built one from 1/4" ply and epoxy.

There has been a lot of ballyhoo about BPA in drinking water. It is used in the formulation of epoxy hardener, so it stands to reason that it could theoretically leach into the water if the resin isn't fully polymerized. The tank will be plumbed to the sink for washing up so I'm not too worried about it.
Here is what West has to say about using epoxy for water tanks and is the guideline I'm going by.

Because my build has the lower corners of the sidewalls 'clipped' to bring the excess width back into the trailer's frame, I have a shape that would create wasted space for a boxy poly water tank. I used that space to hold water and it will contribute to the shell's overall integrity once it's glassed into place, though that won't happen until the wall is glassed into place. The natural solution was a wedge-shaped tank.

Image

Leak testing
Image

As it will be installed
Image

Hmmm...I was sure I had a pic of the stove sitting on it in its spot inside the trailer - I'll edit one into here later if I can't find it.

The back of the stove has a duct where the oven's heat escapes into the range hood. Behind that I will have another 4" or so that makes up the difference between the depth of the stove and the depth of the countertop. In that space I'll run the plumbing to the tank. I'll plumb in a pickup with a standpipe, a non-pressure fill and a vent that will terminate at the top of the backsplash.
I'll be keeping the tank handy (with the top off) as I lay up the rest of the shell so that I have a place to use up any excess epoxy. It's leak free now, but I'll continue building up that layer with the resin that I have leftover after sgueegeeing (is that a word?) the wall section layups.

That's it for the tank. Next up: the countertop.
User avatar
Wobbly Wheels
Donating Member
 
Posts: 1080
Joined: Tue Mar 15, 2011 9:51 am
Top

Re: Another foam standie...

Postby Wobbly Wheels » Sat Mar 16, 2013 11:45 pm

With the tank done and the bulkheads roughed out it made sense to forge on with the galley until I can get back to glassing the outer shell.
First off - I needed to locate the forward bulkhead precisely. Fortunately, I had all my marks from the initial layout and had roughed out the foam core so it was easy to align it to its marks.
Image
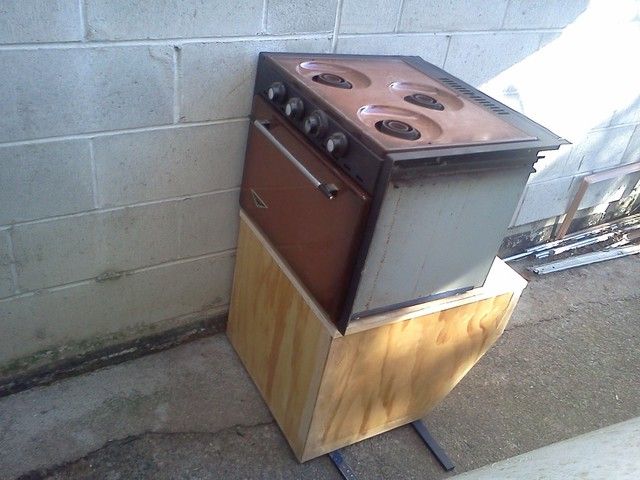
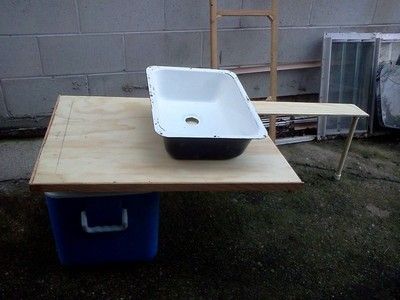
You're looking at the left (street) sidewall and the front of the trailer is to the right. Forward of the bulkhead is the head compartment. For scale, it's 28" from the front face of that b/h to the front of the compartment. The stove will be against the aft face of that bulkhead and will run aft to the edge of the transverse queen berth against the back wall. That leaves me with 50 running inches for a countertop.
There is no practical way to get a 19" wide stove, a 10X16 sink, and the fridge into the 50" allotment (should be "a-little-ment" ?) so I came up with a solution that ought to work pretty well.

Here's the end result and I'll tell you how I got there...
Image

One of the compromises I came up with was to kibosh the fridge: there simply isn't the space for a dedicated, front-opening two way fridge. Or, more correctly: it isn't important enough to me to make the space for it. Instead, I've opted to house a cooler in a drawer like this:
Image
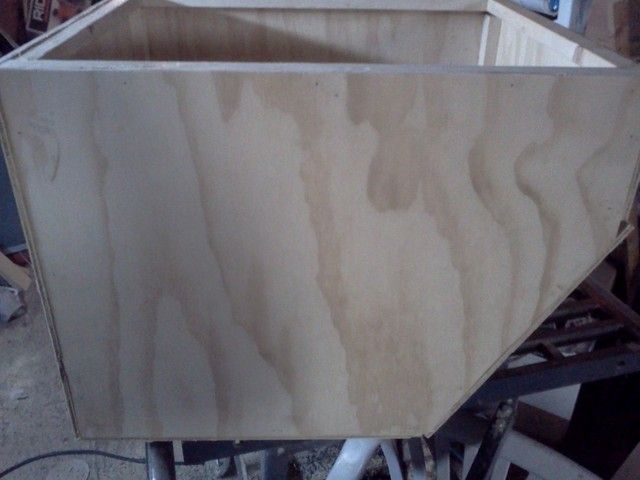
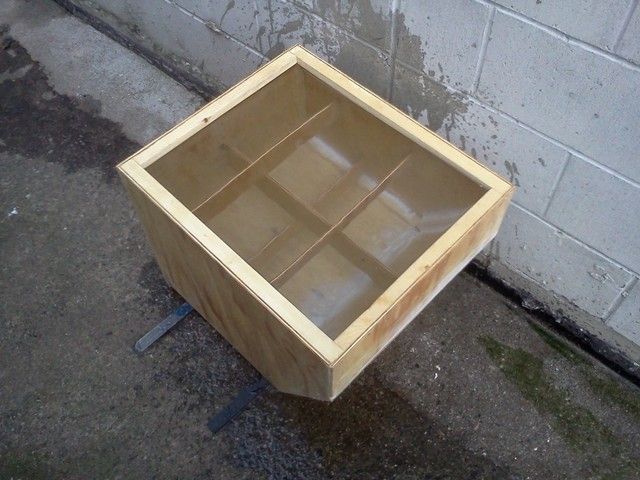
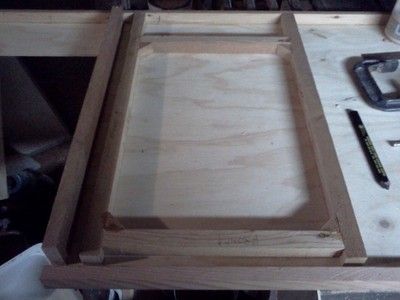
It will take a bit of thought since the table will be secured to the wall opposite the drawer and the drawer may not open enough to be able to open the cooler lid with the table down, but I can build a cooler if I need to with drop in lids rather than hinged if I need to. After I took the fridge out of the plan, I figured on a top opening icebox (like on a sailboat) so I made up a cedar frame to house the lid.
Image
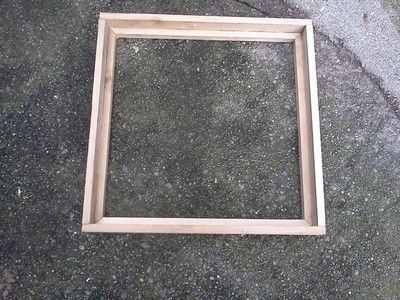
The lip on the inside holds a strip of foam tape that makes a seal. It's more thermally efficient to cant the sides of the opening so the lid drops in like a wedge against two or three seals, but sometimes practical considerations win out.
I sized it based on how much room it would take to be able to reach the bottom and to be able to reach in to clean it. That wound up being 17 1/4" sq.

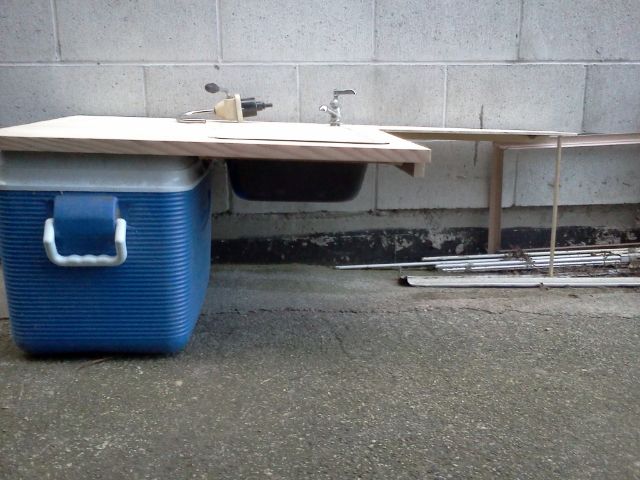
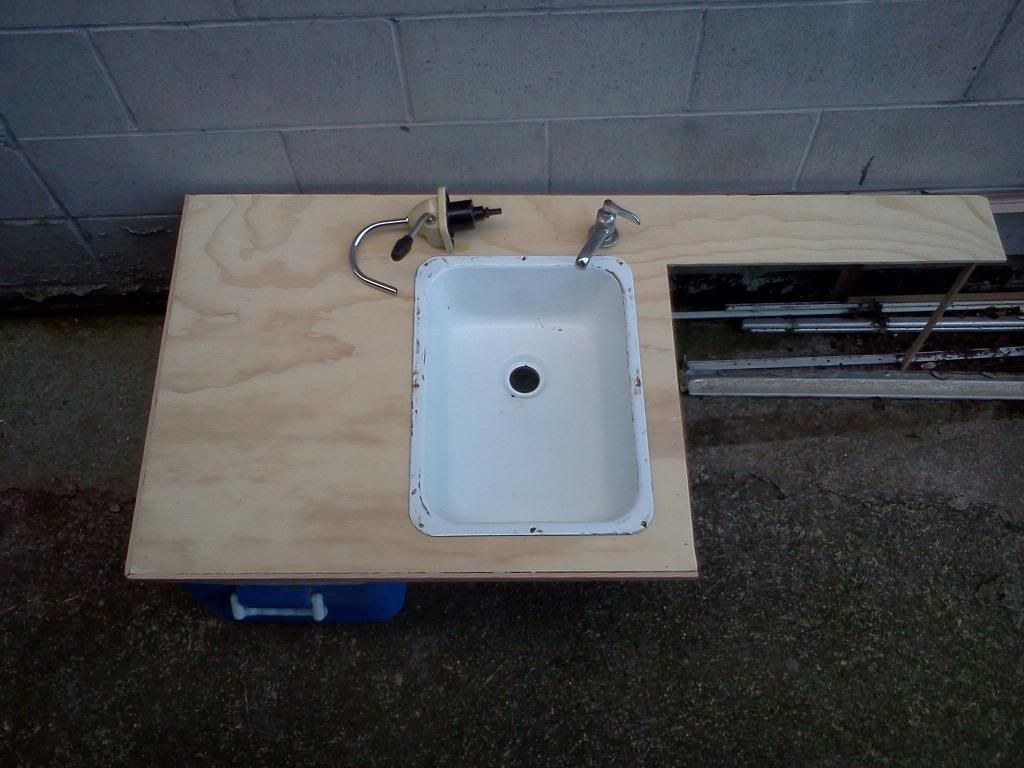
With the sink and the stove, I was no further ahead than with the fridge, so it was back to the drawing board. That's when I came up with the idea of a slide-out cooler. If I mount it low, it will give me the space to mount the sink transversely across the counter and the sink's P-trap will still be above where the cooler slides in. Even better though: mounting the sink with the narrow dimension parallel to the counter edge will ensure no conflict at all and still leave space for the faucet against the wall. That doesn't sound clear as I read it, so here's the thousand words:
Image
The piece of PVC on the right is a stand-in for the stove that will sit in that cutout. That end of the counter will rest on the cleat against the bulkhead that supports the other side of the stove.

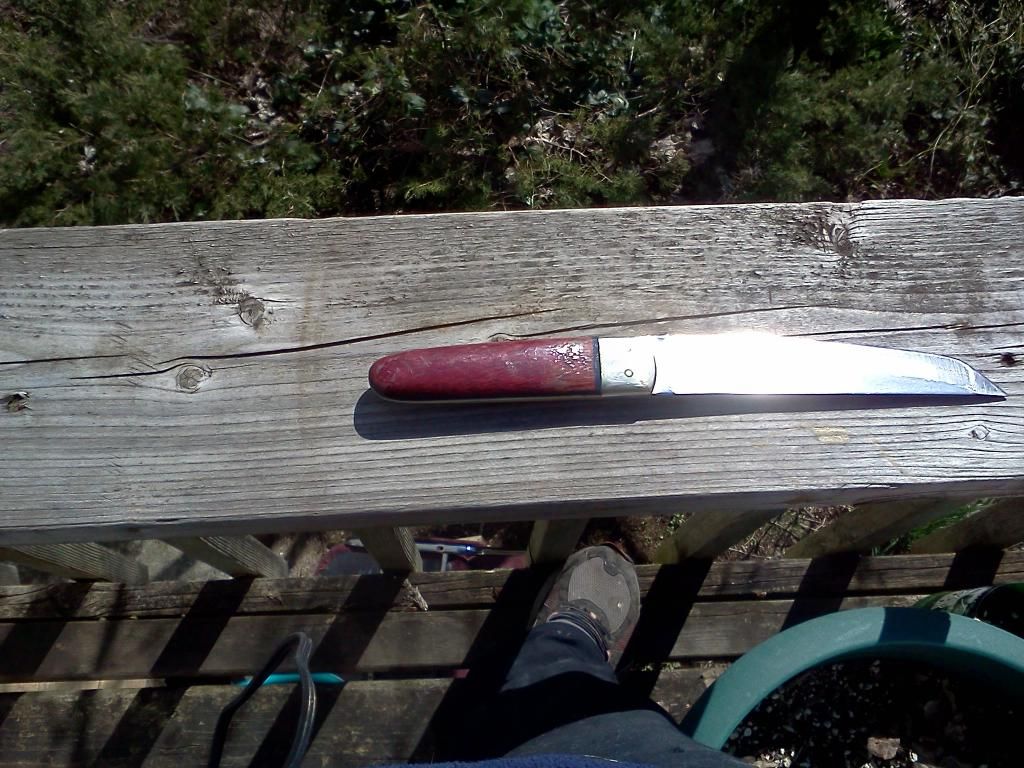
To quote someone whose workmanship I aspire to - lookin' at you KC ;) - I made the plan and stuck to it : it was time to cut some wood and make it permanent !

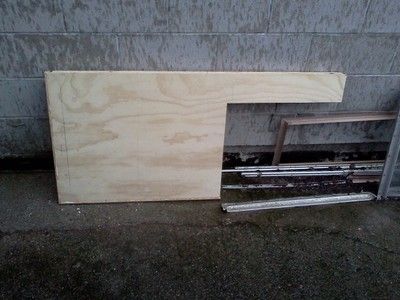
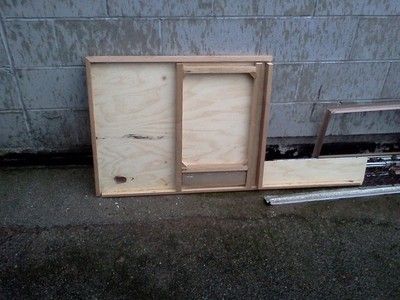
I had already made up a cedar frame to support the sink and left the legs long enough that I could mount it either way. I aligned it, marked the legs and cut it to fit:
Image
The 1/4" gap in the front is to allow for the front face of the cabinet that I'll glue in once the height is fixed, but that's a ways down the road. You're looking at the underside so the stove is to the left.
Glued up and about to be permanent (TB III):
Image

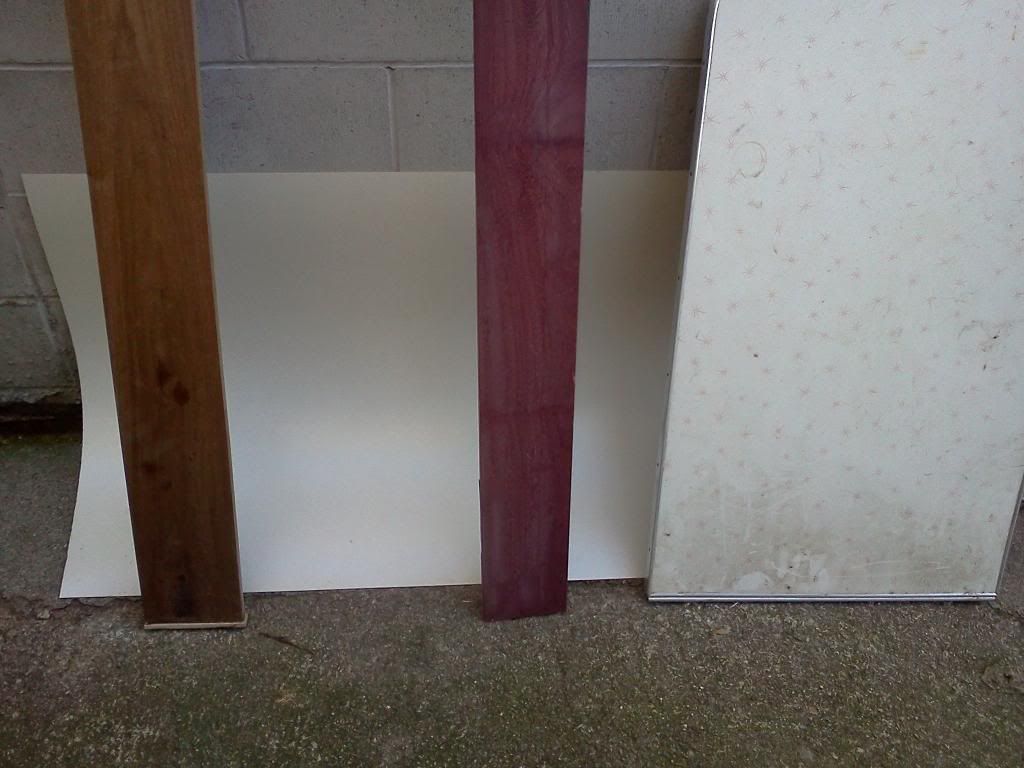
Here's the underside complete. Between the sink edge and the back wall (bottom of pic), the solid cedar blocking is to support the hand pump faucet. The exposed edges are Douglas fir for its hardness, otherwise it's all cedar both for weight and porosity for epoxy resin penetration. The strip that runs parallel to the sink support is D.fir as well because that side of the stove will hang off it.
Image

Now that I'm not building an icebox, I have a lipped cedar 'picture frame' that needs a home. I will cut it down from 17 1/4" sq to 17 1/4 X about 14" or so and use it as the frame for my electrical distribution panel. This is the battery switch I'll be using:
Image
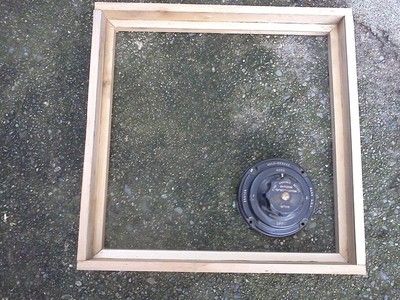
I have two of them and, since I'll likely be using used batteries for a while, I can isolate each individual battery so they don't cross drain. Of course, I'll incorporate diodes downstream from the solar charge controller so they don't backfeed each other. That panel will also house the front end of a 1 kW inverter and a mess of breakers, but that's all for a later post.

These are the faucets I've installed backing for.
Image
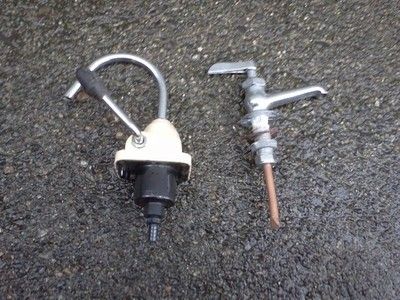
On the left is the primary that will be plumbed to the water tank. On the right is the one that came with the camper I scrapped last summer and, if I use it, it will be a dedicated muni connection. Whether or not I do that depends entirely on how much space I have under the cooler to build in a grey water tank. With a muni supply, one can fill up a waste tank pretty quickly vs having to empty a 5 gallon jug per the current plan.
Fortunately, the areas I camp are remote enough that I can dig a sump and drain my grey water off. That's also why I opted for a hose barb as a shower drain in the head compartment.
User avatar
Wobbly Wheels
Donating Member
 
Posts: 1080
Joined: Tue Mar 15, 2011 9:51 am
Top

Re: Another foam standie...

Postby GPW » Sun Mar 17, 2013 8:36 am

Lookin’ Good W2!!! :thumbsup: 8) :applause:
There’s no place like Foam !
User avatar
GPW
Gold Donating Member
 
Posts: 14911
Images: 546
Joined: Thu Feb 09, 2006 7:58 pm
Location: New Orleans
Top

Re: Another foam standie...

Postby KCStudly » Sun Mar 17, 2013 5:22 pm

Nice looking counter frame, and thanks for the kudos. :thumbsup:
KC
My Build: The Poet Creek Express Hybrid Foamie

Poet Creek Or Bust
Engineering the TLAR way - "That Looks About Right"
TnTTT ORIGINAL 200A LANTERN CLUB = "The 200A Gang"
Green Lantern Corpsmen
User avatar
KCStudly
Donating Member
 
Posts: 9611
Images: 8169
Joined: Mon Feb 06, 2012 10:18 pm
Location: Southeastern CT, USA
Top

Re: Another foam standie...

Postby Wobbly Wheels » Mon Mar 18, 2013 8:53 am

Thx guys.

The slow pace is getting a bit frustrating but there's nothing I can do about that right now. Still, I'm enjoying the 'me' time in the shop.
I was going to cut foam blocking to fill in the underside of the countertop but the span is so short that 1/4" ply with the framing glued in seems plenty stiff enough without it. The next step is to support it on the edges and fill the sink with water to see how it handles the weight, then I'll glue on the laminate (white, 2'X4', $5 at the Habitat store).
User avatar
Wobbly Wheels
Donating Member
 
Posts: 1080
Joined: Tue Mar 15, 2011 9:51 am
Top

Re: Another foam standie...

Postby Bogo » Wed Mar 20, 2013 2:19 pm

If you make your own cooler, make sure all the inside corners are at least 1/2" radius for cleaning. Also brace the sides and bottom for water pressure. For built in coolers the drain plug is always an issue and potential leak spot. I think I'd use the bailing method for getting water out to avoid having that potential leak. You could also hook up a permanent drain hose. That way the fitting to tank joint isn't getting stressed every time a hose is hooked up..

Another thing to think about is coolers weigh allot when full. You'll want to use heavy duty drawer slides so it can handle bouncing down the road.
User avatar
Bogo
500 Club
 
Posts: 658
Images: 39
Joined: Tue Oct 02, 2012 4:32 pm
Location: The land between two rivers.
Top

Re: Another foam standie...

Postby Wobbly Wheels » Wed Mar 20, 2013 9:32 pm

Thanks for the thoughts on coolers Bogo !

I'm not going with a built-in after all, but when I was thinking about it I was going to use a 1/2" through hull with the (permanent) hose running as a trap to keep the cold in. That route would have let me build a greywater tank below it and I would have drained it off into there. I've used sink drains in freezer boxes and that works pretty well, but you have to be able to reach down to the stopper.
The other thing about an icebox is that I'd be able to add a holding plate later if I wanted - oh well, next build I guess !

The cooler I measured up for this is a bit of a rare bird: it doesn't have a drain at all so I'm making up a StarBoard tray for the bottom to keep the ice from sitting in the water - same idea as a teak shower grate.
Good points on the weight: I had figured on cleats to secure the bottom (like a battery) but maybe a couple transit straps to footman clamps would add peace of mind, especially with how light I'm building the cabinetry.
200lb (for 18"), 24" full extension drawer slides are only about $40 at Lee Valley so it just makes sense to overbuild in that department. That said, I don't think I've ever made it out of Lee Valley with only the thing I went there to get !
The base will be 3/4" ply with fir rails for the drawer slides - that sucker's not going anywhere : could you imagine the mess if it did ? :frightened:
User avatar
Wobbly Wheels
Donating Member
 
Posts: 1080
Joined: Tue Mar 15, 2011 9:51 am
Top

Re: Another foam standie...

Postby Wobbly Wheels » Fri Mar 22, 2013 12:10 am

I made a little more progress on the galley over the last couple days. I routed the opening for the sink and put the flush trimming bit and 150 grit RO discs to work. I cut the hole for the muni water tap through the solid blocking under the countertop. I was going to cut the 2" hole for the hand pumper as well, but the mandrel for my holke saw was bent. I wish I had kids to blame for wrecking tools without replacing them, but we don't have kids. Still, the dog was looking pretty guilty....
My spare arbor is at the shop and it was too late to grab another, so just pretend it's there in the pics. It should be pretty obvious where it's going anyway.

I mocked up the galley with the sink in place. On the left, the plan was for a tall drawer front covering the cooler but I think I'll forego that for the time being and use the handle on the cooler as a drawer pull. The cooler itself will be secured with cleats around the base and a strap or two for transit. The space under the sink will be a typical cabinet and there will be a solid cabinet face under the stove, which is the cutout to the right.
Image
Image
Image

I figured I'd share one of the decisions I'm mulling over, so we'll be going off track a little bit. Not to worry, it's for a good reason and I'll bring it back...
I have a hunk of purpleheart and a piece of walnut that I want to use for trim. I also have the 70's table from the camper that the appliances came from. The flat lighting is unavoidable - it's almost dark when I get home. The laminate is white with sort of amoeba-shaped blotches almost the same pinky color as the highlights on the tabletop.
This is the galley in a nutshell:
Image

Salvaged 70's tabletop against countertop laminate
Image

Purpleheart against countertop laminate
Image

Walnut against countertop laminate
Image

That will all go against a light grey base paint. The floor will be vinyl tiles or roll ends, so I'll put in whatever matches. Depending on how the weigh-ins go, I'd like to do the bottom 3' or so of the walls in 1/8" ply, finished bright.

But this decision is a ways off yet...
User avatar
Wobbly Wheels
Donating Member
 
Posts: 1080
Joined: Tue Mar 15, 2011 9:51 am
Top

Re: Another foam standie...

Postby bonnie » Fri Mar 22, 2013 6:33 am

That is a beautiful piece of purple heart. It looks really good with the table. I love it too. Elegant. :applause: :thumbsup:
Remember, the turtle won. :)
User avatar
bonnie
Donating Member
 
Posts: 1389
Images: 107
Joined: Sun Jul 24, 2011 4:14 pm
Location: Roxana, IL
Top

Re: Another foam standie...

Postby Wobbly Wheels » Sun Mar 24, 2013 1:03 pm

Thx bonnie !
I kicked up a few shorts from a lumber yard that specializes in exotic hardwoods. That's the last piece I have, so I figured that trimming the trailer was a great place for it. Fortunately, I don't need any long lengths (not that I couldn't scarf them to what I need).

I think I'm going to rip the walnut for most of the trim since it's easy to get more of it and use the purpleheart just for accents here and there. With a clear polyurethane on everything and light grey paint, I hope the wood will really pop.
User avatar
Wobbly Wheels
Donating Member
 
Posts: 1080
Joined: Tue Mar 15, 2011 9:51 am
Top

Re: Another foam standie...

Postby bonnie » Sun Mar 24, 2013 1:39 pm

It really should. Make sure your poly has some UV, as purple heart tends to fade in sun. Can't wait to see what you do.
Remember, the turtle won. :)
User avatar
bonnie
Donating Member
 
Posts: 1389
Images: 107
Joined: Sun Jul 24, 2011 4:14 pm
Location: Roxana, IL
Top

Re: Another foam standie...

Postby Wobbly Wheels » Sun Mar 24, 2013 2:26 pm

I figure I'll use Varathane's Diand Wood poly. The exterior is UV and I like that it's absolutely clear so all you see is the grain. It doesn't show up in the pic, but the purpleheart has a notch in one end where I cut some stock for knife handles.

Now that it's seen a lot of use, I wouldn't use that finish again for handles because it isn't hard enough. For trim it should be great though.
The sheath for that knife is Kydex, which is even harder on a finish.

This is what it looks like now - you can see where the wood has been exposed to the sun as the finish has worn right near the bolster. IIRC that was about three coats.
Image
User avatar
Wobbly Wheels
Donating Member
 
Posts: 1080
Joined: Tue Mar 15, 2011 9:51 am
Top

Re: Another foam standie...

Postby bonnie » Sun Mar 24, 2013 8:38 pm

That is so pretty, even if the finish is wearing. Shows the knife is used.
Remember, the turtle won. :)
User avatar
bonnie
Donating Member
 
Posts: 1389
Images: 107
Joined: Sun Jul 24, 2011 4:14 pm
Location: Roxana, IL
Top

PreviousNext

Return to Foamies

Who is online

Users browsing this forum: No registered users and 7 guests