Another foam standie...

Canvas covered foamies (Thrifty Alternatives...)

Moderator: eaglesdare

Postby Wobbly Wheels » Mon Aug 01, 2011 11:51 am

Another collection of thoughts, this time re HVAC...

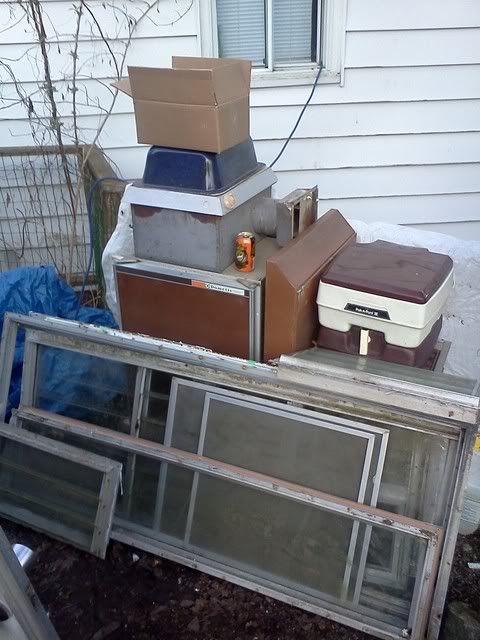
I have an 18cu ft fridge that doesn't work properly - the duct between fridge and freezer keeps icing up. A buddy made me an offer I couldn't refuse so I replaced it rather than mess with it.

While it's a no brainer that the fridge guts don't have the oomph (tech term there) to cool a 400 cu ft towable beer cooler, I may still be able to use it.

What if I immersed the holding plate in a coolant bath and circulated that coolant through insulated lines to a blower ?
I haven't got the downstream end completely worked out yet, but I'm thinking of maybe a tranny oil cooler with a couple PC fans on the back, like a bus heater.

This came about because I'm allowing for a solar hydronic heating system and one of the great things about hydronics is that you can make separate circuits and put the right temperature where you want it much more easily than with forced air. I've built solar heaters for swimming pools in the past (ok....distant past), so this will be a scaled-down version of one of those.

I've installed these into boats:
http://www.novakool.com/products/conversion_units.htm
and
http://www.eberspacher.com/products/wat ... nic-5.html
so essentially I'm combining them all via two parallel summer/winter valves (one for supply, one for return). The hot coil's 'accumulator' will be the hot water tank by default and the valve will be after that.
The chilled coolant will first run through an icebox (prob through a fin&tube rad) then to the a/c unit.

I will need a bypass to maintain circulation in the unused loop (hot side during summer, cold side during winter) but I should be able to use check valves for that.

Here's a block diagram of what I'm thinking:
Image
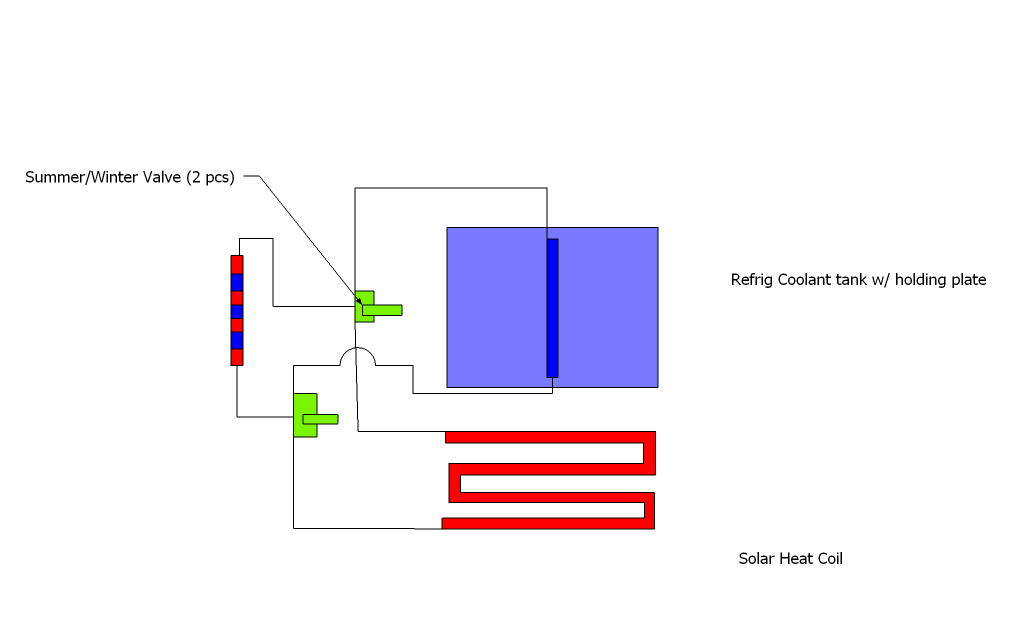
A quick correction: on the cold side, it's the tank that provides the coolant, not the holding plate immersed in the tank. I'll edit, export, re-upload and edit the correction into this quick post sometime....maybe.

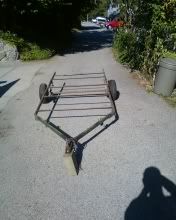
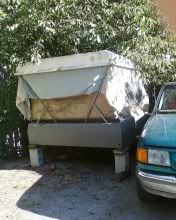
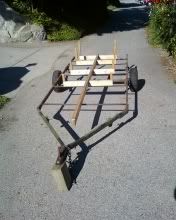
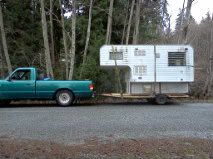
On the trailer, I've now committed to scrapping the tent trailer sooner rather than later. I've stripped out everything I can reuse and am loading it up for a trip to the dump. Because the body is secured to the frame with 1/4-20 carriage bolts, I should be able to bust 'em off pretty quick when I get to the dump, then their machine can lift the old TT shell right off the frame....or lift it enough that I can drive the frame out from under.

Not much progress on the trailer itself really - I now have to buy a bunch of foam to move forward so that won't be happening for a couple weeks yet.
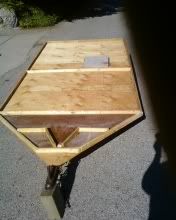
The nose cone floor is glassed and I'm glassing cleats down to build up the toilet pedestal from. I am putting the shower drain right up at the front and it will actually be underneath the toilet pedestal.

And yes fellow foamlings, pix will be forthcoming once the drain is in...
User avatar
Wobbly Wheels
Donating Member
 
Posts: 1080
Joined: Tue Mar 15, 2011 9:51 am

Postby GPW » Mon Aug 01, 2011 12:27 pm

W2, interesting your heat pump ish concept ... :thinking:

Yes, pics please!!! :thumbsup:
There’s no place like Foam !
User avatar
GPW
Gold Donating Member
 
Posts: 14912
Images: 546
Joined: Thu Feb 09, 2006 7:58 pm
Location: New Orleans

Postby Wobbly Wheels » Sun Aug 28, 2011 11:22 am

So, I got a little further this weekend...

I got the frame cut out from under the tent trailer body. The TT will be making its final voyage to the dump next weekend so I'll be loading it up this week. I've got some steel channel that I cut out of the bridle so I'll use the existing holes in the frame to drill up through the floor into the steel, tap the holes, and bolt them from underneath. When I get it to the dump, I can pull the bolts from underneath and their loader can pick the body off the frame. I also have to make a temporary light bar because the lights were attached to the body - that's today's project.
Eventually, I'd like to replace the crossmembers (1" angle) with rectangular tubing the same as the rails.

This will be a dry run of how I think I want to incorporate a removable cabin onto the trailer frame. At this point, I figure I'll get the floor panels done with 3/4" ply pads and tee nuts at the hold-down points. Bolts will come up from underneath the frame to hold it all down. That way, nothing protrudes through the floor and I can lay whatever flooring I want without having to leave access to the nuts. Everything will be encapsulated in epoxy and the floor will be isolated from the frame with foam tape.

Now for some pics !

After a bunch of cutting & grinding, I'm ready to start.
The chains that are on it now are overkill...and too short, so they'll be cut off as well before I sand and paint the frame.
Image

This is where progress is currently at. Once I have a bit of money to throw at it, I'll be getting the materials for the floor panels and get them laid up. The main floor section here is 10' long. The back wall will come up on a 45 from the floor to give me and extra 2' of length at seat height. That means the bed will take up only 4 1/2' of the length of this floor. The next step is to map out where the galley will be and to see if I can get a dinette for two into what's left with the bed down. A slide-out might be the way to go.
Image

The nosecone/head/shower will be bigger than just what's in the pic - the piece there is 28" from the front to where it joins the floor. That fully waterproofed floor section will extend into the cabin for a total floor length of 44". Those cleats will have ply on top of them and will serve as the pedestal for the toilet but I won't be doing that until I figure out how high it needs to be. The shower drain is underneath, so by setting up the trailer slightly nose down, they will channel water to the drain (already in). I can stick a bucket underneath to catch it or pop a 1 1/4" bilge hose on it to drain it away from the campsite. I also have space there to build a tank under the floor later if need be.

But first, I need to get this beast to the dump !!
Image

The reason I'm building the cabin as a removable box (a la GPW) is because I have the space to park only one trailer. I'm currently restoring a 13' Whitehall-esque rowboat (glass replica). When I put it up for sale at the local coop, it will be on a dolly with casters so I can roll it around. The dolly will also convert the trailer into a boat trailer, though I won't be launching with it.
This is the strongback of what will become the dolly sitting where it will be bolted:
Image

I just took in a 16' freighter canoe as my next job, so that will need a dolly as well, but I have a bit of a different idea for that one...stay tuned. Besides, I may keep that one for myself - it looks like it ought to float about 1000 lbs in calm water...perfect for hunting.
User avatar
Wobbly Wheels
Donating Member
 
Posts: 1080
Joined: Tue Mar 15, 2011 9:51 am
Top

Postby GPW » Sun Aug 28, 2011 12:13 pm

W2, Looking GOOD !!! :thumbsup:

Amazing how much a 16' canoe can carry ... I used to fish in one , with a friend , couple ice chests , gear, etc.... In the marsh (salt water) ... Worked Great !!! Even had an electric trolling motor and DD batt for when we got tired of paddling ... :roll:
Wondering if we could make a Foamie canoe ??? :thinking:
There’s no place like Foam !
User avatar
GPW
Gold Donating Member
 
Posts: 14912
Images: 546
Joined: Thu Feb 09, 2006 7:58 pm
Location: New Orleans
Top

Postby Wobbly Wheels » Sun Aug 28, 2011 1:06 pm

Thx, still thinking more than building though !

Foamie canoe ?

That`s funny, I was already thinking about pulling a mold off this one...maybe some 2 part liquid foam...pour it in stages so the heat doesn't distort the mold...maybe lay down a glass skin first.....fittings attached to dowels and poured in place like concrete....
It's used for flotation in boats, so it certainly BETTER work !
I'll have to mull that over for when I get some of these jobs done.

Freighters are pretty impressive. Had the chance to check out an original voyageur canoe during a traveling exhibit. It's pretty damned impressive skill to be able to build one of these things entirely from local materials....then trust your life to 'em in some of the hairiest water in the world. I learned to whitewater paddle on a class III stretch that used to be a native trading route.
We were using aluminum Grummans with extra flotation - I couldn't imagine have MORE boat in the water with all the weight they would have carried. Personal favorites as far as looks though has to be the cedar ones from here on the west coast. The amount of work involved was a whole lot more than what it requires now !
No surprise they were heirlooms
User avatar
Wobbly Wheels
Donating Member
 
Posts: 1080
Joined: Tue Mar 15, 2011 9:51 am
Top

Postby GPW » Sun Aug 28, 2011 6:11 pm

heirlooms ... I thought that's what they used to make wigs and toupees :lol:

One thing at a time , you get your Foamie trailer done , I'll get mine finished (finally) and then we'll make some Foamie canoes ... :thumbsup: 8)
There’s no place like Foam !
User avatar
GPW
Gold Donating Member
 
Posts: 14912
Images: 546
Joined: Thu Feb 09, 2006 7:58 pm
Location: New Orleans
Top

Postby atahoekid » Mon Aug 29, 2011 12:23 am

WW, just caught up with your thread. OMG you are very ambitious :o :o . I'm going to be pretty happy if my pretty simple trailer turns out the way I want it to, never mind the ambitious things you're doing!!! It sounds like you've got the brain and skills to pull all of your ideas off. Bravo :thumbsup: :applause: :thumbsup: :applause: I admire your creativity and you've got skills I've never even thought of. This is going to be interesting to watch
Mel

"Believe in your abilities... Remember amateurs built the ark, professionals built the Titanic"

"Indecision may or may not be my problem" Jimmy Buffet

Image

The Road Foamie Build Thread: viewtopic.php?t=45698
User avatar
atahoekid
Platinum Donating Member
 
Posts: 1773
Images: 158
Joined: Sat Jul 24, 2010 2:49 am
Location: Incline Village, NV
Top

Postby Wobbly Wheels » Mon Aug 29, 2011 12:53 pm

Thx Mel, but I think you might have more faith in my abilities than I do.
:lol:
Much of this is just ideas I'm kicking around...we'll see how much the budget allows for. Still...I can't seem to get the carved 'toilet sconce' idea to go away, lol.
User avatar
Wobbly Wheels
Donating Member
 
Posts: 1080
Joined: Tue Mar 15, 2011 9:51 am
Top

Postby eaglesdare » Tue Aug 30, 2011 9:08 am

great job. i have been quiet on this build. it seems technical stuff is not my thing. but the pics look good!
Louella
May the foam be with you.
User avatar
eaglesdare
Donating Member
 
Posts: 3168
Images: 13
Joined: Tue Aug 26, 2008 7:06 pm
Top

Postby Wobbly Wheels » Wed Feb 01, 2012 3:10 am

I've GOT to be coming up on the record for the slowest build to date... :lol:

I picked up the appliances on Saturday. Unfortunately, the box they came in was an 8' camper from the 70's that was loaded with wet wood. I've checked everything out and it all seems to work except for the furnace, which I'll have to get onto the workbench to check the valve body.

The plan for this (and next) weekend is to strip it out and get it cut down into flat panels to take to the dump. I'll keep the windows, the appliances, the sink....and that's about it - between the case of beer and the dump fees: around $80.

I had to post this picture of picking it up because it looks so much like a 'ghetto' fifth-wheel :D
But it was certainly thrifty !
Image
User avatar
Wobbly Wheels
Donating Member
 
Posts: 1080
Joined: Tue Mar 15, 2011 9:51 am
Top

Postby eaglesdare » Wed Feb 01, 2012 6:19 am

:lol: you just can't beat thrifty.
Louella
May the foam be with you.
User avatar
eaglesdare
Donating Member
 
Posts: 3168
Images: 13
Joined: Tue Aug 26, 2008 7:06 pm
Top

Postby GPW » Wed Feb 01, 2012 9:48 am

Cool !!! Lots of little things you can re-use into new purpose ... :thumbsup:
There’s no place like Foam !
User avatar
GPW
Gold Donating Member
 
Posts: 14912
Images: 546
Joined: Thu Feb 09, 2006 7:58 pm
Location: New Orleans
Top

Postby droid_ca » Wed Feb 01, 2012 10:31 am

I like your ideas on the 12 volt heater
Please more pictures
There is a world, just beyond now,
where reality runs a razor thin seam between fact and possibility;

Anywhere I roam where I lay my head is home....
Image
“Fide Canem”
Please check out my build thread
viewtopic.php?f=5&t=52816
User avatar
droid_ca
Donating Member
 
Posts: 1981
Images: 176
Joined: Thu Sep 30, 2010 5:08 am
Location: Prince George BC Canada
Top

Postby Wobbly Wheels » Sat Feb 04, 2012 12:38 am

Well droid, once I get this camper stripped out and knocked down, I'll be back onto the build and I'll grab some shots as the wall panels go up.
I'll post up some of my reference pics of appliances, cutouts, clearances, etc if anyone's interested.

Seeing this camper has given me a couple changes to my design.
I'm back to a rear-entry floor plan now because a side door is going to take too much wall space. I have taken a bunch of measurements from this camper and I'll put them together in a file as a reference for anyone who's designing from scratch.

At any rate, the windows are coming out tomorrow and the stove (have to cut the galley carcass to get it out). Otherwise it's all stripped out and needs to be cut down into flat panels to get it to the dump. It had some teardrop running lights that will make a great taillight array. I was going to french in some old Mustang taillights but I'm rethinking that now too, lol...

Yeah GPW, there's a bunch stuff I'll be able to reuse. A lot of it is nickel and dime stuff like a 'panel' for a single AC breaker (and 15A breaker) that doesn't cost much on its own but it adds up when you factor it all in.
I didn't expect to get an enamelled sink with a metal faucet...this thing was built when cheap plastic was king.

Louella, if anyone's looking for thrifty, just keep a eye out on local craigslist - there are ALWAYS free RVs to be had from people who want nothing more than for you to show up up and make it go away.
In this case, I was picking it up from the guy's dad and gave him a case opf beer because, when I got there, it had no jacks so we had to use his loader to get it onto the trailer.
IIRC, you had enough friends help on your build that I'm sure you have someone nearby with the know-how to take advantage of a great deal. For the cost of a case of beer (~$30) and ~$50 tipping fee at the dump when I'm done with it (hopefully Sunday !), I got several hundred bucks' worth of appliances...as long as you make sure you're not just getting rid of someone else's garbage.
When I mentioned I built boats for a living, this guy tried to get me to cart off an old 16' runabout full of water with blackberries firmly wrapped around the 50hp Merc...but it was running last summer....lol.

Unfortunately, I am in a bit of a conundrum...to get the range I want I pretty much have to use belly tanks under the floor, but at the same time I want to be able to drag this thing through cross ditches on logging roads. I've decided to upgrade the tent trailer wheels from 8" to 12" (21" OD) for more ground clearance, and the 1600 lbs capacity (840X2) will make the 1200 lb axle & springs the weak point. The extra clearance will help a bit and keeping the tankage down low will certainly help. What's the worst that can happen, leaving a skidmark down the gravel on the way out after tearing the blackwater tank open on a rock ?
:lol:
User avatar
Wobbly Wheels
Donating Member
 
Posts: 1080
Joined: Tue Mar 15, 2011 9:51 am
Top

Postby Wobbly Wheels » Mon Feb 06, 2012 12:30 am

So, the camper is gone now. It's become this pile of parts:
Image

I ran across a couple old tin cans after I pulled the stove. Ewww....
Image

And this is what the shell reduced to after about three hours' work:

Image

When I was done, the scale ticket read 480kg and cost me $60 to dump. Two cheap circular saw blades at about $7 each and a case of beer makes this an affordable option for acquiring appliances.
A caveat though - I do have to put all this stuff on the bench and clean it up. If I didn't already have PPE, I'd have to factor that in as well. I wouldn't want to muck around in an old camper without at least a mask for the potential mold.
User avatar
Wobbly Wheels
Donating Member
 
Posts: 1080
Joined: Tue Mar 15, 2011 9:51 am
Top

PreviousNext

Return to Foamies

Who is online

Users browsing this forum: No registered users and 27 guests