The Poet Creek Express - Foamie Hybrid

Canvas covered foamies (Thrifty Alternatives...)

Moderator: eaglesdare

Re: The Poet Creek Express - Foamie Hybrid

Postby KCStudly » Sun Sep 14, 2014 10:13 pm

Not a bad idea, but it gives me a better one!

Don't glue the lower spar yet, install the skin, remove the lower spar to stain, reinstall the spar with glue then poly. :thinking:

Just a little worried that all that shuffling around and extra fitting might result in mismatching or some other trouble. I think I'll just glue the frame up from here so that all of that is locked down, then the skin is the only x-factor remaining.

Maybe. :lol:
KC
My Build: The Poet Creek Express Hybrid Foamie

Poet Creek Or Bust
Engineering the TLAR way - "That Looks About Right"
TnTTT ORIGINAL 200A LANTERN CLUB = "The 200A Gang"
Green Lantern Corpsmen
User avatar
KCStudly
Donating Member
 
Posts: 9611
Images: 8169
Joined: Mon Feb 06, 2012 10:18 pm
Location: Southeastern CT, USA

Re: The Poet Creek Express - Foamie Hybrid

Postby KCStudly » Thu Sep 18, 2014 10:31 pm

On Monday I fit the upper hatch actuator brackets.
Image
Image

If you look at the threads protruding on the lower bolt (the one where the self-locking nut is drawn up snug) you can see that there are about 5 full threads protruding. Two (2) to five (5) threads protruding is the government spec we used in submarines, but I much prefer being closer to two; less chance of snagging and less gangly looking. Look close and you can see a black Sharpie mark at about the 2nd thread.
Image
Image

I went out of my way to order 2-1/4 inch long bolts (hardware store only had 2 or 2-1/2 long). This way the shanks of the bolts go well into the second bracket. With the holes in the brackets and wood sized one-for-one to the bolt shank, everything is a tight fit.
Image

After sanding the bolt lengths back and re-chamfering them on the Bader, I used a little of the paste wax (bought for the CI table saw top) to lube the bolt threads; dry stainless on stainless is a recipe for new alloys called “seizium” and “gaulium”.
Image
Image

Really sharp eyed followers will also note that the washers are faced wrong for now. Flat washers are die stamped out from sheet and the stamping process coins the washer slightly leaving rounded edges on one side and sharper edges on the other. I always make a habit of facing my flat washers coined side out. My theory is that this adds a tad bit of spring in the joint, kind of like a split lock washer, and presents a smoother finished surface to the outside. However, until I decide on the final finish for the brackets, I didn’t want the washers to dig in, so I turned them out. (Too much detail?)

The Ford started losing air out of one of the tires (TPS technology really is a nice thing), so yesterday I got tied up having the tires rotated (free at point of purchase) and the tire patched/plugged (Uni-seal). It took way longer than it should have.

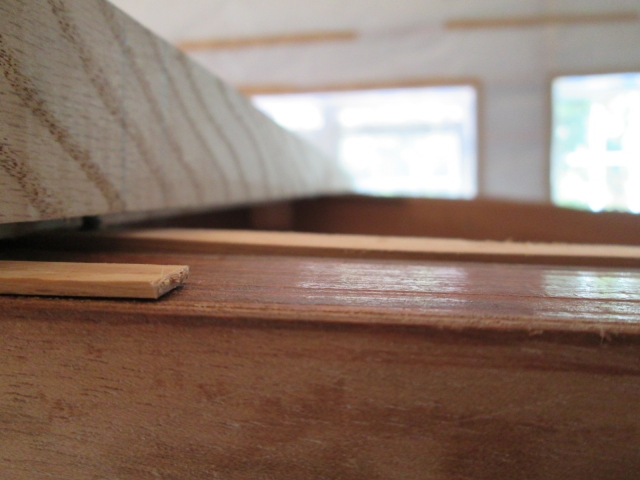
Tonight I worked on the upper hatch spar. The rabbet I had cut for the hatch skin to slip under was a tad on the deep side and I wasn’t sure that it would be snug enough for a good glue bond on both sides (simultaneously between the spar and skin, and the ribs and skin), so I used a scrap of the 5 mm, and planned and sanded until the skin was a nice slip fit; almost flush. This is the before pic.
Image

Here I have masked around the top ends of the ribs and the adjacent areas of the spar, and glued the spar to the rib tips. The little scrap is just barely pinched. I only used the front screws (top) for now so that the other one wouldn’t twist the spar onto the rabbet.
Image
Image

Contemplated a few details on how I am going to skin the hatch. I will need to dry fit the top edge of the ply to the spar rabbet to make sure that it is a nice tight joint while the sides of the panel are even with the sides of the walls. Also, to get a nice tight joint at the lower spar (unless I decide to cut a groove in it) I may have to trim the panels to final length by matching the butt joint at the middle of the panel. Not sure if that is the best method.
KC
My Build: The Poet Creek Express Hybrid Foamie

Poet Creek Or Bust
Engineering the TLAR way - "That Looks About Right"
TnTTT ORIGINAL 200A LANTERN CLUB = "The 200A Gang"
Green Lantern Corpsmen
User avatar
KCStudly
Donating Member
 
Posts: 9611
Images: 8169
Joined: Mon Feb 06, 2012 10:18 pm
Location: Southeastern CT, USA

Re: The Poet Creek Express - Foamie Hybrid

Postby atahoekid » Mon Sep 22, 2014 3:43 pm

That hatch, just like the rest of the build is a work of art. Functional in every way but aesthetically pleasing to the eye. I remain truly impressed.... :thumbsup: :thumbsup:
Mel

"Believe in your abilities... Remember amateurs built the ark, professionals built the Titanic"

"Indecision may or may not be my problem" Jimmy Buffet

Image

The Road Foamie Build Thread: viewtopic.php?t=45698
User avatar
atahoekid
Platinum Donating Member
 
Posts: 1773
Images: 158
Joined: Sat Jul 24, 2010 2:49 am
Location: Incline Village, NV
Top

Re: The Poet Creek Express - Foamie Hybrid

Postby KCStudly » Tue Sep 23, 2014 8:59 am

Thank you for the kind words, Mel. I appreciate the positive feed back. :thumbsup:
KC
My Build: The Poet Creek Express Hybrid Foamie

Poet Creek Or Bust
Engineering the TLAR way - "That Looks About Right"
TnTTT ORIGINAL 200A LANTERN CLUB = "The 200A Gang"
Green Lantern Corpsmen
User avatar
KCStudly
Donating Member
 
Posts: 9611
Images: 8169
Joined: Mon Feb 06, 2012 10:18 pm
Location: Southeastern CT, USA
Top

Re: The Poet Creek Express - Foamie Hybrid

Postby bonnie » Wed Sep 24, 2014 7:49 pm

Been out of pocket and just caught up. Those brackets are a work of art. Well, the whole thing is. 8)

I sit and think and think; then I do something. Sometimes it causes a do over. Part of the fun. :)
Remember, the turtle won. :)
User avatar
bonnie
Donating Member
 
Posts: 1389
Images: 107
Joined: Sun Jul 24, 2011 4:14 pm
Location: Roxana, IL
Top

Re: The Poet Creek Express - Foamie Hybrid

Postby KCStudly » Wed Sep 24, 2014 11:17 pm

I hear you Bonnie, and thank you.

The build has progressed (long ago) into the "build as you go" stage. Makes me wish I had as much experience as some of the more accomplished and prolific builders.

I have to confess that I have been on my second week of vacation this year, this time to the Adirondacks. So far we have spotted three T@Bs, a rough 4x8 sorta TD in someone’s yard as we drove by, and the L’Escargot spotted in the parking lot of the Wild Center in Tupper, NY. I tried to eyeball the owners amongst the other visitors, but w/o confidence to approach anyone.
Image
Image
Image
Image
Image
Image

A more detailed trip report is forth coming after we get home and I have time to cull through the hundreds of pics that I have taken so far.
KC
My Build: The Poet Creek Express Hybrid Foamie

Poet Creek Or Bust
Engineering the TLAR way - "That Looks About Right"
TnTTT ORIGINAL 200A LANTERN CLUB = "The 200A Gang"
Green Lantern Corpsmen
User avatar
KCStudly
Donating Member
 
Posts: 9611
Images: 8169
Joined: Mon Feb 06, 2012 10:18 pm
Location: Southeastern CT, USA
Top

Re: The Poet Creek Express - Foamie Hybrid

Postby KCStudly » Tue Sep 30, 2014 12:55 am

.
Bugged out for a week in the Adirondacks, but am back now and have some catching up to do on the build thread.

On Friday (9/19) I got the hatch frame screwed onto the back of the cabin, anchored into position for the skinning operation.

In order to be able to screw the frame to the galley and still be able to unscrew it after skinning, I used the extra screw holes down thru the ends of the hinge spar at the top, and made a pair of cleats, simulating the future lower edge of the hatch, at the bottom. This way I could run screws thru the temporary cleats and not the permanent piece.

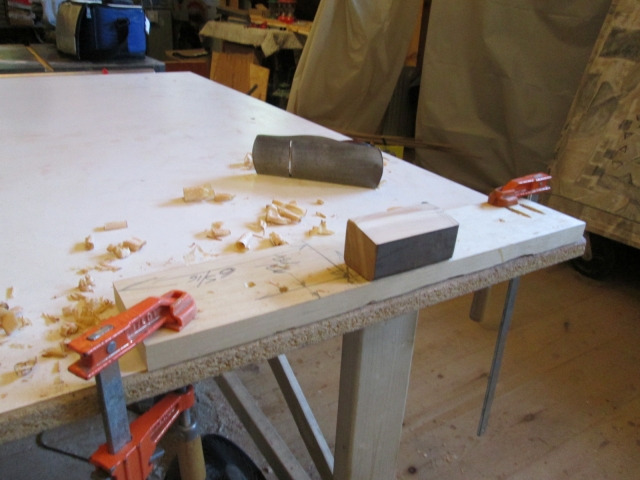
Here I have screwed up thru a scrap of 1x4 into a small chunk of 2x4. The 1x4 allowed me to clamp this small piece to the bench while leaving room between the clamps for the block plane.
Image

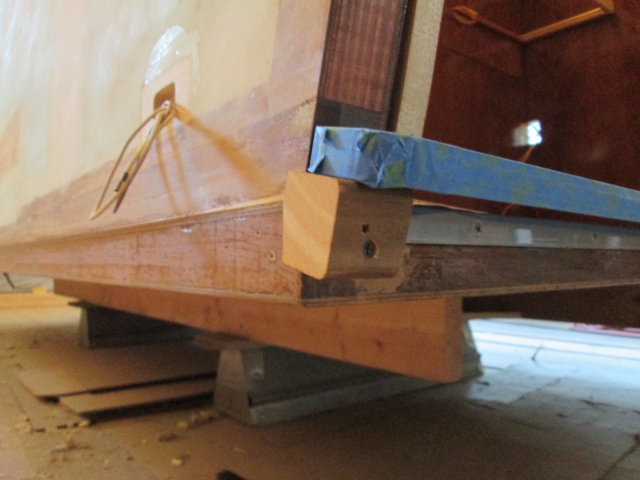
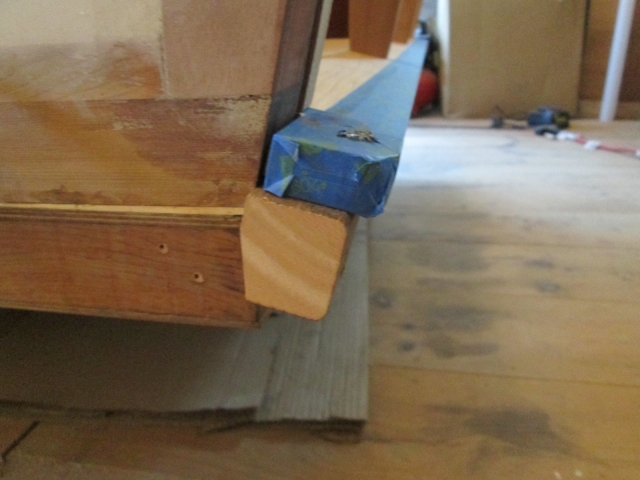
A little trial and error and I had the cleat fitting nicely. Next I cut it into two blocks, one for each side. The holes thru the top of the lower hatch spar (wrapped in blue tape) will be used again when the permanent shaped piece gets attached (later), and will eventually get covered with foam anyway. That just leaves one screw hole on each side into the back of the floor to be filled later.
Image
Image

So that was my short goal for the day before going home to pack for the trip; got the hatch frame secured in the galley.
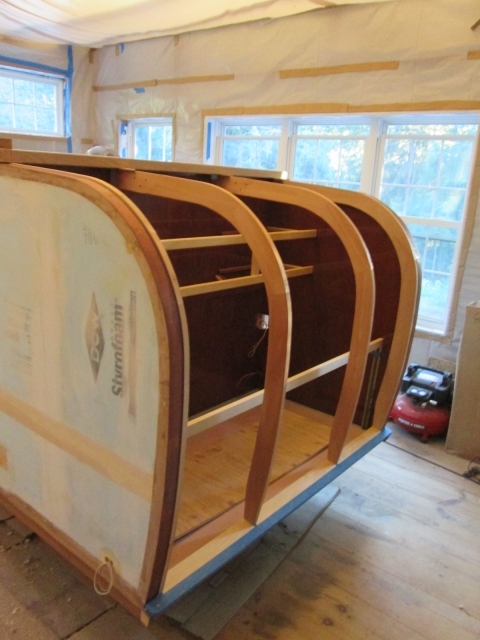
Image

Had a great trip; still too many pics to wade thru, but I like this one of the start of the fall colors while walking thru the woods at Mt Severance, NY.
Image

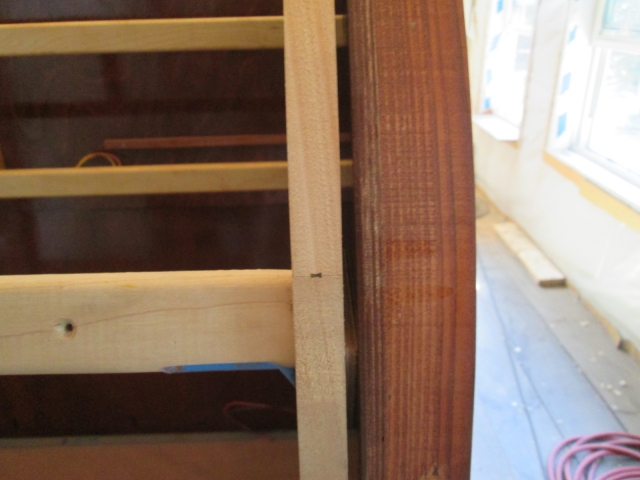
On Sunday (9/29) I picked up work on the hatch again. The curb side rib was somehow twisted in a touch at the hump (top of the bustle) with a much bigger gap to the wall than everywhere else. To correct this without flexing either wall in or out from its free position, I fit temporary spacers starting at the inner face of the street side wall, working across to the curb side wall; held here with blue tape just to be sure that they don’t fall out while fitting the skin.
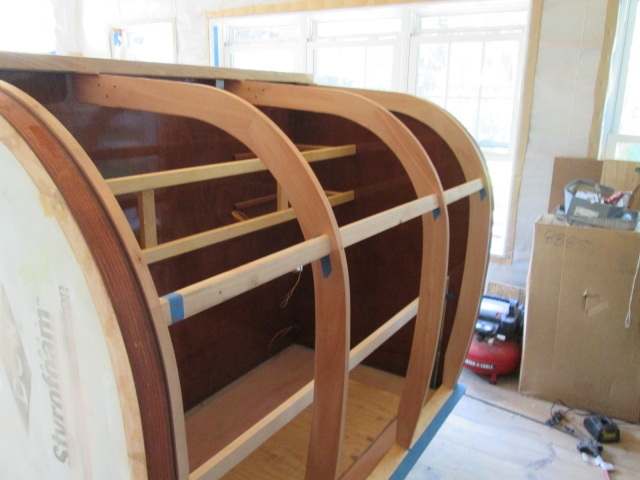
Image

You might just be able to see the 5mm shims on either side.
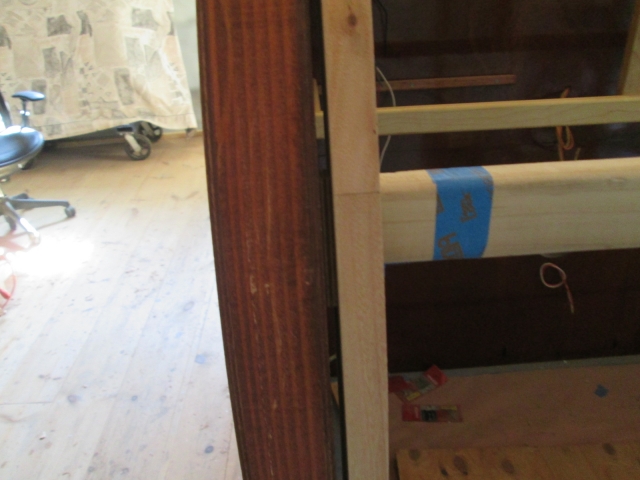
Image
Image

Now, you may recall that the template I used to cut the rib profile was made from a full size cutout of the plan, while the rear wall edges where forced into compliance before being cut with the CNC templates. On top of that, at the last minute I decided to shim the hatch frame up and back by 1/16 to allow for the thickness of the canvas to be wrapped around under the skin. So there is starting to be some stack up of tolerances. The street side rib profile was sticking above the wall profile by about an extra 1/16 inch strong.
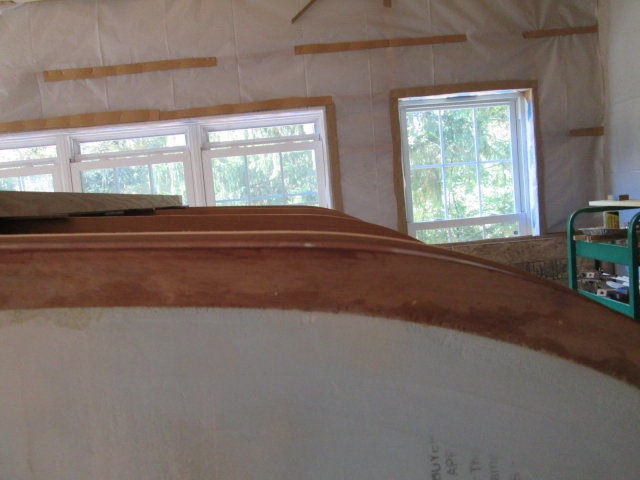
Image

It is not so important to me that it isn’t perfect, but I do want to try and get the gap to at least appear even from top to bottom on each side; can’t hurt the seal to be even, either.

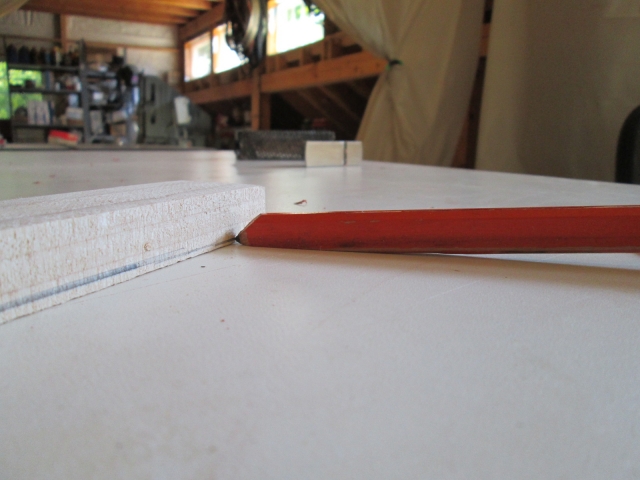
To get a better idea of where I was, I finally got to use one of the carpenter’s pencils salvaged from the Charcoal Briquette resurrection. By shaping the pencil into a wedge with the match box plane I could make it trace a reference line 1/16 inch off the top of the wall edges; demonstrated here on a scrap referencing the top of the bench. (Don’t mind the wandering pencil line in the foreground; I was creeping up on the final shape of the pencil.)
Image

That showed me that I had some areas that were a little tighter (zero), but put a bound on the high area on the top of the street side.

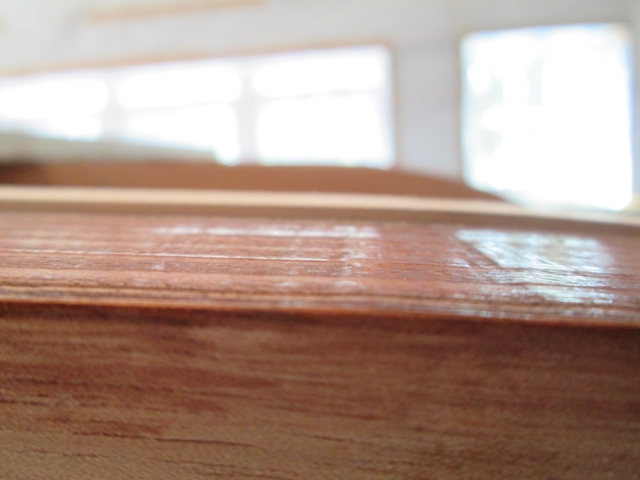
To trim this down I used a 1/2 inch bottom bearing bit and the 5/8 inch roller bearing from my rabbeting bearing set. The smaller 1/2 inch bit worked better in the smaller trim router for this side wall use. I made a first pass referencing the top of the wall, then switched back to the flush bearing to finish the cut referencing the first cut. That brought the top portion of the rib back to 1/16 above the wall.
Image

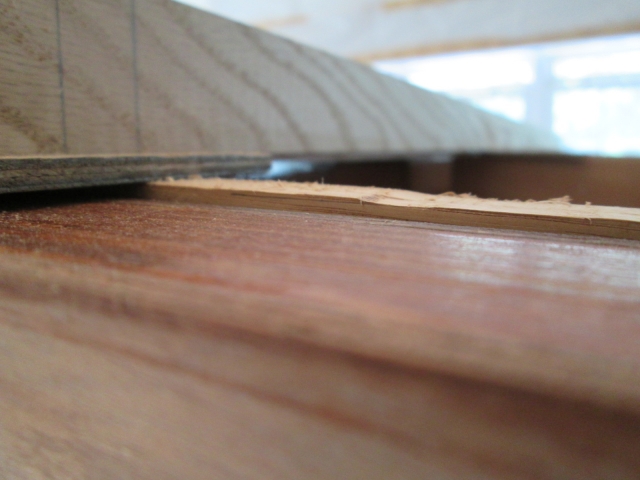
Up by the hinge spar the router base wouldn’t go all the way to the spar.
Image

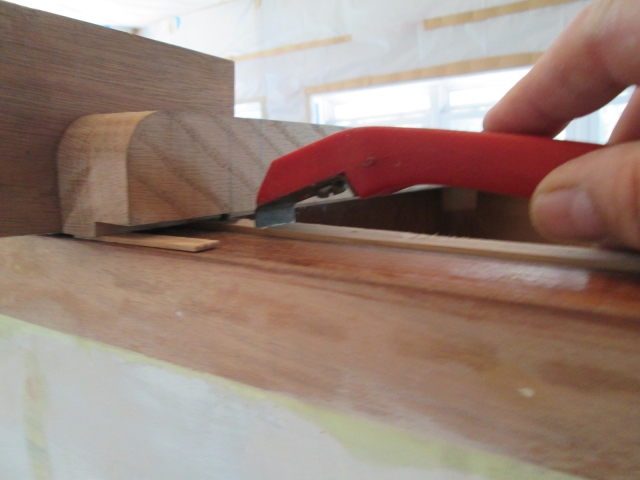
So I blended that in using the small scraper and sanding block.
Image
Image

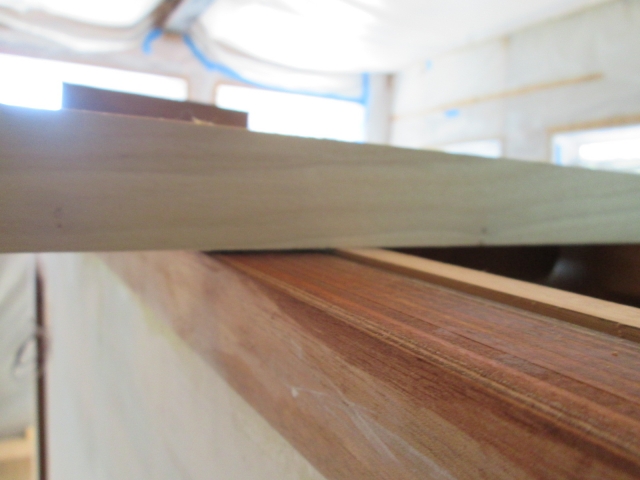
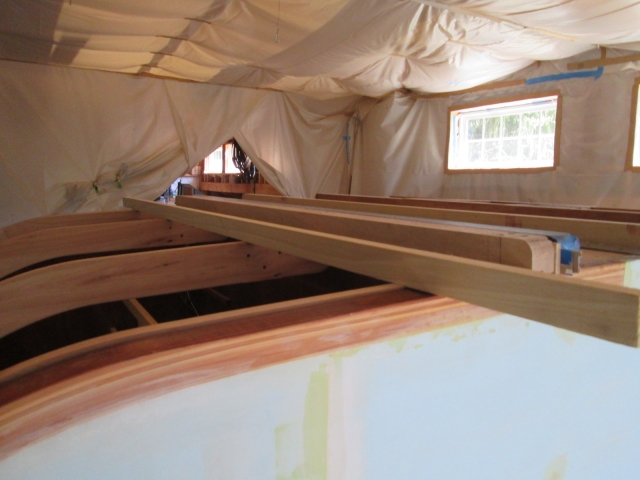
I did some final checks across all four ribs and both walls using a straight piece of 1x2 on edge.
Image
Image
Image

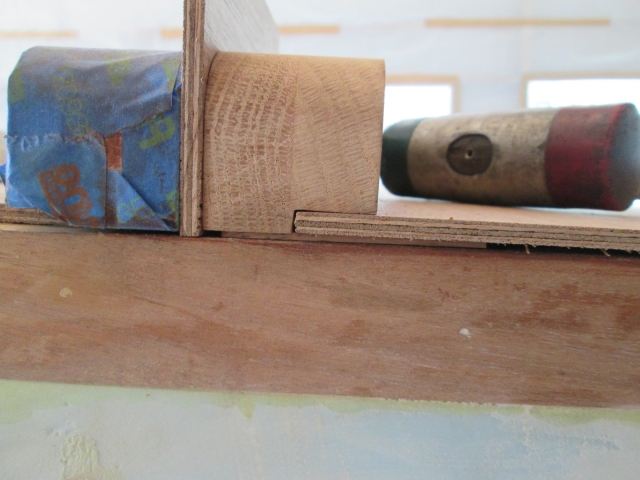
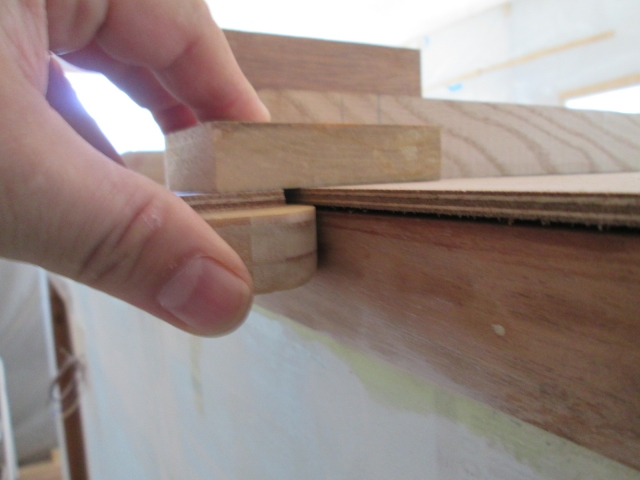
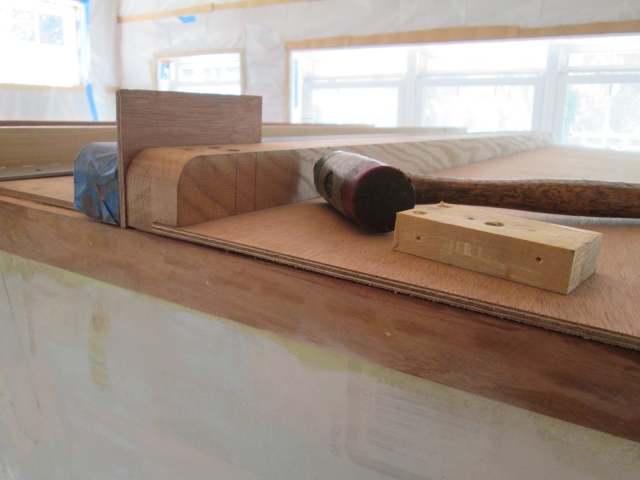
On to the dry fit of the upper hatch skin. Once I removed the temporary spacers and rear screws from the rabbet (of each pair of screws going down thru the hinge spar into each rib) I was able to start the skin into the rabbet. It was nice and snug so I used a small block and mallet on the edges of the skin to knock it into place.
Image
Image

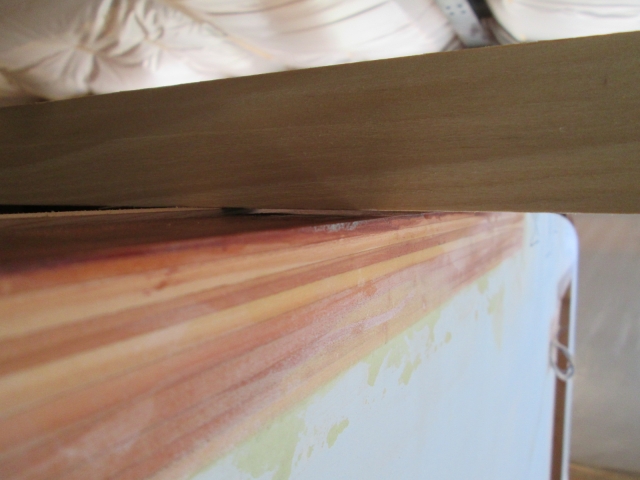
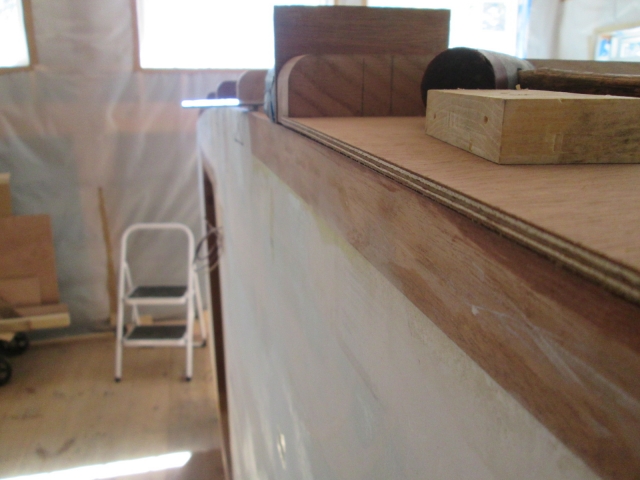
I hadn’t planned for it, but got lucky and found that the skin was a touch long side to side giving me a little wiggle room. Looking up inside at the rabbet joint, it looked about as good as I could expect it to be, and it looked like the extra skin would just be enough to cover the side to side variance in the upper spar alignment; so I decided not to change anything except to shift the skin over so that it was flush to the end of the upper spar on the street side top.
Image

The skin will wander off the street side a pinch.
Image

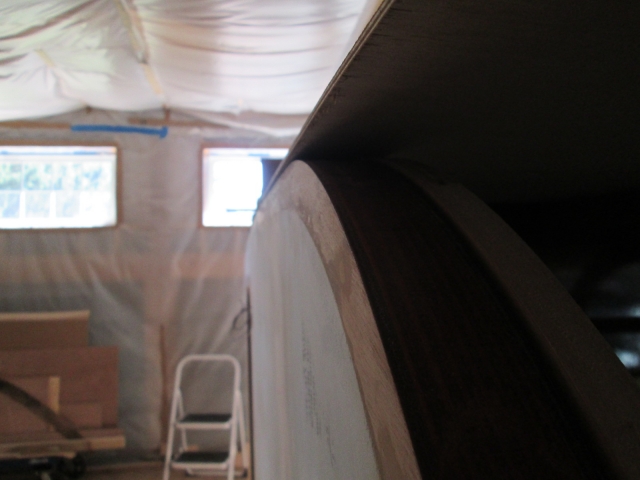
On the curb side the skin will start a little over the wall and will wander back to it. Without actually bending the skin I couldn’t be sure that it wouldn’t go wrong, but at this point it looked like it would be okay and I was worried that “I could make it worse”.
Image

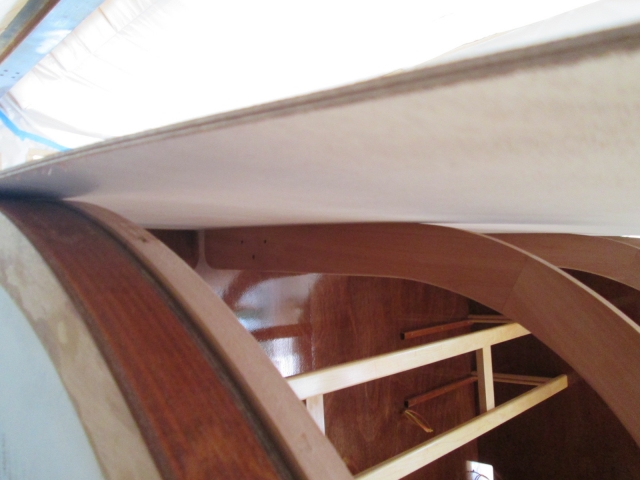
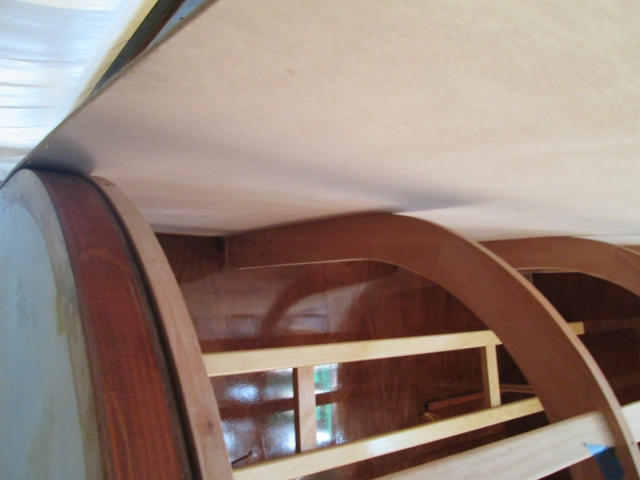
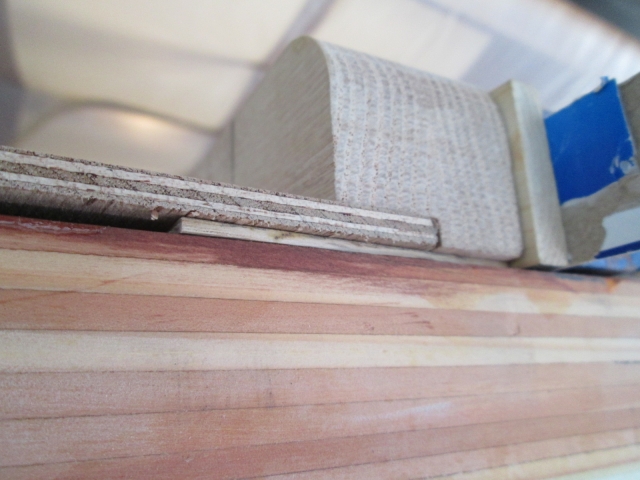
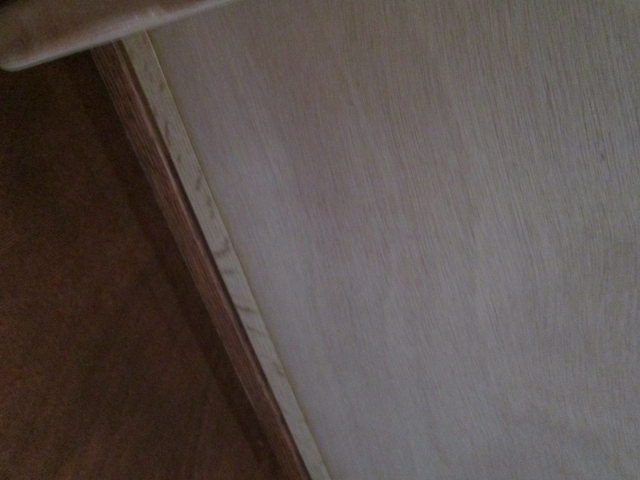
Here’s a pic of what I saw when I peeked up under from the inside. On the left is the shiny surface of the bulkhead; then the narrow strip of stain on the overhanging section of the cabin side hinge spar (no poly yet); then the raw forward portion of the hatch upper hinge spar, then the skin where it butts into the rabbeted edge of the hatch side hinge spar. There is a little yellowing along the edge of the ply, but the joint (dry at this point) is reasonably tight.
Image

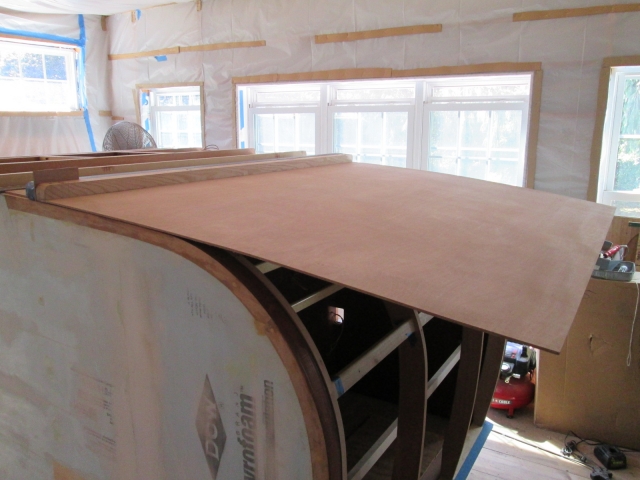
At this point I ran the screws back thru the rear of the upper spar back into the ribs, pinning the top of the skin into position.
Image

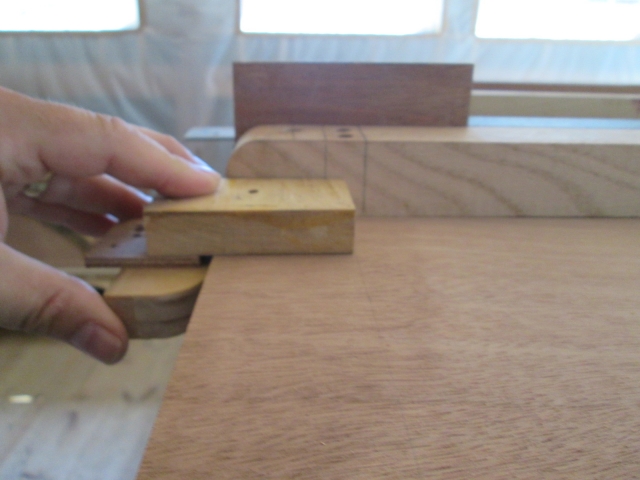
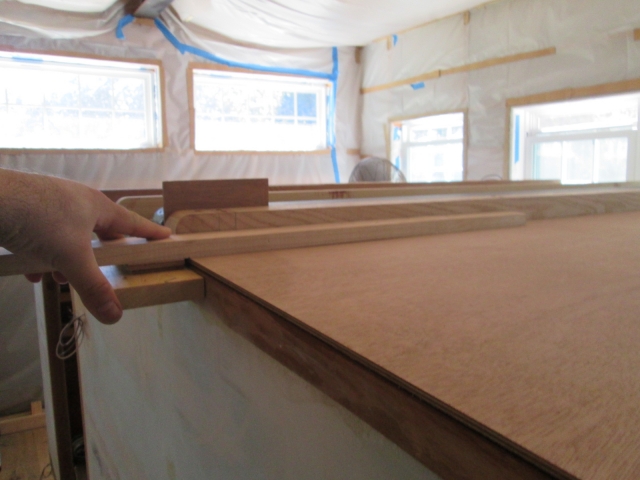
I made a pair of transfer gages to mark a screw line on the outside of the skin at the center of each rib. This is the short gage for the outer pair of ribs. The undercut spacer allows the ‘T’-block to reference the outside surface of the wall without interference from the overhanging skin (later I added a second shim to help deal with the radius edge).
Image
Image

Here’s the longer gage to find the middle pair of ribs, shown first in use.
Image

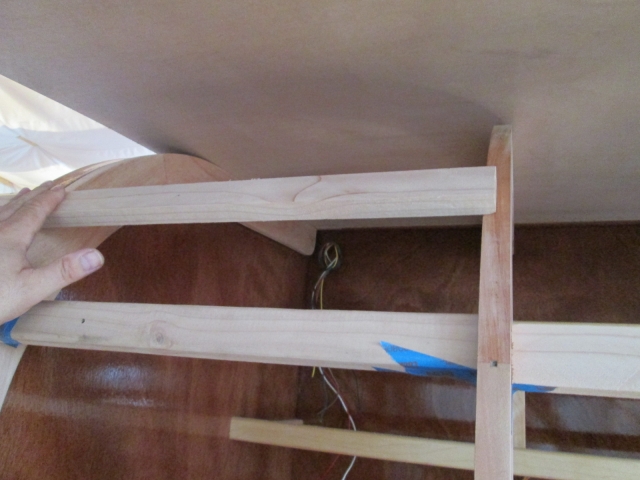
Then just double checking under the skin to be sure that it is actually finding the middle of the rib.
Image

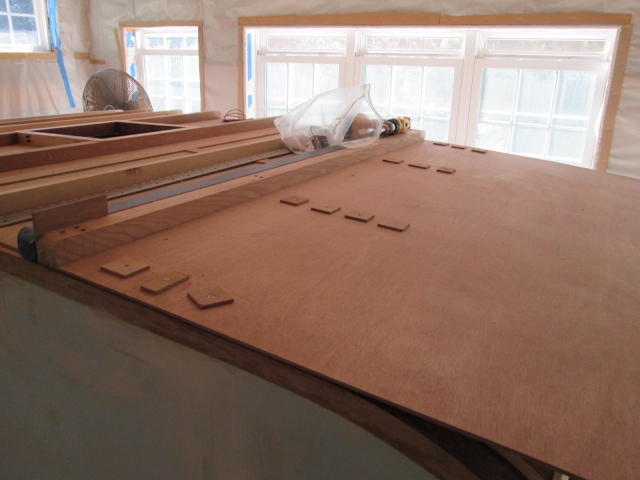
Starting from the top middle working my way out and down, I predrilled each hole using a square cut block as a guide to make sure I was drilling plumb into the ribs. Got a few rows of screws in using temporary wooden washers and checked progress inside.
Image
Image

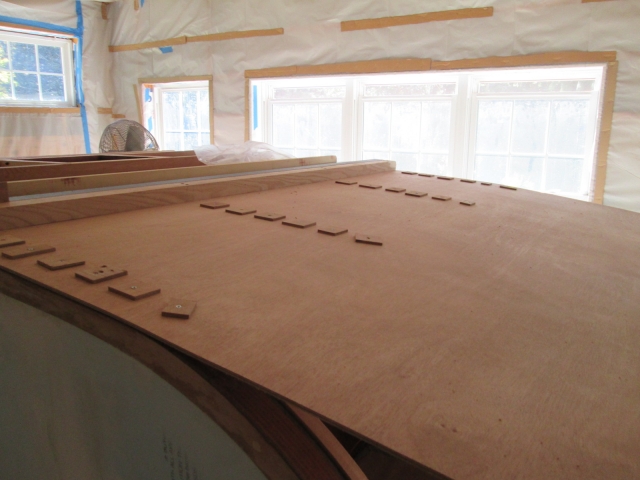
Did a couple more rows of screws before stopping for the day at the top of the tighter radius section.
Image
Image

Catching up now, Monday, I soaked the skin down, clamped a board to the tail end, used a couple of ratchet straps (just pulling the straps thru the pawls using friction mostly in the beginning, then using the ratchets a little further on) to get to this point.
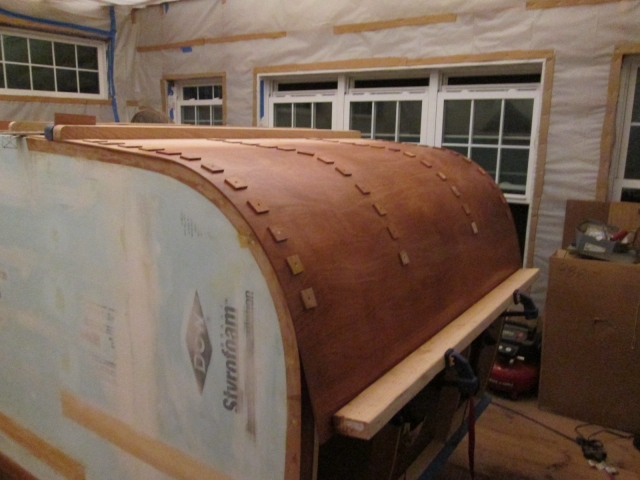
Image

The street side is running out a little further than I had predicted, maybe an 1/8.
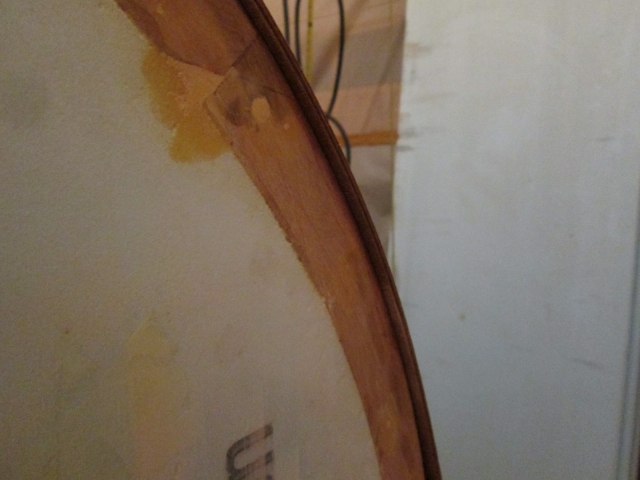
Image

While the curb side is just slightly under flush (just a portion of the lighter colored wood seen between the skin and blue foam here).
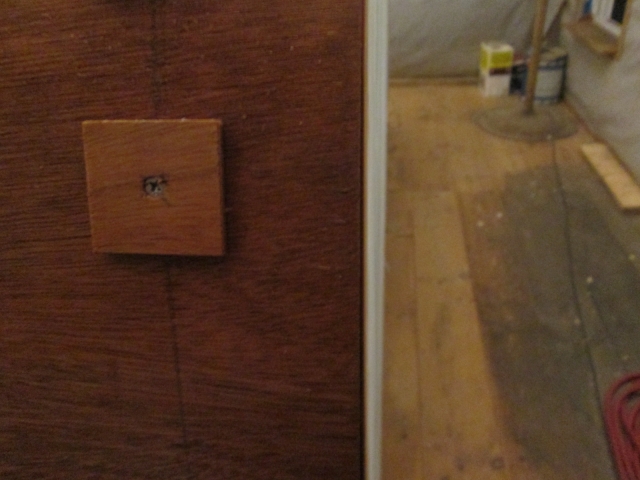
Image

I could let this go, or I could try to fix it before committing to glue. To fix it I could pull the skin back off, shave a little off the top edge (more on the curb side) to skew it back, then reattach it using a new screw pattern; or I could flip the panel top to bottom, refit it straight and use the same screw holes in the skin (assuming they still line up to the ribs okay), but new pilot holes in the ribs (assuming that the pattern shifts enough to avoid the first set of holes). Mud.

I will wait and decide after I finish screwing it down and see how far off it gets. Remember, this will all get covered with foam and canvas wrapped around the edge, so there is opportunity to fudge it a little or add an edging, plus when I fit the lower skin I can help correct the run out from that point down.

Need to remember to pick up some more 6 x 3/4 FH screws.

All caught up.
KC
My Build: The Poet Creek Express Hybrid Foamie

Poet Creek Or Bust
Engineering the TLAR way - "That Looks About Right"
TnTTT ORIGINAL 200A LANTERN CLUB = "The 200A Gang"
Green Lantern Corpsmen
User avatar
KCStudly
Donating Member
 
Posts: 9611
Images: 8169
Joined: Mon Feb 06, 2012 10:18 pm
Location: Southeastern CT, USA
Top

Re: The Poet Creek Express - Foamie Hybrid

Postby Mary C » Wed Oct 01, 2014 12:26 pm

Ok I think I understand , could use a router to cut and trim the edge if it is too wide and I wouldn't worry if a little under on the other edge. I will suggest that you put a few braces between the spars to a. keep them from turning , b. warping c. use as holders for towel holders, ect. on the inside of the galley. I found that the plates I bought will not fit between mine but I can put all sorts of other stuff. I am thinking about a spice rack and bag holder and a place to put some plastic bowls. just light weight stuff. Your workmanship is great outstanding and beautiful as always.

Mary c.
User avatar
Mary C
1000 Club
1000 Club
 
Posts: 1776
Images: 473
Joined: Mon Oct 15, 2012 6:29 pm
Location: Waco, Georgia
Top

Re: The Poet Creek Express - Foamie Hybrid

Postby KCStudly » Wed Oct 01, 2014 3:08 pm

Thank you, Mary.

For the router, you can create very accurate offsets by using various sized bearings on different sized cutters. I wanted a 1/16 inch offset with the rib being a little higher than the wall, so I used a 5/8 inch diameter bearing on a 1/2 inch diameter cutter {(5/8 - 1/2) / 2 = 1/16 inch radius difference}. By holding the base of the router against the inside vertical face of the rib and letting the bearing ride on the wall, I was able to skim cut the offending portion of the rib.

My cutter was a short one, so it did not make the cut all in one pass (only got about half the width of the rib closest to the wall on the first pass), so I switched back to the 1/2 inch bearing and made a second pass with the cutter shifted up into the router base and the bearing now riding on the fresh cut.

I do plan on hanging my galley light and paper towel holder on the underside of the hatch (maybe more?), but I wanted to wait until I can lift the hatch up to the full extent of the actuators so that I can place them where they will work best.

I may add some vertical stiffeners between the ribs at the top under the hinge, but the long screws down thru the hinge spar lock the ribs in place pretty firmly. With all of the screws and glue, and the subsequent stability that will come from the foam and canvas, I'm not sure that it will be needed. Once I get the upper hatch skin screwed all the way down I may finish installing the cabin side hinge spar and hinge, and see how stable it is to lift at that point. This would allow me to remove the lower spar again, and reconsider if I want to add a slot for the lower hatch skin to register into. :thinking:

Either way, I have to install the actuator brackets and actuators, so that I can finalize and drill for the lower actuator brackets before I finish skinning the hatch... or I will have to close myself in the galley to do it afterwards!!! :shock:
KC
My Build: The Poet Creek Express Hybrid Foamie

Poet Creek Or Bust
Engineering the TLAR way - "That Looks About Right"
TnTTT ORIGINAL 200A LANTERN CLUB = "The 200A Gang"
Green Lantern Corpsmen
User avatar
KCStudly
Donating Member
 
Posts: 9611
Images: 8169
Joined: Mon Feb 06, 2012 10:18 pm
Location: Southeastern CT, USA
Top

Re: The Poet Creek Express - Foamie Hybrid

Postby KCStudly » Wed Oct 01, 2014 8:57 pm

Hatch work continues. Got the upper skin fully screwed to the hatch ribs (still just dry fit). The last few rows were down where the radius opens back up again, so didn’t bother wetting it out again.
Image

I was able to crawl halfway in to the lower center opening, turn and sit on the edge of the galley floor to get these shots showing the nice fit between panel and ribs. First looking up forward at the street side.
Image

Looking up forward at curb side.
Image

In this selfie of “the squirrel in the cage” you can also see the water mark along the lower edge of the panel; a result of the soaking water wicking back up the inside face.
Image

Then looking back at the curb side, followed by the street side.
Image
Image

I fiddled around figuring out what else I need for hardware to complete the actuator installation and came up with a plan of attack to drill the required bolt holes for the lower brackets through the bulkhead.

Decided that I should have left the upper actuator brackets attached to the ribs, so I staged everything I needed in the galley and climbed back in. It was not convenient, but I managed to get them fastened into place. I’m not sure I’m saving any steps, but it seemed to make sense to fit the actuators now while I have the hatch all locked down in place and still have access.
Image

Seemed like an opportune time for a mock-up.
Image

Karl found me tucked in.
Image

Squirrel. :D
KC
My Build: The Poet Creek Express Hybrid Foamie

Poet Creek Or Bust
Engineering the TLAR way - "That Looks About Right"
TnTTT ORIGINAL 200A LANTERN CLUB = "The 200A Gang"
Green Lantern Corpsmen
User avatar
KCStudly
Donating Member
 
Posts: 9611
Images: 8169
Joined: Mon Feb 06, 2012 10:18 pm
Location: Southeastern CT, USA
Top

Re: The Poet Creek Express - Foamie Hybrid

Postby GPW » Thu Oct 02, 2014 5:40 am

Extremely Big Squirrel .... :lol:
Nice !!! Is that a motorized opener ? Deluxe !!! :thumbsup:
There’s no place like Foam !
User avatar
GPW
Gold Donating Member
 
Posts: 14911
Images: 546
Joined: Thu Feb 09, 2006 7:58 pm
Location: New Orleans
Top

Re: The Poet Creek Express - Foamie Hybrid

Postby KCStudly » Thu Oct 02, 2014 7:08 am

GPW wrote: Is that a motorized opener?

Yes. 12v electric screw jack actuators. I got a deal I couldn't pass up (free). The trade offs are that I have to make provisions to detach them should there ever be an electrical failure while the hatch is closed; so I am making the lower bracket mounting bolts accessible from inside of the cabin. If, when I press the rocker switch, the hatch does not open, I will be able to unbolt the lower actuator brackets from inside of the cabin, so that they fall away from the bulkhead, allowing me to lift the hatch manually. I haven't decided if I will make the electrical connection with a breakaway connector (shave the detention tabs off so they will pull apart... maybe held together with a rubber band), or just coil some excess wire up so that there is plenty of slack in the leads. There is the added complication of mounting the up/down switch were it is convenient to use but protected, the extra wiring hassle, and keeping idiots (myself the first in that line) from activating the switch when the draw latches are engaged (my efforts to develop an electrical interlock triggered by the draw latches have been unsuccessful so far; all of the weather proof micro and/or plunger type switches I have looked at did not want to "package" as well as I would have liked... I will probably just add a toggle switch at the fuse panel in the lockable tongue box so that the main switch can be left exposed, but be defeated against curious tinkerers while the camper is unattended). My biggest concern is throwing the switch with the draw latches engaged and having the hatch self-destruct under the force of the actuators (...or if the hatch is sturdy enough, they might just stall out?). I guess another concern is that someone might unknowingly try to close the hatch manually; the actuators will not "give" like hydraulics and, with enough force, the leverage could damage the hatch or hinge.

It has been a design exercise, and I think that the extra effort will be worth the small novelty that comes with it.

In addition to the actuators I will have a sturdy handle and draw latches on the lower rear of the hatch, as back up, and if the whole thing is an epic fail, I have made provisions in the walls for standard hydraulic struts.
KC
My Build: The Poet Creek Express Hybrid Foamie

Poet Creek Or Bust
Engineering the TLAR way - "That Looks About Right"
TnTTT ORIGINAL 200A LANTERN CLUB = "The 200A Gang"
Green Lantern Corpsmen
User avatar
KCStudly
Donating Member
 
Posts: 9611
Images: 8169
Joined: Mon Feb 06, 2012 10:18 pm
Location: Southeastern CT, USA
Top

Re: The Poet Creek Express - Foamie Hybrid

Postby GPW » Thu Oct 02, 2014 8:12 am

Maybe a small circuit breaker in line just in case the motor stalls for some reason ? ... :o Such a Cool idea ... :beer:


Might be cool to operate the hatch with a remote 8) (seems possible eh ? ) ... not meaning to complicate things ... :thinking:
There’s no place like Foam !
User avatar
GPW
Gold Donating Member
 
Posts: 14911
Images: 546
Joined: Thu Feb 09, 2006 7:58 pm
Location: New Orleans
Top

Re: The Poet Creek Express - Foamie Hybrid

Postby KCStudly » Thu Oct 02, 2014 8:53 am

GPW wrote:Might be cool to operate the hatch with a remote...


Always a possibility, and it would certainly be nice to be able to start opening the hatch as you walk toward it (rather than to have to stand there and hold the button while it opens, but I have enough junk on my key ring already and don't like having a bunch of stuff on me, so I probably won't bother with that.

The actuators seem to have internal limits (they seem to stop driving when they reach the ends of their throws), so I suppose I could set up latching relays that would allow me to push the rocker switch once (momentary) and have the hatch complete its cycle by itself. :thinking:
KC
My Build: The Poet Creek Express Hybrid Foamie

Poet Creek Or Bust
Engineering the TLAR way - "That Looks About Right"
TnTTT ORIGINAL 200A LANTERN CLUB = "The 200A Gang"
Green Lantern Corpsmen
User avatar
KCStudly
Donating Member
 
Posts: 9611
Images: 8169
Joined: Mon Feb 06, 2012 10:18 pm
Location: Southeastern CT, USA
Top

Re: The Poet Creek Express - Foamie Hybrid

Postby capnTelescope » Thu Oct 02, 2014 9:33 am

:shock: Yet another new level of awesomeness! We're not worthy! :bowdown:
I'll burn that bridge when I come to it.

Brad
ImageImageImage

Building the Bed & Breakfast
User avatar
capnTelescope
Lifetime member
 
Posts: 1218
Images: 368
Joined: Sun Jun 27, 2004 3:44 pm
Location: Round Rock, TX
Top

PreviousNext

Return to Foamies

Who is online

Users browsing this forum: No registered users and 16 guests