The Poet Creek Express - Foamie Hybrid

Canvas covered foamies (Thrifty Alternatives...)

Moderator: eaglesdare

Re: The Poet Creek Express - Foamie Hybrid

Postby Mary C » Thu Apr 16, 2015 7:42 pm

KC and GPW I am so sorry for your loss, Your "babies" have crossed over the rainbow bridge and are both in the greater cat heaven chasing the little mice into their holes., petting butterflys, and purring while rubbing the legs of their angel keepers.

Mary C.
User avatar
Mary C
1000 Club
1000 Club
 
Posts: 1776
Images: 473
Joined: Mon Oct 15, 2012 6:29 pm
Location: Waco, Georgia

Re: The Poet Creek Express - Foamie Hybrid

Postby KCStudly » Fri Apr 17, 2015 1:31 pm

Thanks again for all of the support.

Over on Dales133 build Ok here we go, he mentioned having bowed one of his front wall spars out, probably when propping the inner skin in for glue up. I mentioned a condition that I am seeing with my first two roof spars and how I plan to fix it (maybe). Here is a link to my post in his thread.
KC
My Build: The Poet Creek Express Hybrid Foamie

Poet Creek Or Bust
Engineering the TLAR way - "That Looks About Right"
TnTTT ORIGINAL 200A LANTERN CLUB = "The 200A Gang"
Green Lantern Corpsmen
User avatar
KCStudly
Donating Member
 
Posts: 9615
Images: 8169
Joined: Mon Feb 06, 2012 10:18 pm
Location: Southeastern CT, USA

Re: The Poet Creek Express - Foamie Hybrid

Postby OP827 » Sun Apr 19, 2015 12:50 am

KC,
Just wanted to go back to question of foam is being proud of the spars. Look at this thread in the middle of the page, the foam can be planed with no issues, except I would make sure I'd use my dust collector...

http://www.tnttt.com/viewtopic.php?f=50&t=35852

Cheers 8)
User avatar
OP827
Donating Member
 
Posts: 1557
Images: 405
Joined: Fri Apr 25, 2014 7:27 pm
Location: Bruce County Ontario
Top

Re: The Poet Creek Express - Foamie Hybrid

Postby dales133 » Sun Apr 19, 2015 3:12 am

An KC I would also have done my whole front in 2 X2 spars in hindsight. Many years ago I made furniture and furniture frames for a living and alot involved laminating venèrs to make ply shapes in molds, had my doubts with the front radius in 3.6mm
I intended using 2mm or there abouts but picked this ply up for 10 bucks a sheet and it was about time I caught a break on price!
So are you going to change yours
User avatar
dales133
4000 Club
4000 Club
 
Posts: 4605
Images: 1
Joined: Mon Oct 13, 2014 5:26 pm
Top

Re: The Poet Creek Express - Foamie Hybrid

Postby KCStudly » Sun Apr 19, 2015 12:24 pm

Yeah, Dale, thanks, I have seen that. Unfortunately the planer I got to use before was Ben's and he took it with him when he moved his stuff out of the loft. I suppose I could borrow my BIL's (part of my FIL's estate) but most of the panels will be inconsistent from front to rear, so sanding will be involved no matter what. I guess I would rather be high and sand, than to try and hit it exactly and miss low.

I'm not sure what the cause of this front to back difference is. Yes the foam itself is a little inconsistent from piece to piece, but generally is consistent across each piece. There is some variation at the edges where I rabbeted a little deep for the ceiling splice backers and those areas sucked down a little further than intended. The spars are fairly consistent in their heights, even the ones that were ripped down for over the splice backers. Some of the difference is probably due to the build up of the adhesive in the corners not letting the pieces push down at the edges.

About the dips, or downward bowing of the front two spars: I suppose I should be more concerned about the potential for snow loading, but I doubt I will replace them. I do have a couple more 2x2 cedar spars that where originally for the hatch hinge... decided to go with oak there... but I don't think it's worth the hassle to change them so long as I can fair the roof to look good.

Another thought is to split my portable solar panels into one fixed panel on the roof, and a separate portable panel (there isn't enough room on the roof for both). I could build a panel mount that reinforces these two spars, perhaps even pulling them straight. Not sure I want to upset the profile that way, or to leave the panel out in harm’s way all of the time. On the other hand, stowing the remaining portable portion would be easier at half the weight. Not sure if it will work yet, but I hope to be able to stow it up high under the galley counter.

Sorry for not posting any progress this weekend. On Thursday after clocking out I suddenly lost my voice. I still made some small progress, but by Friday evening the sinus and chest crud came. I’ve been sitting on the couch sipping tea and consuming expectorant. Not sure if this is early onset hay fever, or something else, but it is a real shame given the perfect weather we are having.

Anyway, here are some pics from Thursday. You can see how the stretcher pulled the lower front roof foam up and away from the locker and rock guard sparette.
Image

The same thing happened on the curb side, but the axe head mounting block anchored the outside so it pivoted around that point and only raised a little.
Image
Image

This is good to know. Going forward I will try to configure the stretcher to pull toward a spar instead of away from one.

I sanded the GS filler on the front seam. Down in the wireway groove I wrapped the paper around a 1/4 inch scrap and used the edge down in the groove. I was disappointed in the GS. It didn’t fill well, leaving little voids here and there, and the fact that I had to sand it back was a nuisance. I used the PL300 like a caulk to smear into the little voids and that worked perfectly. Filled all of the voids and no expansion to deal with. I will be using the PL300 to fill the edges of the kerfs at the side walls and anymore of the exposed kerfs in the wireway on the hatch to come.
Image
Image

You can just see a couple of the dark spots in the seam here that the GS didn’t fill. I’ll get those when I apply the PL300 to glue the top layer of foam down.
Image

I found a SS tension coil spring in a pile of junk. It was a little stretched out and too long, so I cut it down and bent half a coil to form a new hook on the end. Added this to my hot wire knife to maintain wire tension. A couple of test cuts seemed to show improvement. There is a lot less initial tension, but it does not go away when heated.
Image
Image

And there you go. My throat is still scratchy, I have no voice, and I’m not sure I will make it to work tomorrow, but I’ll get back to it as soon as I feel a little better.
KC
My Build: The Poet Creek Express Hybrid Foamie

Poet Creek Or Bust
Engineering the TLAR way - "That Looks About Right"
TnTTT ORIGINAL 200A LANTERN CLUB = "The 200A Gang"
Green Lantern Corpsmen
User avatar
KCStudly
Donating Member
 
Posts: 9615
Images: 8169
Joined: Mon Feb 06, 2012 10:18 pm
Location: Southeastern CT, USA
Top

Re: The Poet Creek Express - Foamie Hybrid

Postby E_Rudolph062 » Mon Apr 20, 2015 1:04 pm

Hi KC.

I have been following your posts for almost a year now and for that I am sorry I haven't said anything sooner. My girlfriend and I bought a homemade teardrop last April. On our first camping trip we got in a very bad car accident totaling both the car and the camper. We never spent a night in it.

But, back to your posts. I do most of my projects by reading (working on my '96 Grand Cherokee with the help of the Haynes Manual to be specific) and your detail and creativity has been great. I am looking forward to starting a teardrop for my girlfriend and I. I will be referencing your posts throughout my build to help me through the many head scratching moments to come.

Eric
Eric

Bridge Engineer by day - Teardrop builder by night!

On our way to our first camping trip in our teardrop (May 16, 2014) we went off the road totaling the car and the camper. Thankfully, we survived with only scratches. This is our journey to building our own teardrop.
User avatar
E_Rudolph062
Teardrop Inspector
 
Posts: 1
Joined: Wed Sep 03, 2014 4:53 pm
Location: Near Portland, ME
Top

Re: The Poet Creek Express - Foamie Hybrid

Postby KCStudly » Mon Apr 20, 2015 2:42 pm

Eric, I'm sorry for your misfortune and at the same time delighted that you have found inspiration in my build. I consider it to be a special honor when someone is inspired enough to make their very first post here on my build.

I must caution you, although I am a first time builder and started with little finish carpentry experience, I have always been a hands on fabricator and designer. Having the benefit of access to many tools and a great build space has been a huge factor in my decision process to build this way and to add all of the details. Also, my methods are not the easiest way to build, and they can be quite time consuming compared to other methods.

Take the inspiration you get from my build and use it as you see fit, but take it in appropriate doses for whatever your skills and build situation allow. If you want to build a simple camper and get out there fast for little investment, don't do what I am doing. :R ;)

If you want to change your lifestyle, go way over budget and fore go most other aspects of your life for several years on an obsessed mission, do like I have done!
:lol: :lol: :lol:
KC
My Build: The Poet Creek Express Hybrid Foamie

Poet Creek Or Bust
Engineering the TLAR way - "That Looks About Right"
TnTTT ORIGINAL 200A LANTERN CLUB = "The 200A Gang"
Green Lantern Corpsmen
User avatar
KCStudly
Donating Member
 
Posts: 9615
Images: 8169
Joined: Mon Feb 06, 2012 10:18 pm
Location: Southeastern CT, USA
Top

Re: The Poet Creek Express - Foamie Hybrid

Postby KCStudly » Thu Apr 23, 2015 9:33 pm

I have started feeling a bit better again… back to normal spring hay fever symptoms and my voice is mostly back… so, per Dr.’s recommendation I went back to work today. And if I’m good to go for that I must be good to work on the camper again, right?

Anyway, after helping Karl run some big SS sheets thru the break to crimp some offset flanges for a large industrial steam hood… pasta sauce factory… I got a little work done.

I strung the roof wiring up thru the wireway and into the outlet box; should be for the last time.
Image

The wires are stiff and yet floppy enough that they want to flop out of the vertical part of the wireway. I’ll have to add a couple of strips of packing tape or perhaps a couple of dabs of hot glue to hold them down long enough to glue the outer layer of foam on, but I did manage to do the final dry fit on the lower front curb side piece of foam.
Image

Then I cut, kerfed and fit the upper front first layer of foam.
Image

Finished up the evening by hand fitting the center strips to fill in between the larger front panels (no pic).

Just as I was winding down they played Train Kept A Rollin’ on the radio. Seemed like a good place to wind up.
KC
My Build: The Poet Creek Express Hybrid Foamie

Poet Creek Or Bust
Engineering the TLAR way - "That Looks About Right"
TnTTT ORIGINAL 200A LANTERN CLUB = "The 200A Gang"
Green Lantern Corpsmen
User avatar
KCStudly
Donating Member
 
Posts: 9615
Images: 8169
Joined: Mon Feb 06, 2012 10:18 pm
Location: Southeastern CT, USA
Top

Re: The Poet Creek Express - Foamie Hybrid

Postby Wobbly Wheels » Thu Apr 23, 2015 10:55 pm

KCStudly wrote:And if I’m good to go for that I must be good to work on the camper again, right?

Hmmm...that sounds strangely familiar: the doc tells you it's OK to light the candle so that must mean both ends.... :lol:

Just as I was winding down they played Train Kept A Rollin’ on the radio. Seemed like a good place to wind up.

Tiny Bradshaw, Yardbirds or Aerosmith ?
I realize I might be channeling my inner curmudgeon, but whatever happened to good music ?

Hey, quick question....do you call Karl's (St. Karl?) shop Fab Mecca because of the pilgrimage to get there or because of the treasured artifacts within ?
(I know the brake isn't quite that old)

Love seeing your build come together. Getting closer and closer to its namesake and reminiscent trek :thumbsup: :thumbsup:

One last question that I've been patiently waiting for you to answer before I ask it (as you usually do), why cut foam wedges to fill the center rather than filling it with GS after the side pieces were glued in ?
User avatar
Wobbly Wheels
Donating Member
 
Posts: 1080
Joined: Tue Mar 15, 2011 9:51 am
Top

Re: The Poet Creek Express - Foamie Hybrid

Postby KCStudly » Fri Apr 24, 2015 7:24 am

Wobbly Wheels wrote:...OK to light the candle so that must mean both ends...

:whistle:

Wobbly Wheels wrote:Tiny Bradshaw, Yardbirds or Aerosmith ?

Aerosmith, of course. Quit showing your age(?)... although now I must investigate those other takes!

Wobbly Wheels wrote:Hey, quick question....do you call Karl's (St. Karl?) shop Fab Mecca because of the pilgrimage to get there or because of the treasured artifacts within?

It is both the pilgrimage and the revere that places the shop in such high regard.

Wobbly Wheels wrote:One last question that I've been patiently waiting for you to answer before I ask it (as you usually do), why cut foam wedges to fill the center rather than filling it with GS after the side pieces were glued in ?

I have taken a dislike to sanding GS and GG, plus I think the blue stuff will provide a more consistent thermal barrier... and it gives me an opportunity to tinker. I'm more of a make it fit and assemble it mechanic type of guy than a lay it on and sand it off body man type. :D
KC
My Build: The Poet Creek Express Hybrid Foamie

Poet Creek Or Bust
Engineering the TLAR way - "That Looks About Right"
TnTTT ORIGINAL 200A LANTERN CLUB = "The 200A Gang"
Green Lantern Corpsmen
User avatar
KCStudly
Donating Member
 
Posts: 9615
Images: 8169
Joined: Mon Feb 06, 2012 10:18 pm
Location: Southeastern CT, USA
Top

Re: The Poet Creek Express - Foamie Hybrid

Postby GPW » Fri Apr 24, 2015 8:09 am

Nothing better to fill foam , than foam !!! :thumbsup: The very basis for Foamie’ repair also ... ;) ... :thumbsup: 8) :beer:
There’s no place like Foam !
User avatar
GPW
Gold Donating Member
 
Posts: 14912
Images: 546
Joined: Thu Feb 09, 2006 7:58 pm
Location: New Orleans
Top

Re: The Poet Creek Express - Foamie Hybrid

Postby KCStudly » Fri Apr 24, 2015 8:20 am

Yeah, I'm not sure the sanding dust from fitting is helping my allergies any, but the train must keep a rollin' ! I tend to use the respirator for power tool operations, but catch myself doing "little" hand work tasks w/o it. :FNP
KC
My Build: The Poet Creek Express Hybrid Foamie

Poet Creek Or Bust
Engineering the TLAR way - "That Looks About Right"
TnTTT ORIGINAL 200A LANTERN CLUB = "The 200A Gang"
Green Lantern Corpsmen
User avatar
KCStudly
Donating Member
 
Posts: 9615
Images: 8169
Joined: Mon Feb 06, 2012 10:18 pm
Location: Southeastern CT, USA
Top

Re: The Poet Creek Express - Foamie Hybrid

Postby KCStudly » Sat Apr 25, 2015 8:47 pm

I had one of those, “could have gotten more done today” days, but it was a nice relaxing pace tinkering and getting a few things done.

The more I work on the roof foam the more I wish I had used a single layer of 1-1/2 inch thk foam, kerfs and all. Feels like I am taking twice as long to get it done doing everything twice; though I suppose I would have had a lot more waste not using the drops from full length sheets.

Anyway, I had lost (mistakenly thrown out :? 
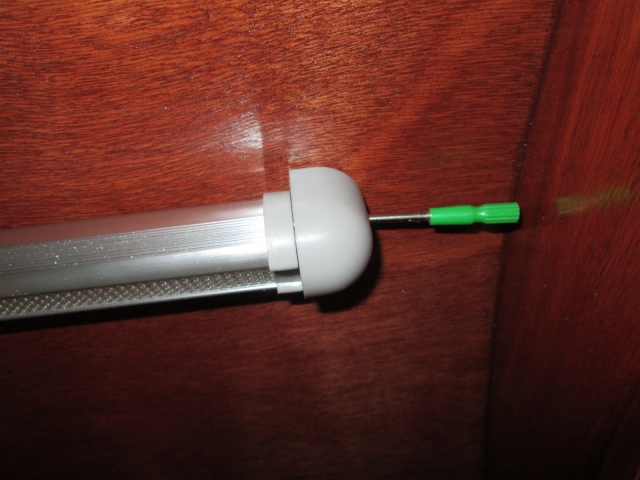
) the screw packet for the galley light, so I had to scrounge up some screws. The mounting screws were no big deal, but the screws that hold the end trim caps on are little teeny tiny #2 size Phillips head. Fortunately Karl had a pack in stock from some job he was doing. Because the trim screws go in from the ends of the light fixture, and the fixture nearly fills the distance between the hatch ribs, I had to shorten the handle on this cheap little jeweler’s screwdriver. Just scored around the plastic handle with a utility knife and snapped it.
Image

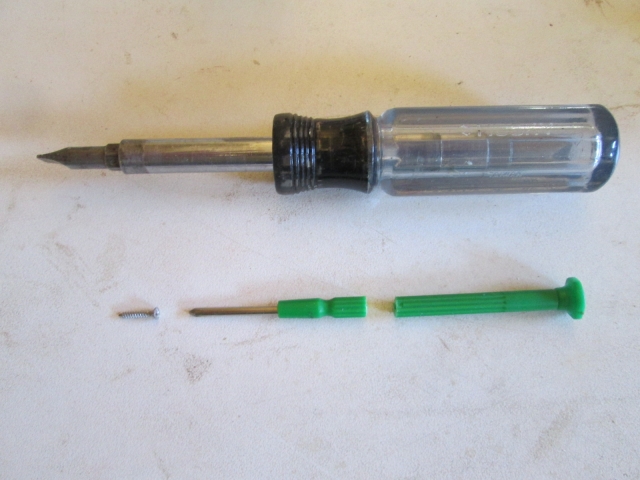
That allowed me to get into the end of the trim cap to drive the retaining screw.
Image

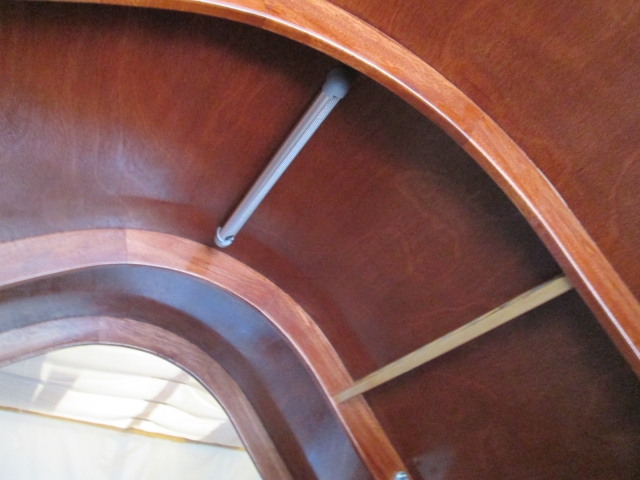
Looking up under the hatch from the street side of the hatch hinge.
Image

Looking up under the hatch from the curb side rear.
Image

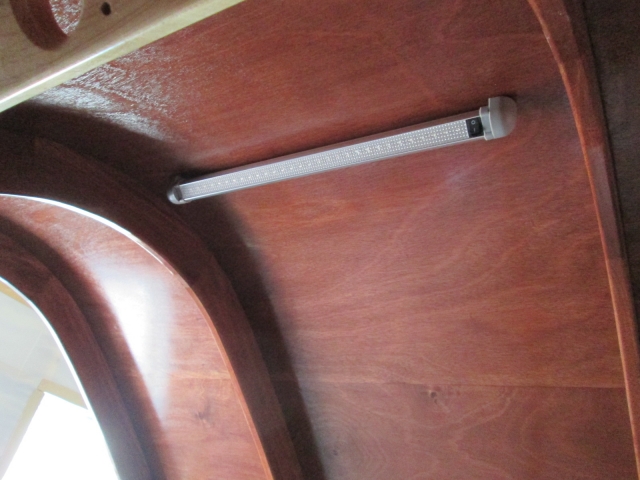
The light bar can be turned to aim the beam, but I made sure that the mounting location was forward from the edge of the counter so that a person standing at the counter does not cast a big shadow, as it would if the light was mounted too far back over your shoulder.

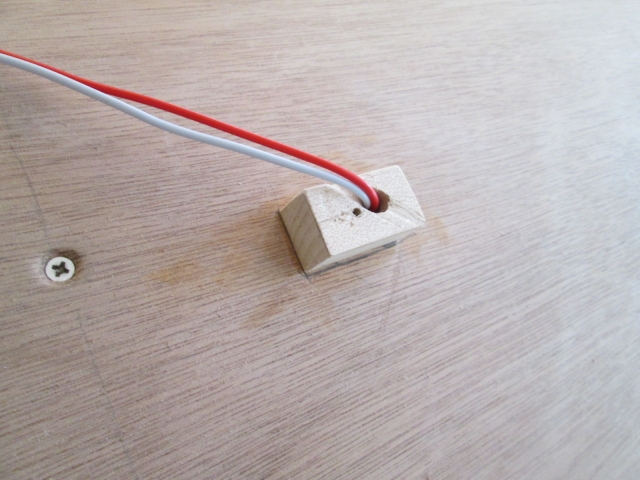
Before stringing the wires thru I used the drill bit in the drill to round the wire hole in the mounting block over toward where the main bundle comes into the hatch.
Image

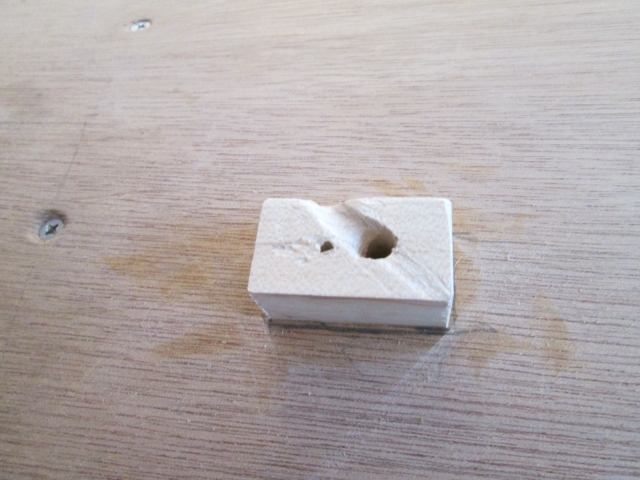
And with the wire pushed up thru. (The block is a little shorter than the 3/4 inch thk first layer of foam that will eventually surround this area.)
Image

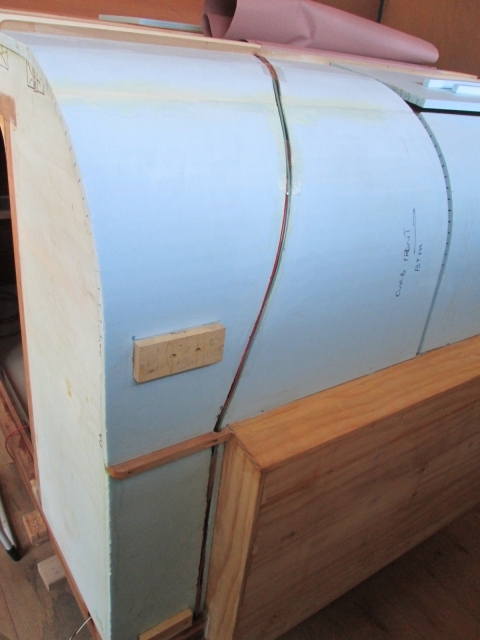
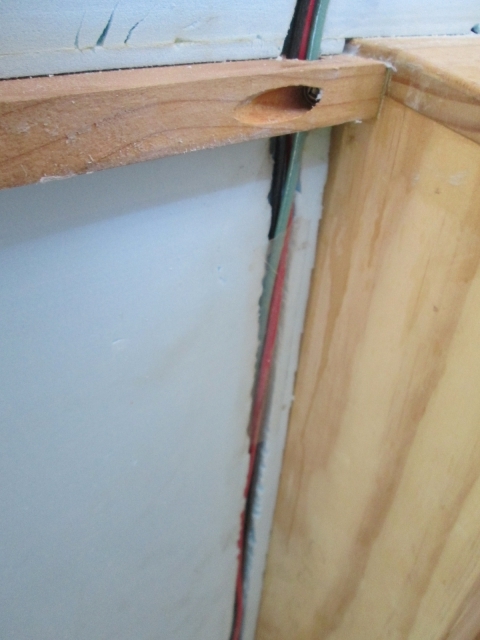
Next, back at the front of the cabin, I used a few stitches of packing tape to help hold the ceiling outlet wiring in the wireway while I prepared to adhere the second layer of foam onto the lower curb side front. You can barely see the swatch of tape starting about 2 inches down from the sparette in the 2nd pic here.
Image
Image

…and then I glued the second layer of foam on.
Image

Turning to the street side, where I had glued the second layer on some time ago, I hand sanded a little before switching to the jitterbug with 100 grit and whacking it back flush to the blocking.
Image
Image

I still have to caulk a few chinks in the joints but it looks pretty good. When I glide my hand over it I can feel where the foam sanded a little deeper around the shovel mount blocking, so I will have to hold back a little and be more careful up on the roof around the spars if I choose to go this way fairing. Fortunately this area will be covered by the rock guard, so it was a good place to experiment.

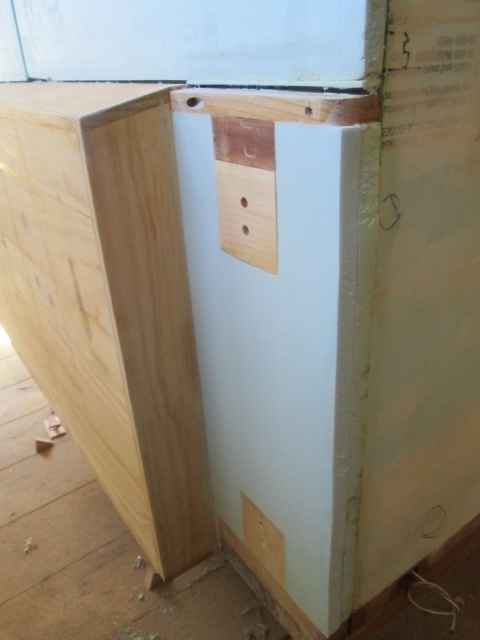
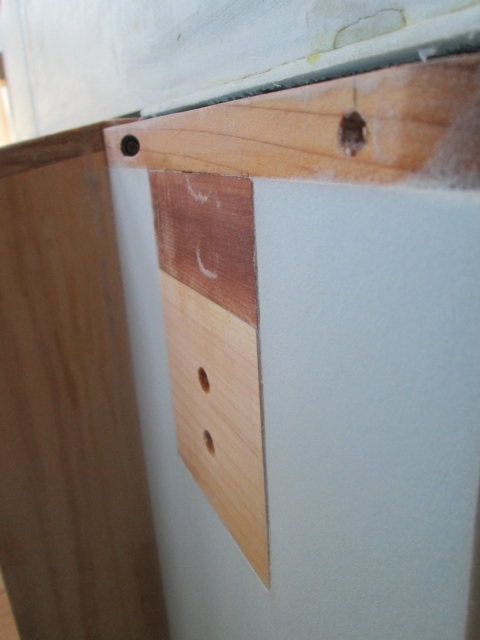
Back on the hatch I decided to add the blocking for the hatch handle, just in case I ever decide or need to add the handle. I wanted a pretty good size solid block under the handle, rather than just a couple of fastener points; otherwise repeated knuckle wraps on foam could cause damage over time. And because the two pedestals on the handle have female threads, the blocking would have to be solid all the way to the inner skin so that bolts coming thru from the inside wouldn’t crush anything.

Now the lower cleat that I used to hold the lower edge of the inner hatch skin down to the bumper has a bevel on it to aid the toed screw angle there, so the first piece of blocking wanted to be counter beveled to match. I selected some maple 1x3 that I had, because it is hard and durable. Dry fitting, here you can see that I have beveled the first piece to match the cleat with the second piece on top; and how the cleat width does not match the 3/4 inch thickness of the block (as evident by the gap).
Image

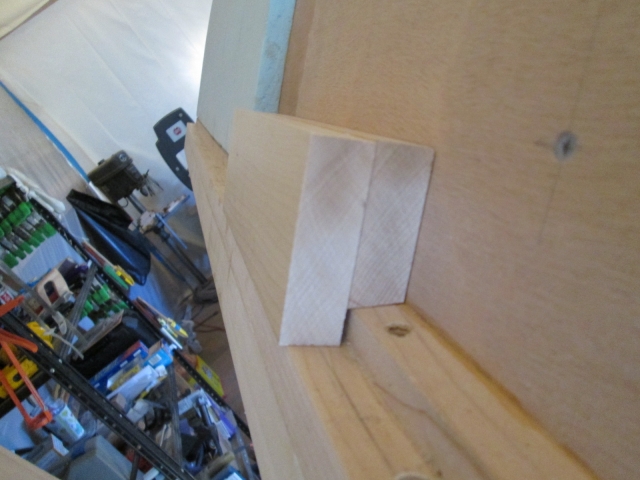
Not having a bench top planer in the shop, I used the table saw to resaw and thin the piece.
Image

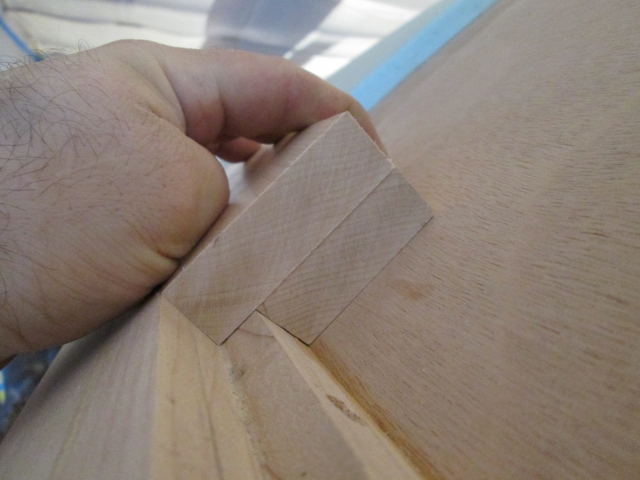
I’ll catch up with some more pics tomorrow, but in short, I split off a couple of smaller pieces from the beveled piece that will act as spacers under the larger piece at the pedestals of the handle. Then I'll fill the back between the spacers with foam, just to save a few ounces on the bitter end of the hatch.

And I will continue with the front roof foam.
Last edited by KCStudly on Sun Apr 26, 2015 9:29 am, edited 1 time in total.
KC
My Build: The Poet Creek Express Hybrid Foamie

Poet Creek Or Bust
Engineering the TLAR way - "That Looks About Right"
TnTTT ORIGINAL 200A LANTERN CLUB = "The 200A Gang"
Green Lantern Corpsmen
User avatar
KCStudly
Donating Member
 
Posts: 9615
Images: 8169
Joined: Mon Feb 06, 2012 10:18 pm
Location: Southeastern CT, USA
Top

Re: The Poet Creek Express - Foamie Hybrid

Postby dales133 » Sun Apr 26, 2015 5:41 am

Looking great mate and we all have the feel we should have done more days.
Glad your feeling better my Mrs has a serious chest info ti on at the moment...the joys of the changing seasons.
User avatar
dales133
4000 Club
4000 Club
 
Posts: 4605
Images: 1
Joined: Mon Oct 13, 2014 5:26 pm
Top

Re: The Poet Creek Express - Foamie Hybrid

Postby daveesl77 » Sun Apr 26, 2015 6:51 am

Absolutely beautiful and precise work! Your "baby" is going to be just spectacular.

dave
*******
Dave and Regina - Enjoying old age, a LOT!

Build Journal - http://www.tnttt.com/viewtopic.php?f=50&t=62386
User avatar
daveesl77
Donating Member
 
Posts: 871
Images: 273
Joined: Tue Jan 27, 2015 4:33 pm
Location: Pocahontas County, West Virginia
Top

PreviousNext

Return to Foamies

Who is online

Users browsing this forum: No registered users and 16 guests