The Poet Creek Express - Foamie Hybrid

Canvas covered foamies (Thrifty Alternatives...)

Moderator: eaglesdare

Re: The Poet Creek Express - Foamie Hybrid

Postby KCStudly » Thu Jul 17, 2014 9:35 am

kk4czd wrote:I hope you understand what I am trying to say...

Yeap, got it. I have thought about other methods, including wedging a 2x between the timbers of the loft and the front panel, hooking pipe clamps in the door jambs to hold the backer, and even clamping to the rear edge of the galley floor then running the straps all the way over the top so they are pulling more from the bulkhead, but this is what I started with and has worked okay so far. For the final install I may up the ante to my big 2 inch cargo straps (the ratchets on these small 1 inch straps are only good for about 300 lbs and are straining pretty hard... cheap crap).

GPW, I think that the TB2, foam and canvas will stabilize it and protect it from the weather. I have not ruled out adding a layer of fiberglass/epoxy on this front section after final install, before the foam. I might even consider your chipboard idea. For now I still need to be able to take the screws back out, so I can't cover it over yet. I have considered (and Karl also suggested) maybe trying to glass it before removal, but again there are the screws in the way, and I think it would still spring back (unless I added external ribs... but that also adds a lot of complication).

Thank you all for the suggestions and interest; I am considering all options with my feet on the ground making the final decisions. We are getting through this together!
:thumbsup:
Last edited by KCStudly on Mon Jul 21, 2014 8:57 am, edited 1 time in total.
KC
My Build: The Poet Creek Express Hybrid Foamie

Poet Creek Or Bust
Engineering the TLAR way - "That Looks About Right"
TnTTT ORIGINAL 200A LANTERN CLUB = "The 200A Gang"
Green Lantern Corpsmen
User avatar
KCStudly
Donating Member
 
Posts: 9615
Images: 8169
Joined: Mon Feb 06, 2012 10:18 pm
Location: Southeastern CT, USA

Re: The Poet Creek Express - Foamie Hybrid

Postby KCStudly » Thu Jul 17, 2014 11:05 pm

Success! Dry fitting of the ceiling panel is all but complete.

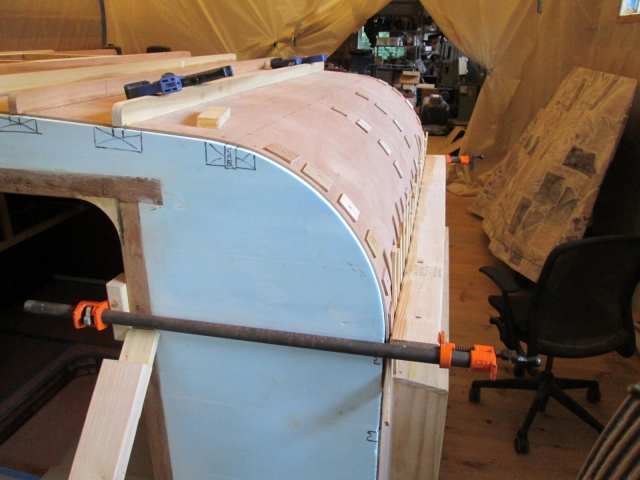
First I striped the ratchet strap set up off and decided to use the pipe clamps from the door jambs arrangement. Double back taped a block to each jamb to protect the softer cedar; used a couple of small bar clamps to temporarily hold the backer 2x4 to the edge of the panel (just long enough to get the pipe clamps started otherwise they would be pinched in the way, second set of hands); clamped a small block on each end of the 2x4 to support the pipe clamps (third set of hands); and followed that up with some boards propped up under the ends of the pipe clamps to deflect them from damaging the door seal flanges in the event that they were to fall.
Image
Image
Image

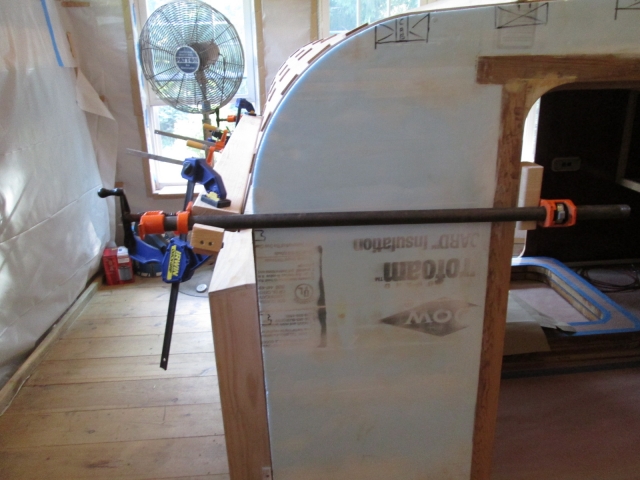
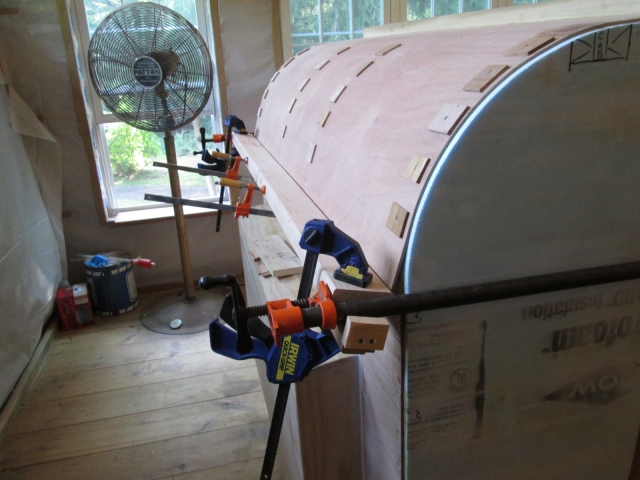
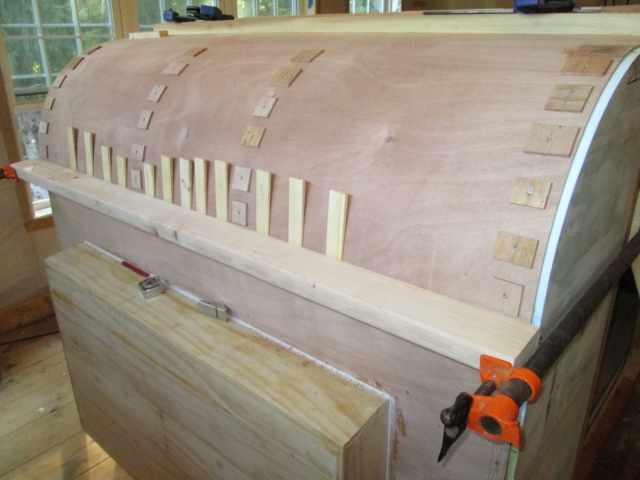
Once I snugged the pipe clamps up enough that they supported themselves, and removed the small orange bar clamps from the middle, I was able to squeeze the 2x4 up using the pipe clamps. The sides came together before the middle (not sure if this was due to a preexisting bow in the 2x or from the spring force in the panel) but I had to use the wedged shims to get the middle to close up. This brought the excess portion of the ceiling right up close and overlapping the front wall, but the shims were extending down over the joint.
Image

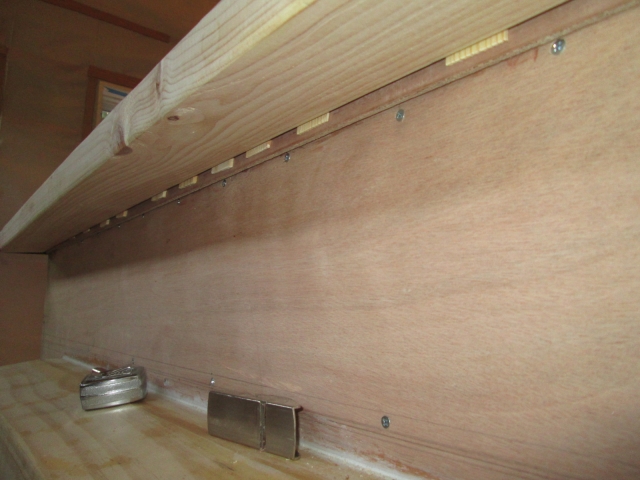
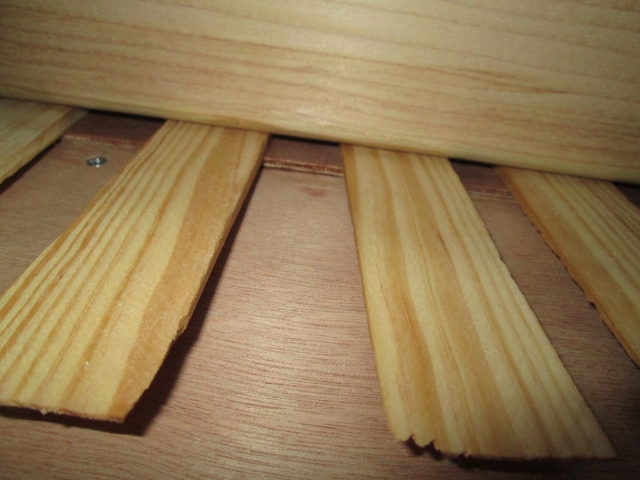
This is looking up under the 2x4. Image

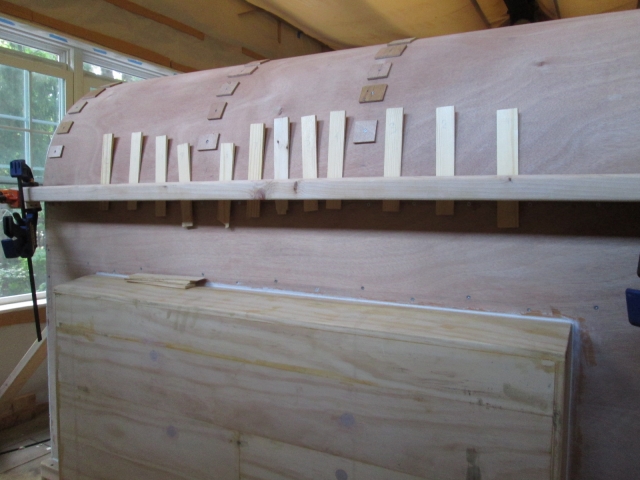
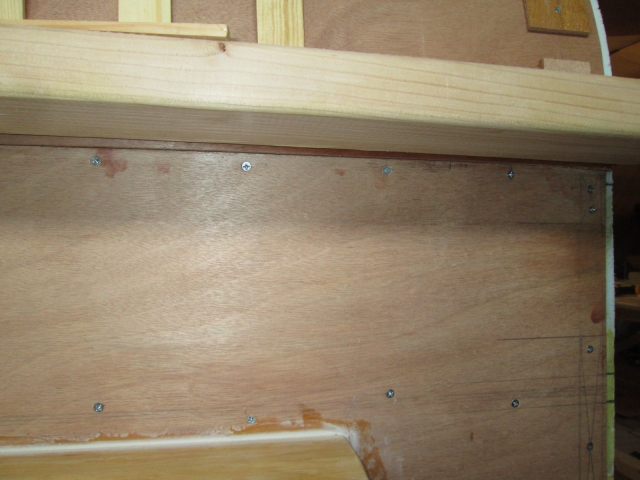
I made sure to leave room for the 6th and last row of screws into the riblets, and added those.
Image

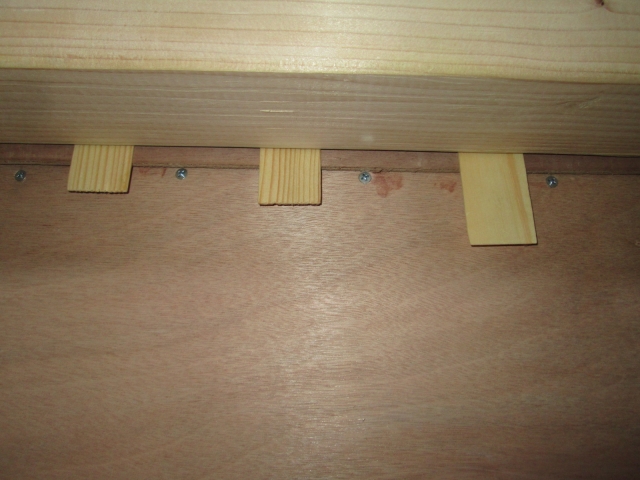
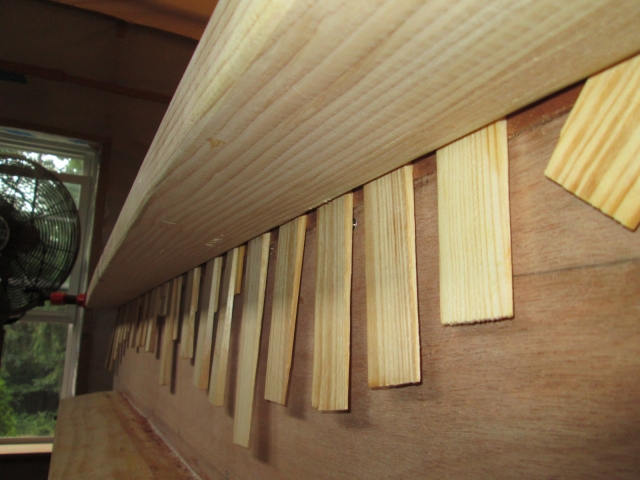
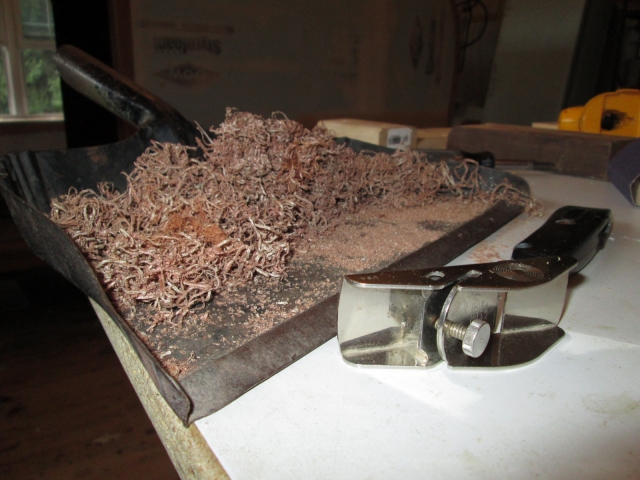
From there I made a pencil line across each shim even with the underside of the 2x and took each one individually to the miter saw to trim the excess. I could have done this in place with the utility knife, but I didn’t want to make any false cuts in the panel. Here they are after trimming.
Image
Image

About this time I started hearing some mild popping, so I wetted the lower portion of the panel again.

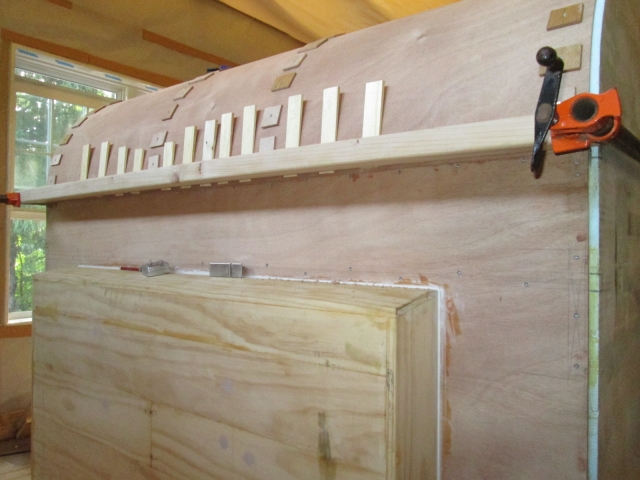
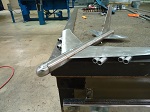
Next I used the matchbox plane shown in the previous pic to shave the lower edge of the ceiling panel until the top of the front wall started to become visible. Here the street side is just starting to come in.
Image

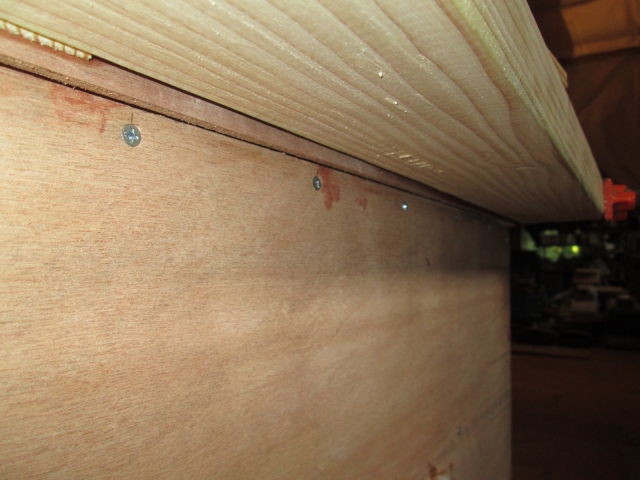
I had to make sure that row of screws was sunk just below flush so that the side of the plane could slide along the lower panel easily, using it as a guide.

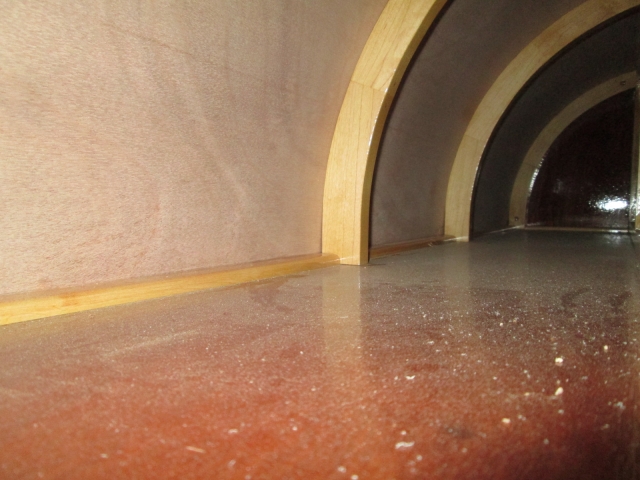
Here the joint is starting to come in pretty good.
Image

Testing with the shims I could fine tune the joint making sure that the edge slipped by cleanly. The wedges didn’t want to push it that last little bit, but by pressing the edge with my finger, I could tell if it was clear because the panel would depress and all of the adjacent wedges would fall out. If the panel fetched up a little the wedges would stay put. Some fine tuning and it was looking really good.
Image

This little spot needed a little more work.
Image

Even though the wedges wouldn’t put it perfectly fair, they got it close enough for the planned screw flange to get the rest of the job done (at least that is the plan).

I kept thinking about the famous Groucho Marx line (paraphrased), “I just flew in from Poet Creek, and boy are my arms tired”, operating the plane.
Image

Tiny little shadow line at the very bottoms of the riblets should pull up tight with the screw flange.
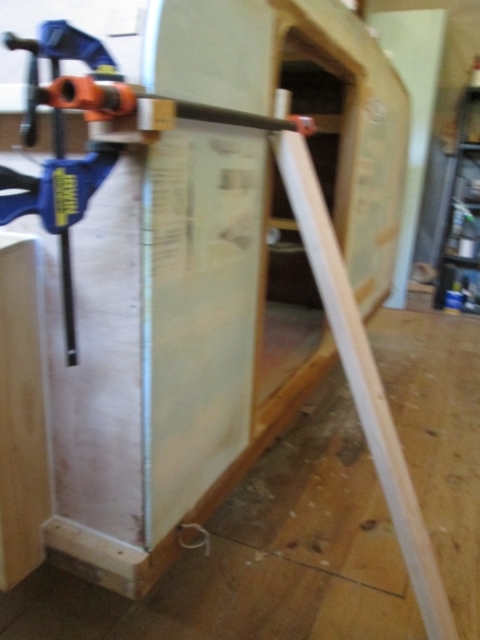
Image

The outside look.
Image

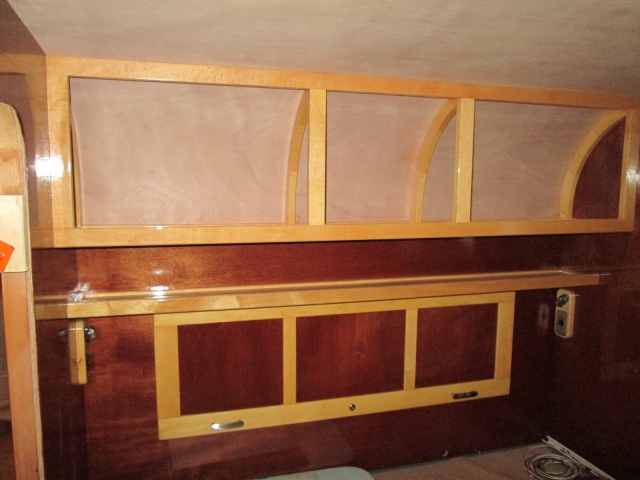
Getting a feeling for how the inside will be when finished.
Image

Thinking about the next step, I almost started taking it back off before making the final pencil marks inside for the masking (doh). Almost.

I think the next move will be to break down this clamp setup and see if I can still get the spring clamps on the edge of the ceiling panel enough to glue the screw flange on; then set the clamps back up and dry fit the last of the screws into the shelf ledger.

Here’s a question for you. When I go to remove the ceiling for staining, will I need to reverse all of these clamping steps, or can I just start removing screws? My concern is that the springiness of the ply will still be there and could put too much force on any one screw or portion of the bend causing a pullout or crack. Maybe if I leave it for a few days?
KC
My Build: The Poet Creek Express Hybrid Foamie

Poet Creek Or Bust
Engineering the TLAR way - "That Looks About Right"
TnTTT ORIGINAL 200A LANTERN CLUB = "The 200A Gang"
Green Lantern Corpsmen
User avatar
KCStudly
Donating Member
 
Posts: 9615
Images: 8169
Joined: Mon Feb 06, 2012 10:18 pm
Location: Southeastern CT, USA

Re: The Poet Creek Express - Foamie Hybrid

Postby RandyG » Fri Jul 18, 2014 6:46 am

I would reverse the process, cause like you said, that one screw could be under some stress after you take others out.
Randy
Aircraft fabricator, novice carpenter, electrical apprentice, audio engineer dropout.
Build thread - http://www.tnttt.com/viewtopic.php?f=50&t=54126
User avatar
RandyG
500 Club
 
Posts: 695
Images: 115
Joined: Thu May 10, 2012 6:52 pm
Top

Re: The Poet Creek Express - Foamie Hybrid

Postby tony.latham » Fri Jul 18, 2014 2:02 pm

I'd put a bit more moisture on it, let it sit to the point it's equalized with your humidity and then reverse the process.

But I'm not the one sitting in the room. Staring at it. Feeling the wood's tension through the nerves on my finger tips. Tasting the strain in the air like an old wheelwright bending a piece of steam-hot ash.

TL
User avatar
tony.latham
Gold Donating Member
 
Posts: 6905
Images: 17
Joined: Mon Jul 08, 2013 4:03 pm
Location: Middle of Idaho on the edge of nowhere
Top

Re: The Poet Creek Express - Foamie Hybrid

Postby KCStudly » Fri Jul 18, 2014 2:43 pm

tony.latham wrote:Feeling the... tension through the nerves... Tasting the strain in the air...


Maybe it's just because I'm a newb to this process (I mean, the great ones don't still get this worked up over bending a little ole piece of plywood, do they?), but I will add, "riding the razors edge, standing on pins and needles, and jumping out of your shoes with every whisper of a creak or pop".

This has to be the most "stressful" part of the build to date, and yet it seems to be going well so far. :worship:

Tonight I plan to attach the front screw flange. After the glue is truly dry (maybe tomorrow evening... I have to work during the day :thumbdown: ) I will screw it down all the way and soak it some more. Then I should be able to better assess taking it all back off. I'm leaning toward a full reversal of the process, hoping that it will go much quicker. :worship:
KC
My Build: The Poet Creek Express Hybrid Foamie

Poet Creek Or Bust
Engineering the TLAR way - "That Looks About Right"
TnTTT ORIGINAL 200A LANTERN CLUB = "The 200A Gang"
Green Lantern Corpsmen
User avatar
KCStudly
Donating Member
 
Posts: 9615
Images: 8169
Joined: Mon Feb 06, 2012 10:18 pm
Location: Southeastern CT, USA
Top

Re: The Poet Creek Express - Foamie Hybrid

Postby KCStudly » Fri Jul 18, 2014 8:50 pm

Tonight I broke down the shims and pipe clamps, and unscrewed the bottom row of riblet screws.

It was relatively easy to just push on the panel near each screw to hold it and zip the screws out. However, I’m not so sure that it would go as easily higher up, so will reserve judgment on that for now.

This allowed the edge of the ceiling panel to spring away from the front wall enough to get the jaws of the spring clamps under the lip. This pic shows the dry fit of the 2 piece screw flange (2 pieces because it is made from scraps).
Image
Image

The staggered high/low pattern is intended to spread the screws and spring load from the panel onto the relatively small shelf ledger. By adding the screw flange I hope to transfer some of the load to the portion of the ledger that is under the groove for the shelf, and figure that it will help pull the two panels flush, backing up the parting line.

All of the water and manipulation left the edge of the ceiling panel with a bit of a ripple, and I was concerned that if I just clamped the screw flange to it that it would lock the ripple into place.
Image
(In the above pic you can also see how I used the double back tape to stick scrap wood “pucks” on the skin to aid alignment of the screw flange during glue up. This is the same technique that I used to locate the roof spars and seems to work really well to keep the parts from sliding around in the glue while avoiding extra fastener holes.)

To deal with the ripple I picked a suitable piece of scrap pine to act as a temporary backer. To prevent this from becoming glued on by the glue that would squeeze thru the predrilled holes, I ran a length of masking tape along it (shown here turned up). I also taped the two sections of screw flange together to make handling and alignment easier.
Image
Image

Then I flipped the backer onto the flange and taped the two together, again, just to make handling and clamping everything together much easier.
Image
Image

I am a firm believer in going thru a dry run for all but the simplest glue ups, and because I don’t have much margin for screw placement, this one is pretty critical; so I did a full dry run on the clamp setup. The backer did the trick and straightened the edge of the panel out nicely.
Image

In this end view you can get a better idea of what I’m trying to accomplish. The sharpie mark on the foam represents the shape of the shelf ledger and the target for the screws.
Image

The actual glue up looks eerily similar to the dry run, which is a good thing.
Image

Tomorrow after work I won’t be able to do much more than pull the clamps and check it out before getting myself home for a haircut “appointment” with Yvette.
KC
My Build: The Poet Creek Express Hybrid Foamie

Poet Creek Or Bust
Engineering the TLAR way - "That Looks About Right"
TnTTT ORIGINAL 200A LANTERN CLUB = "The 200A Gang"
Green Lantern Corpsmen
User avatar
KCStudly
Donating Member
 
Posts: 9615
Images: 8169
Joined: Mon Feb 06, 2012 10:18 pm
Location: Southeastern CT, USA
Top

Re: The Poet Creek Express - Foamie Hybrid

Postby S. Heisley » Fri Jul 18, 2014 9:31 pm

Oh, KC, even your work with clamps is a work of art. That pretty green and perfectly aligned..... :)
User avatar
S. Heisley
Super Lifetime Member
 
Posts: 8774
Images: 495
Joined: Mon Sep 17, 2007 10:02 am
Location: No. California
Top

Re: The Poet Creek Express - Foamie Hybrid

Postby KCStudly » Fri Jul 18, 2014 10:11 pm

I call it "Clamp Art". :D
KC
My Build: The Poet Creek Express Hybrid Foamie

Poet Creek Or Bust
Engineering the TLAR way - "That Looks About Right"
TnTTT ORIGINAL 200A LANTERN CLUB = "The 200A Gang"
Green Lantern Corpsmen
User avatar
KCStudly
Donating Member
 
Posts: 9615
Images: 8169
Joined: Mon Feb 06, 2012 10:18 pm
Location: Southeastern CT, USA
Top

Re: The Poet Creek Express - Foamie Hybrid

Postby GPW » Sat Jul 19, 2014 4:25 am

:thumbsup: 8) :D It’s Working !!!
There’s no place like Foam !
User avatar
GPW
Gold Donating Member
 
Posts: 14912
Images: 546
Joined: Thu Feb 09, 2006 7:58 pm
Location: New Orleans
Top

Re: The Poet Creek Express - Foamie Hybrid

Postby bonnie » Sat Jul 19, 2014 6:49 am

KCStudly wrote:I call it "Clamp Art". :D


I'm with Sharon. That really is pretty.
Remember, the turtle won. :)
User avatar
bonnie
Donating Member
 
Posts: 1390
Images: 107
Joined: Sun Jul 24, 2011 4:14 pm
Location: Roxana, IL
Top

Re: The Poet Creek Express - Foamie Hybrid

Postby KCStudly » Sat Jul 19, 2014 10:13 pm

Here’s an article on repetitive object patterns in photography. Kind of interesting, but a little OT.

Here’s a link that I posted in the construction techniques forum giving a little more of a detailed write-up on the glue alignment block technique that I’ve been using.

I only got about an hour in today, but in my not so humble opinion another significant milestone has been achieved. Dry fitting of the ceiling panel to the cabin is 100/ct complete.

After pulling the clamps and backer off of the screw flange glue up the ripple was back (kind of hard to see in the pic).
Image

No matter. It is better to know that it will go back flat again, than it would be to find out the hard way that it won’t.

I got the door jamb clamp setup back in place, and the last row of screws back into the riblets… then a moment later heard a pretty good POP. “Oh gggg’s, don’t do that!” I forgot to wet things down. Scurry around for the spray bottle; empty. Hurry, hurry, crack open a bottled water, pour it in and get spraying. Whew. Looks like another micro split at the bottom of that same street side edge.
Image

Starting in the middle and working my way out to either side in alternating fashion, I drilled and screwed the flange into the shelf ledger. The lower row goes thru the screw flange, the top of the front wall and the lower edge of the ledger; while the upper row of screws goes thru the flange, the bottom of the ceiling panel, and the upper portion of the ledger.
Image

I had just enough time to strip off the clamps and snap a photo of the completed dry fit.
Image

Tomorrow I will reverse the process and hopefully get the panel back down on the bench for some finishing.

Progress is progress and the train keeps a rollin’.
KC
My Build: The Poet Creek Express Hybrid Foamie

Poet Creek Or Bust
Engineering the TLAR way - "That Looks About Right"
TnTTT ORIGINAL 200A LANTERN CLUB = "The 200A Gang"
Green Lantern Corpsmen
User avatar
KCStudly
Donating Member
 
Posts: 9615
Images: 8169
Joined: Mon Feb 06, 2012 10:18 pm
Location: Southeastern CT, USA
Top

Re: The Poet Creek Express - Foamie Hybrid

Postby bonnie » Sun Jul 20, 2014 4:23 am

Man, that's pretty. Progress is progress. :)
Remember, the turtle won. :)
User avatar
bonnie
Donating Member
 
Posts: 1390
Images: 107
Joined: Sun Jul 24, 2011 4:14 pm
Location: Roxana, IL
Top

Re: The Poet Creek Express - Foamie Hybrid

Postby KCStudly » Sun Jul 20, 2014 9:11 am

Thank you, Bonnie. I'm very happy with how it is turning out. :D
KC
My Build: The Poet Creek Express Hybrid Foamie

Poet Creek Or Bust
Engineering the TLAR way - "That Looks About Right"
TnTTT ORIGINAL 200A LANTERN CLUB = "The 200A Gang"
Green Lantern Corpsmen
User avatar
KCStudly
Donating Member
 
Posts: 9615
Images: 8169
Joined: Mon Feb 06, 2012 10:18 pm
Location: Southeastern CT, USA
Top

Re: The Poet Creek Express - Foamie Hybrid

Postby KCStudly » Sun Jul 20, 2014 8:10 pm

Closer inspection of the front shelf ledger found that a couple of screws holding the ceiling panel broke thru the finish on top. I’ll see what I think once the ceiling is back off and I can get a better look.
Image

I used the door jamb clamp setup to remove the screws in the screw flange. After that I had enough leverage in the flap to just press on the bottom to take out the screws at either side riblet. In the middle I leaned in between the remaining screws with my forearm, spreading the force out until I had both of the middle screws out, and that was enough to work my way up without the complexity of the strap setup.
Image
Image

With all of the front screws removed you can see how much “training” it put into the ply.
Image

Here’s a closer look at those errant screw holes. Two just barely broke thru and two others were too close for comfort. I was able to flatten the raised fibers of wood somewhat, and will probably just stuff some wood filler in the holes, rather than attempt a more serious repair (probably do more damage than good to try and “patch” the finish).
Image

Right now while it’s fresh in my mind I drilled and circled new slightly lower holes to use when it all goes back together.
Image

Next I removed the rest of the screws along the tops of the walls, and across the rear cabinet and bulkhead to where the ceiling was free again. Then I cleared the bench off in prep for flipping the ceiling assembly over, but Karl wasn’t around today and it is just too big and awkward for me to handle by myself without doing damage, so that will have to wait until tomorrow.
Image

It was really nice build weather today, too. Not hot, dry, but after working a full day yesterday I kind of wanted to take it easy anyway. So I called it a day early after just a couple of hours.
KC
My Build: The Poet Creek Express Hybrid Foamie

Poet Creek Or Bust
Engineering the TLAR way - "That Looks About Right"
TnTTT ORIGINAL 200A LANTERN CLUB = "The 200A Gang"
Green Lantern Corpsmen
User avatar
KCStudly
Donating Member
 
Posts: 9615
Images: 8169
Joined: Mon Feb 06, 2012 10:18 pm
Location: Southeastern CT, USA
Top

Re: The Poet Creek Express - Foamie Hybrid

Postby lfrazer98 » Thu Jul 24, 2014 12:32 am

After seeing your technique, I so wished I had more knowledge of wood before bending my ply. We had to make do and fix mistakes along the way. We tried to plan, but sometimes there is too much info to read through! Looking great! I only have 1 or 2 finishing steps to complete and have yet to figure out how I am going to get my hatch to close. It is a dilemma. Anyway, loving the pics! I am really learning a lot!
User avatar
lfrazer98
Teardrop Master
 
Posts: 204
Images: 217
Joined: Tue Sep 17, 2013 6:25 pm
Location: New York
Top

PreviousNext

Return to Foamies

Who is online

Users browsing this forum: No registered users and 9 guests