The Poet Creek Express - Foamie Hybrid

Canvas covered foamies (Thrifty Alternatives...)

Moderator: eaglesdare

Re: The Poet Creek Express - Foamie Hybrid

Postby Sheddie » Sat Oct 10, 2015 4:32 am

KCStudly wrote:Thanks for stopping in, Sheddie. I'm assuming your projects were with vinyl ester or polyester, perhaps with a separate epoxy barrier coat on the boat. Was the plastic sheet a dedicated peel ply or release fabric, or was it just hardware store plastic sheeting? .

No, I have only used epoxy resin on all the fibreglassing that I have done. It was only on the bottom of the hull, from the keel to the chine, that we used the the plastic sheet, and it was just cloth and resin. I don't remember exactly what the plastic was, it was quite a heavy stuff like what is used for windows in convertible tops probably about half a mm thick. The guy that helped us with the job got it for us, he had international patents on the system back then.
KCStudly wrote:Everything I have read recommends doing lean wet outs of the cloth, then separate filler and barrier coats. Otherwise the cloth can float in excess epoxy, weighing more and making it weaker. The peel ply works by allowing the excess resin to slip thru the polyester or nylon weave, which it does not stick to. The weave creates a fracture
point so when you peel it up (with great difficulty sometimes) it leaves a level surface with little excess epoxy and no need to remove amine or sand if additional bonding is required (such as for the filler and barrier coats.

I'd be interested to learn more about different methods.

The cloth was laid on the hull, both dry, and the thinned coat was applied. By the time the plastic was in place for the rest of the resin to be applied the cloth was probably not going to lift, and then when going over the plastic with the squeegee was to remove air and excess resin. The next morning the plastic pealed off real easy. The sides of the hull were done in the normal way with 2 oz f/g cloth, the decks and cabin tops were done the normal way with the 8 oz because we had (still have) a big roll of it. That's also what I used on the car.
2015-10-10 10.21.03 - Copy.jpg
2015-10-10 10.21.03 - Copy.jpg (123.37 KiB) Viewed 1576 times

KCStudly wrote:There was a comment in here or the other thread about the composite shattering with an impact. Some of the reading I've been doing lately does indicate that polyester resin can do that, but epoxy doesn't seem to have that problem.

We haven't had any problems with that, and we have had a few bumps and scrapes over the years.
User avatar
Sheddie
1000 Club
1000 Club
 
Posts: 1499
Images: 1129
Joined: Mon Jul 01, 2013 3:26 pm
Location: Whangarei, New Zealand

Re: The Poet Creek Express - Foamie Hybrid

Postby KCStudly » Sat Oct 10, 2015 10:05 am

Thanks for the added details, Sheddie. Much appreciated, and your camel back cover looks great! :thumbsup:

OP, thanks for the vid. I'll check that out later tonight.

Off to hone my FG'ing skills on the TB.
KC
My Build: The Poet Creek Express Hybrid Foamie

Poet Creek Or Bust
Engineering the TLAR way - "That Looks About Right"
TnTTT ORIGINAL 200A LANTERN CLUB = "The 200A Gang"
Green Lantern Corpsmen
User avatar
KCStudly
Donating Member
 
Posts: 9613
Images: 8169
Joined: Mon Feb 06, 2012 10:18 pm
Location: Southeastern CT, USA

Re: The Poet Creek Express - Foamie Hybrid

Postby KCStudly » Sun Oct 11, 2015 2:15 am

Kind of like Big Mike’s quote, I’m hoping that the cost and “pain” of doing TPCE in FG will soon be forgotten and the quality will be remembered for a very long time.

I made the first steps today toward lining the battery box compartment of the tongue box with a single layer of cloth. I figured the TB would be a good place to start, being a larger more complex project for me to take the next stepping stone on. Plus I want it to be fairly rugged to handle the abuse of having stuff dumped in it, and to be a little more resistant to any battery corrosives that might get out. In fact it had been my plan to glass the battery box (BB) all along (well, at least since I decided to make my own as part of the TB).

I want the outside skin of the box to roll over the edges of the BB last, so it made sense to start by doing the inside of the BB first. As it turns out, the BB is probably going to be the most difficult thing on the whole camper to cover, with odd angles, small space, multiple sides up and down, and a lip around the inside edge of the access opening.

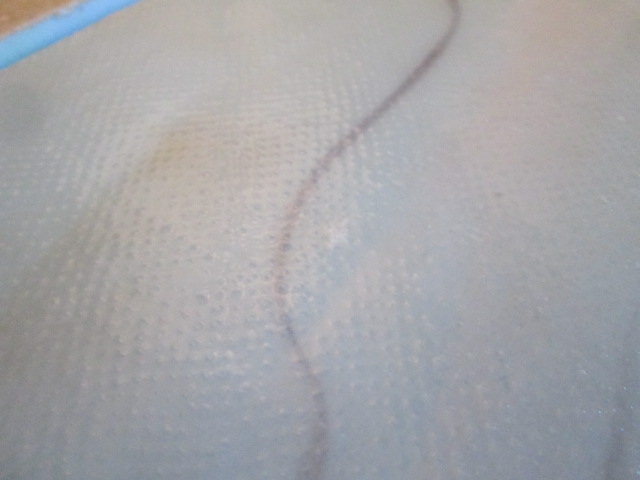
But first let’s get caught up on a couple of photo’s. Here is a close-up of the sample glass layup after spreading on a layer of epoxy.
Image

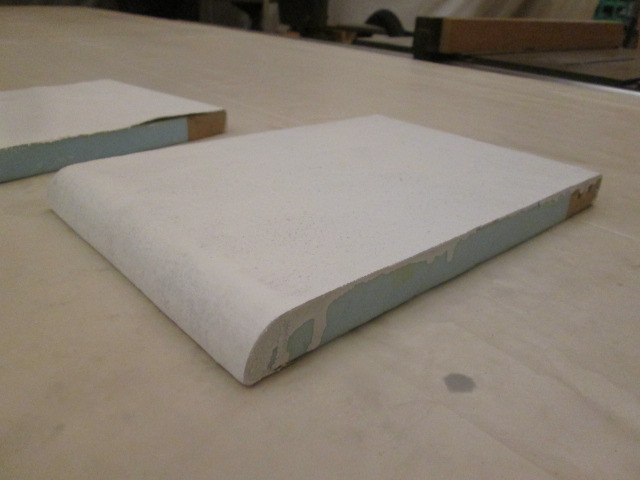
Here is the canvas sample with one coat of primer. The Zinsser 123 I had was about 1/2 gal left over from a project last year and seemed to be really thick to stir, but brushed on fine. I didn’t remember it being that thick the last time I used it, but then again it was probably 10 to 20 deg F or more warmer at the time.
Image

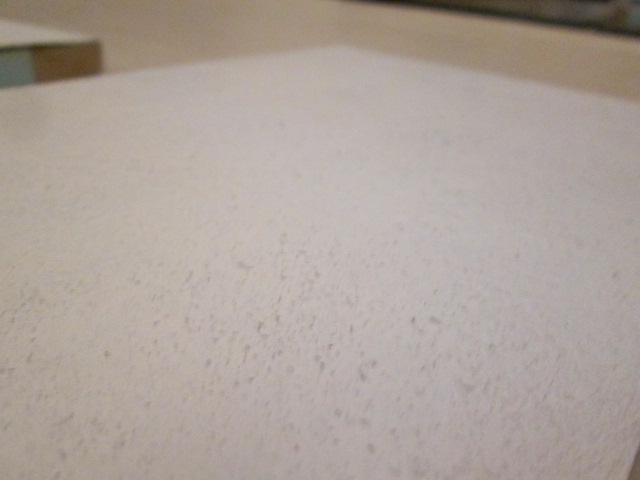
This close-up is trying to show the canvas nibs that are poking up thru the primer. They sanded off pretty easily leaving a rash of breakthroughs in the primer, yet pretty smooth. A second coat of primer would be all that would be needed before paint.
Image

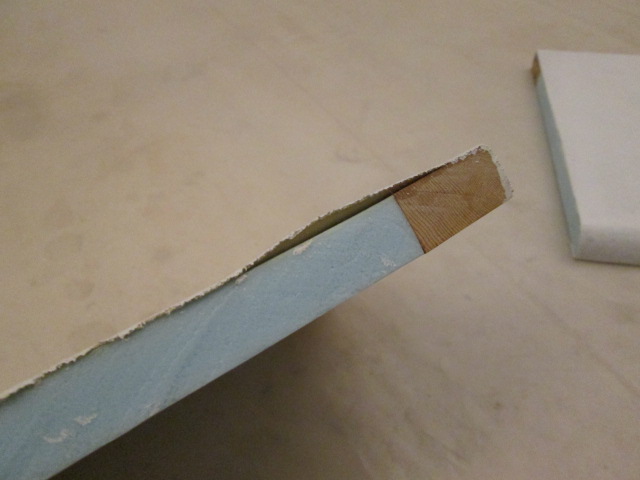
Here you can see the edge of the canvas sample that delaminated.
Image

Haven’t seen more than 2/3 of the bench top cleared off in a good long time. I figured I should cover it up with some of that 6 mil plastic sheet I had left over from the drape walls. In fact I recycled the piece I had used for my vacuum bag set-up (saved the bubble wrap and cut up the rest of the odd bits to use for the poor man’s prepreg process that I will describe here shortly).
Image

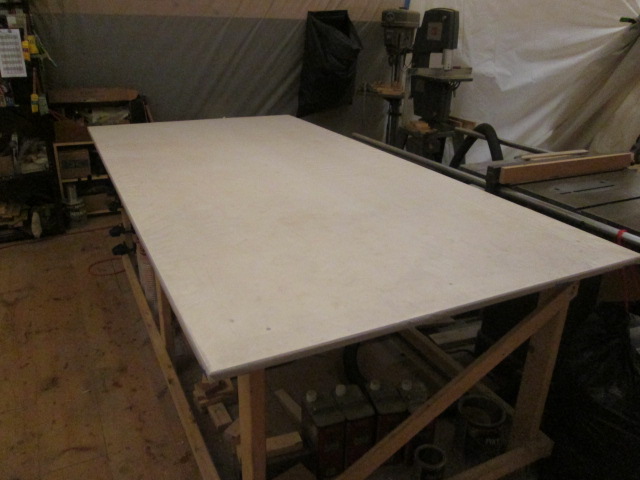
Starting in the middle and working my way back and forth pulling the slack out of the sheet, and folding the edges under neatly, I taped it to the underside of the table’s edge.
Image

Now we are getting serious. I started thinking to myself that I was getting crazy with the details again, but then I couldn’t think of a better way to do the BB w/o making an utter mess of it. I read a blog entry by a guy demonstrating “poor man’s prepreg” on his Cozy EZ homebuilt plane project (as in pre-impregnated glass cloth) and it seemed like it might be the best way to do the BB. Basically you do your wet out between two sheets of plastic, then trim it, then peel back one layer of plastic and the other piece helps keep everything neat and aligned while you get it in place. Seems to help keep edge fibers and warping of the shape under control, and appears to be a very practical method for out of position applications.

Here’s a similar technique using a zip lock bag: EAA Poor Man’s Prepreg Video.

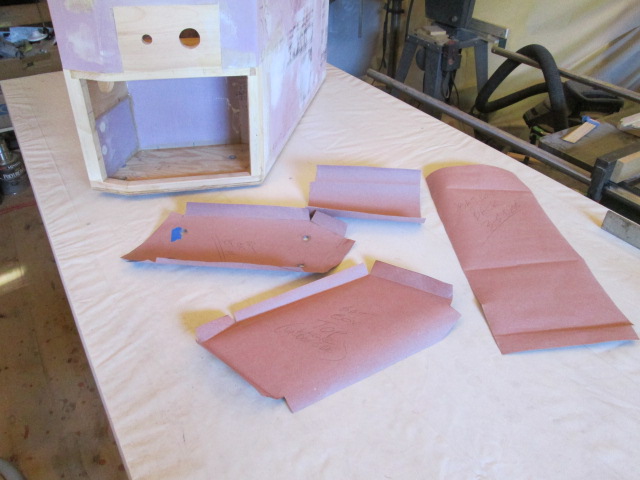
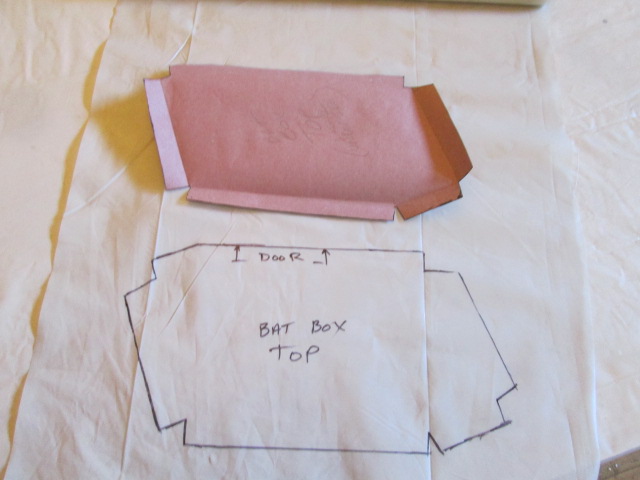
So how do I figure out what shapes to cut? Make rosin paper templates. Here’s the one for the floor of the BB being test fit.
Image
Image
Image

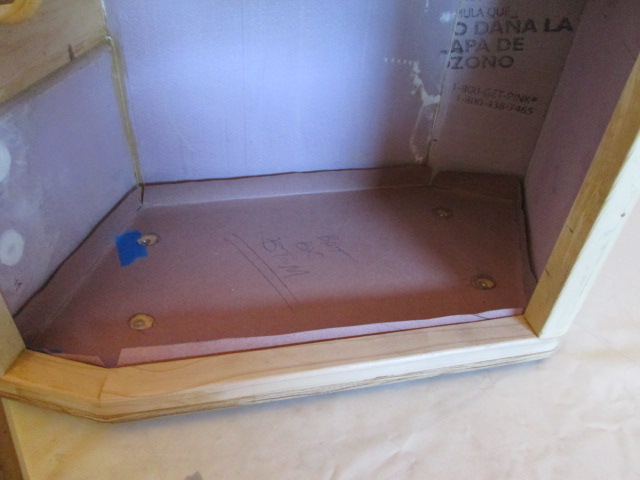
I had already masked the battery tie down nutserts with packing tape (and will probably wax and thread the bolts in from the opposite side just to be sure. The holes cut out in the template are just there so I can mark the approximate location on the glass with sharpie to help locate the holes later. I wouldn’t try to cut those now before final positioning.

About this time I realized this was going to be a complex process that I could roll around in the details forever, but the templates didn’t need to be perfectly fit, especially because I haven’t filleted the corners yet, and I think it will really make the glass go in so much easier having pre fit these.

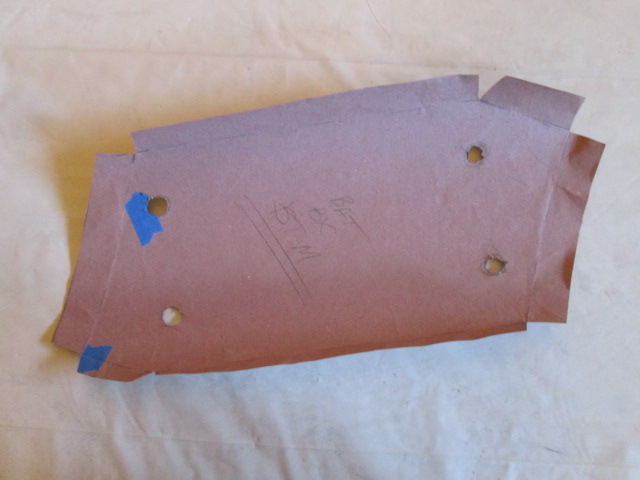
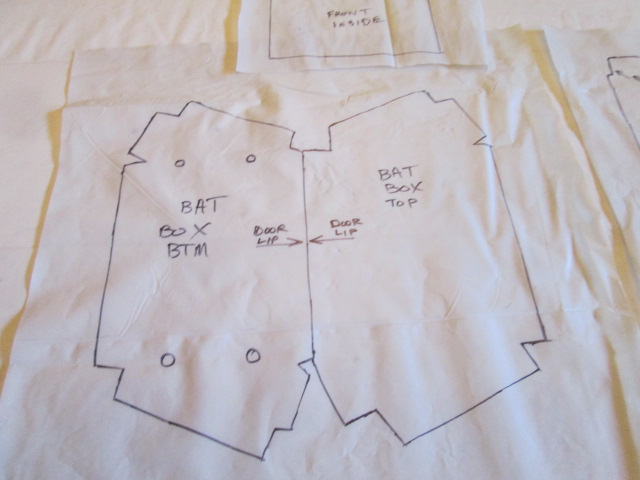
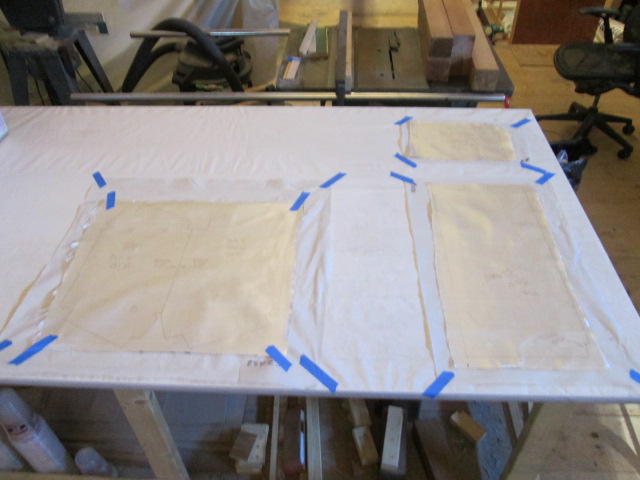
Here are the four templates for the inside of the BB. From lower left clockwise, the ceiling piece, the floor, the front inside, and the remaining 3 sides.
Image

Next I traced around the templates onto suitably sized pieces of the 6 mil plastic.
Image

I figured it would be a more efficient use of product to do the top and bottom back to back.
Image

Then I was able to use these to optimize my fabric usage while still leaving a little extra around all of the edges.
Image

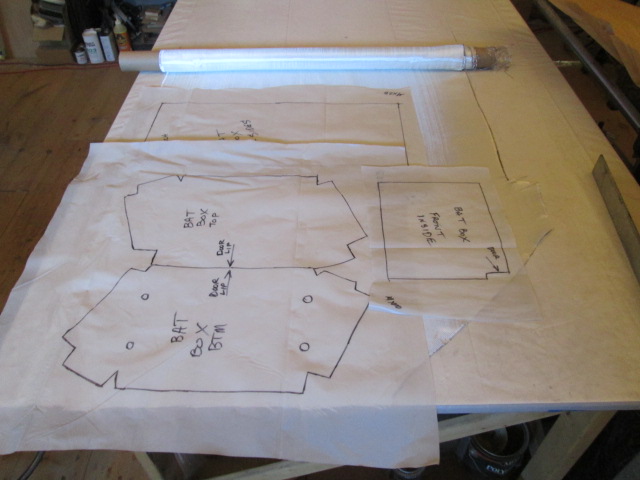
Next was to tape the plastic sheets with the template tracings down to the covered bench and lay the over sized glass on the tracings.
Image

So they say when you are preparing for a “major” layup, it is a good idea to have everything ready, but to be well rested and ready for the time that it will take to do the whole job before you start mixing epoxy. By this time it was about 5:30pm and there were ribs at Grotto Jeff’s annual Oktoberfest party that were calling my name. So I decided that some succulent pork heaven was just the thing I needed to slow my thoughts down and get ready for tomorrow’s continuing efforts.

(Hey Tony, is that what you call a cliff hanger in literature speak?)

I covered the glass with the top sheets of plastic to keep them clean for tomorrow. I’ll start by doing the fillets with thickened mix, then wet, cover, squeegee, cut to the lines, peel one side, fold to get the pieces inside the box, and lay the glass in place before peeling the second layer of plastic.

Compared to this I expect the dry on dry method on the outside will go much easier.
KC
My Build: The Poet Creek Express Hybrid Foamie

Poet Creek Or Bust
Engineering the TLAR way - "That Looks About Right"
TnTTT ORIGINAL 200A LANTERN CLUB = "The 200A Gang"
Green Lantern Corpsmen
User avatar
KCStudly
Donating Member
 
Posts: 9613
Images: 8169
Joined: Mon Feb 06, 2012 10:18 pm
Location: Southeastern CT, USA
Top

Re: The Poet Creek Express - Foamie Hybrid

Postby GPW » Sun Oct 11, 2015 6:39 am

KC, we were always taught to keep a battery in a wooden box , ( Old school dogma) so any spills would be absorbed by the wood ... We’ve done that for years , and that seems to work great , so when the wooden box gets nasty over time , we just replace it ... I don’t know if that’s valid anymore , but it does work ... I was thinking a sacrificial wooden battery “tray" for the bottom of that nice FG box... :thinking:
There’s no place like Foam !
User avatar
GPW
Gold Donating Member
 
Posts: 14912
Images: 546
Joined: Thu Feb 09, 2006 7:58 pm
Location: New Orleans
Top

Re: The Poet Creek Express - Foamie Hybrid

Postby KCStudly » Sun Oct 11, 2015 8:16 am

By using FG with a couple of drain holes in the bottom, completely isolated from the rest of the TB, I figure I could hose the thing out with baking soda if I had to, w/ or w/o removing the battery.
KC
My Build: The Poet Creek Express Hybrid Foamie

Poet Creek Or Bust
Engineering the TLAR way - "That Looks About Right"
TnTTT ORIGINAL 200A LANTERN CLUB = "The 200A Gang"
Green Lantern Corpsmen
User avatar
KCStudly
Donating Member
 
Posts: 9613
Images: 8169
Joined: Mon Feb 06, 2012 10:18 pm
Location: Southeastern CT, USA
Top

Re: The Poet Creek Express - Foamie Hybrid

Postby ghcoe » Sun Oct 11, 2015 8:39 am

Do you like messing with battery acid?

Do you like replacing batteries that have discharged and then froze during the winter?

Do you like batteries that loose capacity once they have been discharged below 10 volts?

Do you like to make a battery box so you can keep your battery outside of your trailer to keep you away from fumes and acid?

Don't you wish there was something better?

Well do you?

I give you the Optima........http://www.optimabatteries.com/en-us/products/bluetop/

I warn you though, Once you go Optima there is no going back....... :thumbsup:
George.

Gorrilla Glue, Great Stuff and Gripper. The three G's of foamie construction.

My build viewtopic.php?t=54099
Working with flashing for foamie construction viewtopic.php?f=55&t=60303
Making a hot wire http://tnttt.com/viewtopic.php?f=55&t=55323
User avatar
ghcoe
1000 Club
1000 Club
 
Posts: 1946
Joined: Fri Dec 11, 2009 11:20 pm
Location: SW Idaho
Top

Re: The Poet Creek Express - Foamie Hybrid

Postby KCStudly » Sun Oct 11, 2015 8:49 am

George, perhaps it was just a bad review or someone trying to spoil the market for another brand, but I had read in some 4x4 circles that, after the Optimas came out, became all the big rage and everybody had one, they shifted production to Mexico and started building them cheaper to the point where they had become less reliable. But then again, you can't believe everything you read on the internet, right? ;)

Thing is I already have a couple of wet cells from my boat. If either of those check out (after a few of years of inactivity :roll: :oops: ) I'll be using one of them. Otherwise I'll have to check my battery charger again; I forget if it is compatible with the gel cells.
KC
My Build: The Poet Creek Express Hybrid Foamie

Poet Creek Or Bust
Engineering the TLAR way - "That Looks About Right"
TnTTT ORIGINAL 200A LANTERN CLUB = "The 200A Gang"
Green Lantern Corpsmen
User avatar
KCStudly
Donating Member
 
Posts: 9613
Images: 8169
Joined: Mon Feb 06, 2012 10:18 pm
Location: Southeastern CT, USA
Top

Re: The Poet Creek Express - Foamie Hybrid

Postby ghcoe » Sun Oct 11, 2015 9:52 am

KC, I had read or heard of that too. It was some years ago though. I have purchased 4 refurbished Optima's in the last 8 years. Although, I did sell the car the oldest one was in 2 years ago in my old jeep, I still have one that is 6 years old in my daily driver, one that is 4 years old in my wife's car and one that is 2 years old in my Jeep. All have been trouble free and they were refurbished units. My first optima lasted 10 years, it even sat in a vehicle for a year and a half while I pulled the motor and replaced it. I was surprised once I put the engine in, connected the battery and it had plenty of power to start the engine without any charging or jumping. The voltage regulator went out one day and took it out, along with most of the lights. Who knows how long it could have lasted it that did not happen. To me they are well worth the money spent. I have been getting refurbished units here for under $80.00.

Optima's are not gel cell, they are AGM http://www.optimabatteries.com/en-us/te ... -batteries. They are sometimes a bit finicky about the chargers you use though. But, that is why I get refurbs...... :twisted:
Last edited by ghcoe on Sun Oct 11, 2015 8:12 pm, edited 1 time in total.
George.

Gorrilla Glue, Great Stuff and Gripper. The three G's of foamie construction.

My build viewtopic.php?t=54099
Working with flashing for foamie construction viewtopic.php?f=55&t=60303
Making a hot wire http://tnttt.com/viewtopic.php?f=55&t=55323
User avatar
ghcoe
1000 Club
1000 Club
 
Posts: 1946
Joined: Fri Dec 11, 2009 11:20 pm
Location: SW Idaho
Top

Re: The Poet Creek Express - Foamie Hybrid

Postby tony.latham » Sun Oct 11, 2015 11:47 am

(Hey Tony, is that what you call a cliff hanger in literature speak?)


The cliff-hanger that I'm waiting for is when you lower the PCE down to the first floor!

Your layup will go fine. Fiberglassing is all about planning and thinking it through and you're a master of that.

Tony
User avatar
tony.latham
Gold Donating Member
 
Posts: 6900
Images: 17
Joined: Mon Jul 08, 2013 4:03 pm
Location: Middle of Idaho on the edge of nowhere
Top

Re: The Poet Creek Express - Foamie Hybrid

Postby dales133 » Sun Oct 11, 2015 6:06 pm

So it looks like the FG won mate?
User avatar
dales133
4000 Club
4000 Club
 
Posts: 4605
Images: 1
Joined: Mon Oct 13, 2014 5:26 pm
Top

Re: The Poet Creek Express - Foamie Hybrid

Postby KCStudly » Sun Oct 11, 2015 6:19 pm

Ghcoe, I will consider it if I do have to get a new battery. Thanks.

Thanks Tony, I appreciate the confidence! Things went about as well as I could have hoped for. The PMPP (poor man’s prepreg) technique worked very well, especially when it came to cutting out the very detailed pieces for the BB ceiling and floor. I did get a few stringy bits pulling out of the last small side piece right at the end of the layup, but I think I know what to do different if there is a next time. The inside of the TB isn’t quite as complicated, but I may use the technique again there, at least for the area around the backside bump of the BB.

It was not very conducive taking pictures with gooey gloves, but I managed to snap a couple of pics at glove changes, Karl took a few action shots for me when he stopped by to see how I was doing, and I got some after complete.

First I mixed up some epoxy/glass filler and laid fillets all around. That was a bit sloppy because the thickened epoxy wants to ball up, but between the 5/16 radius stick I made, my gloved fingers and a credit card squeegee to scrape up the excess messy bits I got it good enough to help the cloth make it around the inside corners. By doing this wet just before the cloth layup there was no need to sand any raised nubs. Plus they tended to smooth out considerably when brushing the wet coat on before laying the cloth. I did have to be a little more careful to avoid smushing the fillets out when squeegeeing the cloth, but it was very manageable. I had a little filler left over so I laid it in to the stiffening rib under the TB floor; not enough to finish that, but no reason to waste it.

Here I have wet out the top and bottom pairing, placed the top sheet of plastic over and squeegeed it out again thru the plastic. The 6 mil plastic is stiff enough and not super flat (from being folded before being put on the OEM roll), so it can lift a bit here and there, but so long as I went over every square inch I could be sure that everywhere was fully saturated.
Image

I started with the floor piece. Really hard to see the glass here (which is a good thing!), but if you look closely at the back walls you can kind of see a line about 1-1/4 inch up.
Image

Like I said, cutting the wet glass sandwich went exceedingly well. Hardly had to clean the scissors at all and the glass threads were all very much under control, even the pointy corners of the darts and flaps.

And as advertised, handling the glass after peeling the bottom ply of plastic off was also very manageable. Very important to pull the bottom plastic and not the top!

When peeling the top ply of plastic it wasn’t always easy to pull in a direction that didn’t try to lift one edge or another, but having already squeegeed thru the plastic down into the wet coat meant that even if it did lift a bit, it was still fairly well positioned and easy enough to press back down.

One small thing I learned from watching the video linked by OP above, was to set your mix cup upside down over the next piece of cloth to be wet. You’d be surprised how much more epoxy comes out of an empty cup when you flip it over. Another thing I picked up is to not rush, let the glass soak for a bit. Once soaked you can take more epoxy out without starving it because it has actually soaked in and you are only removing excess.

Working in small 1 to 2oz batches worked great. Here I am wetting out the 3-side piece. In the first pic you can see the radius stick used for the fillets resting on a disposable paper plate. It has one corner at 5/16 inch and the other about 7/16 inch.
Image
Image
Image

Here’s a look at the finished product, inside front looking up. Although I did get a couple of stringy bits on the last piece right at the end, you can’t see that in the pics. The stringy looking white stuff you see here is actually spackle repairs under the glass.
Image

In this shot looking at the back and up, you can see the epoxy filler in the pocket screw holes in the BB ceiling, now under glass. I’ll trim the excess flash from the main opening, and the large vent hole after it has cured.
Image

I glassed right over the bottom drain/vent holes and the taped over thread inserts; will trim as appropriate later.
Image

If I had been a little more prepared I might have kept going and covered the inside of the box, but it was also nice to get out of the PPE and go outside to get some fresh air. With the medium hardener and mild temperature I decided not to wait around for the trim stage. My testing proved that a single ply can be trimmed okay when fully cured, so no worries.

I think tomorrow I will go get another gallon of resin and maybe some of the faster hardener (in anticipation of cooler temps), along with metering pumps. I don’t mind weighing the batches, but pouring out of the cans always leave product on the rims, takes time and paper towels to wipe up and is wasteful. Plus it always seems that I have to use channel lock pliers to get the lids off the cans next time.

My confidence level is much higher now. I think I can get thru this.

Unfortunately I think I will have to pull the hatch off again so that I can properly mask the edges of the walls and the faces of the hinge spars.

I’m thinking that I will mask the tops of the galley wing walls on down a way under the hatch; then maybe just glass the edge of the hatch right down over the seal gap on to the mask. Let that cure then cut through the seal gap slot; remove the hatch; trim flush to the underside of the hatch inner skin leaving a sharp edge; maybe use that Rutan process of back gouging the edge of the ply for a fillet of epoxy filler, then glass the underside flap from the outer edge of the first ribs using the glass tape; and then cut that flush to the outside edge (or maybe glass the underside lip first with the tape then install the hatch and overlap down the side, etc.). This method could allow me to keep a crisp line at the hatch to seal gap w/o having to seriously radius the thin edge of the hatch inside skin.

All in all it was a good day in the shop. It seems like I didn’t get much done, but it was a pretty big hurdle for me and I think I made it “over the hump”.
KC
My Build: The Poet Creek Express Hybrid Foamie

Poet Creek Or Bust
Engineering the TLAR way - "That Looks About Right"
TnTTT ORIGINAL 200A LANTERN CLUB = "The 200A Gang"
Green Lantern Corpsmen
User avatar
KCStudly
Donating Member
 
Posts: 9613
Images: 8169
Joined: Mon Feb 06, 2012 10:18 pm
Location: Southeastern CT, USA
Top

Re: The Poet Creek Express - Foamie Hybrid

Postby Atomic77 » Sun Oct 11, 2015 9:34 pm

See...nothing to it. ;)
Nice work KC.
:thumbsup:
Michael

"The Strength is in the Sum of the Parts..."

The Astroliner

Follow The Astroliner Blog Here!

Check out our YouTube video
User avatar
Atomic77
1000 Club
1000 Club
 
Posts: 1463
Images: 309
Joined: Tue Oct 08, 2013 5:29 pm
Location: Fort Wayne Indiana
Top

Re: The Poet Creek Express - Foamie Hybrid

Postby KCStudly » Sun Oct 11, 2015 10:09 pm

Thanks for all of your support, Michael. I don't know about "nothing to it" but it is definitely helpful to know the pitfalls of the process and just what you can and can not get the material to do.

For instance, I had not rounded over the inside corner of the rim around the BB door frame very well, just some hand sanding. Where the three sided piece ran long out the left side jamb I should have trimmed it closer and just left a bit sticking into the door opening to trim off later; but instead I tried to wrap it out to the face of the frame all in one go. I'm pretty sure that it will have lifted along that inside edge.

I should have known better, but it is very minor in the grand scheme of things. I'll have a chance to fix it before I do the outside.
Last edited by KCStudly on Tue Oct 13, 2015 11:46 am, edited 1 time in total.
KC
My Build: The Poet Creek Express Hybrid Foamie

Poet Creek Or Bust
Engineering the TLAR way - "That Looks About Right"
TnTTT ORIGINAL 200A LANTERN CLUB = "The 200A Gang"
Green Lantern Corpsmen
User avatar
KCStudly
Donating Member
 
Posts: 9613
Images: 8169
Joined: Mon Feb 06, 2012 10:18 pm
Location: Southeastern CT, USA
Top

Re: The Poet Creek Express - Foamie Hybrid

Postby capnTelescope » Sun Oct 11, 2015 11:02 pm

Nicely done, KC. Very nice. :applause:

:beer:
I'll burn that bridge when I come to it.

Brad
ImageImageImage

Building the Bed & Breakfast
User avatar
capnTelescope
Lifetime member
 
Posts: 1218
Images: 368
Joined: Sun Jun 27, 2004 3:44 pm
Location: Round Rock, TX
Top

Re: The Poet Creek Express - Foamie Hybrid

Postby OP827 » Mon Oct 12, 2015 1:18 am

Good results KC and thanks for sharing that trick of plastic sandwiched FG, can be very handy for smaller FG areas.
BTW, I also found on my own to turn my epoxy cup upside down on the FG layup.
:thumbsup:
User avatar
OP827
Donating Member
 
Posts: 1556
Images: 405
Joined: Fri Apr 25, 2014 7:27 pm
Location: Bruce County Ontario
Top

PreviousNext

Return to Foamies

Who is online

Users browsing this forum: No registered users and 32 guests