The Poet Creek Express - Foamie Hybrid

Canvas covered foamies (Thrifty Alternatives...)

Moderator: eaglesdare

Re: The Poet Creek Express - Foamie Hybrid

Postby KCStudly » Fri Oct 10, 2014 9:01 pm

Last night I didn’t get much done, just started laying out a scenario for the rib stiffener/paper towel hanger. Mostly it was SOP (Standard 'O'-voidence Procedure); wasn’t sure I was ready to pull the hatch skin back off yet.

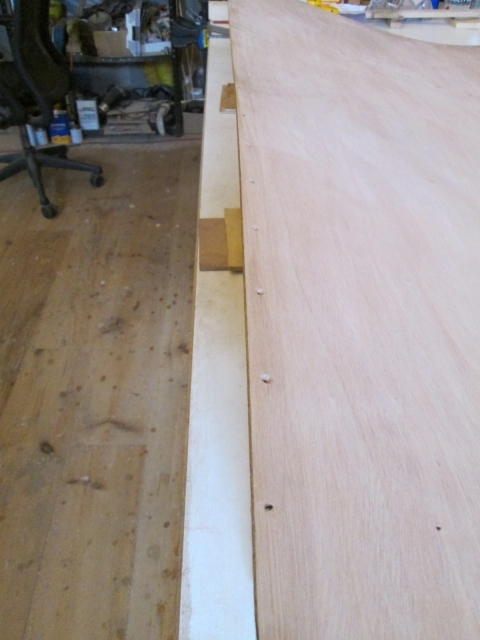
Tonight before pulling the skin off, I tried a couple of different methods to trace a line on the edge of the wall parallel to the underside of the skin. Although I had tried for 1/16 inch gap, in some places it is tighter and I don’t want the canvas to bind. I’ll probably end up hand working the high areas down to the line or maybe take the line, too, to give me a little leeway for pleats. That way when I rabbet the outside edge of the wall where the wall canvas will wrap and the seal will seat, there will also be a nice even gap at the reveal. (I should have given this all more attention in the design phase, but I still haven't pinned down just how much to allow for the canvas.)
Image
Image

Next I set the drill driver on high speed and spun all of the little screw/wooden washer fasteners out of the skin like little tops spinning madly. The skin had taken a nice set and to try and preserve this I propped it up against the front wall with a board clamped along the front edge to keep it straight. I used the same tether technique just in case.
Image
Image

So now I’m back to here.
Image

It was about this time that I realized that I never went up under the hinge spar and predrilled for the screws that need to go up thru the skin into the spar in the areas between the ribs. The panel seemed tight enough along this edge, but I suspect that the PL will expand a little.

… and I am getting really worried about how I am going to get the skin back on with adhesive without smudging it all around where I don’t want it. It will definitely take a second set of hands, and then some.

Decided that I need to wait until the skin is glued on and I can cycle the hatch to decide where the paper towel hanger needs to go; too close to the hinge and it will be too far back to reach easily when the hatch is up; too far away from the hinge and it might be too high for the wife to reach when the hatch is up.

I’m at one of those spots where you have to slow down just to be sure you are not screwing up, or painting yourself into a corner, but my goal for tomorrow (or at least the weekend) is to have the hatch skin on permanently.
Last edited by KCStudly on Thu Oct 16, 2014 10:23 pm, edited 1 time in total.
KC
My Build: The Poet Creek Express Hybrid Foamie

Poet Creek Or Bust
Engineering the TLAR way - "That Looks About Right"
TnTTT ORIGINAL 200A LANTERN CLUB = "The 200A Gang"
Green Lantern Corpsmen
User avatar
KCStudly
Donating Member
 
Posts: 9615
Images: 8169
Joined: Mon Feb 06, 2012 10:18 pm
Location: Southeastern CT, USA

Re: The Poet Creek Express - Foamie Hybrid

Postby bonnie » Sat Oct 11, 2014 7:35 am

Good idea to slow down a bit and think it through. Little things like the towel bar positioned poorly will, over time, be an aggravation.
8)
Remember, the turtle won. :)
User avatar
bonnie
Donating Member
 
Posts: 1390
Images: 107
Joined: Sun Jul 24, 2011 4:14 pm
Location: Roxana, IL

Re: The Poet Creek Express - Foamie Hybrid

Postby KCStudly » Sat Oct 11, 2014 9:10 am

:lol: The turtle won! :lol: :lol: :lol: :D
KC
My Build: The Poet Creek Express Hybrid Foamie

Poet Creek Or Bust
Engineering the TLAR way - "That Looks About Right"
TnTTT ORIGINAL 200A LANTERN CLUB = "The 200A Gang"
Green Lantern Corpsmen
User avatar
KCStudly
Donating Member
 
Posts: 9615
Images: 8169
Joined: Mon Feb 06, 2012 10:18 pm
Location: Southeastern CT, USA
Top

Re: The Poet Creek Express - Foamie Hybrid

Postby GPW » Sat Oct 11, 2014 10:02 am

... or end up in the Soup ... :o :lol: :lol: :lol:
There’s no place like Foam !
User avatar
GPW
Gold Donating Member
 
Posts: 14912
Images: 546
Joined: Thu Feb 09, 2006 7:58 pm
Location: New Orleans
Top

Re: The Poet Creek Express - Foamie Hybrid

Postby KCStudly » Sat Oct 11, 2014 10:21 am

Cajun soup? :R :lol: :lol: :lol:
KC
My Build: The Poet Creek Express Hybrid Foamie

Poet Creek Or Bust
Engineering the TLAR way - "That Looks About Right"
TnTTT ORIGINAL 200A LANTERN CLUB = "The 200A Gang"
Green Lantern Corpsmen
User avatar
KCStudly
Donating Member
 
Posts: 9615
Images: 8169
Joined: Mon Feb 06, 2012 10:18 pm
Location: Southeastern CT, USA
Top

Re: The Poet Creek Express - Foamie Hybrid

Postby GPW » Sat Oct 11, 2014 10:47 am

Oh it’s soooooo Good .... with Sherry in it ... Yum !!! not easy to make , you have to be Fast to catch those Turtles ... :lol:
There’s no place like Foam !
User avatar
GPW
Gold Donating Member
 
Posts: 14912
Images: 546
Joined: Thu Feb 09, 2006 7:58 pm
Location: New Orleans
Top

Re: The Poet Creek Express - Foamie Hybrid

Postby KCStudly » Sun Oct 12, 2014 10:33 pm

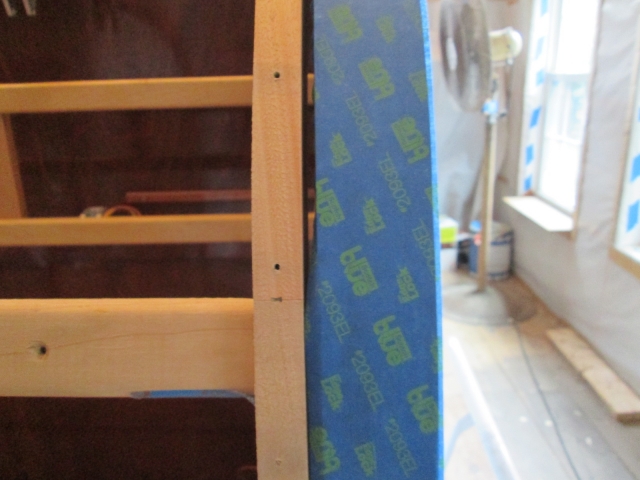
More prep for gluing the hatch skin. I used the almost 2 inch tape along the top edges of the walls. By placing the edge of the tape even with, or just slightly over the edges of the outer ribs, I was able to use a small hobby stick (tongue depressor like Popsicle stick) to fold the overhanging portion down into the gap.
Image

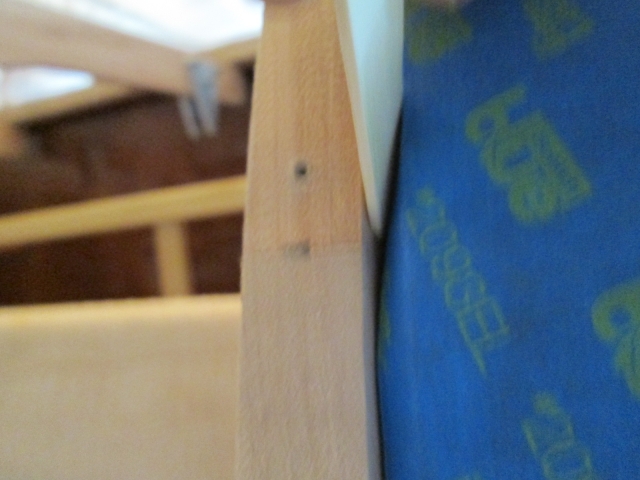
A second pass with the stick (the lighter colored piece of wood at the top of this pic) tucked the flap of tape onto the inside surface of the walls.
Image

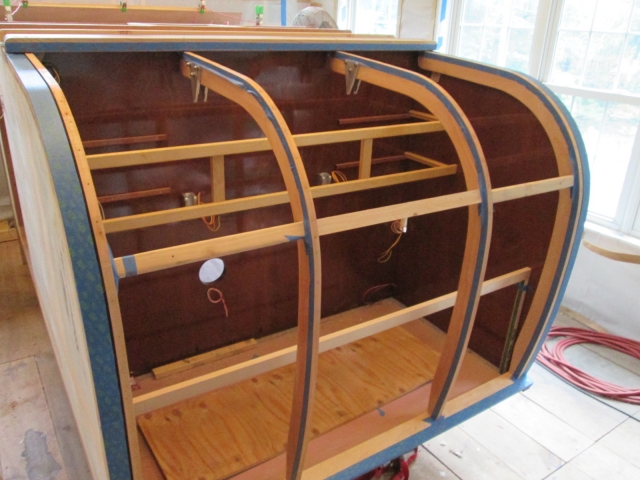
Taping the inner facing edges of the ribs was pretty straightforward, just had to do the “squirrel in a cage” routine to get the top middles.
Image

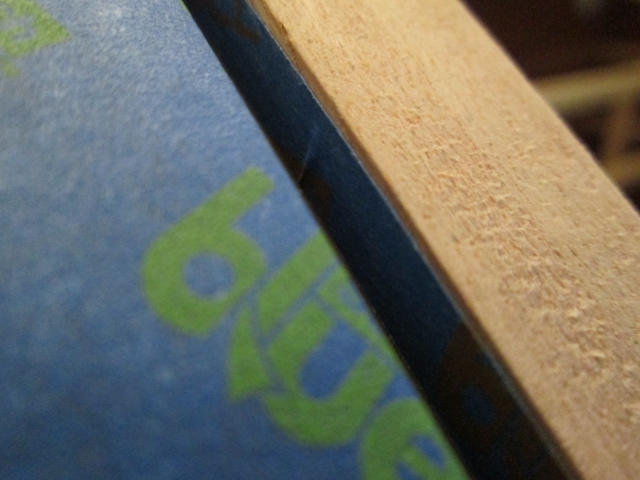
I didn’t think that I would be able to tape the outside edges of the two outer ribs (should have thought to do that before mounting the hatch frame in the galley), but with the success using the stick to tuck the wall tape, I thought maybe I could do a little something. I used the almost 1 inch tape on the tops of the ribs, bridging the gaps to the inside edges of the walls, as before; then tucked the flap of tape onto the side of the rib using the stick; then ran the razor knife using the top of the wall as a guide to trim the tape all along just below the top face.
Image
I have learned that it is far easier to deal with a small even line of glue contact; than it is to pick blue tape out of a pinched joint (the blue tape stands out like a laser beam if you don’t get it all).

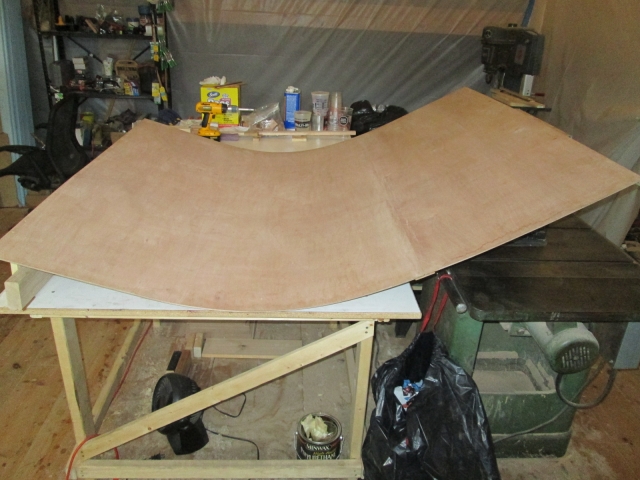
Propped the skin back up on the bench, laid out and predrilled the screw holes along the inside top edge where the skin will be screwed to the rabbet on the underside of the hinge spar.
Image
Image

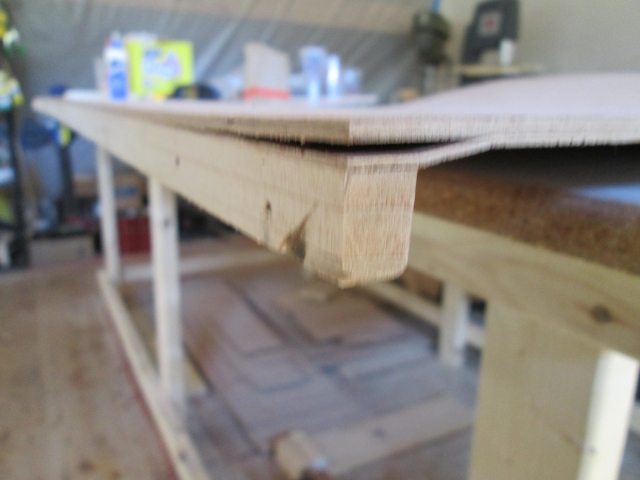
That was yesterday. Today when I went to move the skin, it got away from me when trying to flip it. The bottom edge slid along the bench until it found the gap with the table saw, where it whacked the edge of the saw and I heard a “POP”. The dark mark on the cleat is where it hit the edge of the saw. The glue joint with the cleat held up fine, but it split the first ply back a ways.
Image

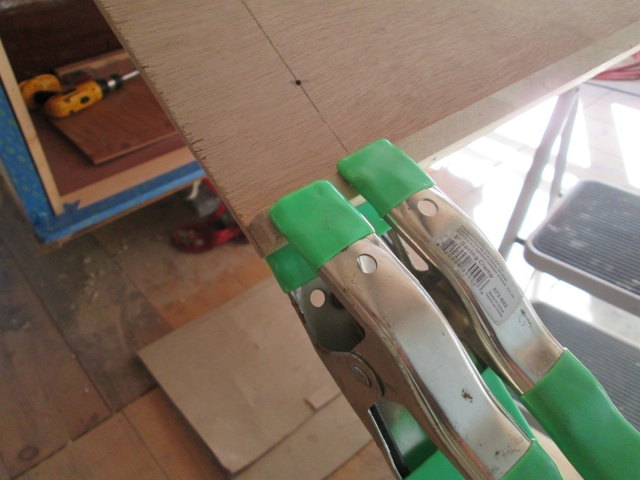
Kind of frustrating (select your favorite cuss word here), but not hard to fix. Just forced some glue into the gap, dragged the glue around in the gap with a thin blade, and clamped it up.
Image

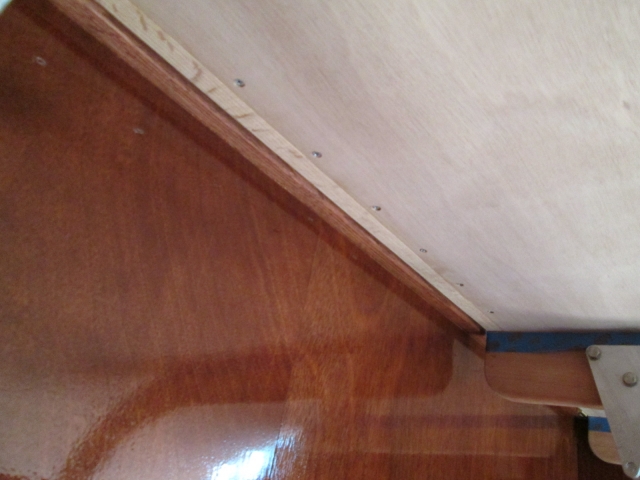
Didn’t even wait for that to cure before stuffing the skin back under the hinge spar to predrill for the screws there (squirrel took this picture after driving all of the screws for a dry run).
Image

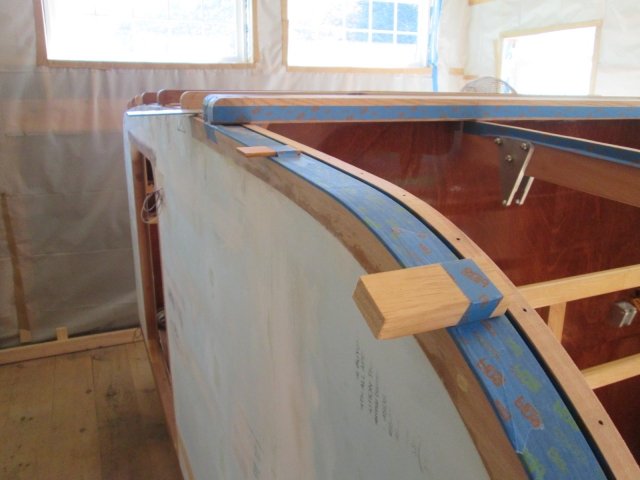
While I had the skin up there I placed these temporary spacers on the walls in the hopes that, once I had the ribs all coated with PL, I would be able to get the front edge of the skin under the hinge spar and positioned before setting it down on the ribs without smearing glue all over the underside of the skin.
Image

Well, there was no time for pics during the actual glue up. I used the home made notched credit card to spread PL Premium along the top front edge of the skin and on the tops of the ribs; stuffed the front edge and screwed the four deck screws down thru the spar and skin into the ribs; then climbed under into “the cage” and screwed up thru the skin into the spar all along the front edge. Unfortunately, I wasn’t able to control the skin well enough to keep it on my spacer blocks (Karl was on the road doing an install), so I had a couple of big smudges of PL get on the field. I kind of predicted this, so I had already staged a paper towel damped in spirits, and while I was in there I wiped it off as best that I could.

Next it was back outside where I started driving all of the screws down into the ribs, removing the spacer blocks as I went. When I reached the tighter radius I applied glue down the back sides of the ribs, spritzed the ply with water and continued screwing. There’s no glue under the cleat at this time, but I did screw it to the lower hatch spar to make sure that the skin was tight all the way to the bottom.
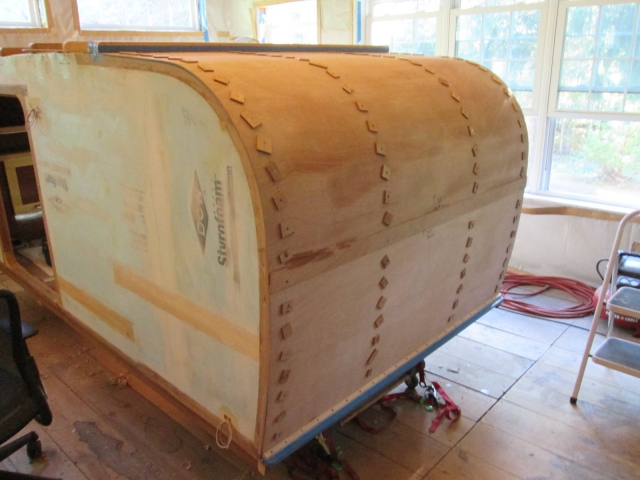
Image

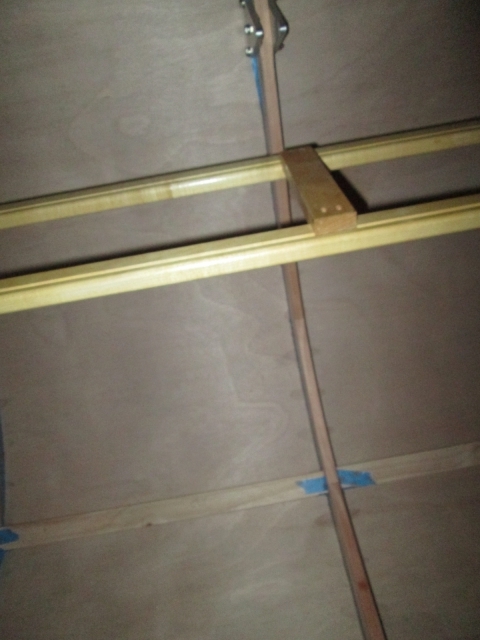
I stuck my hand thru the vent fan hole in the bulkhead to get this pic looking up. You can see some of the water marks from previous soakings seeping thru the screw holes, but experience suggests that these will be unnoticeable when the stain goes on.
Image

Before wrapping up for the day I cleaned all of the tools off of the bench and put a first coat of polyurethane on the cabin side hinge spar (no pic).

And the train kept a rollin’.
KC
My Build: The Poet Creek Express Hybrid Foamie

Poet Creek Or Bust
Engineering the TLAR way - "That Looks About Right"
TnTTT ORIGINAL 200A LANTERN CLUB = "The 200A Gang"
Green Lantern Corpsmen
User avatar
KCStudly
Donating Member
 
Posts: 9615
Images: 8169
Joined: Mon Feb 06, 2012 10:18 pm
Location: Southeastern CT, USA
Top

Re: The Poet Creek Express - Foamie Hybrid

Postby bonnie » Mon Oct 13, 2014 7:34 am

Wonderful! Really! Won't be long now, you know. Lots to do, which seems to be always. Progress is progress! :thumbsup: :applause:
Remember, the turtle won. :)
User avatar
bonnie
Donating Member
 
Posts: 1390
Images: 107
Joined: Sun Jul 24, 2011 4:14 pm
Location: Roxana, IL
Top

Re: The Poet Creek Express - Foamie Hybrid

Postby KCStudly » Mon Oct 13, 2014 8:41 am

Thank you for your constant support, Bonnie. Very appreciated. :thumbsup:
KC
My Build: The Poet Creek Express Hybrid Foamie

Poet Creek Or Bust
Engineering the TLAR way - "That Looks About Right"
TnTTT ORIGINAL 200A LANTERN CLUB = "The 200A Gang"
Green Lantern Corpsmen
User avatar
KCStudly
Donating Member
 
Posts: 9615
Images: 8169
Joined: Mon Feb 06, 2012 10:18 pm
Location: Southeastern CT, USA
Top

Re: The Poet Creek Express - Foamie Hybrid

Postby GoTurtleGo » Mon Oct 13, 2014 2:36 pm

This is amazing, Mr. KC. I sometimes have to read your posts two or three times to understand what you are talking about! But it is always worth the effort so I am continuing to learn from your detailed brain. And I always look forward to seeing how you will solve the next problem.

The build is looking great. Must be exciting to reach this stage.
GoTurtleGo
User avatar
GoTurtleGo
Teardrop Advisor
 
Posts: 77
Images: 0
Joined: Tue Jul 29, 2014 6:03 am
Top

Re: The Poet Creek Express - Foamie Hybrid

Postby KCStudly » Mon Oct 13, 2014 5:53 pm

GoTurtleGo wrote:The build is looking great. Must be exciting to reach this stage.

Thanks GTG, it is very exciting. I always love it when things end up looking like the plan!

GoTurtleGo wrote:I sometimes have to read your posts two or three times to understand what you are talking about! But it is always worth the effort...

I'm open to constructive criticism. I know that I can be verbose in my technical writing; it goes back to my days documenting submarine repairs where it was important to be specific; and I seem to be catching myself writing run on sentences more and more. I'll blame that on the casual thinking "out loud" nature of the forum medium. Perhaps it is just the trade jargon that is hanging you up?

Regardless, I am pleased that you are enjoying my efforts! :D
KC
My Build: The Poet Creek Express Hybrid Foamie

Poet Creek Or Bust
Engineering the TLAR way - "That Looks About Right"
TnTTT ORIGINAL 200A LANTERN CLUB = "The 200A Gang"
Green Lantern Corpsmen
User avatar
KCStudly
Donating Member
 
Posts: 9615
Images: 8169
Joined: Mon Feb 06, 2012 10:18 pm
Location: Southeastern CT, USA
Top

Re: The Poet Creek Express - Foamie Hybrid

Postby GPW » Wed Oct 15, 2014 7:50 am

We love the narratives , it’s why we come here to read and learn ... :thumbsup: 8) :D

KC, I was just thinking , all this is coming along so NICELY, the trailer is really going to deserve a Super Special covering job ... :thinking: I’m thinking sock-like , sewn seams , fitted like a toaster cozy ... slip it over the cabin glue it down and allow it to shrink tightly in place ... 8)

You know, a local upholstery guy should be easily and quickly able to sew something like this up out of a quality canvas ...and not for a lot of bucks either ...a Pro job... :thinking:
There’s no place like Foam !
User avatar
GPW
Gold Donating Member
 
Posts: 14912
Images: 546
Joined: Thu Feb 09, 2006 7:58 pm
Location: New Orleans
Top

Re: The Poet Creek Express - Foamie Hybrid

Postby KCStudly » Wed Oct 15, 2014 8:57 am

I'm thinking I can actually do a better job overlapping the side walls from the top; follow the techniques of those who have been successful before me. ;)

My concern for stitched seams is that if they don't fit just right they would be more of an eyesore, and could be baggy or too tight. Whereas the trimmed edges can be made to suit on the fly; fit in place.

I think it is more practical for the detailed areas around the doors and hatch to be cut and folded anyway (I plan to "back jamb" these areas with bedsheets first), so it will be more consistent to have trimmed seams everywhere else, too.

There are some really successful canvas jobs out there, and I hope to emulate them. :thumbsup:
Last edited by KCStudly on Sat Mar 28, 2015 10:45 am, edited 1 time in total.
KC
My Build: The Poet Creek Express Hybrid Foamie

Poet Creek Or Bust
Engineering the TLAR way - "That Looks About Right"
TnTTT ORIGINAL 200A LANTERN CLUB = "The 200A Gang"
Green Lantern Corpsmen
User avatar
KCStudly
Donating Member
 
Posts: 9615
Images: 8169
Joined: Mon Feb 06, 2012 10:18 pm
Location: Southeastern CT, USA
Top

Re: The Poet Creek Express - Foamie Hybrid

Postby GPW » Wed Oct 15, 2014 10:58 am

I’d think you’d want to do it “Better” 8) ... It’s all in the planning ... something you already do well eh !!! ... ;)

And a lot too depends on how you choose to do your foam “edges” ... sharp , or rounded , or in between ... :NC
There’s no place like Foam !
User avatar
GPW
Gold Donating Member
 
Posts: 14912
Images: 546
Joined: Thu Feb 09, 2006 7:58 pm
Location: New Orleans
Top

Re: The Poet Creek Express - Foamie Hybrid

Postby KCStudly » Wed Oct 15, 2014 11:16 am

The main profile corner between the walls and roof will be 3/4 inch radius. Where the canvas wraps under the lower rear and bottom corners of the hatch it will be similar (the "bumper"). The door jambs and edges of the doors; the underside of the sides of the hatch (up to the joint between the inner skin and outer ribs); the tops of the walls adjacent to the galley (between the outside face of the wall and the rabbet that I will cut later for the hatch seal to seat into... the seal being attached to the underside of the hatch) and the edge all around the underside of the floor will have as small a radius as possible... perhaps as little as 1/8 inch... so that I can still have the semblance of crisp joints.
KC
My Build: The Poet Creek Express Hybrid Foamie

Poet Creek Or Bust
Engineering the TLAR way - "That Looks About Right"
TnTTT ORIGINAL 200A LANTERN CLUB = "The 200A Gang"
Green Lantern Corpsmen
User avatar
KCStudly
Donating Member
 
Posts: 9615
Images: 8169
Joined: Mon Feb 06, 2012 10:18 pm
Location: Southeastern CT, USA
Top

PreviousNext

Return to Foamies

Who is online

Users browsing this forum: Eskapet111 and 17 guests