#1

Canvas covered foamies (Thrifty Alternatives...)

Moderator: eaglesdare

Re: #1

Postby ghcoe » Sat Mar 14, 2015 8:41 pm

Then I wired in the switch. Since this is all low power LED lighting I just used speaker wire, its cheap and easy to use and able to handle the power needed.

DSCF3449s.jpg
Light switch
DSCF3449s.jpg (91.83 KiB) Viewed 2081 times


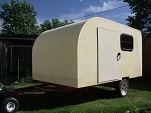
Installed the light cover and test the wires to confirm proper polarity and operation. All is good. 8)

DSCF3450s.jpg
Ready for testing
DSCF3450s.jpg (76.46 KiB) Viewed 2081 times
George.

Gorrilla Glue, Great Stuff and Gripper. The three G's of foamie construction.

My build viewtopic.php?t=54099
Working with flashing for foamie construction viewtopic.php?f=55&t=60303
Making a hot wire http://tnttt.com/viewtopic.php?f=55&t=55323
User avatar
ghcoe
1000 Club
1000 Club
 
Posts: 1946
Joined: Fri Dec 11, 2009 11:20 pm
Location: SW Idaho

Re: #1

Postby pchast » Sat Mar 14, 2015 9:14 pm

:thumbsup:
pchast
Platinum Donating Member
 
Posts: 2028
Images: 97
Joined: Mon Jan 28, 2013 5:47 pm
Location: Athens, NY

Re: #1

Postby GPW » Sun Mar 15, 2015 6:45 am

Looks Nice !!! 8)
There’s no place like Foam !
User avatar
GPW
Gold Donating Member
 
Posts: 14912
Images: 546
Joined: Thu Feb 09, 2006 7:58 pm
Location: New Orleans
Top

Re: #1

Postby lrrowe » Sun Mar 15, 2015 8:20 am

I like the foam cutter. I know it has been used before on the forum. I think I have the old soldering iron to make one. I need to do some similar cuts.
Bob

First Post on Purchase of Trailer: http://www.tnttt.com/viewtopic.php?f=42&t=60722
Hot water infloor and radiator heating project:[url]http://www.tnttt.com/posting.php?mode=reply&f=54&t=62327[/

Image Image
User avatar
lrrowe
Donating Member
 
Posts: 3285
Images: 439
Joined: Sun Feb 10, 2013 5:54 am
Location: SW Virigina
Top

Re: #1

Postby ghcoe » Sun Mar 15, 2015 8:36 am

Yes, cuts like butter :thumbsup: Just have to keep the wire fairly short, too long and it will not cut. Just take your time. Best part is that you have no foam dust to deal with.
George.

Gorrilla Glue, Great Stuff and Gripper. The three G's of foamie construction.

My build viewtopic.php?t=54099
Working with flashing for foamie construction viewtopic.php?f=55&t=60303
Making a hot wire http://tnttt.com/viewtopic.php?f=55&t=55323
User avatar
ghcoe
1000 Club
1000 Club
 
Posts: 1946
Joined: Fri Dec 11, 2009 11:20 pm
Location: SW Idaho
Top

Re: #1

Postby lrrowe » Sun Mar 15, 2015 8:49 am

ghcoe wrote:Yes, cuts like butter :thumbsup: Just have to keep the wire fairly short, too long and it will not cut. Just take your time. Best part is that you have no foam dust to deal with.


:thumbsup: :thumbsup: to the "no dust".
Bob

First Post on Purchase of Trailer: http://www.tnttt.com/viewtopic.php?f=42&t=60722
Hot water infloor and radiator heating project:[url]http://www.tnttt.com/posting.php?mode=reply&f=54&t=62327[/

Image Image
User avatar
lrrowe
Donating Member
 
Posts: 3285
Images: 439
Joined: Sun Feb 10, 2013 5:54 am
Location: SW Virigina
Top

Re: #1

Postby lrrowe » Sun Mar 15, 2015 11:16 pm

ghcoe wrote:I just order in my LED lighting today. I got (10) 20" interior lights, (4) yellow clearance lights, (4) red clearance lights, (6) white porch lights, (2) tail lights and (2) license plate lights. A grand total of $73.62.

Marker lights LED.png


George, I have tried reviewing over 100 pages with AliExpress and I cannot find these particular marker lamps with the threaded shafts. You wouldn't have the direct link to them anymore would you?

Thanks,
Bob

First Post on Purchase of Trailer: http://www.tnttt.com/viewtopic.php?f=42&t=60722
Hot water infloor and radiator heating project:[url]http://www.tnttt.com/posting.php?mode=reply&f=54&t=62327[/

Image Image
User avatar
lrrowe
Donating Member
 
Posts: 3285
Images: 439
Joined: Sun Feb 10, 2013 5:54 am
Location: SW Virigina
Top

Re: #1

Postby ghcoe » Mon Mar 16, 2015 8:52 pm

lrrowe wrote:George, I have tried reviewing over 100 pages with AliExpress and I cannot find these particular marker lamps with the threaded shafts. You wouldn't have the direct link to them anymore would you?

Thanks,


The place I got them from is not selling them right now. You can get them from other vendors though. Just watch the price it varies widely with each vendor. I got mine for $2.80 for a pair. Just type in "eagle eye LED" and it should pop up a bunch of vendors. There is a few different varieties read the descriptions. There are 3 watt and 10 watt units. I purchased the 10 watt units.
George.

Gorrilla Glue, Great Stuff and Gripper. The three G's of foamie construction.

My build viewtopic.php?t=54099
Working with flashing for foamie construction viewtopic.php?f=55&t=60303
Making a hot wire http://tnttt.com/viewtopic.php?f=55&t=55323
User avatar
ghcoe
1000 Club
1000 Club
 
Posts: 1946
Joined: Fri Dec 11, 2009 11:20 pm
Location: SW Idaho
Top

Re: #1

Postby Fred Trout » Sat May 23, 2015 1:31 pm

George, a few questions if that's ok.

Do you still plan to use carriage bolts through the existing door frame assembly as you originally intended or will the canvas hold all of it well enough ? I assume the canvas will not wrap all the way across the door edge to the far side but will stop at some point on the metal flashing inside edge.

How will you deal with the corner bead edge sticking into the doorway opening ? Is it too sharp an edge to leave raw ? Or will the rubber gasket cover it ?

I am trying to decide if I should embed wood in my door installation; it's hard to see how you plan to install the door lock mechanism without that.

Thanks for all your posts; they have been very helpful.
User avatar
Fred Trout
The 300 Club
 
Posts: 396
Joined: Fri May 08, 2015 4:30 pm
Location: SW Montana
Top

Re: #1

Postby ghcoe » Sat May 23, 2015 5:40 pm

Fred Trout wrote:George, a few questions if that's ok.

Do you still plan to use carriage bolts through the existing door frame assembly as you originally intended or will the canvas hold all of it well enough ? I assume the canvas will not wrap all the way across the door edge to the far side but will stop at some point on the metal flashing inside edge.

How will you deal with the corner bead edge sticking into the doorway opening ? Is it too sharp an edge to leave raw ? Or will the rubber gasket cover it ?

I am trying to decide if I should embed wood in my door installation; it's hard to see how you plan to install the door lock mechanism without that.

Thanks for all your posts; they have been very helpful.


Fred, the carriage bolts where originally for bolting the inside door frame to the outside wall, which at that time was going to be wood. I needed a way to attach the wood and make a solid inside door frame. Since then I decided to do away with the wood and instead made the door frame the way I described by using two pieces of flashing and a dry wall beading edge. This creates a nice channel once pop riveted together and made for a pretty strong hinge attachment point. I still plan on reinforcing hinge and door latch areas more, but just have not got to that point yet.

I have not decided how the canvas is going to go on around the door opening yet. It probably will not wrap all the way around, but stop at the inside flange.

The flange is made of drywall beading and the way it is made it wraps onto itself so there is no sharp metal edge to cut you with. It is also quite strong and should hold up to a door pressing up against it just fine.
George.

Gorrilla Glue, Great Stuff and Gripper. The three G's of foamie construction.

My build viewtopic.php?t=54099
Working with flashing for foamie construction viewtopic.php?f=55&t=60303
Making a hot wire http://tnttt.com/viewtopic.php?f=55&t=55323
User avatar
ghcoe
1000 Club
1000 Club
 
Posts: 1946
Joined: Fri Dec 11, 2009 11:20 pm
Location: SW Idaho
Top

Re: #1

Postby ghcoe » Sat May 23, 2015 6:03 pm

Fred Trout wrote:George, a few questions if that's ok.

Do you still plan to use carriage bolts through the existing door frame assembly as you originally intended or will the canvas hold all of it well enough ? I assume the canvas will not wrap all the way across the door edge to the far side but will stop at some point on the metal flashing inside edge.

How will you deal with the corner bead edge sticking into the doorway opening ? Is it too sharp an edge to leave raw ? Or will the rubber gasket cover it ?

I am trying to decide if I should embed wood in my door installation; it's hard to see how you plan to install the door lock mechanism without that.

Thanks for all your posts; they have been very helpful.


Fred, the carriage bolts where originally for bolting the inside door frame to the outside wall, which at that time was going to be wood. I needed a way to attach the wood and make a solid inside door frame. Since then I decided to do away with the wood and instead made the door frame the way I described by using two pieces of flashing and a dry wall beading edge. This creates a nice channel once pop riveted together and made for a pretty strong hinge attachment point. I still plan on reinforcing hinge and door latch areas more, but just have not got to that point yet.

I have not decided how the canvas is going to go on around the door opening yet. It probably will not wrap all the way around, but stop at the inside flange.

The flange is made of drywall beading and the way it is made it wraps onto itself so there is no sharp metal edge to cut you with. It is also quite strong and should hold up to a door pressing up against it just fine.
George.

Gorrilla Glue, Great Stuff and Gripper. The three G's of foamie construction.

My build viewtopic.php?t=54099
Working with flashing for foamie construction viewtopic.php?f=55&t=60303
Making a hot wire http://tnttt.com/viewtopic.php?f=55&t=55323
User avatar
ghcoe
1000 Club
1000 Club
 
Posts: 1946
Joined: Fri Dec 11, 2009 11:20 pm
Location: SW Idaho
Top

Re: #1

Postby Fred Trout » Sun May 24, 2015 2:59 am

Thanks, George. Did the dry wall bead come like that or did you bend it back on itself ? I have been looking at gasket material and noticed that the edge mounting gasket might be a good solution for that particular door configuration & liked what you did.

McMaster-Carr calls them "Edge-Grip with Rubber Bulb Seals"
http://www.mcmaster.com/#bulb-seals/=xbdxdi

Appears to me some additional support is required for the door lock though. I think I am just going to mount a standard lever lockset in a glued-in wood inset because I know how to do those, so no fussing around getting it right. Requires a 1 3/4 inch thick door, which should be easy with an inset. SS piano hinge riveted in should do fine for the doors.

http://www.amazon.com/Legend-809110-Scr ... hi&ie=UTF8
http://www.amazon.com/dp/B007HBNXCC/ref=biss_dp_t_asn
User avatar
Fred Trout
The 300 Club
 
Posts: 396
Joined: Fri May 08, 2015 4:30 pm
Location: SW Montana
Top

Re: #1

Postby ghcoe » Sun May 24, 2015 9:42 pm

Piano hinge should work fine. I was thinking of going with that, but my build is more on the economical build so I decided to go with screen door hinges.....well at least for now, subject to change. If I went with the piano hinge I would have to spring for the stainless steel ones and they are a bit spendy.

If it helps any, I am planning on using a screen door handle and locking device for the latch. The inside latch will catch on a adjustable piece of wood screwed to the back side of the door jamb. I will have to make a extended rod for the 2" thick door though. Should be easy enough. I am putting a locking handle on the curb side and a standard handle on the road side.

Not sure about the gasket you show if you go the same route I did. There is very little clearance from the door to the jamb. I was just going to use a small "stick on" felt type gasket. I suppose you could use a narrower door or step back the edge some to make room for a larger gasket.

The drywall beading came that way. Home Depot has a good selection of beading, but Lowe's sells the paper baked beading, but not as good of other selections.
George.

Gorrilla Glue, Great Stuff and Gripper. The three G's of foamie construction.

My build viewtopic.php?t=54099
Working with flashing for foamie construction viewtopic.php?f=55&t=60303
Making a hot wire http://tnttt.com/viewtopic.php?f=55&t=55323
User avatar
ghcoe
1000 Club
1000 Club
 
Posts: 1946
Joined: Fri Dec 11, 2009 11:20 pm
Location: SW Idaho
Top

Re: #1

Postby Fred Trout » Mon May 25, 2015 1:03 am

Thanks for taking the time to explain - appreciate it. We will see how it comes together as I build and I don't know what I don't know at this point :) There is only one door on my build so that cuts down on the cost. Can experiment with the drywall bead placement, like on the back side of the inside wall or shave off some door edge to accommodate gasket if needs be.

Tomorrow the window and door cut outs using this knife jigsaw blade - real smooth cuts with zero foam dust but it does not track well at the 4" depth because the blade seems to flex too much:

http://www.amazon.com/Bosch-T313AW3-6-I ... CSZSKXF2EK

Was easy enough to use a sanding block to make it an even cut.
User avatar
Fred Trout
The 300 Club
 
Posts: 396
Joined: Fri May 08, 2015 4:30 pm
Location: SW Montana
Top

Re: #1

Postby ghcoe » Mon May 25, 2015 9:30 am

I have found with jig saw blades is that you want to go real slow, it allows the blade to do it's job. If you press too hard then the foam resists the cut and deflects the blade more.
George.

Gorrilla Glue, Great Stuff and Gripper. The three G's of foamie construction.

My build viewtopic.php?t=54099
Working with flashing for foamie construction viewtopic.php?f=55&t=60303
Making a hot wire http://tnttt.com/viewtopic.php?f=55&t=55323
User avatar
ghcoe
1000 Club
1000 Club
 
Posts: 1946
Joined: Fri Dec 11, 2009 11:20 pm
Location: SW Idaho
Top

PreviousNext

Return to Foamies

Who is online

Users browsing this forum: No registered users and 31 guests