#1

Canvas covered foamies (Thrifty Alternatives...)

Moderator: eaglesdare

Re: #1

Postby ghcoe » Mon Mar 28, 2016 8:28 pm

GPW wrote:Any thoughts on bending/folding that flashing and using Pop rivets to make rudimentary FRAMES for the foam pieces.


Not sure if I understand what you are getting at. I did make frames to fit around the doors on my first attempt at installing hard edges.
Attachments
CAM00887a.jpg
Door framed
CAM00887a.jpg (155.57 KiB) Viewed 28069 times
Last edited by ghcoe on Tue Mar 29, 2016 8:48 pm, edited 1 time in total.
George.

Gorrilla Glue, Great Stuff and Gripper. The three G's of foamie construction.

My build viewtopic.php?t=54099
Working with flashing for foamie construction viewtopic.php?f=55&t=60303
Making a hot wire http://tnttt.com/viewtopic.php?f=55&t=55323
User avatar
ghcoe
1000 Club
1000 Club
 
Posts: 1948
Joined: Fri Dec 11, 2009 11:20 pm
Location: SW Idaho

Re: #1

Postby GPW » Tue Mar 29, 2016 6:11 am

That’s it exactly , with the potential for even more :thinking: ... You’ve done such a SUPER job developing and proving the flashing concept , I was just trying to think of further , expanded usage ... It sure seems to work well and certainly looks Great ... and won’t Rot ... 8)
There’s no place like Foam !
User avatar
GPW
Gold Donating Member
 
Posts: 14912
Images: 546
Joined: Thu Feb 09, 2006 7:58 pm
Location: New Orleans

Re: #1

Postby ghcoe » Sat Apr 02, 2016 9:38 pm

Two more days of work on the trailer. Was able to finish off the canvasing of the roof and begin the fairing in of the galley area.

DSCF4070.JPG
Roof and hatch
DSCF4070.JPG (154.35 KiB) Viewed 28004 times


DSCF4058.JPG
Before
DSCF4058.JPG (154.99 KiB) Viewed 28004 times


DSCF4060.JPG
After
DSCF4060.JPG (157.33 KiB) Viewed 28004 times
George.

Gorrilla Glue, Great Stuff and Gripper. The three G's of foamie construction.

My build viewtopic.php?t=54099
Working with flashing for foamie construction viewtopic.php?f=55&t=60303
Making a hot wire http://tnttt.com/viewtopic.php?f=55&t=55323
User avatar
ghcoe
1000 Club
1000 Club
 
Posts: 1948
Joined: Fri Dec 11, 2009 11:20 pm
Location: SW Idaho
Top

Re: #1

Postby ghcoe » Sat Apr 02, 2016 9:42 pm

Also, started to fair in the inside of the hatch too. Figured I had better do that before finishing the exterior side.

DSCF4059.JPG
Before
DSCF4059.JPG (154.2 KiB) Viewed 28002 times


DSCF4061.JPG
After
DSCF4061.JPG (155.28 KiB) Viewed 28002 times
George.

Gorrilla Glue, Great Stuff and Gripper. The three G's of foamie construction.

My build viewtopic.php?t=54099
Working with flashing for foamie construction viewtopic.php?f=55&t=60303
Making a hot wire http://tnttt.com/viewtopic.php?f=55&t=55323
User avatar
ghcoe
1000 Club
1000 Club
 
Posts: 1948
Joined: Fri Dec 11, 2009 11:20 pm
Location: SW Idaho
Top

Re: #1

Postby GPW » Sun Apr 03, 2016 8:33 am

Looking really GOOD !!! :thumbsup: 8) :D So Close now !!!
There’s no place like Foam !
User avatar
GPW
Gold Donating Member
 
Posts: 14912
Images: 546
Joined: Thu Feb 09, 2006 7:58 pm
Location: New Orleans
Top

Re: #1

Postby KCStudly » Sun Apr 03, 2016 2:57 pm

+1

Your unique technique and ability to incorporate good structural elements while still keeping things relatively simple is a real inspiration. :thumbsup:

You're almost "done".
KC
My Build: The Poet Creek Express Hybrid Foamie

Poet Creek Or Bust
Engineering the TLAR way - "That Looks About Right"
TnTTT ORIGINAL 200A LANTERN CLUB = "The 200A Gang"
Green Lantern Corpsmen
User avatar
KCStudly
Donating Member
 
Posts: 9613
Images: 8169
Joined: Mon Feb 06, 2012 10:18 pm
Location: Southeastern CT, USA
Top

Re: #1

Postby ghcoe » Sun Apr 03, 2016 8:11 pm

Thanks guys. Even though it has been slow for a relatively simple build I feel some good building techniques did come out of it. Lots of though went into each step of this build. I think that is also a lot of the reason it has taken longer than I had anticipated. Hours of thinking to accomplish minutes of work. Nearly done now and I am eagerly awaiting it's maiden voyage and then on to the next foamie. Hopefully it will not take as long.
George.

Gorrilla Glue, Great Stuff and Gripper. The three G's of foamie construction.

My build viewtopic.php?t=54099
Working with flashing for foamie construction viewtopic.php?f=55&t=60303
Making a hot wire http://tnttt.com/viewtopic.php?f=55&t=55323
User avatar
ghcoe
1000 Club
1000 Club
 
Posts: 1948
Joined: Fri Dec 11, 2009 11:20 pm
Location: SW Idaho
Top

Re: #1

Postby GPW » Mon Apr 04, 2016 6:19 am

No worries George , it’s not a race , and the longer you take , the more we get to enjoy your build progress... :thumbsup: 8)

I do heartily agree that thinking before building always gets the best results ... :thinking:
There’s no place like Foam !
User avatar
GPW
Gold Donating Member
 
Posts: 14912
Images: 546
Joined: Thu Feb 09, 2006 7:58 pm
Location: New Orleans
Top

Re: #1

Postby ghcoe » Mon Apr 04, 2016 7:21 pm

I did get most of the wiring in yesterday.

DSCF4072.JPG
Wiring
DSCF4072.JPG (153.67 KiB) Viewed 27857 times


DSCF4075.JPG
Wiring #2
DSCF4075.JPG (167.96 KiB) Viewed 27857 times


DSCF4083.JPG
Wiring hatch
DSCF4083.JPG (148.68 KiB) Viewed 27857 times
George.

Gorrilla Glue, Great Stuff and Gripper. The three G's of foamie construction.

My build viewtopic.php?t=54099
Working with flashing for foamie construction viewtopic.php?f=55&t=60303
Making a hot wire http://tnttt.com/viewtopic.php?f=55&t=55323
User avatar
ghcoe
1000 Club
1000 Club
 
Posts: 1948
Joined: Fri Dec 11, 2009 11:20 pm
Location: SW Idaho
Top

Re: #1

Postby S. Heisley » Mon Apr 04, 2016 7:27 pm

One of the many advantages of using foam is that the walls are thick enough to use those plastic electrical junction boxes! It's looking good! :thumbsup:
User avatar
S. Heisley
Super Lifetime Member
 
Posts: 8774
Images: 495
Joined: Mon Sep 17, 2007 10:02 am
Location: No. California
Top

Re: #1

Postby ghcoe » Mon Apr 04, 2016 7:30 pm

Then it was time to fill in the channeled foam. Caulking first,

DSCF4076.JPG
Caulking
DSCF4076.JPG (156.74 KiB) Viewed 27928 times


Then use flat device to squish foam back into cut out channel. This also makes the foam even with surrounding foam.

DSCF4080.JPG
Replacing channeled foam
DSCF4080.JPG (156.64 KiB) Viewed 27928 times


Almost looks perfect. Now a little sanding and filling to fair it out.

DSCF4082.JPG
Finished
DSCF4082.JPG (168.05 KiB) Viewed 27928 times
George.

Gorrilla Glue, Great Stuff and Gripper. The three G's of foamie construction.

My build viewtopic.php?t=54099
Working with flashing for foamie construction viewtopic.php?f=55&t=60303
Making a hot wire http://tnttt.com/viewtopic.php?f=55&t=55323
User avatar
ghcoe
1000 Club
1000 Club
 
Posts: 1948
Joined: Fri Dec 11, 2009 11:20 pm
Location: SW Idaho
Top

Re: #1

Postby ghcoe » Mon Apr 04, 2016 9:16 pm

S. Heisley wrote:One of the many advantages of using foam is that the walls are thick enough to use those plastic electrical junction boxes! It's looking good! :thumbsup:


Thanks Heisley,
The foam is not thick enough for a standard size electrical box. I have found these at Lowes. They are a 1 1/4" deep with no weird tabs to mess with. They are a little tight for wiring when using switches and outlets, but work great for junction boxes when routing wiring.
Image
George.

Gorrilla Glue, Great Stuff and Gripper. The three G's of foamie construction.

My build viewtopic.php?t=54099
Working with flashing for foamie construction viewtopic.php?f=55&t=60303
Making a hot wire http://tnttt.com/viewtopic.php?f=55&t=55323
User avatar
ghcoe
1000 Club
1000 Club
 
Posts: 1948
Joined: Fri Dec 11, 2009 11:20 pm
Location: SW Idaho
Top

Re: #1

Postby ghcoe » Mon Apr 11, 2016 8:43 pm

Some work done this last weekend. Started to fair the road side door for canvas. Hung the curb side door for fitting and started the canvasing process on the hatch.

DSCF4131.JPG
Draped canvas
DSCF4131.JPG (158.28 KiB) Viewed 27650 times


DSCF4134.JPG
Glued canvas
DSCF4134.JPG (157.7 KiB) Viewed 27650 times


DSCF4142.JPG
Edges canvased
DSCF4142.JPG (158.36 KiB) Viewed 27650 times
George.

Gorrilla Glue, Great Stuff and Gripper. The three G's of foamie construction.

My build viewtopic.php?t=54099
Working with flashing for foamie construction viewtopic.php?f=55&t=60303
Making a hot wire http://tnttt.com/viewtopic.php?f=55&t=55323
User avatar
ghcoe
1000 Club
1000 Club
 
Posts: 1948
Joined: Fri Dec 11, 2009 11:20 pm
Location: SW Idaho
Top

Re: #1

Postby TheOtherSean » Mon Apr 11, 2016 9:53 pm

Well done, well done. I think you may have a camper soon.
User avatar
TheOtherSean
The 300 Club
 
Posts: 407
Images: 111
Joined: Sun May 11, 2008 9:42 pm
Location: Ohio
Top

Re: #1

Postby ghcoe » Sun May 22, 2016 5:11 pm

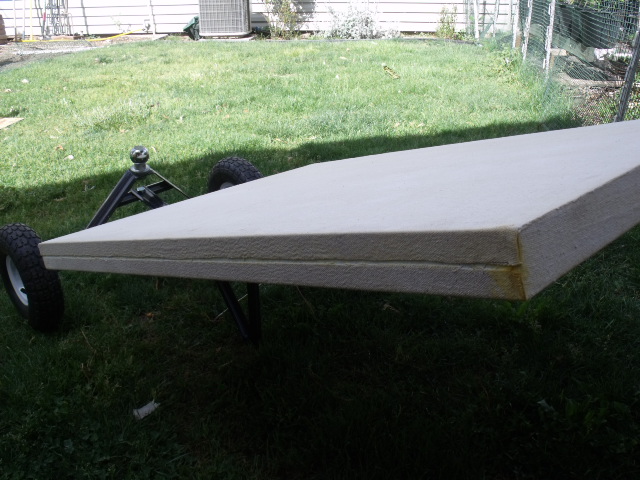
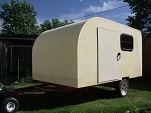
Another short day of foamie work. Was able to get the road side door canvased and remounted. Going to be a tight fit I think once the foam heats up, but right now it is ok without paint and cool. We shall see. Anyway I weight the door and it came in at 6.8 lbs.

DSCF4245.JPG
Door
DSCF4245.JPG (154.88 KiB) Viewed 27233 times


Worked on getting the hatch covered with canvas. Went smooth and fast luckily since the rain storms moved in.

Working with the canvas on the hatch was the same as the roof. I placed the hatch on a table so that it was flat. Then I place the canvas on top and centered it to where I wanted it to be.
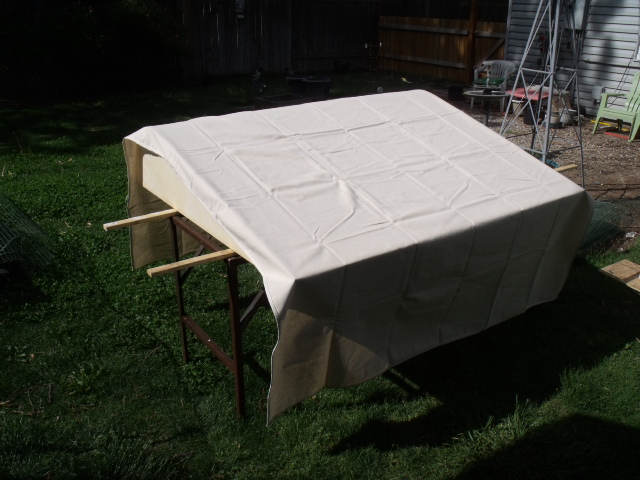
DSCF4244.JPG
Canvas centered
DSCF4244.JPG (157.64 KiB) Viewed 27233 times


Then I folded the canvas into small folds. In this case I folded from both edges.
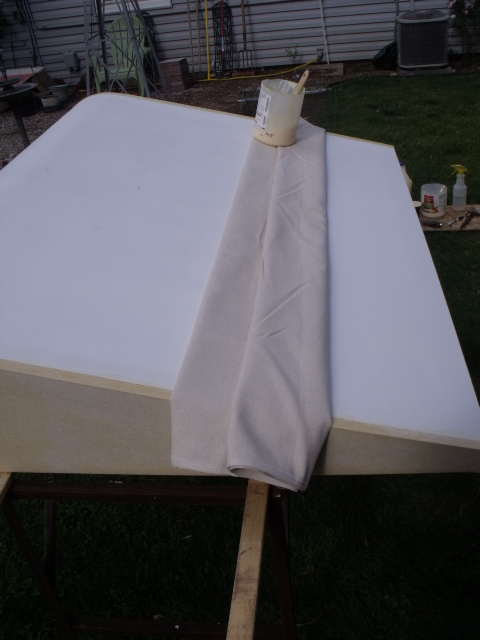
DSCF4247.JPG
Canvas folded
DSCF4247.JPG (157.82 KiB) Viewed 27233 times
George.

Gorrilla Glue, Great Stuff and Gripper. The three G's of foamie construction.

My build viewtopic.php?t=54099
Working with flashing for foamie construction viewtopic.php?f=55&t=60303
Making a hot wire http://tnttt.com/viewtopic.php?f=55&t=55323
User avatar
ghcoe
1000 Club
1000 Club
 
Posts: 1948
Joined: Fri Dec 11, 2009 11:20 pm
Location: SW Idaho
Top

PreviousNext

Return to Foamies

Who is online

Users browsing this forum: No registered users and 4 guests