Sealing Fantastic Fan & Canvas

Canvas covered foamies (Thrifty Alternatives...)

Moderator: eaglesdare

Sealing Fantastic Fan & Canvas

Postby StanDahl » Fri Jan 06, 2017 12:28 pm

I'm about to put the Fantastic fan onto the roof of my camper, but I'm not sure how the canvas wrap will work with this. The RV parts supply guy that I bought the fan from says something about using a foam ring (which I thought was part of the packing material - the directions are pretty minimal - it seems more likely that it would be used on the interior), and then this rolled up tape-goo that he sells. That would be topped off with some self-leveling stuff that comes in a large tube, which I'm not sure is necessary.

I'm wondering how to then wrap the canvas around the base. I figure that the canvas would go up under the dome, but it doesn't seem like TB2 would stick to the plastic fan exterior. Use Gripper? Then there would also be gaps in the corners where the canvas would have to be patched.

I searched, but couldn't find an answer. Any tips?

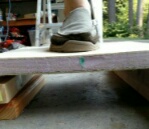
P1061263 copy.JPG
P1061263 copy.JPG (141.34 KiB) Viewed 573 times


(Yes, I realize I have to put a wood block in the left side corner.)
User avatar
StanDahl
Teardrop Advisor
 
Posts: 69
Joined: Sun Nov 20, 2011 5:41 pm
Location: So. Cal.

Re: Sealing Fantastic Fan & Canvas

Postby yrock87 » Fri Jan 06, 2017 12:37 pm

I would foam the roof to the 14x14 hole for the fan. completely build up your roof with canvas, TB2, paint ext to make a complete, water proof roof (minus the 14x14 hole). THEN attach the fantastic on top of the finished roof skin. The plastic "ring" of the fan housing will rest on top of the complete roof, and the butyl tape (goo tape you mention) and self leveling sealer will create the water tight bond between the roof and the fantastic housing. The plastic ring of the fan goes on top of the roof skin, not the other way around.

This has several benefits to trying to build the fantastic ring/housing into the roof skin. A. if the fantastic needs to be replaced, or wiring needs to be accessed, you don't have to rip up your roof. B. it negates your concerns about TB2 adhering to the plastic. C. less chance of leak in the future and easier diagnosis of leaks. D. following this traditional install gives you access to the experience and expertise from hundreds of other installs.
The SJ Cruiser, my 5x10 Benroy build http://www.tnttt.com/viewtopic.php?f=50&t=64944
User avatar
yrock87
Teardrop Master
 
Posts: 286
Images: 97
Joined: Sat Oct 31, 2015 2:32 pm

Re: Sealing Fantastic Fan & Canvas

Postby StanDahl » Fri Jan 06, 2017 3:15 pm

Well dang, that makes so much sense that I'm embarrassed I didn't think of it! :oops:

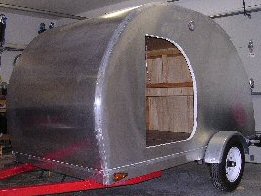
I guess I wanted to mount it first because the camper is so tall I wasn't sure I'd be able to deal with it easily once that segment of the roof was glued in place. Here's what it looks like today:

Day 42b copy.JPG
Day 42b copy.JPG (89.16 KiB) Viewed 541 times


I guess I should start a build journal, but I've been working on it for nearly a year and now I'm too busy working on it to try to meet a deadline. Gotta get it wrapped by the middle of next month.
John
User avatar
StanDahl
Teardrop Advisor
 
Posts: 69
Joined: Sun Nov 20, 2011 5:41 pm
Location: So. Cal.
Top

Re: Sealing Fantastic Fan & Canvas

Postby ghcoe » Fri Jan 06, 2017 5:22 pm

Looks Great! :thumbsup:

I installed my roof vent with Gorilla Glue construction adhesive. I have not done it yet, but I will be using Dap Caulking to seal around the edges and the screw holes. I'll watch for leaks at that point.

DSCF4638.JPG
DSCF4638.JPG (150.32 KiB) Viewed 523 times
George.

Gorrilla Glue, Great Stuff and Gripper. The three G's of foamie construction.

My build viewtopic.php?t=54099
Working with flashing for foamie construction viewtopic.php?f=55&t=60303
Making a hot wire http://tnttt.com/viewtopic.php?f=55&t=55323
User avatar
ghcoe
1000 Club
1000 Club
 
Posts: 1942
Joined: Fri Dec 11, 2009 11:20 pm
Location: SW Idaho
Top

Re: Sealing Fantastic Fan & Canvas

Postby Don L. » Fri Jan 06, 2017 10:09 pm

I second Yrock87's comments.

I used some polyurethane caulk to seal mine.

One note; I had to screw the flange of the vent on top to something since the inside trim ring was not intended to receive the screws from above so I cut a kerf into the edge of the foam all the way around the hole edges and inserted some 1/4" plywood strips to accept the screws. I wanted the plywood to expand the thickness of the foam so that the screws cinched down from the outside would not only hold the screws but increase the thickness of the foam in order to shed water away from the vent.

I had heard others here say that water can pool around the vent if it cinches (compresses) the foam right there at the flange or frame.

I cut the groove into the edge of the foam with a little 3" diameter circular saw blade meant for a dremel or something like that and chucked it into my cordless drill. It was a little uneven going but it was really fast and easy cutting with that.
Link to my foamie camper build viewtopic.php?f=55&t=67321
instagram #don_leister_violin.rva
Don L.
Teardrop Master
 
Posts: 230
Images: 0
Joined: Sat Jan 02, 2016 7:11 am
Location: Richmond, VA
Top


Return to Foamies

Who is online

Users browsing this forum: No registered users and 10 guests