Removable Foamie camper. New Build

Canvas covered foamies (Thrifty Alternatives...)

Moderator: eaglesdare

Re: Removable Foamie camper. New Build

Postby zzzizxz » Sat Mar 23, 2019 8:03 pm

Today I started gluing things together!

Decide to start with the long sides first. Decided the fastest way was to clamp both sides at the same time, keeping them separate using some plastic.
Image

Kept going with the smaller rails, but kept these separate with parchment paper.
Image

The plastic seems to have kept the Great Stuff from setting up, but the parchment paper didn't have the same problem.
Image
Image

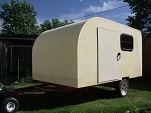
I figured out that the scrap cutouts from the wheel wells were the exact shape as the front curve. Decided recycling them was the best thing, so I cut the three I had in half, and cut out a couple more.
Image
Image

After the GS residue dried, I tried again, but this time without the plastic. Definitely worked better this time!
Image
zzzizxz
Teardrop Advisor
 
Posts: 86
Images: 142
Joined: Wed Oct 10, 2018 4:44 am

Re: Removable Foamie camper. New Build

Postby GPW » Wed Mar 27, 2019 6:34 am

Maybe I missed something , but are you going to put some kind of rubber seal on the floor-wall join where it’s removable ? … It is a Cool idea … the foam Cabins are usually pretty Light by themselves …
There’s no place like Foam !
User avatar
GPW
Gold Donating Member
 
Posts: 14912
Images: 546
Joined: Thu Feb 09, 2006 7:58 pm
Location: New Orleans

Re: Removable Foamie camper. New Build

Postby zzzizxz » Thu Mar 28, 2019 9:40 pm

GPW wrote:Maybe I missed something , but are you going to put some kind of rubber seal on the floor-wall join where it’s removable ? … It is a Cool idea … the foam Cabins are usually pretty Light by themselves …


No, the whole cabin will be able to come off the trailer, floor and all.
zzzizxz
Teardrop Advisor
 
Posts: 86
Images: 142
Joined: Wed Oct 10, 2018 4:44 am
Top

Re: Removable Foamie camper. New Build

Postby zzzizxz » Thu Mar 28, 2019 10:07 pm

Glued the rails to the floor today! I glued the rails down, then pinned them, so didn't need to clamp it. I did need two clamps to glue the side rails to the front rail.
Image

I remembered to put a piece of plastic down on the trailer bed before I glued the rails, so I was able to glue the floor pieces together, without worrying about gluing it all to the trailer. I did need a little weight to make sure the foam flooring was even with each other.
Image

After letting it cure for about 5 hours, I had my brother help me test it out. I pulled the pins out of the side rails, and each of us got on one side, and the camper came right up off the trailer! It went back in with no trouble, either.
While the camper part isn't completely finished, I have to call this a successful proof of concept!

Since I'll need to work on the underside next, I had him help me pull it back up one more time, and rest on the rails. You should be able to see light coming through between the trailer floor and the foam. Having it halfway out like this will let me flip it over to apply the canvas by myself, or maybe with the kids to help.

Image
zzzizxz
Teardrop Advisor
 
Posts: 86
Images: 142
Joined: Wed Oct 10, 2018 4:44 am
Top

Re: Removable Foamie camper. New Build

Postby CharlieL » Fri Mar 29, 2019 6:47 pm

Apropos of nothing. I see where Home Depot is carrying thick cardboard rolls (35 " by 60 feet} , Was remembering some testing that said the thicker cardboard paper (chipboard) really added strength to the walls of the build they were working on. Just a thought1
charliel
Last edited by CharlieL on Sun Mar 31, 2019 3:39 pm, edited 1 time in total.
Someday I will get off my rump and jump into a build, Thanks folks, for the info. and the things y'all do for one another

Charlie
CharlieL
Teardrop Builder
 
Posts: 28
Joined: Sun Sep 16, 2012 3:36 pm
Location: Mero Atlanta
Top

Re: Removable Foamie camper. New Build

Postby zzzizxz » Sat Mar 30, 2019 10:38 am

I'm not totally sure what I'm going to do about the cutout for the wheel well. I was going to glue in a piece of 1/4 thick foam there, and just wrap the canvas up and around. Looking at it though, I don't know if I will be able to fit foam in there.
I'll have to think on this for a minute while I get the front curve started.
zzzizxz
Teardrop Advisor
 
Posts: 86
Images: 142
Joined: Wed Oct 10, 2018 4:44 am
Top

Re: Removable Foamie camper. New Build

Postby stcyrwm » Sat Mar 30, 2019 7:31 pm

Wow, very cool. Can't wait to see your continued progress!

Thanks, Bill
stcyrwm
Teardrop Builder
 
Posts: 34
Joined: Mon Feb 04, 2019 4:01 pm
Top

Re: Removable Foamie camper. New Build

Postby GPW » Sun Mar 31, 2019 5:43 am

ZZZ, how about a foam “wall” on the inside of the wheel well ??? Forming an enclosed niche for the well to fit into . :thinking:
There’s no place like Foam !
User avatar
GPW
Gold Donating Member
 
Posts: 14912
Images: 546
Joined: Thu Feb 09, 2006 7:58 pm
Location: New Orleans
Top

Re: Removable Foamie camper. New Build

Postby zzzizxz » Sun Mar 31, 2019 1:16 pm

GPW wrote:ZZZ, how about a foam “wall” on the inside of the wheel well ??? Forming an enclosed niche for the well to fit into . :thinking:


I was planning on having the interior wall being luan board. I've considered gluing a sheet of 1/2 inch foam on the inside, but that may give me problems with installing the doors. I don't know that I could get a trim ring of 2 3/4.

Maybe I'll just have the interior door trim recessed into the wall and have the 1/2 foam and luan sticking out a bit. I'd hate to lose 1.5 inches inside though.

I could also just use 1/2 foam at the wheel well, and cut the luan around that foam. I would only lose 1/2 inch between the wheels, which wouldn't be terrible, and would make life a whole lot easier.
I'll have to think about what that would look like for a while.
zzzizxz
Teardrop Advisor
 
Posts: 86
Images: 142
Joined: Wed Oct 10, 2018 4:44 am
Top

Re: Removable Foamie camper. New Build

Postby zzzizxz » Thu Apr 04, 2019 11:53 am

Got the front curve started. I wanted this lower part done, so I can canvas this once with the underside canvas, then a second time when I canvas the roof, for extra durability from thrown objects.

Image

Started lightly sanding the underside in preparation for canvas. The sander and shop-vac combination has been working really well, and leaving very little dust. I also hook the shop vac up to the jigsaw whenever I make cuts, and it gets almost everything.
After sanding everything, I wiped it down really well with denatured alcohol.

Image
Image

Then, I put on a coat of Gripper.

Image

Next step will be to canvas the cutouts where the trailer hinges are, followed by canvassing the whole bottom.
zzzizxz
Teardrop Advisor
 
Posts: 86
Images: 142
Joined: Wed Oct 10, 2018 4:44 am
Top

Re: Removable Foamie camper. New Build

Postby GPW » Fri Apr 05, 2019 6:52 am

That’s coming along Nicely !!! 8)
There’s no place like Foam !
User avatar
GPW
Gold Donating Member
 
Posts: 14912
Images: 546
Joined: Thu Feb 09, 2006 7:58 pm
Location: New Orleans
Top

Re: Removable Foamie camper. New Build

Postby zzzizxz » Fri Apr 05, 2019 12:32 pm

GPW wrote:That’s coming along Nicely !!! 8)


Thank you! I'm pretty excited about it all. Just put in my order for two doors and a stargazer window yesterday.
zzzizxz
Teardrop Advisor
 
Posts: 86
Images: 142
Joined: Wed Oct 10, 2018 4:44 am
Top

Re: Removable Foamie camper. New Build

Postby zzzizxz » Fri Apr 05, 2019 9:27 pm

Nothing too exciting. I used lint-free shop rags to line the inside of the hinge cutouts. Glued them in with full-strength TBII.

Image

After letting the glue dry overnight, I trimmed the extra cloth, and then coated them with a second coat of full-strength glue.

Image

The canvas will be folded over the edges and glued down for a fully waterproof underside. Not sure the best way to have the canvas go around the side-rail posts though. Might just have to glue the canvas down in small sections to minimize any potential shrinkage, and cut out holes for the posts.
zzzizxz
Teardrop Advisor
 
Posts: 86
Images: 142
Joined: Wed Oct 10, 2018 4:44 am
Top

Re: Removable Foamie camper. New Build

Postby ghcoe » Sat Apr 06, 2019 10:08 pm

Looking good. :thumbsup:
George.

Gorrilla Glue, Great Stuff and Gripper. The three G's of foamie construction.

My build viewtopic.php?t=54099
Working with flashing for foamie construction viewtopic.php?f=55&t=60303
Making a hot wire http://tnttt.com/viewtopic.php?f=55&t=55323
User avatar
ghcoe
1000 Club
1000 Club
 
Posts: 1947
Joined: Fri Dec 11, 2009 11:20 pm
Location: SW Idaho
Top

Re: Removable Foamie camper. New Build

Postby zzzizxz » Mon Apr 29, 2019 8:38 pm

Just some more little stuff. Working here and there, trying to get the bottom canvassed so I can flip it over and start work on the top.

I grippered the interior.

Image

Then glued down bedsheet to the floor.

Image

I want to make absolutely sure that this is completely waterproofed from both sides. Especially since there is the chance that there could be moisture sitting between the bottom of the camper pod and the floor of the trailer.

Tonight I started gluing plastic drywall corner bead onto the edges using gripper.

Image

Image

I used corsage pins to hold it in place while it dries. I got this idea from ghcoe, and definitely think it will make the corners look much nicer. It will also give the corners some more support, as that will be where it gets lifted from to put on and take off.
zzzizxz
Teardrop Advisor
 
Posts: 86
Images: 142
Joined: Wed Oct 10, 2018 4:44 am
Top

PreviousNext

Return to Foamies

Who is online

Users browsing this forum: No registered users and 24 guests