I am well on the way on my build and have several things done so here is my build progress over the last several months to get you up to date and to provide my (hopefully beneficial to someone) contribution to this great forum.
I started with a card board mockup last Christmas to decide if a 5x10 was the size I wanted to build and if our camping gear would fit. Over the winter I bought and read Steve Fredericks manual and then built a temporary 4’x10’ work table as he and others suggested. I made a full size drawing of what I wanted. Paper is cheaper and easier to change with an eraser than wood. I changed it many times as I drew it up, showed it to my wife and kids and got their opinions and incorporated my ideas from my research from this web site. I prioritize our wants/desires and studied it some more. The picture below doesn't do the drawing justice but you get the idea.
During March and April as I figured out what parts I wanted to use I started buying lights, handles, hinges, windows etc. As each of the parts arrived in the mail I adjusted the full size drawing as needed to accommodate the real parts sizes and mounting locations. Below are several pictures of the parts I picked for my build.
These are taillights and backup light to match/coordinate with my Jeep (They will go into the galley hatch door), third brake light with adapter, over 80" wide center light, side marker lights and rear taillights for under frame
This is my reading lights which I converted to LED and porch lights for the outsides
These are my slides for coolers pull outs
These are my stainless wall plates with grey outlets since they match the interior and planned grey carpet better than white or ivory, battery tender and Fuse panel
These are the door piano hinges, drip rails for over windows, side table mounts and galley lid latches
I bought off ebay a set of three older RV lights and ordered some cheap 48 LED panels and converted them to LED. One will be used inside the cabin and the other two for the galley
Even though my lights have switches on them I decided I would like a two way switch for the cabin by each door and a single switch for the galley lights. I located some small switches and made a few light switch panels out of aluminum. I scuffed the aluminum surface switch plates with a DA sander and then cleaned and primed with Bull Dog adhesion promoter and spray painted with clear coat wheel paint.
I bought crank out windows, Hurricane hinge and door handles from Grant Whip at Lil' Bear. I made some aluminum striker plates for the inside and finished like I did the switch panels
I bought a small stainless steel boat hand rail and made an aluminum plate to use as a galley hatch handle.
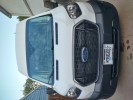
From eBay I bought 2" wheel spacers so my Jeep wheels will clear the hubs
Once I settled on the design I then joined two sheets of ¼’ plywood with fiberglass cloth and epoxy to make a 4’x11’ panel and laid out my profile, cut the template out and set it against my Jeep to decide if it is what we really wanted to build. I decide I liked the profile and size and thought it would go well with my Jeep. The front was pushed out to allow a shelf and storage compartment up front but not over our heads while lying down. The top was left flat for a sunroof, vent and to maximize head room. The back end was copied off a generic Benroy pattern to maximize galley space and room for two cooler slide outs.
I then cut out the door and laid out my concept for gear shelf, head board storage etc. as shown in the picture
I also laid out a rough idea of my galley. It will have two cooler slide outs. One on each side. A shelf for food prep and a place for propane stove, a few drawers for small items and baskets for the rest. I also will have room to store a pull out shelf that will mount on the outside of the teardrop for cooking.
In April I started building my teardrop inside out. I started with the bulk head between the galley and bed as a test panel. I built a 1"x3" frame and used ¾" foam insulation and covered with 1/8” Baltic Birch (BB) plywood glued together with PL adhesive. I wanted to test what 1/8" BB would be like. It was plenty strong. My wife and I decided we needed some color on the plain Baltic Birch and settled on a water based light "Summer Oak" stain from Rustoleum and then finished with several coats of Behr satin water based polyurethane .
Since we typically camp with a duffle bag per person and I wanted to save the weight I decided I wanted a shelf instead of cabinets at the foot of the bed. Here is my storage shelf I built out of 1"x2" frame and ¼" plywood. I stained and finished in polyurethane.
I then built a shelf to go up top over our heads with a set of reading lights underneath. It was built out of 1x2 frame and ¼ BB plywood.
I original stated with a generic Benroy style profile but later decided I wanted some storage in front of the bed as a head board and shelf. Here is the headboard panel I built. It will have a small ¼ plywood shelf once mounted. I created cutouts for drawer pulls and I didn’t want any handles sticking out to hit our head on.
I also located a sun roof on eBay and built a frame for it and my roof fan. I glued 1"x2" clear pine together for the spars. I plan to let them sit until needed and see which ones stay straight.
On my work bench I created a wiring harness for the trailer lights frame. I decide I wanted a 7 wire junction box under the floor in front of the trailer and one and near the left rear under the Galley. This was to allow me to put a battery in the galley or on the tongue. I also built a wire harness for the stop taillights, backup lights and other lights to be mounted in the Galley. My plan is to run wires from the junction box up to a connector between galley and hatch door and terminate at a terminal strip inside the galley hatch door. I will then wire the lights in the galley hatch to the terminal strip.
In July After we got back home from a 3 week family camping vacation to Northern California to take the kids to all of the National parks I ordered my metal for my trailer frame. I had been working on my design and finalized it and during the month of July welded my frame. I used 14 gauge 2"x2" square tubing for outer frame and first cross member and 1/8" 2"x2" angle iron for the middle cross members. I determined how to mount my lights, stabilizers, axle etc. based on research from this web site.
I wanted a trailer that was able to go on wash board roads, mild off road trails and highways. Originally I was going to use a 3500 lb axle so I could get the larger electric brakes and mount 5x4 ¼ Jeep wheels. My research and past experience with trailers and a spring system says it bounces too much when empty and even with shocks I wasn’t sure it would work as I wanted. I did more research on different axle type and decide I wanted to try the Timbren axles system. I ordered from E trailer a Timbren Axless system (ASR2KHDS01). It is a 3500lb axle with de-rated 2000 lb rubber springs. It accepts the larger hubs and electric brakes and with a 2” wheel spacer will allow me to mount matching Jeep wheels. I mounted my axle using the trailer balance spreadsheet and then etched and painted my frame with TP Rust Cover paint in satin black.
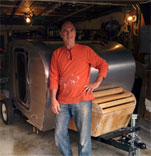
After painting I installed and wired my lights. I then took it for a test drive around the neighborhood. My side panels will cover the frame so the lights I made small mounts and welded them below the frame. I then made a dolly so I could remove the axles to fit through the double door to my utility room so I can assemble the body over the winter and roll out in the spring, bolt on the axles and finish welding the cross bar and take it on its maiden outing.
In late July/Early August built, my floor frame out of 1"x4" and 1"x3" with ¾” foam insulation and covered with 1/8” Baltic Birch (BB) plywood on both sides. I then covered the bottom with 7 oz fiberglass cloth and Raka epoxy. I then rolled on a coat of duplicator bed liner to make it black and provide additional protection. I put epoxy on top and finished with a coat of satin polyurethane. I mounted it to the frame with several elevator bolts.
Here is a picture of my finished frame with profile template.
[img]http://www.tnttt.com/gallery/image.php?album_id=3166&image_id=111037&display=popup[/img
I bought some 1/8” Baltic Birch from Austin Hardwoods in Denver Colorado and glued together with fiberglass cloth and epoxy two 4’x11’ panels for the side skins
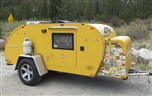
I used my template and cut out the side panels and door skins with a router bit. I had one issue as the stop for the top bearing on the router bit came loose and I gouged my side panels a little bit. Since I plan to paint with smooth Monstaliner bed liner paint to match my Jeep yellow I just filled the gouge with epoxy filler and smoothed the edges.
This past weekend I bought some 1"x4" and 1"x3" pine boards and laid out my side panel frames on top of my template. I use biscuits and glued them together on the table and once dry removed them. I sanded the side smooth to remove glue spills. I also glued the door frames together waiting on them to dry.
Well that brings you up to my current build progress so far. I will post an update once I make some more progress and have new pictures
Dan
 Looks like a great start
  I hope you post again before you are camping in it.
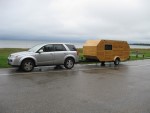
 Fred
Fred 
 I'm interested in the timbren axle too.