
 What a RIPOFF!!! Here clear wood is only a little more (like 10-15%) than the regular knotty wood ...
Moderator: eaglesdare
![]() by GPW » Tue Jan 28, 2014 6:28 am
by GPW » Tue Jan 28, 2014 6:28 am
What a RIPOFF!!! Here clear wood is only a little more (like 10-15%) than the regular knotty wood ...
![]() by jseyfert3 » Tue Jan 28, 2014 12:44 pm
by jseyfert3 » Tue Jan 28, 2014 12:44 pm
GPW wrote:I’d find a real lumberyard !!!!!!!!!! .... It’s Totally Ridiculous to pay 5X for the clear lumber...

![]() by jseyfert3 » Tue Jan 28, 2014 2:55 pm
by jseyfert3 » Tue Jan 28, 2014 2:55 pm


![]() by KCStudly » Tue Jan 28, 2014 3:21 pm
by KCStudly » Tue Jan 28, 2014 3:21 pm


![]() by GPW » Tue Jan 28, 2014 7:23 pm
by GPW » Tue Jan 28, 2014 7:23 pm
 ... JMHO...
![]() by be_a_jayhawk » Tue Jan 28, 2014 8:49 pm
by be_a_jayhawk » Tue Jan 28, 2014 8:49 pm

![]() by jseyfert3 » Wed Jan 29, 2014 10:56 pm
by jseyfert3 » Wed Jan 29, 2014 10:56 pm
![]() by KCStudly » Thu Jan 30, 2014 12:22 am
by KCStudly » Thu Jan 30, 2014 12:22 am
![]() by tac422 » Thu Jan 30, 2014 1:20 pm
by tac422 » Thu Jan 30, 2014 1:20 pm

![]() by jseyfert3 » Sat Feb 01, 2014 9:47 pm
by jseyfert3 » Sat Feb 01, 2014 9:47 pm
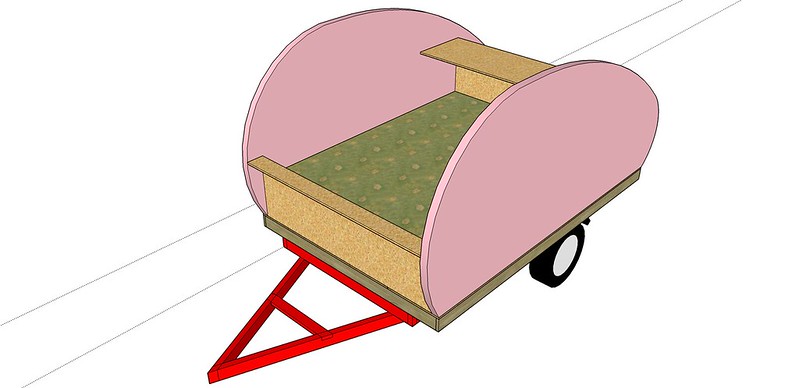
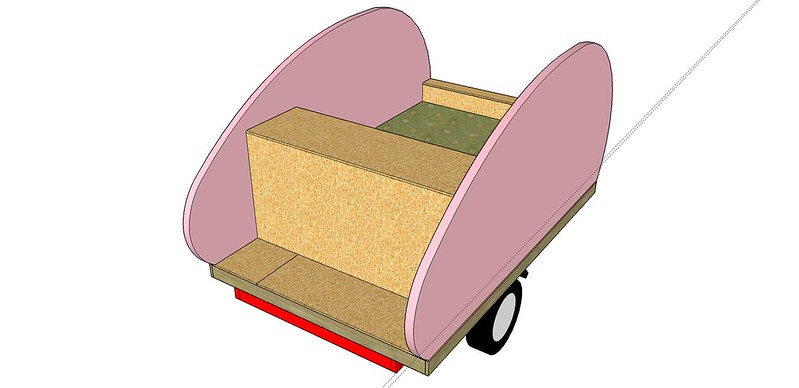
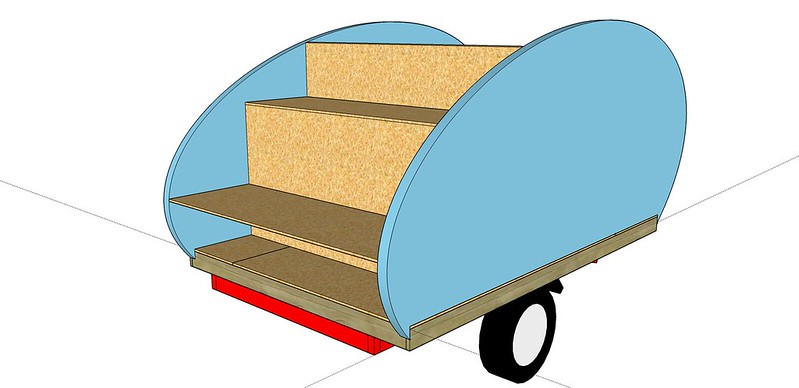
KCStudly wrote:Look here, an original profile is no small feat! Don't discount it. This could be the single biggest thing that makes or breaks the first and overall impression of your build. Really.
Take the time to make sure that you are happy with it. It will set the tone for your entire build. Do not under value it.
Yes, playing with radii and center locations and ellipsis can become maddening, but you must not "settle" until you are truly satisfied.
You really do appear to have gotten a true handle on Sketchup; use it to your advantage and seal the deal.
That said, what you have shown looks pretty damn good. It proves to me that you know what you are doing and can make whatever changes you need to to get that extra 5/ct to make yourself truly happy. My personal preference is not so concerned with covering the frame because I would rather crash steel on stone than wood, but that is a function of my intended use and vision, as much as yours is for you.
What I have learned is that this is a much more involved and longer process than we might have originally thought (... depends on your goals and threshold of quality, of course), so take your time and please yourself.
(This is not my first model)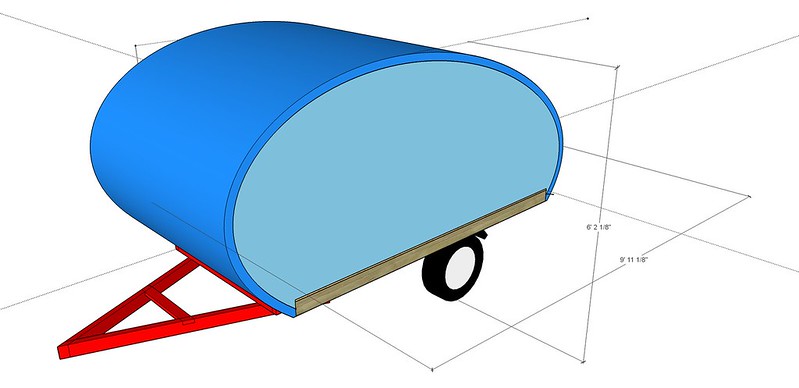


![]() by GPW » Sun Feb 02, 2014 6:30 am
by GPW » Sun Feb 02, 2014 6:30 am

![]() by jseyfert3 » Sun Feb 02, 2014 6:55 pm
by jseyfert3 » Sun Feb 02, 2014 6:55 pm
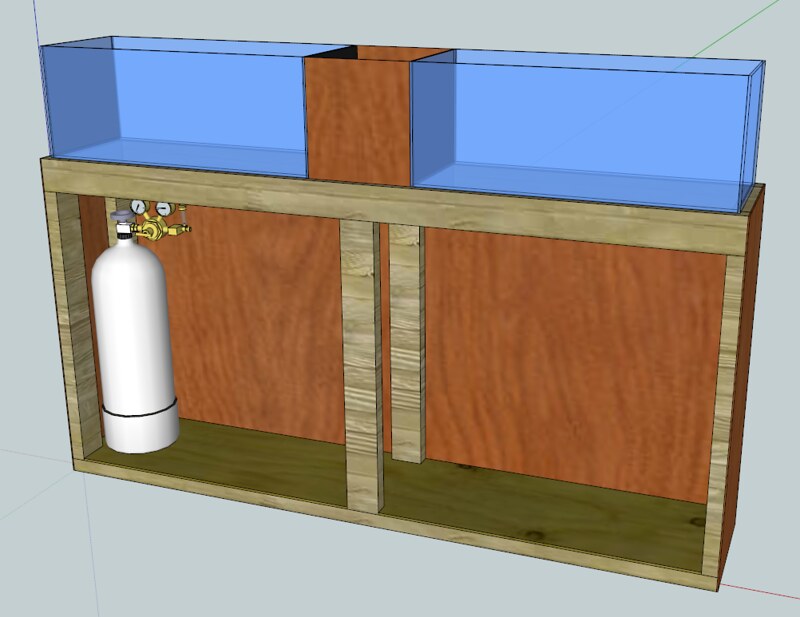
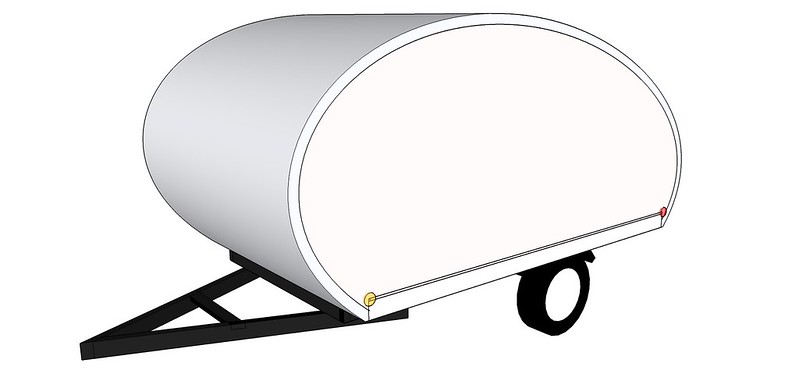
GPW wrote:JS, NICE Aquarium !!!
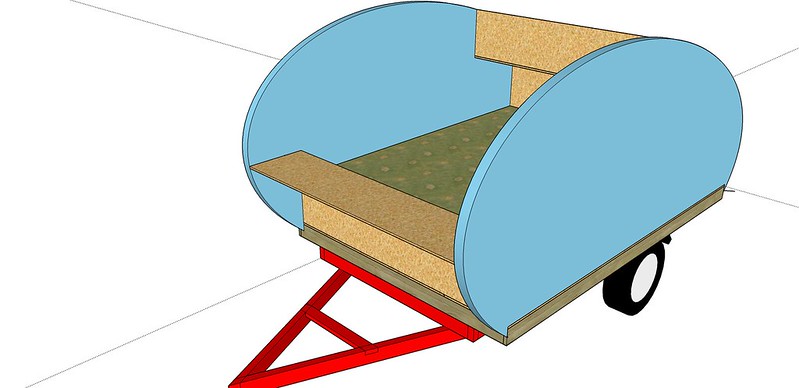
And a very NICE profile design for the trailer ...
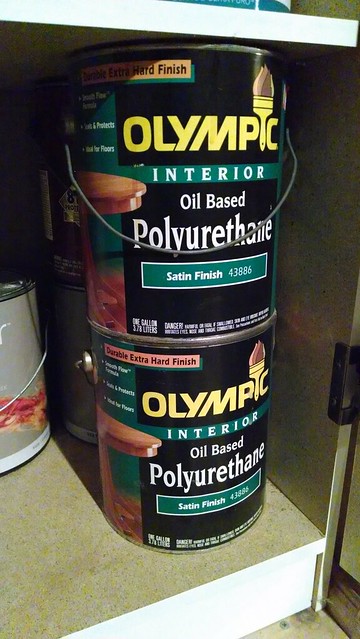
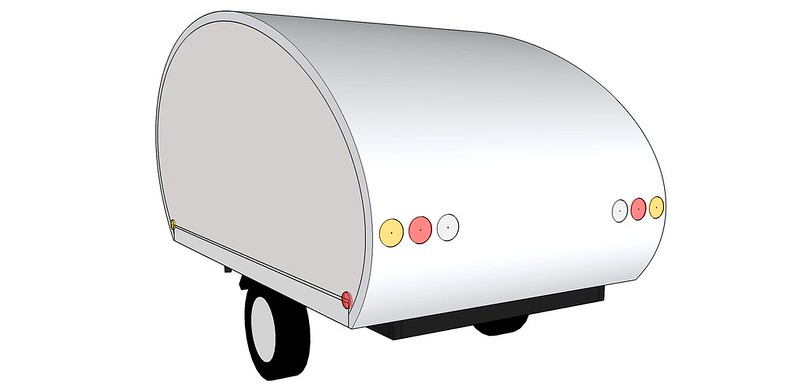
Great find on the poly !!! .... by the time you cut it with Mineral Spirits , 2 gallons make 8 gallons of the mix ... enough to waterproof many wood projects ... Being solvent based , and mostly used in interior areas anyway (out of the sun) You’ll be just fine ... Basically all the mix will be sunk deep into the wood ... doing it’s job !!!
![]() by jseyfert3 » Tue Feb 04, 2014 2:11 am
by jseyfert3 » Tue Feb 04, 2014 2:11 am
![]() by KCStudly » Tue Feb 04, 2014 7:34 am
by KCStudly » Tue Feb 04, 2014 7:34 am
![]() by tac422 » Tue Feb 04, 2014 8:17 am
by tac422 » Tue Feb 04, 2014 8:17 am
Users browsing this forum: No registered users and 1 guest