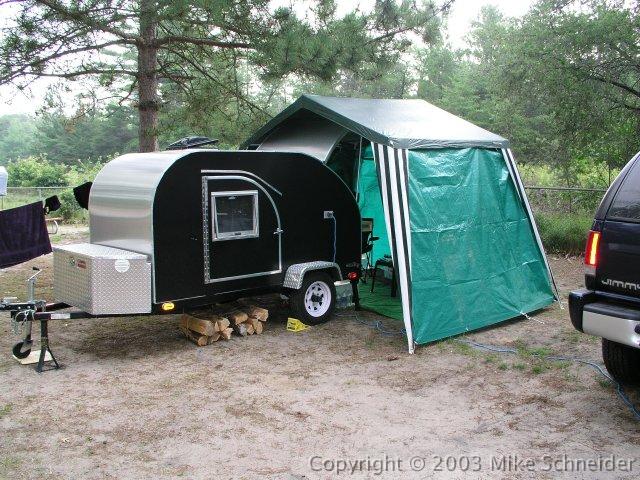
"Jackal" 5x10 TD Running water.

...ask your questions in the appropriate forums BUT document your build here...preferably in a single thread...dates for updates, are appreciated....

Re: "Jackal" 5x10 TD Hatch Trim Help

Postby KCStudly » Sat Mar 05, 2016 9:23 am

Base hobby shop should have torches you could use.
KC
My Build: The Poet Creek Express Hybrid Foamie

Poet Creek Or Bust
Engineering the TLAR way - "That Looks About Right"
TnTTT ORIGINAL 200A LANTERN CLUB = "The 200A Gang"
Green Lantern Corpsmen
User avatar
KCStudly
Donating Member
 
Posts: 9633
Images: 8169
Joined: Mon Feb 06, 2012 10:18 pm
Location: Southeastern CT, USA

Re: "Jackal" 5x10 TD Hatch Trim Help

Postby Tomterrific » Sat Mar 05, 2016 12:08 pm

I think there are sheet metal tools for stretching and shrinking thin metal. By shrinking the side of the L it should curve nicely. I'm sure you can get a thinner L somewhere to work with.

I like the idea of the dropped edge for water run-off. Water flows down hill after all. :-) My hatch edge has no rubber seal just the overhang and it doesn't leak. It surprised me but the camper stays outside and there it is, no leak. My hatch is vertical so i believe the straight shot of the water has much to do with the lack of leak.

T
Tomterrific
500 Club
 
Posts: 611
Images: 8
Joined: Thu Mar 26, 2015 3:18 pm
Location: Central Ohio
Top

Re: "Jackal" 5x10 TD Hatch Trim Help

Postby JmsCaverly » Sun Mar 06, 2016 6:18 am

KCStudly wrote:Base hobby shop should have torches you could use.


You know I called and in fact they don't but the sheet metal shop does. I stopped in and they had a large bender and pre bent most of my angle for me.

I got lucky this time .
Come visit my build journal
139728 139588
viewtopic.php?f=50&t=63870
User avatar
JmsCaverly
Teardrop Master
 
Posts: 150
Images: 175
Joined: Mon Jul 20, 2015 4:32 pm
Location: Travis AFB
Top

Re: "Jackal" 5x10 TD Hatch Trim Help

Postby JmsCaverly » Sun Mar 06, 2016 6:29 am

Tomterrific wrote:I think there are sheet metal tools for stretching and shrinking thin metal. By shrinking the side of the L it should curve nicely. I'm sure you can get a thinner L somewhere to work with.


I know harbor bright sells one but for really a one time use its not worth it to spend the money. I looked into both a plenishing and a stretcher.

Tomterrific wrote:I like the idea of the dropped edge for water run-off. Water flows down hill after all. :-) My hatch edge has no rubber seal just the overhang and it doesn't leak. It surprised me but the camper stays outside and there it is, no leak. My hatch is vertical so i believe the straight shot of the water has much to do with the lack of leak.

T


After really looking at mine I could see the seals sit really well along the length of the hatch so I went with the shorter legged "L". Plus I have the secondary seal and the rain gutter inside the wall to give water a chance to run if need be.
Come visit my build journal
139728 139588
viewtopic.php?f=50&t=63870
User avatar
JmsCaverly
Teardrop Master
 
Posts: 150
Images: 175
Joined: Mon Jul 20, 2015 4:32 pm
Location: Travis AFB
Top

Re: "Jackal" 5x10 TD Hatch Trim Help

Postby JmsCaverly » Sun Mar 06, 2016 6:38 am

Well here we are I after a long day fighting with it and fitting it as best as possible the hatch is skinned and trimmed. I still need to do the bottom edge but I have some fitting I want to do with the bumper in place first so that will have to wait till then.

Image

I still have a bit of finesse to do on the edge to get get rid of a few kinks but I think it works. We'll see when I do the water tests later this week.

Image


Passanger door goes on tomorrow, I'm hoping to be at the DMV on Monday filing to get my VIN number finally. I'll also get a weight too which I've been wondering what it would be since the beginning.
Come visit my build journal
139728 139588
viewtopic.php?f=50&t=63870
User avatar
JmsCaverly
Teardrop Master
 
Posts: 150
Images: 175
Joined: Mon Jul 20, 2015 4:32 pm
Location: Travis AFB
Top

Re: "Jackal" 5x10 TD Hatch Skinned

Postby ELM » Sun Mar 06, 2016 11:27 am

Looking great. :applause: Let us know how it goes at DMV
My Build journal. viewtopic.php?f=50&t=65395
User avatar
ELM
Teardrop Master
 
Posts: 277
Images: 176
Joined: Thu Nov 26, 2015 5:49 am
Location: Sutter Creek CA
Top

Re: "Jackal" 5x10 TD Hatch Skinned

Postby jmascioni » Sun Mar 06, 2016 8:43 pm

Is it just me, or is your door a little long on the bottom edge?
I was just curious, seems to me that would make for a terrible wind drag if it sticks down below the bottom of the floor.
jmascioni
Teardrop Inspector
 
Posts: 11
Joined: Mon Feb 08, 2016 4:35 pm
Top

Re: "Jackal" 5x10 TD Hatch Skinned

Postby JmsCaverly » Sun Mar 06, 2016 10:24 pm

jmascioni wrote:Is it just me, or is your door a little long on the bottom edge?
I was just curious, seems to me that would make for a terrible wind drag if it sticks down below the bottom of the floor.


Good observation, but as I stated above I still have some work to do to the bottom edge, once I fit the bumper I'll know how I want the bottom edge of the hatch to sit.
Come visit my build journal
139728 139588
viewtopic.php?f=50&t=63870
User avatar
JmsCaverly
Teardrop Master
 
Posts: 150
Images: 175
Joined: Mon Jul 20, 2015 4:32 pm
Location: Travis AFB
Top

Re: "Jackal" 5x10 TD Hatch Skinned

Postby JmsCaverly » Wed Mar 09, 2016 12:32 am

Just a bit of progress updating:


I got the passenger door on and fitting perfectly, this side needed a little bit of extra love but I got it to sit nicely. I also got the fender on this side mounted, but dummy me when I went to Ace Hardware I only got enough for one side. Sooo I'll have to make another trip back ..... Oh darn.

Image


So I tried to use this bin I had for my battery's, but as you can see I have managed to crack this whole side of the box. I really did think they were going to fit it was so close. So I'm going to look and see if I can get a dual box for my battery's.

Image


I have taken some before photos of my galley as far as what I had origally planned, I just don't think it fit with what I have in my head. I really wanted to do a pull out stove but I really just don't have the space. I have had to sacrifice space in my galley to accommodate the kids bunks up front. At the deepest point my gally is only 20" deep so I have to think very carefully about how things will lay out. But my wife came up with a really cool idea that I thought was genius, instead of having the stove inside we'll put it outside much like most people have used the side tables but ours will be at about a 40 degree angle, that will bring the table back towards the galley instead of inline with the counter top.


Image

Image

This is the beginning of how the new planned galley will look very much the same but without the stove drawer. I've also pulled out all the old plywood supports in favor of the nice new cherry that will be the cabinetry. I've brought the drawer up a bit so that I can service the battery's and get them in and out if need be.

Image


I got my drip rail in for SoCal Teardrops today too so I was able to get that mounted it looks good. It didn't set like I wanted it to so I'll have to figure something else out for the hinge. To protect it while I'm driving in weather conditions.

Image

I still need to order the other window and another piece of the side table railing, but I'm leave for the next two weeks so lots and lots of time to work the cabinetry and get her road worthy. I also put the first coat in the bumper tomorrow I'll use 320 grit and and start the process of getting it really really shinny.
Come visit my build journal
139728 139588
viewtopic.php?f=50&t=63870
User avatar
JmsCaverly
Teardrop Master
 
Posts: 150
Images: 175
Joined: Mon Jul 20, 2015 4:32 pm
Location: Travis AFB
Top

Re: "Jackal" 5x10 TD Progress...... Progress

Postby lfhoward » Wed Mar 09, 2016 12:30 pm

Your progress on this build has been amazing. Super quick and it is coming out so well!

Too bad the plastic tub shattered on you! Are you planning to have the batteries on the tongue or in the galley? I have some battery boxes that I didn't end up using that might work for you if you are putting them indoors. The boxes are Group 24 and have their own vent hoses. PM me if you might be interested. I have 3.

Image
My off-road camper build on an M116A3 military chassis:
http://www.tnttt.com/viewtopic.php?f=50&t=62581
Tow vehicle: 2008 Jeep Liberty with a 4 inch lift.
User avatar
lfhoward
1000 Club
1000 Club
 
Posts: 1370
Joined: Wed Jan 22, 2014 6:10 pm
Location: Philadelphia, PA
Top

Re: "Jackal" 5x10 TD Progress...... Progress

Postby bobhenry » Wed Mar 09, 2016 12:42 pm

Image


I would look at coolers you could even vent it thru the drain cock and the "polyprop" coolers are a lot tougher.
Growing older but not up !
User avatar
bobhenry
Ten Grand Club
Ten Grand Club
 
Posts: 10359
Images: 2623
Joined: Fri Feb 09, 2007 7:49 am
Location: INDIANA, LINDEN
Top

Re: "Jackal" 5x10 TD Progress...... Progress

Postby JmsCaverly » Wed Mar 09, 2016 6:02 pm

lfhoward wrote:Your progress on this build has been amazing. Super quick and it is coming out so well!

Too bad the plastic tub shattered on you! Are you planning to have the batteries on the tongue or in the galley? I have some battery boxes that I didn't end up using that might work for you if you are putting them indoors. The boxes are Group 24 and have their own vent hoses. PM me if you might be interested. I have 3.

Image


Thanks!! I don't have a ton of room in my galley so I needed a box that fit really well. I'll just have too keep looking I'll find one it out there I know it. I don't want to put them up on the tongue because I have my climate right out there and I don't want the tongue getting to heavy. I took some quick snap shots to show what I'm working with. I got these battery's for free back at the beginning of my build so it really does t make sense to part ways with them.

Image
Come visit my build journal
139728 139588
viewtopic.php?f=50&t=63870
User avatar
JmsCaverly
Teardrop Master
 
Posts: 150
Images: 175
Joined: Mon Jul 20, 2015 4:32 pm
Location: Travis AFB
Top

Re: "Jackal" 5x10 TD Progress...... Progress

Postby JmsCaverly » Wed Mar 09, 2016 6:03 pm

bobhenry wrote:Image


I would look at coolers you could even vent it thru the drain cock and the "polyprop" coolers are a lot tougher.


I'll look into those, Thanks.
Come visit my build journal
139728 139588
viewtopic.php?f=50&t=63870
User avatar
JmsCaverly
Teardrop Master
 
Posts: 150
Images: 175
Joined: Mon Jul 20, 2015 4:32 pm
Location: Travis AFB
Top

Re: "Jackal" 5x10 TD Progress...... Progress

Postby JmsCaverly » Thu Mar 17, 2016 11:34 pm

Well guys she's road worthy, off to the weight station and DMV first thing in the morning.

https://m.youtube.com/watch?v=NUbHXf0BLsg
Come visit my build journal
139728 139588
viewtopic.php?f=50&t=63870
User avatar
JmsCaverly
Teardrop Master
 
Posts: 150
Images: 175
Joined: Mon Jul 20, 2015 4:32 pm
Location: Travis AFB
Top

PreviousNext

Return to Build Journals

Who is online

Users browsing this forum: No registered users and 11 guests