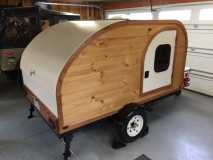
Lots of detail work over the last few weeks and today, I call it done...until I make some changes. I very pleased with the way it turned out. Not exactly the way I envisioned it when I started the planning process, but happy with all the deviations.
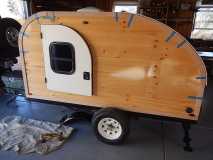
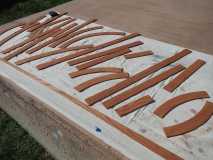
The trim went on easier than I expected. I purchased 2.5" X 1/4" oak lattice boards for the straight pieces. The curved segments were cut from a 10" wide X 1/2" board I planed down to 1/4". I was worried that the curved and straight segments would look vastly different after staining but ended up getting consistent tonality. Used the super-sticky PL Premium and a few brads to attach.
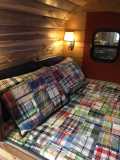
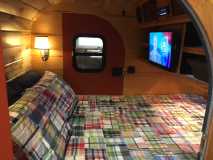
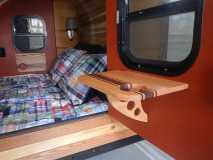
I decked out the interior when I completed all the construction. I like the color contrasts between the various wood stains, quilt, and inside door. TV and stereo sound great and there's good airflow with the vent on and windows open. Plenty of lighting from the overhead LEDs, foot lighting or reading lamps. Storage is perfect for 1 or 2 light packers. I believe I achieved the level of
Gemütlichkeit I was looking for. Cozy.
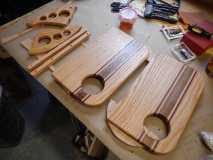
After sitting in the completed TD for awhile, I realized there was no good spot to place a drink or food. I built 2 folding tables, one for each door. They have 6 lb rare magnets on the back to hold them closed when the TD is in motion.
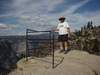
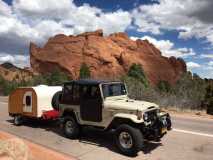
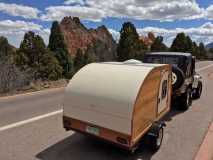
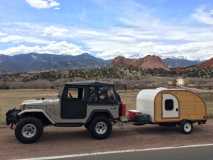
Today I took it for a test ride behind the Land Cruiser. It towed great with about 100 lbs on the tongue. No wobble, shimmy or bouncing over a few tough potholes. I also seemed like a light weight behind the '73 cruiser. It'll pull fine but it's gonna be a slow ride up and over the passes. I drove it to Garden of the Gods for a few snapshots. While I was parked, 2 couples already came up to me to discuss the trailer. I don't mind showing it off. One of the pictures has Pikes Peak in the background.
My first camping adventure will be to Moab, UT in a few weeks. I'll test the TD and probably come back with a bunch of modifications. Can't wait!

Thanks to everyone who followed along on my build blog and a special
thank you to those who responded with answers to my questions. See you on the road!

 I'm having a heluva time finding a rod latch for my galley hatch. I can find the T handles and getting rods are easy but where do I find the rotating mechanism? A complete kit would work for me also. Thoughts? Thank you!

 Hatch will start downward on it's own accord. I borrowed my neighbor's scale and my hatch weighs 49.5 lbs. The strut attaches 6.5 inches from the hinge with a 90 degree angle at full extension. Now I can actually calculate the necessary holding power. Ugh.

 It would not be too difficult to pull it off (it's held in by 5 bolts and some caulk) and lay in some contrasting wood strips. Hmmm. I have to tow it to the State police station on Tuesday for a VIN verification so it will stay for now. I'll add it to my future upgrade list.
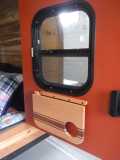
 Argh! After a few choice words, I decided both the interior and exterior of the doors would be PMF. Sand the poly, apply the PMF and then paint the inside...red. I like it! I like it better than the knotty pine. In the end it worked out for the better but the road to get there was no fun.