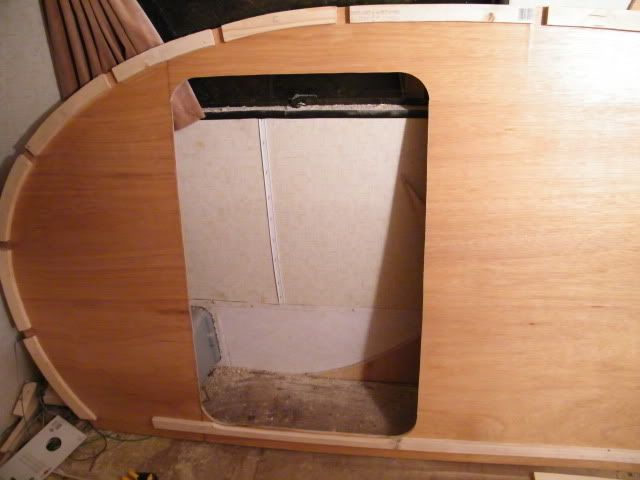
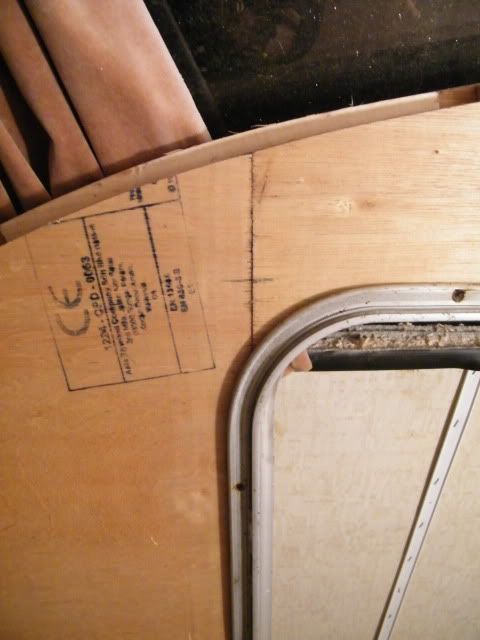
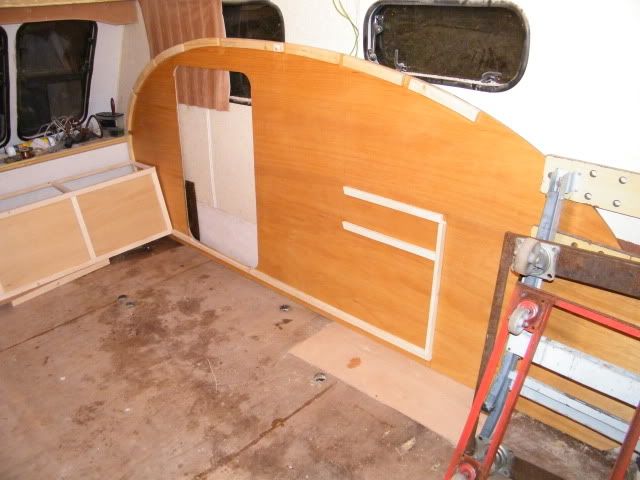
New tug and new trailer....to be ....

...ask your questions in the appropriate forums BUT document your build here...preferably in a single thread...dates for updates, are appreciated....

New tug and new trailer....to be ....

Postby jackdaw » Mon Oct 26, 2009 6:14 pm

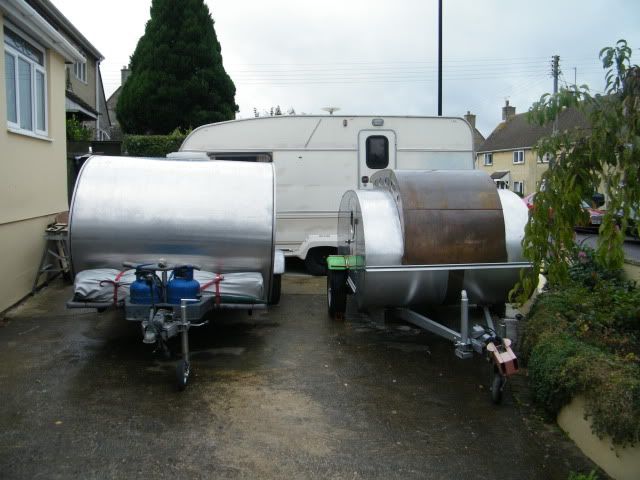
We've had a lot of fun with our Grumman this year, and had lots of interest from other campers at the various festivals and campsites where we've stayed.

I really like the set up of the galley in #1 and find the cabin has loads of room being 1.7m wide. With the wheels outside the walls,#1 is a tad wide . We have had a couple of hairy moments meeting oncoming trafic on narrow lanes. As with many builds, the first one was probably a little heavier than it needs to be.

I'm hoping to build mk2 , a little narrower , a little lighter, with the same sort of galley. I'm still undecided on as to go with a trolley top ....or not.
I 'm hoping Rosie likes #2 more than #1, and will alow us to sell #1. At the moment she won't let us sell our first build, she's become bonded :lol:

Both previous builds have been started in the spring time, to take advantage of improving light , and weather condition. I have no workshop, and the builds have taken place outside on the driveway.

I bought a donor caravan for £20 a few months ago, from a guy that needed it moving.

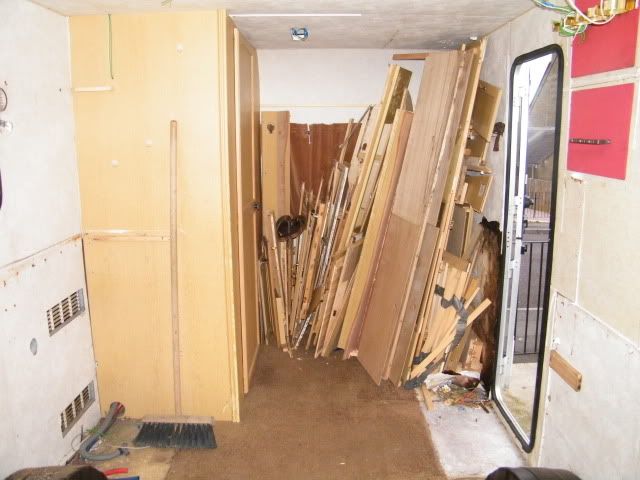
The planed was to strip out the caravan, and use it as a temporary workshop to make up as much as I can in the dry.
If I think I've got enough room, I may even assemble it, and then cut the donor van off. It could be like an egg hatching :roll: :roll:

I started earlier this month with the donor caravan
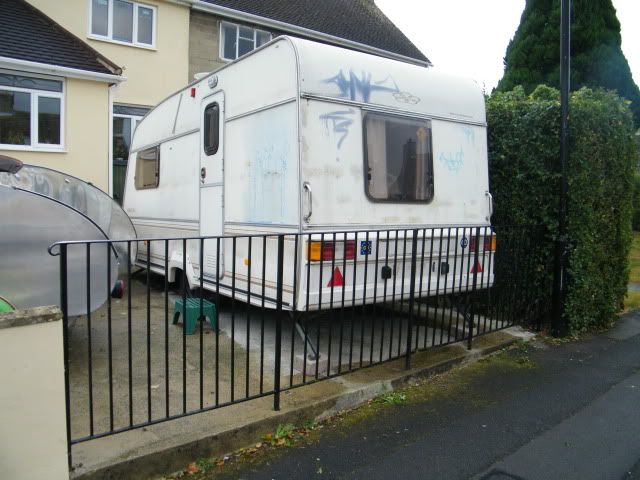
Image

It's tucked out of the way :lol: :lol:

Image

The first thing was to strip out all the fittings, some stuff will be reused, some stuff will get sold on.
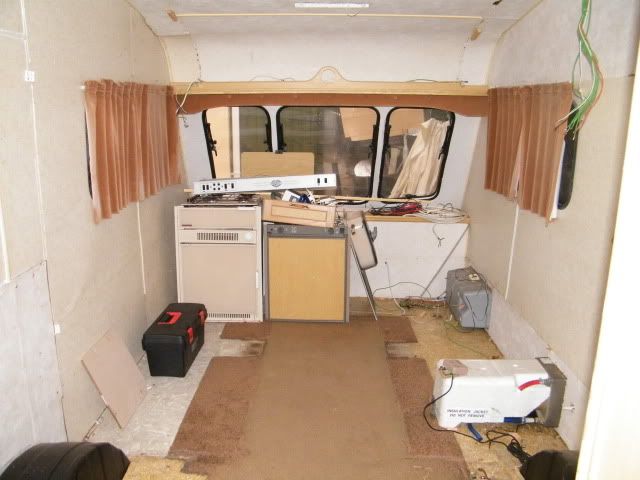
Image

Some stuff will be burned

Image

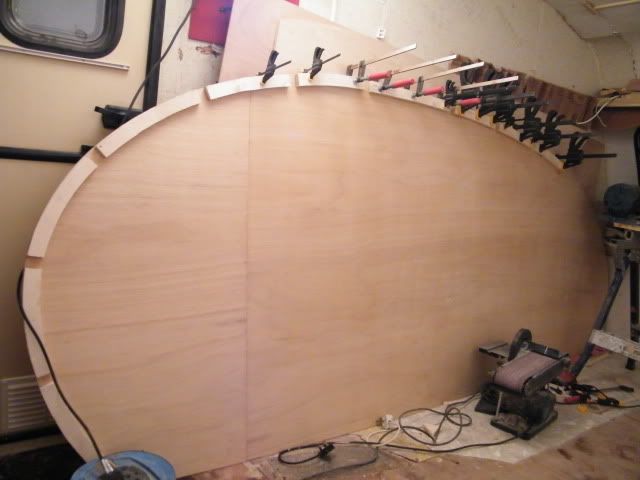
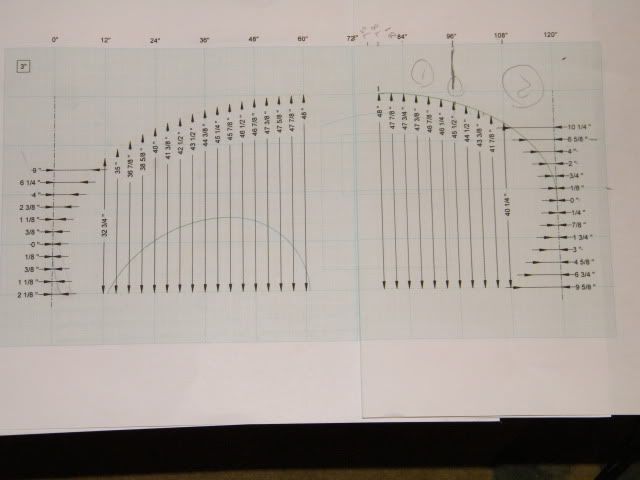
With enough room to make a start, the prifiles were plotted out from Andrews Grumman drawings
Image

I've made a slight alteration to loose the flat spot on the top. The sides are cut out and sanded using 1/2" ply.
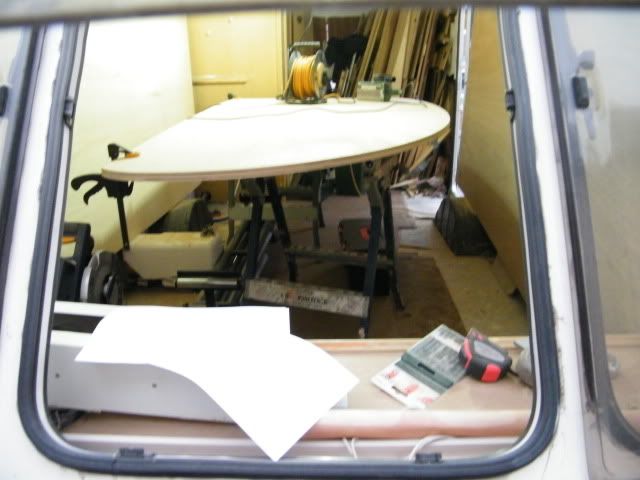
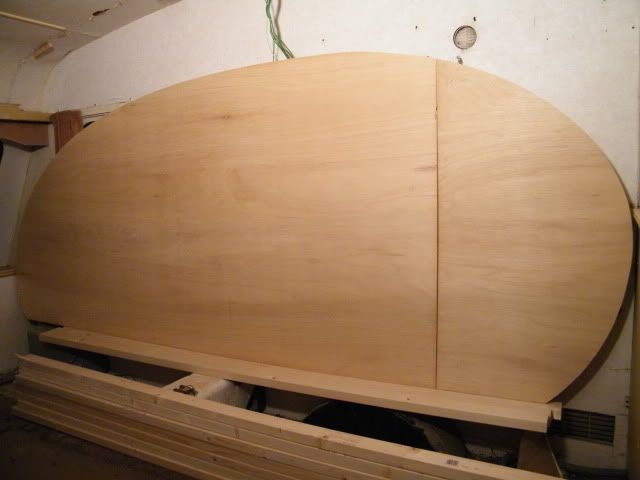
Image

Image

The profiles just fit in snug up against the bathroom wall
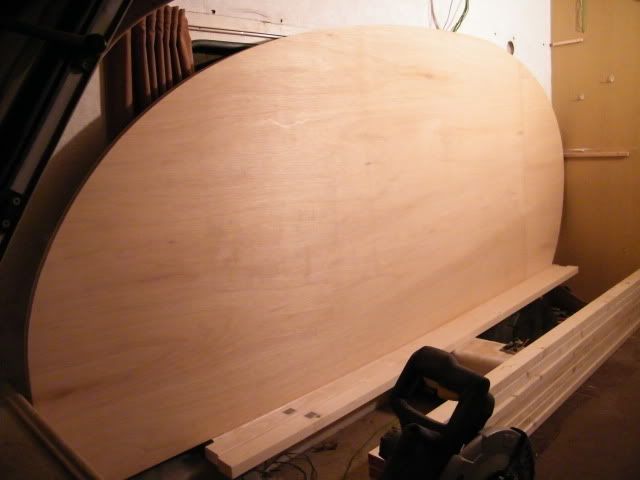
Image

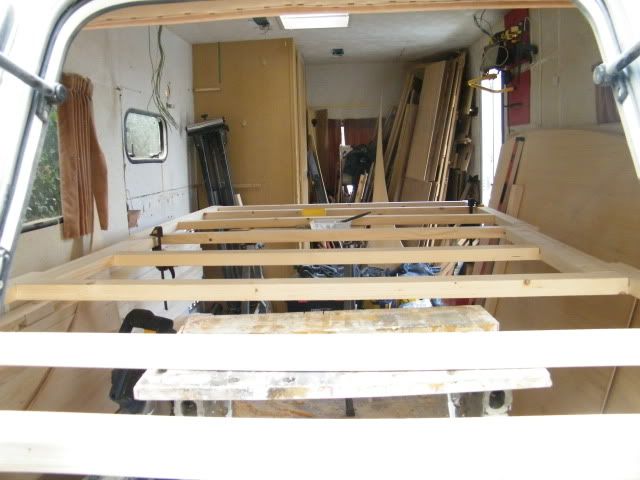
With the profiles cut and sanded, I moved on to making the frame for the floor. I've used 2 1/2"x 1 1/2" CLS.
I've halved out all the cross members, and halved out the side strings. I've made some cutouts for where the semi recessed wheel wells will be.
I should have enough room for the fridge, hob and sink unit in the galley.
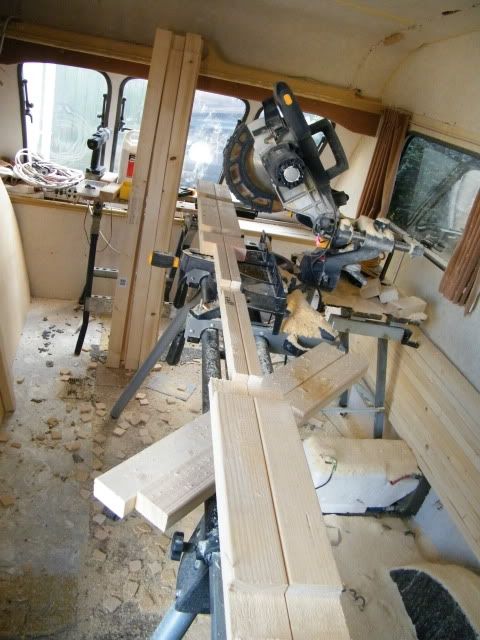

Image

With the frame assembled, there wasn't much space in the workshop :lol:

Image

I moved the glued and screwed frame to the garden
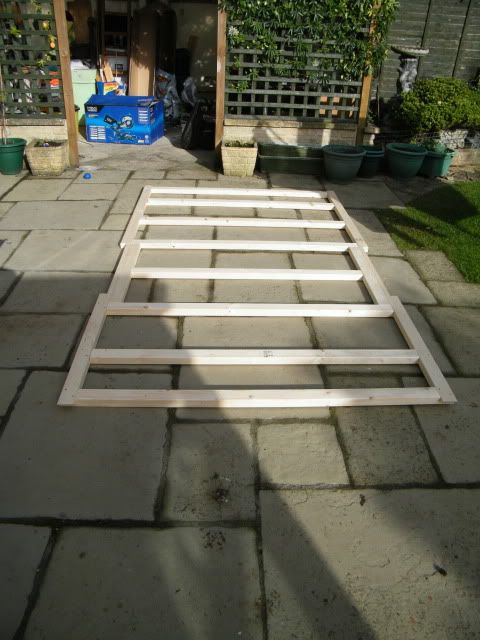
Image

I've used 1/4 " ply for the floor, glued and screwed every 8"-12"
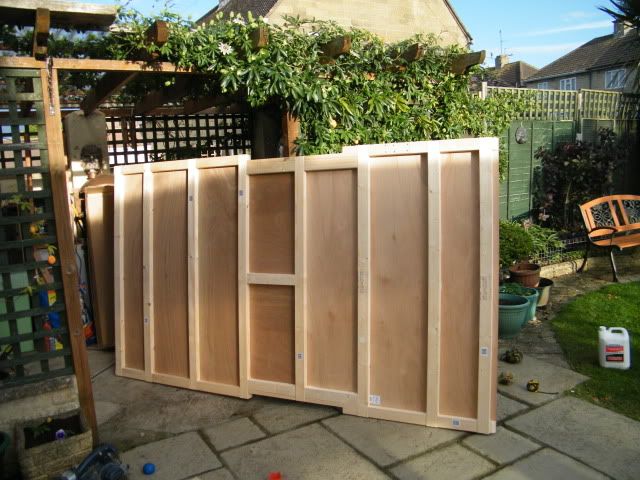
Image

The frame is stored in the dry,out the way untill we get on to protecting it, and putting things together.

I started cutting out some edge framing , to give a little extra to fix into. I'm planning on fitting an awning rail/trim and need more than 1/2" to fix into.
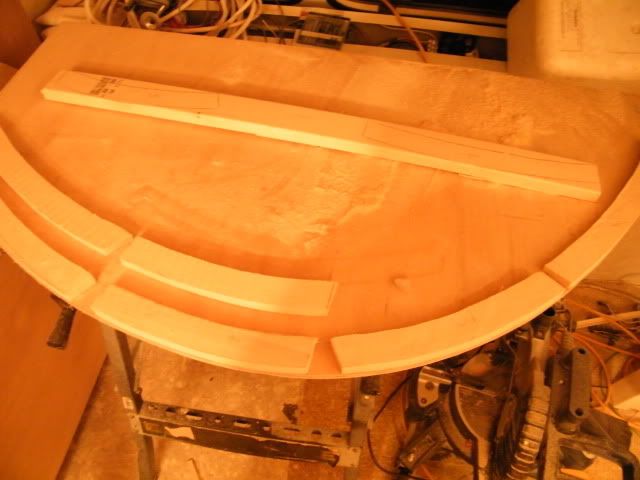
Image

After cutting the first few with a jigsaw and belt-sanding them to finnish them off, I got the old bandsaw out of storage.
Its made it a lot easier, and I can cut them in pairs :thumbsup:

I've got one side all glued up ,

Image

As i ran out of clamps, I thought I should make some more space in the workshop for the next stage...
The bathroom has now been removed, as has the pile of fire wood
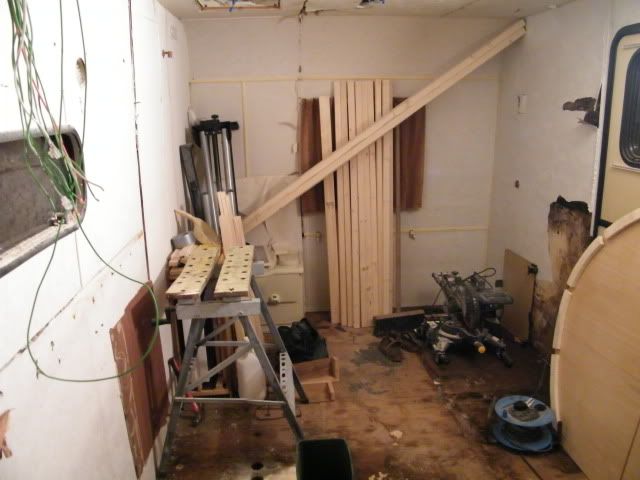
Image

I'm so happy to be building again, and in a workshop too :D
Last edited by jackdaw on Tue Sep 16, 2014 3:15 pm, edited 12 times in total.
User avatar
jackdaw
500 Club
 
Posts: 598
Images: 124
Joined: Fri Feb 22, 2008 2:31 pm
Location: Wltshire, UK

Postby grizz » Mon Oct 26, 2009 6:32 pm

As said before .... Master at work.

I still need to cut my profiles etc.... but some day, we will sleep in the Grizz-Pod too.
Greetings from England.

Rian.


Hoping to get it all done in time.
User avatar
grizz
1000 Club
1000 Club
 
Posts: 1210
Images: 29
Joined: Mon Sep 21, 2009 2:37 pm
Location: Rochester, Kent, UK

Postby angib » Tue Oct 27, 2009 1:47 pm

I like your temporary workshop - excellent value for £20!

Andrew
User avatar
angib
5000 Club
5000 Club
 
Posts: 5783
Images: 231
Joined: Fri Apr 30, 2004 2:04 pm
Location: (Olde) England
Top

Postby jackdaw » Tue Oct 27, 2009 7:07 pm

Cheers Grizz,
I'm not sure of the 'Master at work', but it's great to be building again. :D :D

Andrew, I'm so pleased to have somewhere to 'do a bit'. :thumbsup: As for the cost :lol: :lol: I'll be looking to recoop that from the sale of the water heater, cooker and windows.
I'll be using the threeway fridge, chassis ,12v zig unit, 12v lights, gas regulator, lots of the trim/ awning rail, aswell as the door, and possibly the roof, on the build.
I've already used the 240 consumer unit to replace the faulty one on our first build, and the cusions have been used as the matress in the coppertop.

I've been out and got the first coat of thinned out varnish on the profiles tonight, so just a little more progress.

Dave
User avatar
jackdaw
500 Club
 
Posts: 598
Images: 124
Joined: Fri Feb 22, 2008 2:31 pm
Location: Wltshire, UK
Top

Postby jackdaw » Sat Nov 07, 2009 1:49 pm

I had a couple of hours on the build today.
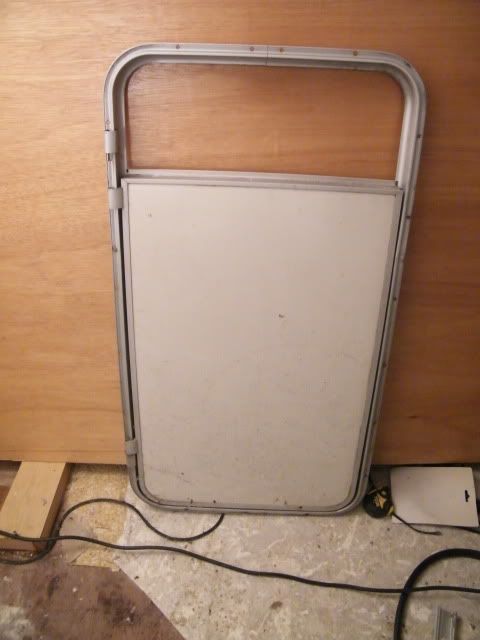
I've started altering the caravan door from last years donor.

Caravan doors seem to be fairly narrow, around 20", thats fine for steping through, but maybe a little tight for sitting and swinging your legs around.

I bought some ali wire and argon gas to weld up the altered frame, and door. I haven't tried welding this stuff before, so it's a case of suck it and see.

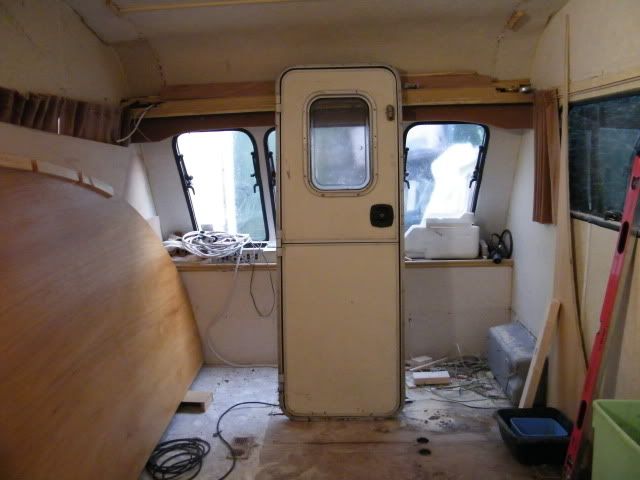
Heres the fairly comon caravan stable type door;

Image

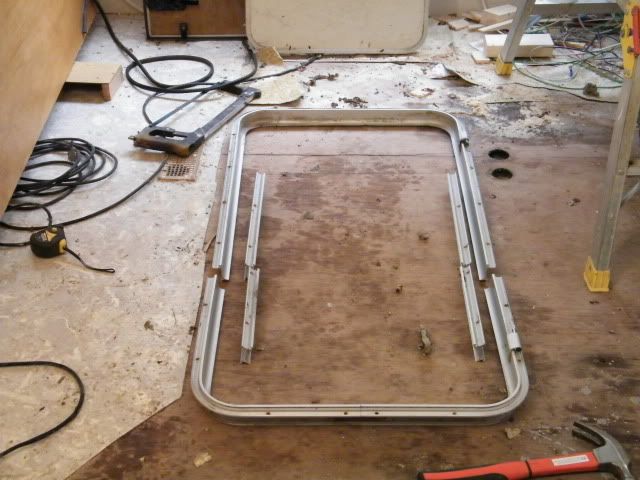
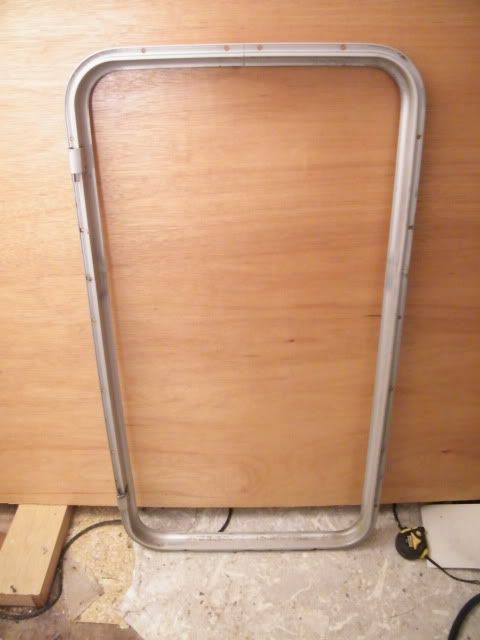
the frame after I had been at it with a hacksaw

Image

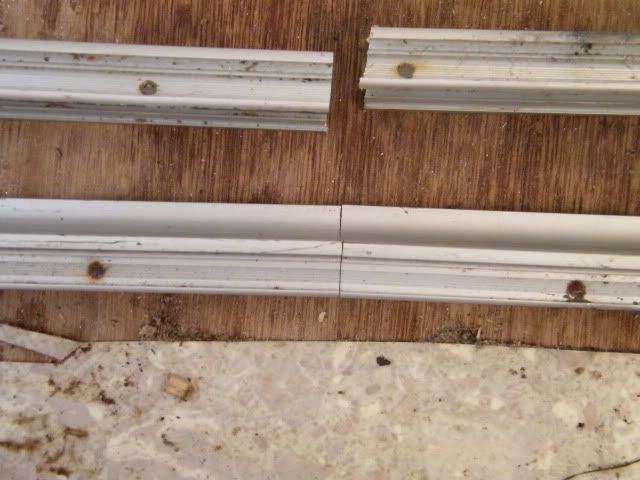
I finished the cuts off with a bench type belt sander. They're prity flush

Image

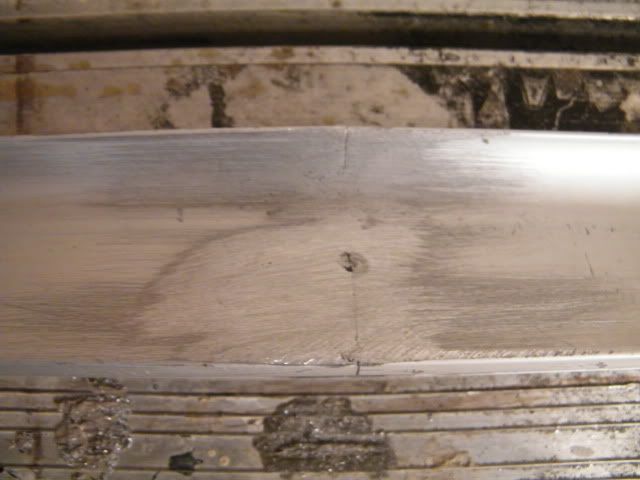
I filed the back of the joint to allow a bit of weld to fill the gap.

Image

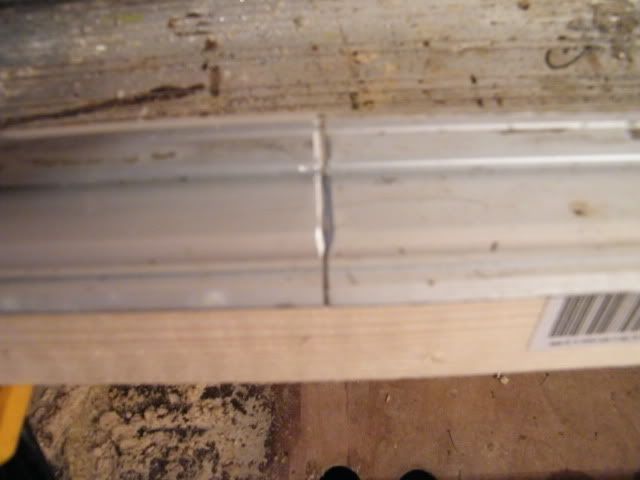
The welds seem to penetrate fairly well. they don't need alot of strenth, as the frame will be screwed to the side wall.

Image

The frame is now 40" high,

Image

I'm going to have to get some more tips for the welder, as the one I had was knackered after the two joints . :cry:

Image

I'm planning to make it 4" wider , and then I can make a start on the door. :thumbsup:

Happy building ,

Dave
User avatar
jackdaw
500 Club
 
Posts: 598
Images: 124
Joined: Fri Feb 22, 2008 2:31 pm
Location: Wltshire, UK
Top

Postby grizz » Sat Nov 07, 2009 3:09 pm

Nice one Dave.

We have been out with friends all day, and I just spent about 45 minutes in the garage, ended up realising the Oak bits I brought home are headed for the tip..... the way they are all screwed and bonded is not worth the agro.

Wondering if I should not make my door wider than it is now, as it is standard width.
Greetings from England.

Rian.


Hoping to get it all done in time.
User avatar
grizz
1000 Club
1000 Club
 
Posts: 1210
Images: 29
Joined: Mon Sep 21, 2009 2:37 pm
Location: Rochester, Kent, UK
Top

Postby 2fry » Sat Nov 07, 2009 3:49 pm

Fantastic use of the old/doner caravan,i'm well impressed and jelious.
I'm still working between showers,gails,sleat,etc....
User avatar
2fry
Teardrop Builder
 
Posts: 45
Joined: Sat Jun 13, 2009 9:14 am
Location: Sunny Scotland
Top

Postby jackdaw » Sat Nov 07, 2009 4:51 pm

2fry wrote:Fantastic use of the old/doner caravan,i'm well impressed and jelious.
I'm still working between showers,gails,sleat,etc....


Thanks fella, But it does have a few drawbacks :lol: :lol:
I spent a couple of hours varnishing, both sides of both sides, with the door and windows closed. At the time I was so pleased to be getting on with it, of an evening , in the dry.
A few hours later I was soooo ill. My body was on a mission to empty as quick as possible :oops: :oops:
Two days off work....then I read the warning sign on the can. :oops: :oops: Needless to say I won't be doing that again.


It's going to be interesting putting it together in the caravan :lol: :lol:
I think I've got enough room. I'll have to wait to put the second door in, as thats still in use. :lol: :lol:

Dave
User avatar
jackdaw
500 Club
 
Posts: 598
Images: 124
Joined: Fri Feb 22, 2008 2:31 pm
Location: Wltshire, UK
Top

Postby jackdaw » Sat Nov 07, 2009 5:07 pm

grizz wrote:Nice one Dave.

We have been out with friends all day, and I just spent about 45 minutes in the garage, ended up realising the Oak bits I brought home are headed for the tip..... the way they are all screwed and bonded is not worth the agro.

Wondering if I should not make my door wider than it is now, as it is standard width.


Grizz its a shame about your Oak, I'm sure it would burn nicely if you've got a woodburner

As for your door, It may be worth setting it up , and trying it for size.
It would be a shame if you found it too tight, espesially as your just having the one door. If it is wide enough, then thats great, It will save you messing about with it. I know Briggsy used the top half of a caravan door on his build. I think he's happy with it. It's just down to personal preferance.
I like the idea of having radius corners all round too :thumbsup:

Dave
User avatar
jackdaw
500 Club
 
Posts: 598
Images: 124
Joined: Fri Feb 22, 2008 2:31 pm
Location: Wltshire, UK
Top

Postby jackdaw » Sun Nov 22, 2009 5:17 pm

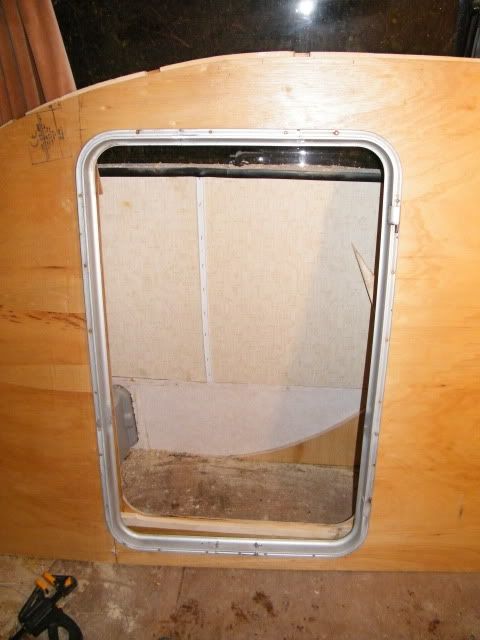
The new tips for the welder arrived, so I've widened the door frame and added a base board in the cabin area , from the front locker back to the galley/cabin divider.
My welding hasn't improved much :lol: , but I'm confident it will clean up OK
I'm happy with the size of the openings now.It's a more sensible size. It's now prepared to take a 40"x25" door.

I've stated marking out where the cupboards are going to be and added.

Here's the 4" gain on the frame.
Image

Heres a shot of the frame sitting in the profile, although its upside down as the hinges will be at the front

Image

You can see where the bed is going to finish, and the front locker is going to start. I'm going with a 6' bed, as thats plenty long enough for us, and the locker will slope towards the front by a few inches to make a more comfy backrest when sitting up in bed. The baseboard should make it easier to locate the profiles onto the floor.

Image

This is the join in the sheets, I've put a biscuite in the joint, and it has an 1 1/2" frame glued and screwed to the back of the joint.

Image

It's nice to get a bit more done.
Last edited by jackdaw on Tue Mar 16, 2010 3:23 am, edited 1 time in total.
User avatar
jackdaw
500 Club
 
Posts: 598
Images: 124
Joined: Fri Feb 22, 2008 2:31 pm
Location: Wltshire, UK
Top

Postby jackdaw » Sat Nov 28, 2009 12:40 pm

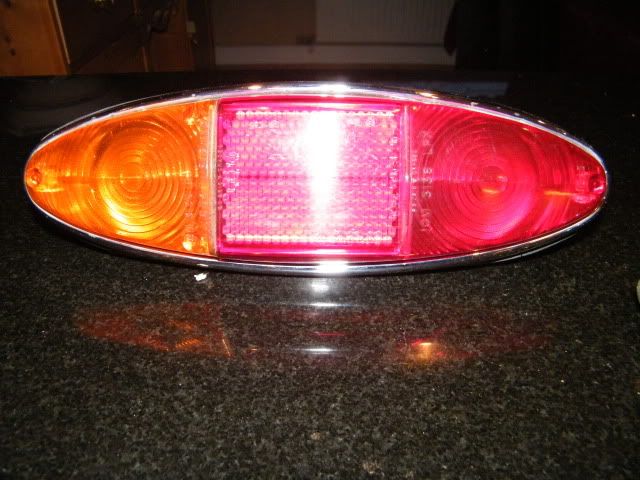
The postie delivered my rear trailer lights this afternoon :D :D
I found them on ebay, they're 1965 Hillman minx rear lights. I've seen them go for silly money, but these were less than £20 including delivery .

Image

Unfortunately, they only came with 3 bulb holders, so if anyone know where I could get a rear/brake bulb holder for the above, I would be most gratefull. If I can't get hold of the proper fitting,, I'll have to make something up to suit.

I've spent a while making more room in the caravan today. I've removed the wheels, and taken out the wheel wells/ mudguards. I've also managed to open and then remove the battery /electric hookup box . I was quite supprised to find a near new leisure battery in the box.I'll be useing that for the build 8)
The extra space is going to meen there is enough room to put the trailer together inside the caravan. It's not ideal, and I may have to cut a slot in the back of the trailer to get any sheets in. Its got to be better than trying to work outside at this time of year.

I've just got a little trailer progress to report.
I've made up the front storage lockers, and added some cleats to pick up the rear bulkhead and shelves in the rear cabinets.

Image

Dave
Last edited by jackdaw on Mon Jan 24, 2011 7:24 pm, edited 1 time in total.
User avatar
jackdaw
500 Club
 
Posts: 598
Images: 124
Joined: Fri Feb 22, 2008 2:31 pm
Location: Wltshire, UK
Top

Postby grizz » Sat Nov 28, 2009 1:05 pm

Having spoken to you earlier Dave, I see you are making great progress.
That donor caravan has been a winner alright.
Greetings from England.

Rian.


Hoping to get it all done in time.
User avatar
grizz
1000 Club
1000 Club
 
Posts: 1210
Images: 29
Joined: Mon Sep 21, 2009 2:37 pm
Location: Rochester, Kent, UK
Top

minx

Postby dandan » Tue Dec 01, 2009 4:10 pm

learned to drive in a hillman minx !

hope all is well & look forward to catching up with you sometime when the
weather turns better.

this is quite a production line you have Dave !
8) 8) 8)

best rgds dan. :thumbsup:
Nostalgia's not what it used to be !!!
User avatar
dandan
Roswell Club
 
Posts: 229
Images: 214
Joined: Sat Sep 06, 2008 8:33 am
Location: Northants, UK.
Top

Re: minx

Postby jackdaw » Tue Dec 01, 2009 5:17 pm

dandan wrote:learned to drive in a hillman minx !

hope all is well & look forward to catching up with you sometime when the
weather turns better.

this is quite a production line you have Dave !
8) 8) 8)

best rgds dan. :thumbsup:


Now your showing your age Dan :lol: :lol:

I'm so looking forward to the better weather :thumbsup: This has got to be my least favorite time of year. It's just too dark too soon plus its too wet and too windy at the moment. :thumbdown:

Do you have any shows local to you next year ? It would be cool to have a trailer meet somewhere around your neck of the woods . :thumbsup:

I'm just feeding the obsession with the current build :lol: :lol: It's going to be interesting putting this one together, in the caravan. Oh for a decent workshop :worship:

Looking forward to seeing the Roswell , and how you fit it out .:thumbsup:

Cheers Dave
User avatar
jackdaw
500 Club
 
Posts: 598
Images: 124
Joined: Fri Feb 22, 2008 2:31 pm
Location: Wltshire, UK
Top

Postby dandan » Tue Dec 01, 2009 6:45 pm

it will be like the old caravan giving birth to the new one !
this could bring a new meaning to "shedding a tear" :lol:

there are a few steam rallies held this neck of the woods;
hollowell,
stoke goldington,
earls barton / holocote
& the kettering motor cavalcade
if you are into that sort of stuff.

never been disappointed with the real ale tents at these occasions.
must dig out my pipe & sandals !

billing ackey throws events in the summer
(must check the wind direction cos of the water works near by)
& you know all about wicksteed park.
also there is emberton park & cosgrove park if you like fishing.

im sure something can be arranged for next year.
(not necessarilary around this immediate locality)
best rgds dan. :thumbsup:
Nostalgia's not what it used to be !!!
User avatar
dandan
Roswell Club
 
Posts: 229
Images: 214
Joined: Sat Sep 06, 2008 8:33 am
Location: Northants, UK.
Top

Next

Return to Build Journals

Who is online

Users browsing this forum: No registered users and 44 guests